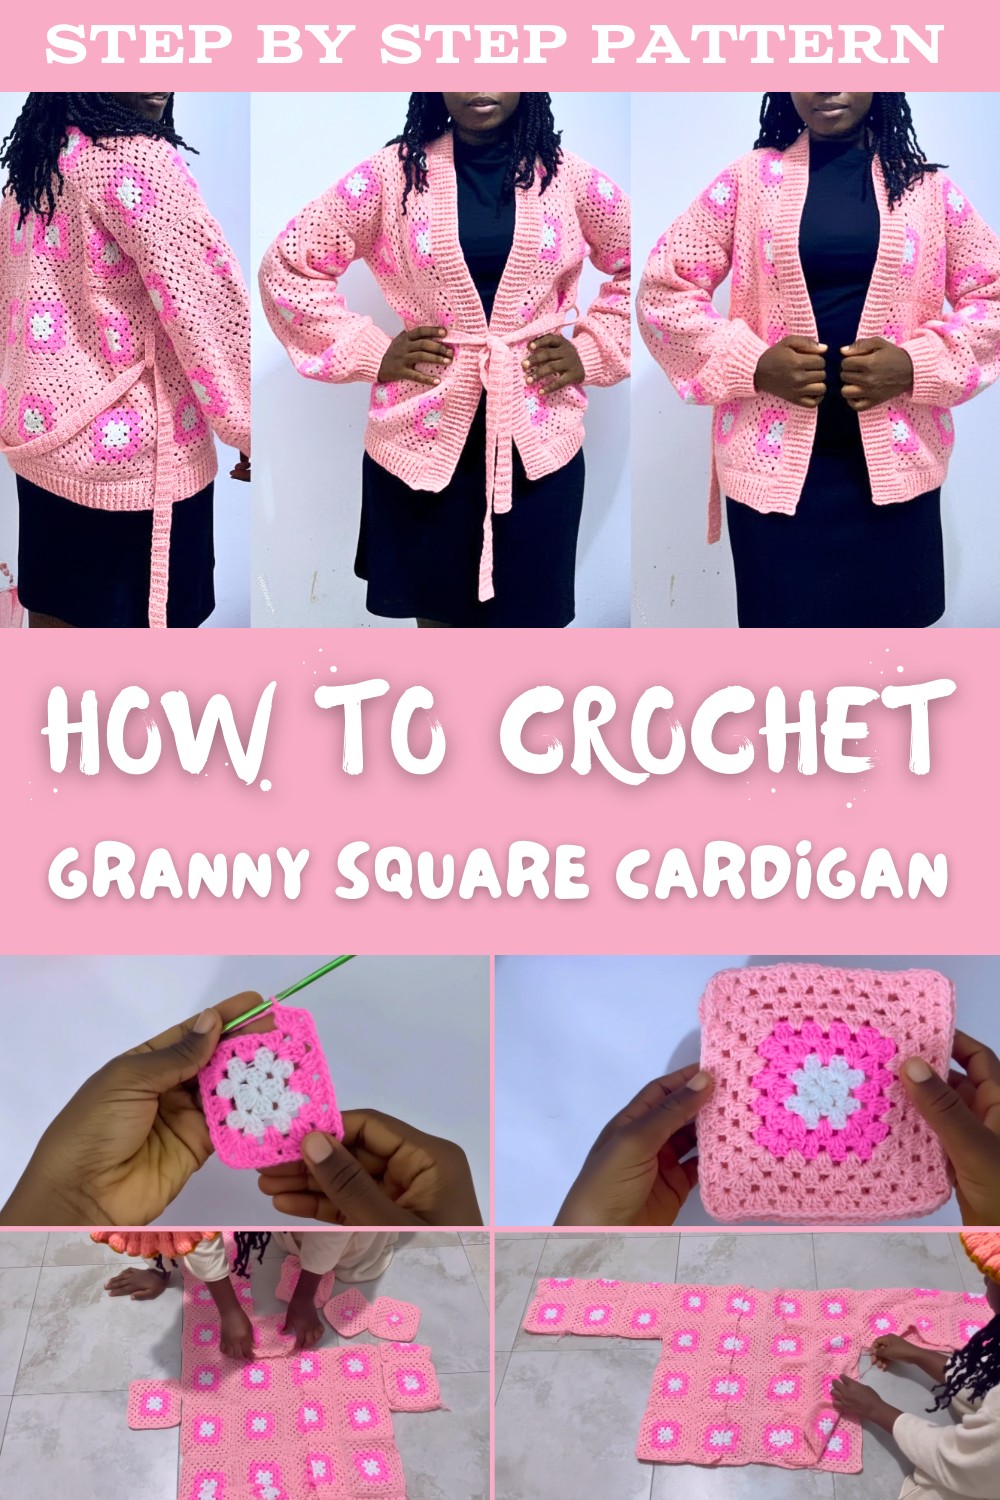
Easy Free Crochet Granny Square Cardigan Pattern Adds Handmade Charm
Snuggle into charm with this FREE Crochet Granny Square Cardigan Pattern, ideal for casual outings, cozy vibes, and adding a handmade touch to your wardrobe.
The charm of a handmade garment often lies in its ability to combine nostalgia with modern flair. A Free Crochet Granny Square Cardigan pattern is the perfect example of this, offering a timeless design that's both functional and stylish. Granny squares, known for their playful geometric appeal, come together to create a cardigan that works beautifully for layering in cooler months or adding a pop of color to transitional outfits.
Trendy Free Crochet Granny Square Cardigan Pattern
Style it with jeans and a simple tee for a casual look or drape it over a dress for cozy sophistication. This pattern is an excellent opportunity to use leftover yarn or experiment with a variety of hues, making each piece truly one of a kind. Along with its aesthetic appeal, crocheting a granny square cardigan promotes sustainability, allowing you to build a wardrobe of unique, handcrocheted clothing that reflects your personal style.

Crochet Granny Square Cardigan Pattern
Skill Level
- Intermediate (Perfect for advanced beginners willing to learn)
Materials Needed
- Yarn:
- Acrylic lightweight or worsted-weight yarn (~400g total).
- Three complementary colors (one for the center, one for the main body, and one accent color).
- Example: White, Blue, and Gray (or any contrast colors).
- Hook Size:
- 4mm crochet hook (or size suitable for your yarn).
- Additional Tools:
- Tapestry needle for sewing.
- Tape measure.
- Scissors.
- Optional:
- A belt for accessorizing the cardigan.
Gauge:
- Each finished granny square (8 rounds) should measure 6 inches by 6 inches when slightly stretched.
Abbreviations (US Terminology):
- ch: Chain
- dc: Double Crochet
- sc: Single Crochet
- sl st: Slip Stitch
- st(s): Stitch(es)
- rep: Repeat
Special Notes:
- Customizable:
- Adjust the size of the cardigan by increasing or decreasing the number of granny squares.
- Joining Method:
- This tutorial uses a needle join method, but feel free to use join-as-you-go or slip stitch joins if preferred.
- Row Numbers:
- The main granny squares have 8 total rounds, with color changes every 2 rounds.
- Half Squares:
- Half granny squares are used to balance the cardigan's edges and form clean armhole shaping.
Finished Measurements
- The size of the finished cardigan depends on the number of granny squares used and their size (approximately 6 inches per square). You can customize the cardigan size to fit your bust, back length, and sleeve length.

Pattern Instructions:
Step 1: Granny Square (Core Component)
Each granny square has 4 sides and grows outward, creating a square design.
Round 1: Starting the Granny Square
- Magic Ring:
Create a magic ring, chain 2 (does not count as a stitch). - In the Magic Ring:
(3 dc, ch 2) four times. You should have 4 groups of 3 dc and 4 corner chain-2 spaces. - Close the Round:
Pull the magic ring tight to close the center. Slip stitch into the top of the first dc to join.- Stitch Count: 12 dc and 4 chain-2 spaces.

Round 2: Expanding the Square
- Slip Stitch into the First Corner Space:
- Chain 2 (does not count as a stitch).
- Work the Corner:
(3 dc, ch 2, 3 dc) in the first corner.- Move to the next corner with (3 dc, ch 2, 3 dc).
- Repeat Corners Across: Repeat in each chain-2 space from Round 1.
- Close the Round: Slip stitch into the top of the first dc.

Rounds 3-8: Extending the Size
- For each corner, work (3 dc, ch 2, 3 dc).
- For spaces in between corners, work 3 dc into each space.
- Change yarn color every 2 rounds to create visual contrast.

Final Dimensions for Granny Squares:
- Each square should measure 6 inches by 6 inches after 8 rounds.
Step 2: Half Granny Square
The half granny square is worked similarly to a full square but stops midway to create a triangular shape.
Half Granny Square Instructions:
- Round 1:
- Chain 4, slip stitch to form a circle.
- Work (3 dc, ch 2, 3 dc) in the circle. This forms one edge and one corner.
- Round 2 and Beyond:
- Turn your work at the end of each round.
- Start each round with ch 2 (does not count as a stitch).
- Work corners (3 dc, ch 2, 3 dc) and straight edges (3 dc).
- Stretch your work to ensure it matches the size of half a regular square.
- For consistency, ensure your half square has the same total number of rows as the full squares (8 rows).
Step 3: Assembly of Panels
Back Panel
- Rows and Columns Arrangement:
- The back panel consists of 4 rows of 4 granny squares (4x4 layout).
- Join individual squares row by row (horizontally), then join the rows together.
- Joining Method:
- Place two squares wrong sides together.
- Use a tapestry needle. Sew through both loops of the matched stitches along one edge to join.


Front Panels:
- Each front panel consists of:
- 4 full granny squares.
- 4 half granny squares.
- Half granny squares are attached to the edge of each front panel to create a neck opening.
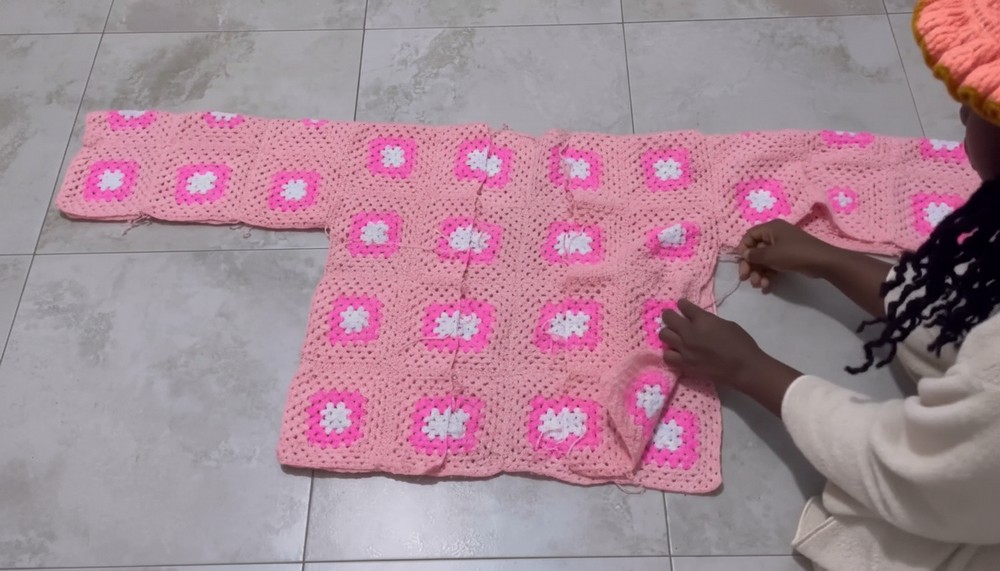
Sleeves:
- Each sleeve is made with:
- 3 granny squares joined widthwise.
- Attach sleeves so they seamlessly transition between the front and back panels, ensuring symmetry.
Step 4: Edging and Ribbing
For the base, armholes, and front opening, use ribbing techniques for a polished finish.
- Single Crochet Base Round:
- Attach your yarn at the edge of the area (e.g., sleeve opening).
- Work one sc into each stitch evenly around.
- Double Crochet Round:
- Chain 2 and work dc into each stitch.
- Front Post & Back Post Ribbing:
- Alternate working Front Post Double Crochet (FPdc) and Back Post Double Crochet (BPdc) stitches.
- Continue ribbing for 8 rows or the desired width.

Optional Belt and Loops
- Belt:
- Chain to the desired length (long enough to wrap around your waist and tie).
- Work 2-3 rows of half double crochet to create a belt.
- Loops:
- Chain 13, work 3 rows of single crochet to form loops. Attach loops to the side seams of the cardigan at hip level.
Final Steps
- Weave in all loose ends using a tapestry needle.
- Block the cardigan to ensure each motif lays flat.
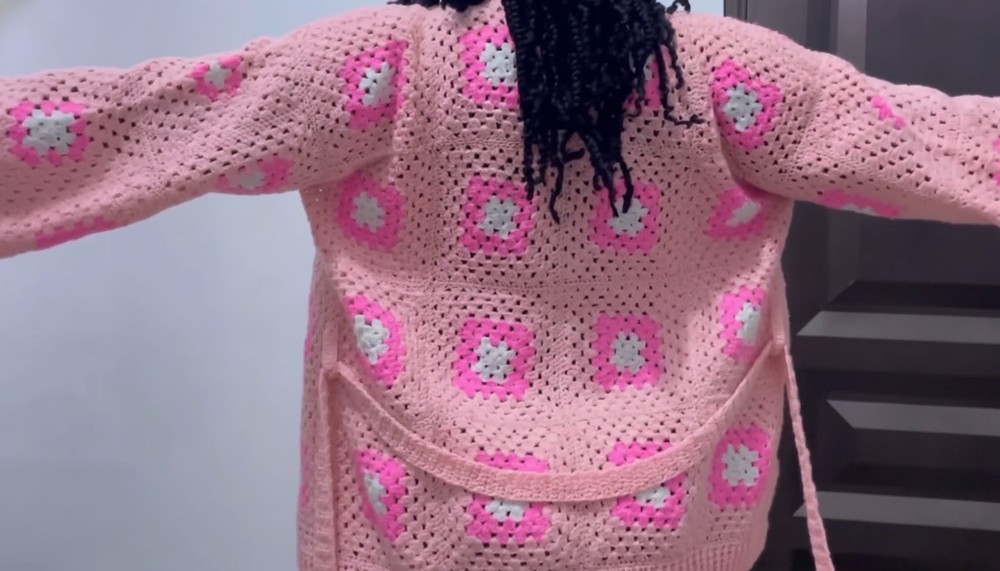
Conclusion
Congratulations! Your Granny Square Cardigan is complete!
This timeless design combines traditional granny squares with a modern and fashionable twist. The versatile construction allows for endless customization. Whether you're making this for yourself or as a thoughtful handmade gift, this cardigan is sure to turn heads with its vibrant colors and classic charm.

Pattern Corrections
- Blocked Edges: Ensure granny squares are blocked for evenness, as it improves the final fit.
- Versatile Joining Methods: If the needle join isn't comfortable, try slip stitch joins or join-as-you-go.
Tips for Success
- Use a stretchy yarn like acrylic to allow flexibility and easy stretching if needed.
- Be consistent with your stitch tension to create evenly sized granny squares.
- If you plan to make a larger or smaller size, adjust the number of squares in width and length.