
Easy Free Crochet Granny Square Skirt Pattern to Style Anywhere
Create a vibrant summer look with this FREE Crochet Granny Square Skirt Pattern, perfect for casual outings, beach days, and playful handmade style.
Summer afternoons filled with laughter and a gentle breeze call for outfits that are both playful and unique. The Free Crochet Granny Square Skirt pattern is the perfect project to capture that vibe, transforming colorful yarn into a wearable piece of art. This versatile skirt pairs beautifully with casual tees, crop tops, or denim jackets, making it ideal for beach days, picnics, or strolls through the park.
Free Crochet Granny Square Skirt Pattern For Comfy Wear

Each granny square adds a touch of handmade charm, while the crochet technique keeps the skirt light, breathable, and comfortable. Beyond its style appeal, making this skirt sharpens your crochet skills, encourages creativity, and results in a personalized garment that no store-bought skirt can match. Whether worn solo or layered, this skirt combines fun, fashion, and function, offering a rewarding project and a standout piece that brings joy every time you step out.
Crochet Granny Square Skirt Pattern
Skill Level
- Intermediate: Familiarity with granny squares, double crochet (dc), front and back post stitches, and basic assembly techniques required.
Finished Measurements
- The skirt's size can be adjusted to fit your measurements by increasing or decreasing the number of granny squares used.
Materials Needed
- Yarn:
- Acrylic or cotton worsted-weight yarn (~500-800g total, depending on size).
- Two contrasting colors. Example: Black and White (or any contrasting colors).
- Hook Size:
- 4.5mm crochet hook (or size needed to meet gauge).
- Additional Tools:
- Scissors.
- Tapestry needle for sewing.
- Stitch markers for securing edges during joining.
Gauge:
- Each granny square (after blocking and laid flat) should measure 5-6 inches by 5-6 inches.
Abbreviations (US Terminology):
- ch: Chain
- dc: Double Crochet
- sc: Single Crochet
- sl st: Slip Stitch
- st(s): Stitch(es)
- rep: Repeat
- FPdc: Front Post Double Crochet
- BPdc: Back Post Double Crochet
Special Notes:
- Customizable:
- Adjust the number and size of granny squares to fit your preferred skirt size or length.
- The waistband and base edging can be customized for different designs.
- Join-As-You-Go (Optional):
- The tutorial uses a joining technique with a needle, but feel free to use slip-stitch or other joining methods if desired.
- Colors:
- Change colors in the corners to create stunning geometric designs, ensuring each square has alternating colors.
Granny Square Skirt - Step-by-Step Pattern
Step 1: Granny Square (Core Component)
Each granny square consists of four sides forming a square. Alternating colors in the corners creates a unique geometric pattern.
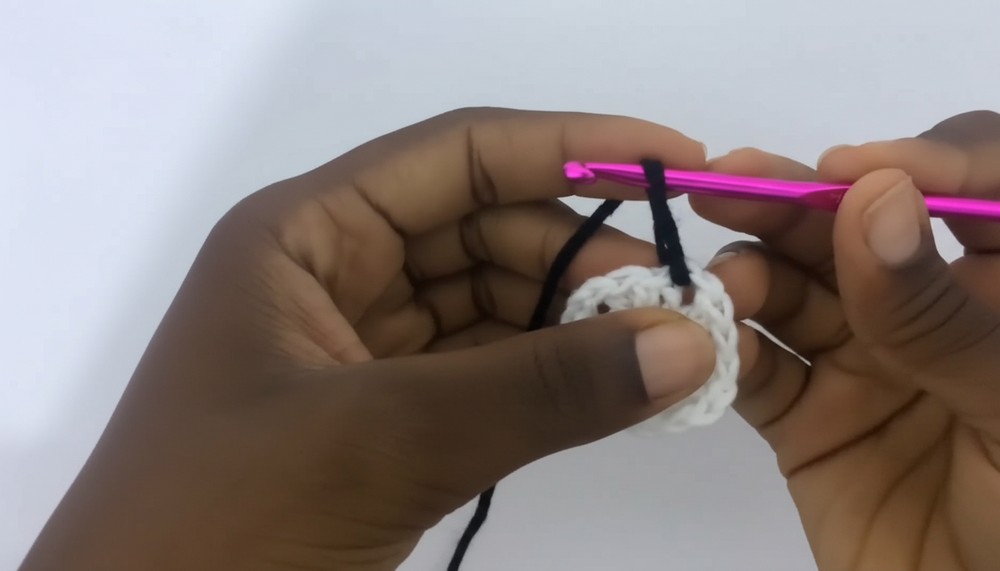
Round 1: Create the Base Circle
- Magic Ring:
- Form a magic ring and chain 3 (counts as the first dc).
- Into the Magic Ring:
- (3 dc, ch 2) four times to form four groups of 3 dc and four corners.
- Close the Circle:
- Tighten the magic ring and slip stitch into the top of the first dc to join.
- Stitch Count: 12 dc and 4 chain-2 spaces.
Round 2: Expanding the Square
- Change Colors:
- Bring in the second color before slip stitching (e.g., switch from white to black by completing the last stitch with the new color).
- Work the Corners:
- In each chain-2 space, (3 dc, ch 2, 3 dc).
- In Between Corners:
- Work 3 dc in each space between corners.
- Close the Round:
- Slip stitch into the top of the first dc.

Rounds 3-6: Extending the Square
- For every corner, work: (3 dc, ch 2, 3 dc).
- For every non-corner space, work: 3 dc.
- Alternate colors in corners every round:
- Example: Start Round 1 corners as white, Round 2 as black, Round 3 as white, etc.

Step 2: Assembly of Granny Squares
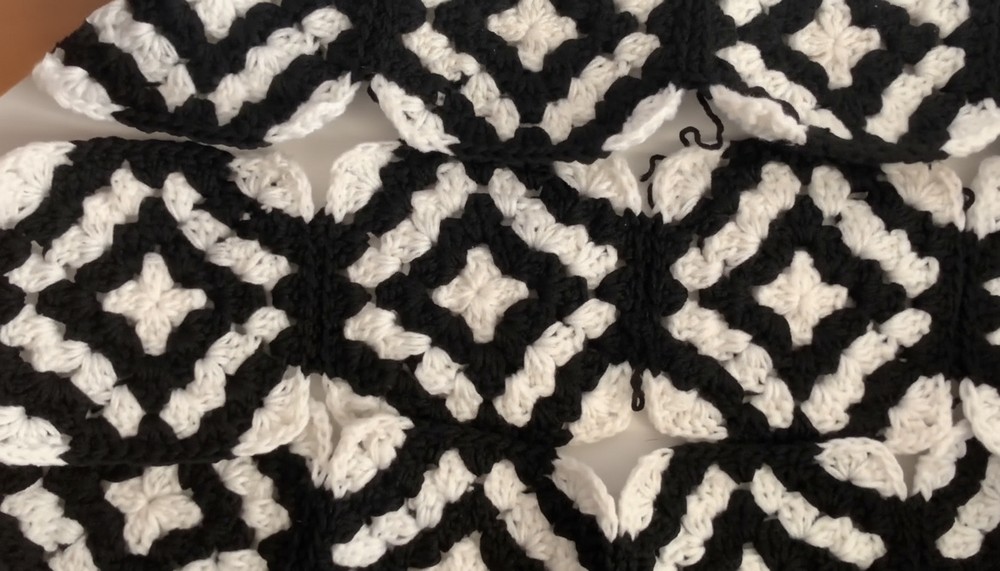
Step 2.1: Arrange Squares for Front and Back Panels
- Create a total of 24 granny squares (adjust number as necessary for your skirt size).
- Divide the squares evenly into two panels:
- Front Panel: 12 squares (3 rows of 4 squares).
- Back Panel: 12 squares (3 rows of 4 squares).
Step 2.2: Joining Squares
Use the following steps to join granny squares row-by-row and panel-by-panel:
- Preparation:
- Ensure the right sides of the squares are facing outward.
- Place two squares wrong sides together.
- Needle Join Method:
- Black Side:
- Insert the tapestry needle through the front loop of one square and the back loop of the other square. Pull gently to secure.
- Continue this process along the black side of the square until joined.
- White Side:
- Repeat the joining method on the white edge of the square for uniformity.
- Black Side:
- Assemble Panels:
- Repeat rows of 4 for both the front and back panels.
- Join the two panels along the sides to form a cylindrical skirt base.

Step 3: Waistband
Step 3.1: Single Crochet Round
- Attach Yarn to the Top Edge:
- In the stitch closest to the seam, attach yarn and chain 1.
- Work Single Crochets:
- Work evenly spaced single crochets around the entire circumference of the waistband edge.
Step 3.2: Double Crochet Round
- Chain 2:
- Turn your work, chain 2 (does not count as a stitch).
- Dc in Each Stitch:
- Work 1 dc into each sc around the waistband edge.

Step 3.3: Ribbing with Front and Back Post Stitches
- Round 1:
- Alternate between FPdc and BPdc.
- FPdc: Insert hook around the front of the post below and work a dc.
- BPdc: Insert hook around the back of the post below and work a dc.
- Alternate between FPdc and BPdc.
- Round 2 and Beyond:
- Continue working FPdc over FPdc and BPdc over BPdc for a total of 8 rows (or adjust for desired waistband height).
- Finish Off:
- Slip stitch to join, fasten off, and weave in ends.

Step 4: Base Edging
- Work 3 rows of single crochet evenly along the base of the skirt for a polished finish.
- Slip stitch into the first single crochet to join, fasten off, and weave in ends.
Step 5: Waist Tie (Optional)
- Chain:
- Make a long chain that can be woven through the waistband. Adjust the length for preferred tie style.
- Weave:
- Using your crochet hook or tapestry needle, weave the chain through the top row of ribbing stitches.

Conclusion
You've completed your stunning Granny Square Skirt!
This delightful design showcases the timeless granny square technique while offering a modern and elegant look. The skirt is perfect for special occasions, casual outings, or even as a fun beachwear piece.

Pattern Corrections
- For beginners, ensure your tension is consistent across all squares for uniform size.
- If the slip stitch joining causes gaps, tighten slightly or try a whip stitch.
Tips for Success
- Color Combinations: Experiment with vibrant or monochromatic shades to suit your personal style.
- Blocking: Block each granny square before joining for better alignment and neatness.
- Adjust for Fit: Make a smaller waistband or add panel snaps/buttons for additional adjustments.