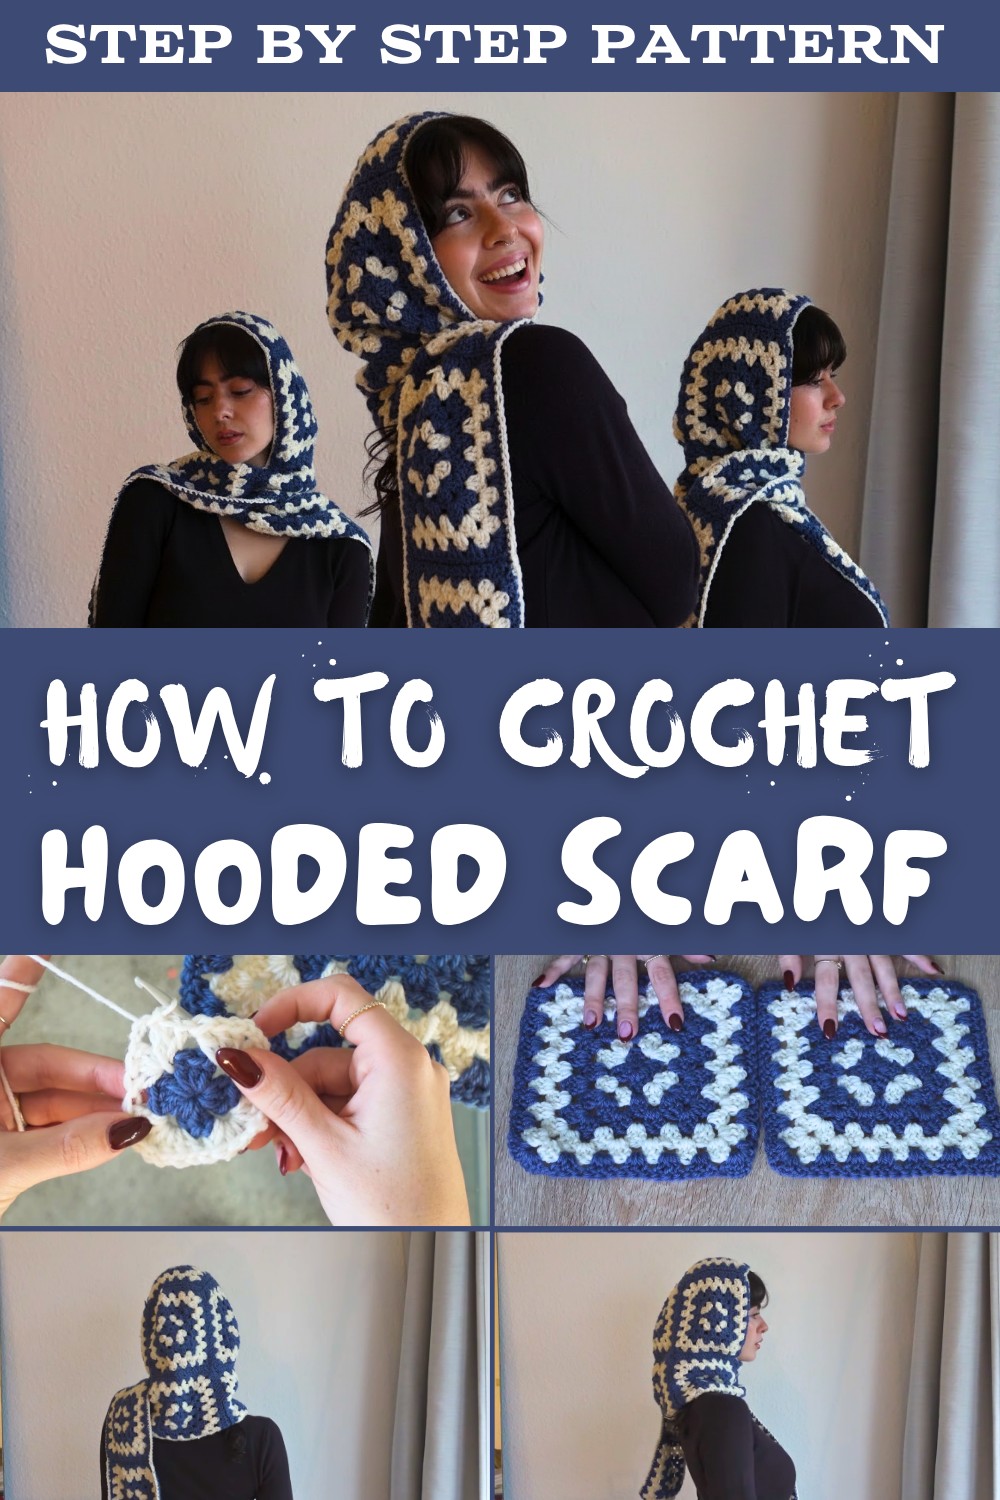
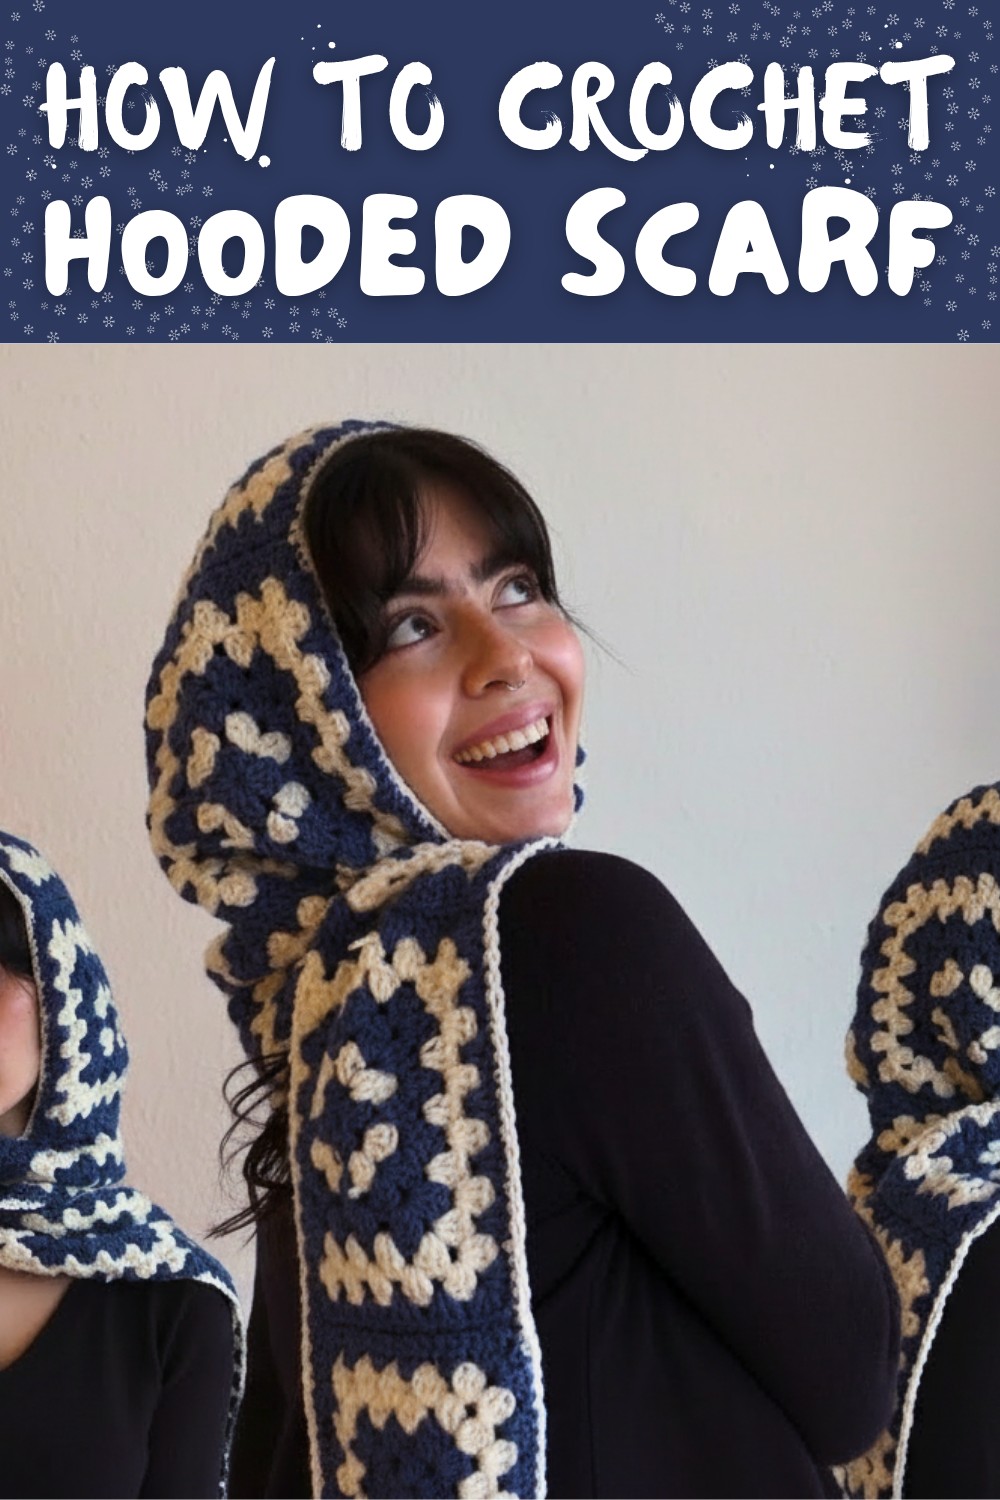
Easy Free Crochet Hooded Scarf Pattern to Stay Warm
Stay warm and stylish with a cozy hooded scarf that protects your head and neck in cold weather while adding a charming touch to any outfit.
On chilly days, nothing feels better than wrapping up in something cozy that keeps you warm from head to toe. This wonderful accessory combines the softness of a scarf with the snug protection of a hood, making it ideal for staying cozy in windy or cold weather. It's designed to shield your head and neck from the chill while adding a stylish touch to any outfit.
Free Crochet Hooded Scarf Pattern to Keep You Cozy
Made with soft and comfy material, it's gentle against the skin and easy to wear for hours. Its versatile design gives you the option to use the hood for extra warmth when needed or simply drape it like a regular scarf for a relaxed look.
Perfect for colder months, it pairs beautifully with casual or outdoor outfits, making it a must-have for anyone who loves staying warm while looking fashionable. Easy to use and effortlessly charming, it's a simple way to enjoy comfort and style all in one.
Hooded Granny Square Scarf Pattern
Skill Level
Beginner - Uses basic stitches like chain, double crochet (DC), and single crochet (SC). Familiarity with sewing or joining crochet pieces is beneficial but not required.
Materials Needed
Yarn:
- Worsted-weight, medium (size 4) acrylic yarn.
- Colors used in this tutorial: Blue and Off-White.
- Approximately 300g of yarn total (half for each color):
- 3 balls of blue (100g each).
- 3 balls of off-white (100g each).
- You can use more or fewer colors depending on your preferences.
Crochet Hook:
- 4 mm crochet hook.
- This smaller hook ensures tight, sturdy granny squares.
Additional Supplies:
- Scissors: For cutting yarn.
- Yarn needle: For weaving in ends and sewing granny squares together.
- Stitch markers: To help mark the center of the granny squares while working.
- Measuring Tape: To ensure your granny squares are the correct size.
Special Techniques
- Granny Square Basics: Each square includes clusters of three double crochet stitches (DC) separated by chain spaces to create the classic granny square design.
- Invisible Seam: Use a yarn needle to sew granny squares together through only the back loops for a seamless look.
- Rotating Color Change: To keep squares even, start new colors in opposite corners of the previous round.
Finished Size
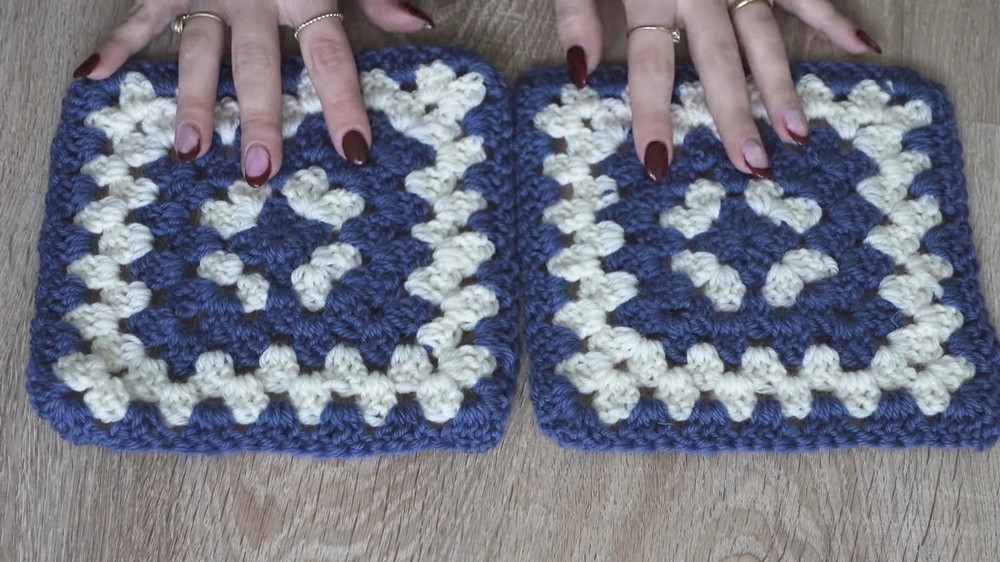
- Granny Squares: Each square measures 15 x 15 cm (6 x 6 inches).
- Hood: Oversized, but you can adjust the size by modifying the square dimensions.
- Scarf Length: For this project, 13 granny squares were used. Customize the length by adding or reducing squares (must be an odd number).
Pattern Instructions
Step 1: Crochet Granny Squares
You will need 13 granny squares in total for this hooded scarf project.
Granny Square Pattern:
- Start with a slip knot and chain 3.
- Form a circle by slip stitching into the back loop of the first chain.
- Mark the center of the circle with a stitch marker (optional).
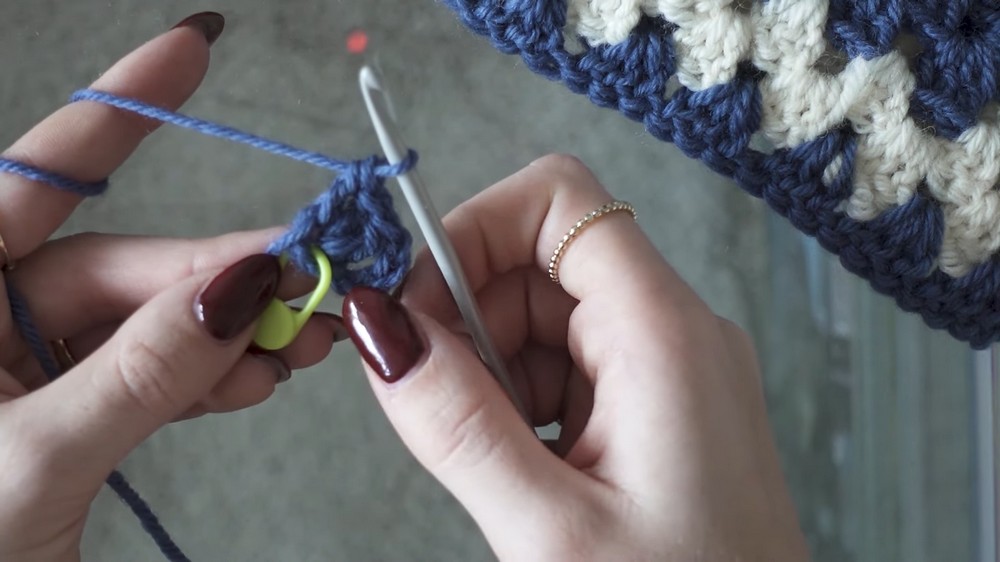
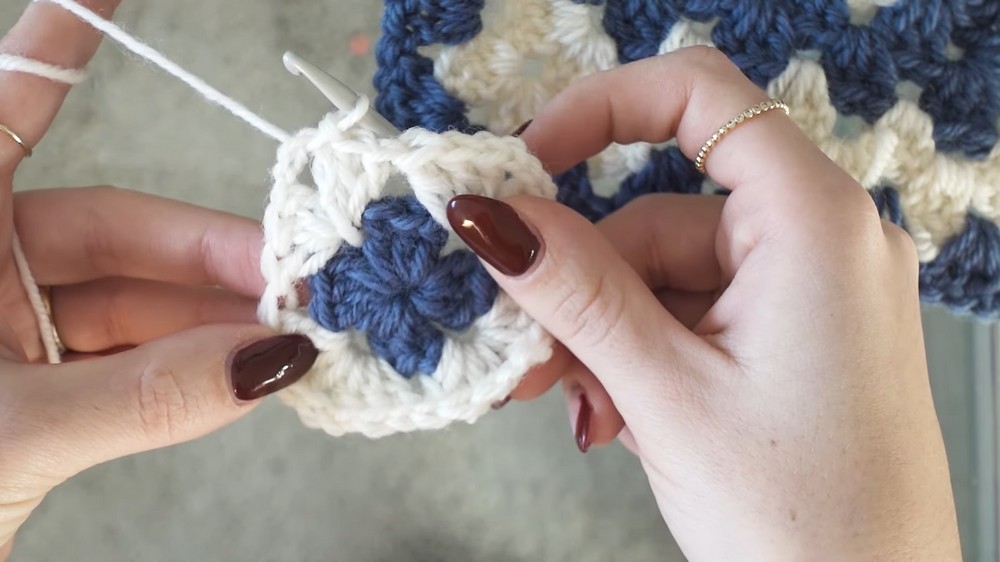
Round 1: Form the Foundation Clusters
- Chain 4 (acts as the first double crochet + corner chain).
- Into the center of the circle, work 3 double crochets (DC) to form the first cluster.
- Chain 2 to create the first corner.
- Repeat the sequence 3 more times:
- 3 DC → Chain 2 into the center (you will have 4 clusters and 4 corners).
- To finish the round: Work 2 DC, then slip stitch into the top of Chain 3 to join.
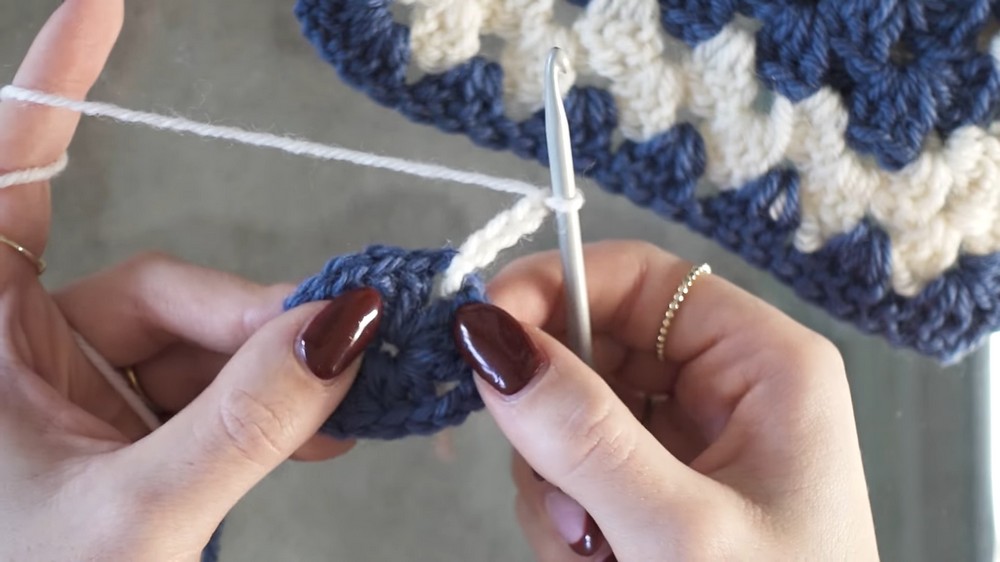
Round 2 (First Border):
- Change yarn color (optional). Attach new yarn to the opposite corner of the previous round for even shaping.
- Chain 4 (counts as the first DC + corner chain). Work 3 DC into the same corner space.
- Skip the next cluster and work directly into the next corner:
- 3 DC → Chain 2 → 3 DC (corner completed).
- Repeat this pattern for all sides and corners.
- For the final side, work 2 DC into the last space, then slip stitch into the top of Chain 3.
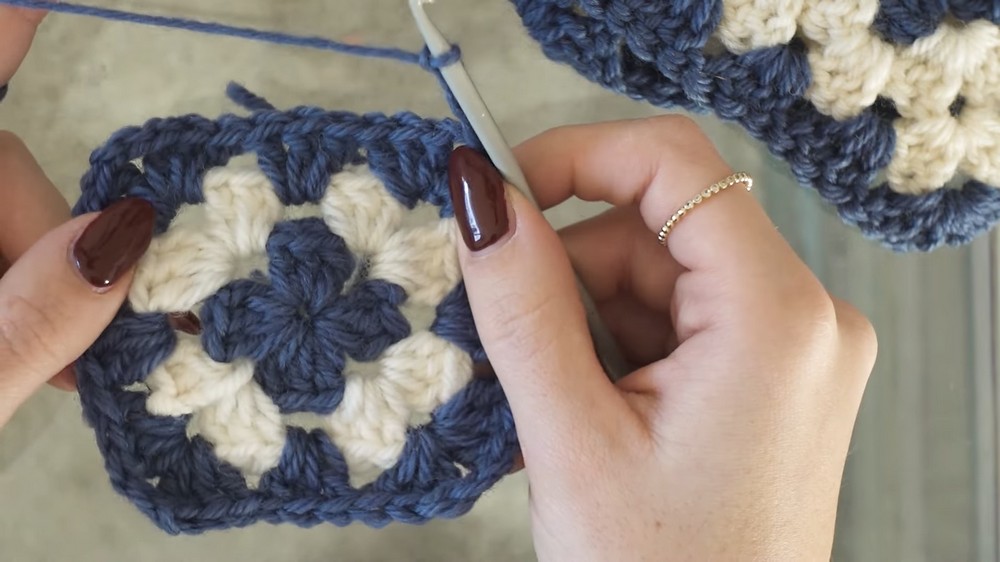
Round 3 and Beyond (Expansion):
Each new round will have additional spaces on the sides:
- Corners: Work 3 DC → Chain 2 → 3 DC into corner spaces.
- Sides: Work 3 DC clusters into each space created by the clusters below (no chains between side clusters).
- Continue until your squares measure 15 x 15 cm (6 x 6 inches).
Step 2: Assemble the Granny Squares
Once you've completed your 13 granny squares, it's time to assemble them.
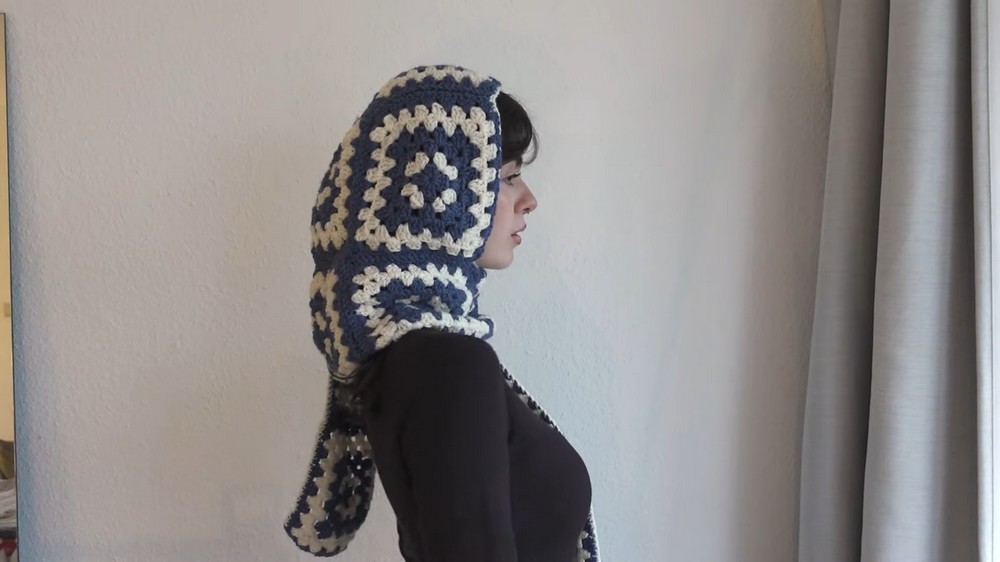
Hood Section:
- Use 4 squares for the hood.
- Position 1 square on top as the "roof" of the hood.
- Attach 3 squares to the sides of the top square:
- Make sure each side square aligns evenly with the edges of the top square.
- Sew or slip stitch the squares together using the invisible seam technique:
- Hold the squares with right sides facing each other.
- Sew or crochet through the back loops only for an invisible join.

Scarf Section:
- Use 9 squares for the scarf.
- Connect the 9 squares in a single straight line.
- Once joined, attach the middle of the scarf to the base of the hood.
- Ensure the hood is centered at the midpoint of the scarf.
Step 3: Add the Border
To give the edges of your hooded scarf a neat and finished look, add a single crochet border.
Border:
- Attach yarn in any corner.
- Work single crochet (SC) evenly around the entire scarf and hood opening:
- Work 3 SC into each corner for a smooth turn.
- For the sides, aim for 1 SC per stitch/space.
- Repeat for 1-2 more rounds until the border is to your liking.
- Use the same color throughout, or alternate for a decorative effect.

Finishing
- Weave in all loose ends securely using a yarn needle.
- Gently block your hooded scarf if the squares appear wonky or uneven. This helps the scarf drape nicely.
- Try it on and make adjustments if necessary by tightening joins or rearranging the hood-to-scarf connection.
Final Words
Congratulations on finishing your Hooded Granny Square Scarf! The hood's oversized look adds a cozy, casual touch, while the scarf itself keeps you warm and stylish.
Tips for Customization
- Hood Fit: Adjust the size of the top square for a snug or oversized fit. Align it to your jawline for more structure.
- Scarf Length: Add or remove squares from the scarf portion to suit your height or style preference.
- Colors: Experiment with gradient yarn for a seamless color shift or make each square a different color for maximum vibrance.
- Fringe: Add fringe or tassels to the scarf ends for a bohemian flair.