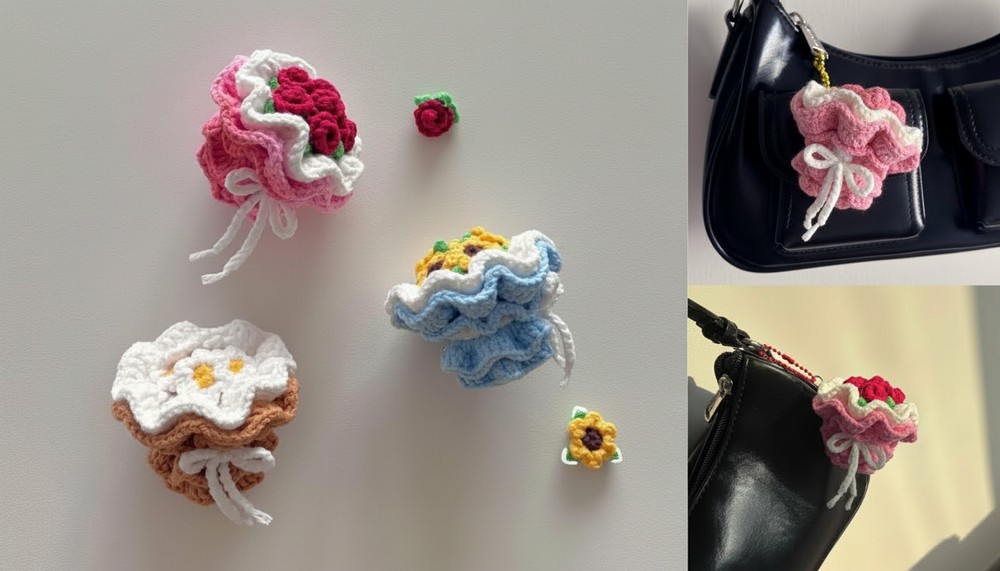
Easy Free Crochet Mini Flower Bouquet Keychain Pattern
Brighten your keys with this Free Crochet Mini Flower Bouquet Keychain Pattern and its cheerful blooms that bring charm to any bag or gift.
Flowers don't have to grow in gardens to bring joy, they can bloom right in your hands! This crochet pattern creates a delightful mini flower bouquet keychain that's as charming as it is creative. Tiny, colorful flowers are carefully crafted into a cute little bundle, making it the perfect accessory to brighten up your keys, bags, or even your car. Its cheerful design and handmade touch add personality and beauty to your everyday items.
Crochet Mini Flower Bouquet Keychain Pattern with Quick Steps

Lightweight yet sturdy, it's both fun and functional, blending creativity with practicality. You can customize it with any color combination to suit your style or make it as a thoughtful handmade gift for someone special. With its playful look and unique charm, this mini flower bouquet keychain is not only a joy to craft but also a beautiful reminder that the smallest things can brighten even the dullest days.
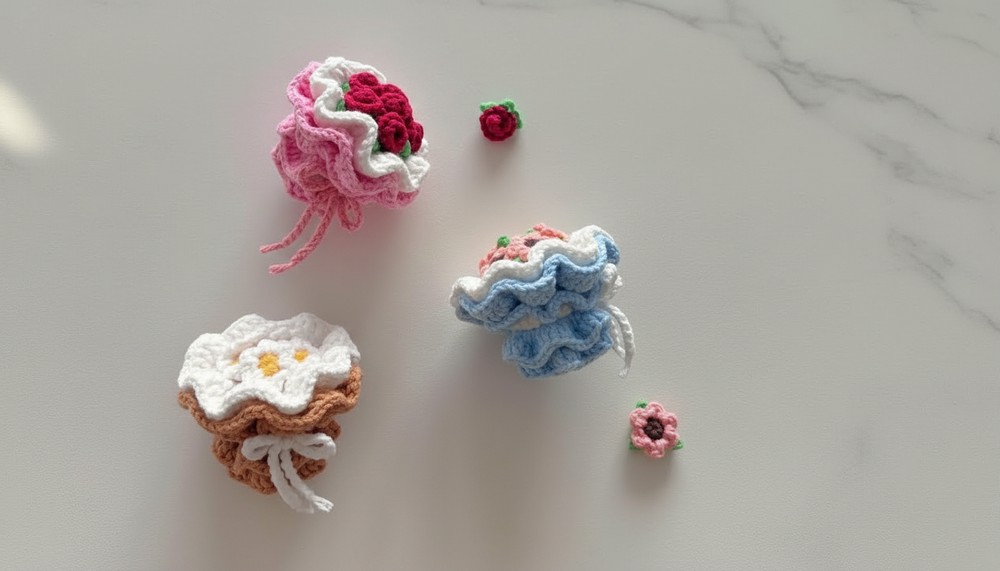
Crochet Mini Flower Bouquet Keychain Pattern
Follow this detailed pattern to crochet these beautiful bouquets.
Materials Needed
- Yarn:
- Milk Cotton Yarn (Weight 3):
- Brown for bouquet base.
- t-pink for roses.
- Green for leaves.
- White for daisy petals and upper bouquet layers.
- Optional: Other colors for variety.
- Milk Cotton Yarn (Weight 3):
- Hook:
- 2.5 mm crochet hook.
- Scissors:
To cut yarn neatly. - Tapestry Needle:
For weaving in loose ends and sewing pieces together. - Hot Glue Gun:
To assemble flowers, leaves, and bouquet layers.
Special Techniques
Magic Ring (MR):
- Create a loop with the yarn, crossing the loose end over the working end to form a circle.
- Insert the hook through the loop, yarn over, and pull up a loop.
- Chain 1 to secure the ring. Work the required stitches into the center of the ring.
- Pull the loose tail to close the ring tightly.
Back Loop Only (BLO):
For rounds requiring work into the back loop only:
- Insert the hook under the back loop of the stitch.
- Yarn over and pull through as usual to complete the stitch.
Increase (inc):
Make two single crochets in one stitch.
Decrease (dec):
Combine two stitches into one. To do this, insert the hook into the first stitch, yarn over, pull up a loop, insert the hook into the next stitch, yarn over, pull through, and then yarn over and pull through all loops on the hook.
Whipstitch:
Used to sew layers together. With a needle, sew through both pieces of fabric or stitches to join them.
Finished Size
The finished mini bouquet measures approximately:
- 4-5 inches high and 3-4 inches wide, depending on the number and arrangement of flowers.
Pattern Instructions
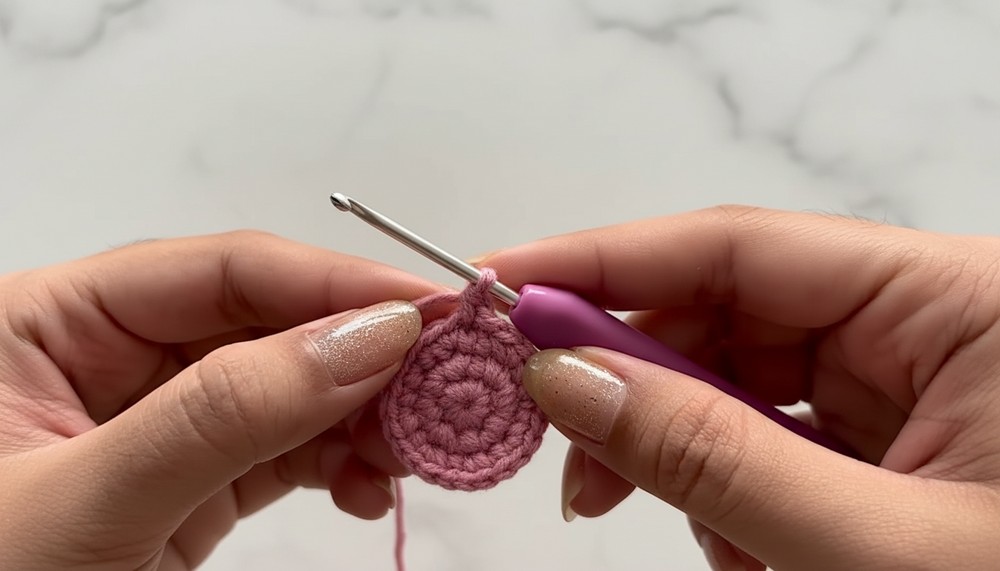
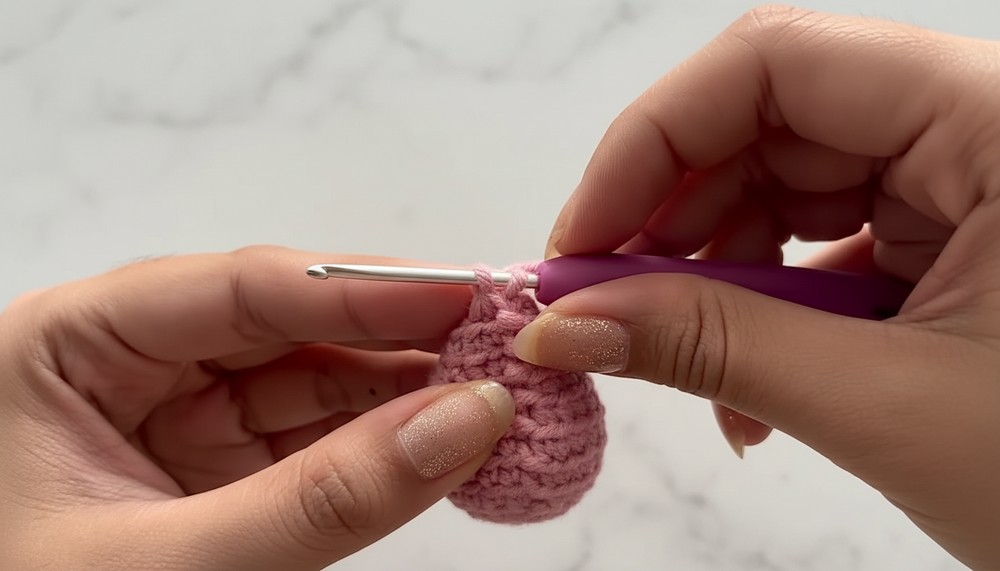
Step 1: Bouquet Base
Instructions
- Foundation Round:
- Start with a magic ring. Make 8 single crochet (sc) into the ring. (8 stitches)
- Pull the yarn tail tightly to close the ring. Slip stitch to the first stitch and chain 1. (Round 1 complete)
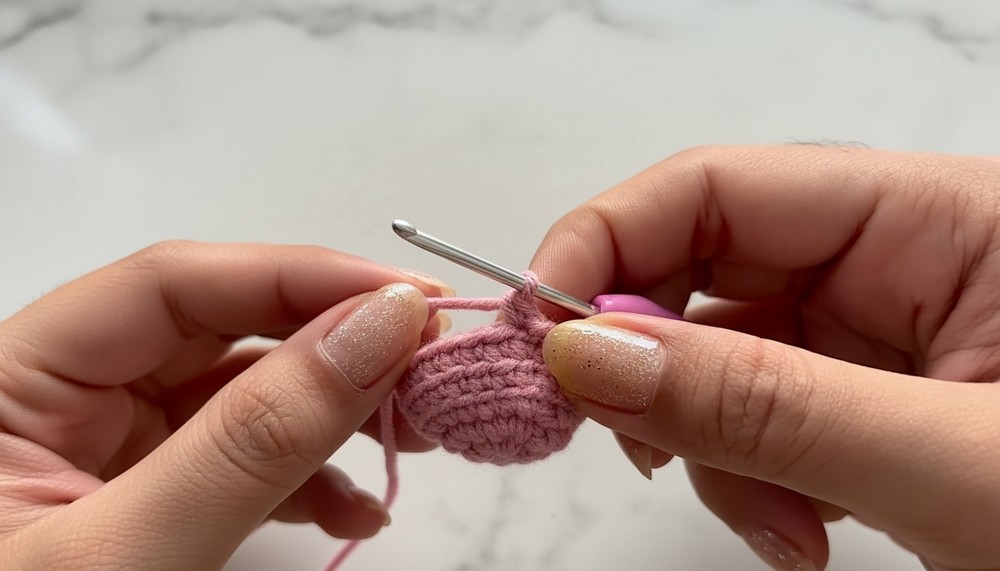
- Round 2:
- Work an increase in each stitch around. (16 stitches)
- Round 3:
- Alternate 1 sc, 1 inc around. (24 stitches)
- Slip stitch to join at the end of the round and chain 1.
- Round 4:
- Work 1 sc into each stitch around. (24 stitches)
- Slip stitch to join at the end of the round and chain 1.
- Rounds 5-6:
- Work in Back Loop Only (BLO): Make 1 sc into each stitch around. (24 stitches per round)
- Round 7:
- Continue in BLO: Alternate 2 sc, 1 dec around. (18 stitches)
- Round 8:
- In BLO: Make 1 sc into each stitch around. (18 stitches)
- Round 9:
- In BLO: Alternate 1 sc, 1 dec around. (12 stitches)
Step 2: Lower and Upper Layers
First Lower Layer
- Identify the back loops of Round 9. Attach yarn, chain 2, and begin Round 1:
- Work 2 dc in each back loop around. (24 stitches)
- Slip stitch to join and chain 2.
- Begin Round 2:
- Alternate 1 dc, 1 dc inc around. (36 stitches)
- Fasten off and hide yarn tails.
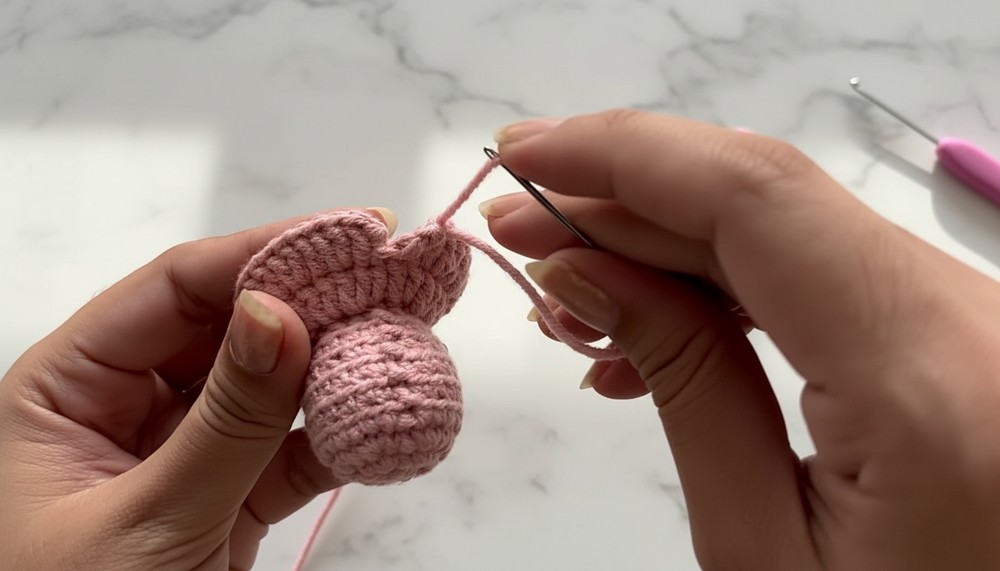

Second Lower Layer
- Locate the back loops of Round 8. Attach yarn, chain 2, and begin Round 1:
- Work [1 hdc, ch 1, 1 hdc] in each back loop around. (18 petals)
- Slip stitch to close the round, chain 2.
- Begin Round 2:
- Work 1 hdc into each st and 1 hdc into each chain space around. (54 stitches total)
- Fasten off and hide yarn tails.

Upper Layers (Three Total)
- Locate the back loops on Rounds 7, 6, and 5. For each Upper Layer:
- Attach yarn to a back loop, chain 2, and begin Round 1:
- Work [1 dc, ch 1, 1 dc] in each loop around. (24 petals per upper row)
- Fasten off and hide yarn.

Step 3: Flowers
Rose
- Chain 7.
- Begin in the second chain from the hook:
- Work 1 inc (2 sc) into each chain for the first two chains.
- On the next five chains, work 3 sc into each chain.
- Fasten off and roll the piece tightly to create a rose shape. Secure rolls with hot glue.
Sunflower
- Begin with a magic ring using brown yarn. Work 6 sc into the ring.
- Switch to yellow yarn. Work [sl st, ch 1, sc, ch 1, sl st] into each stitch. (6 petals total)
- Attach green yarn, using a magic ring to make the leaves:
- Work 4 chain, then:
- Sl st into the 2nd ch, sc into the next ch, hdc into the following ch.
- Sl st into the magic ring. Repeat 2 more times for 3 leaves in total.
- Pull the center tail to close the ring and cut the yarn.
- Work 4 chain, then:
- Attach flower to leaf with hot glue.
Daisy
- Follow the exact same steps as the sunflower, but use white yarn for the petals instead of yellow. Leaves are optional.
Step 4: Assembly
- Assemble the flowers with a hot glue gun, applying a small amount of glue to secure the leaves and flowers together.
- Rose Bouquet: Glue one rose in the center and glue five more around it to form a circular arrangement.
- Sunflower Bouquet: Arrange the five sunflowers in a circular pattern.
- Daisy Bouquet: Follow the same steps as for the sunflower bouquet.
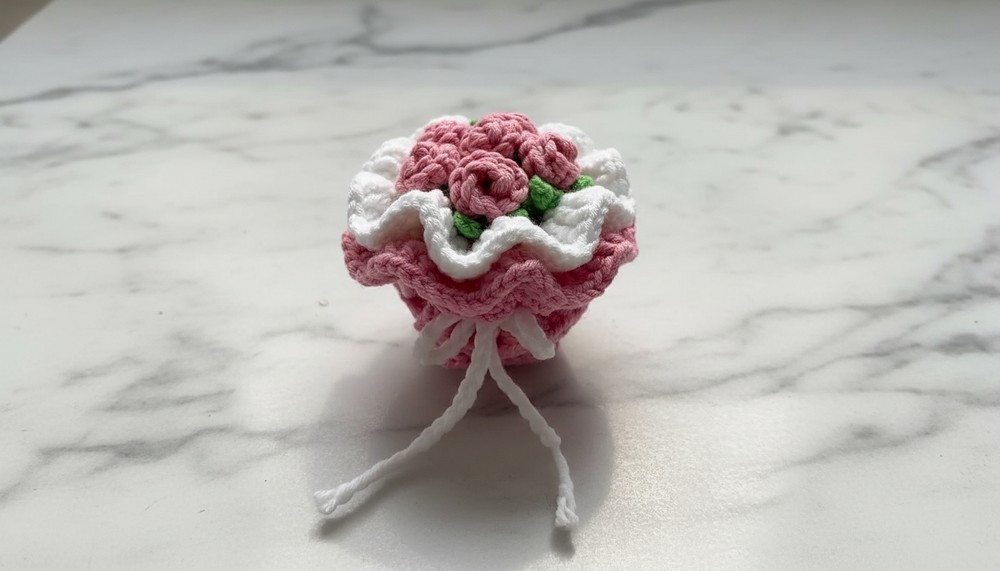
Finishing Touches
Separating the Layers
- Use white yarn to crochet a ribbon to wrap between the upper and lower layers:
- Chain 21.
- Work 1 sc into each chain.
- Fasten off and sew the ends to secure around the bouquet.
Ribbon
- Chain 50.
- Tie the chain into a bow and attach it to the center of the bouquet.
Final Words and Tips
- Customization: Feel free to change the colors of the bouquet base, flowers, and layers to create different looks. For example, add more layers or flowers for larger arrangements.
- Embellishments: Use beads or pearl pins to highlight the flowers for an elegant touch.
- Care: Spot clean the bouquet gently with a damp cloth to maintain its appearance.

Conclusion
Congratulations on completing your mini bouquet! This design is versatile and perfect for a variety of occasions, such as weddings, gifts, or even home décor. The charming layered design, combined with the lovely flowers, creates a timeless and elegant look. Enjoy crocheting your mini bouquets, and be sure to share your creations with friends and loved ones.