
Easy Free Crochet Pattern: Small Pouch Bag for Beginners
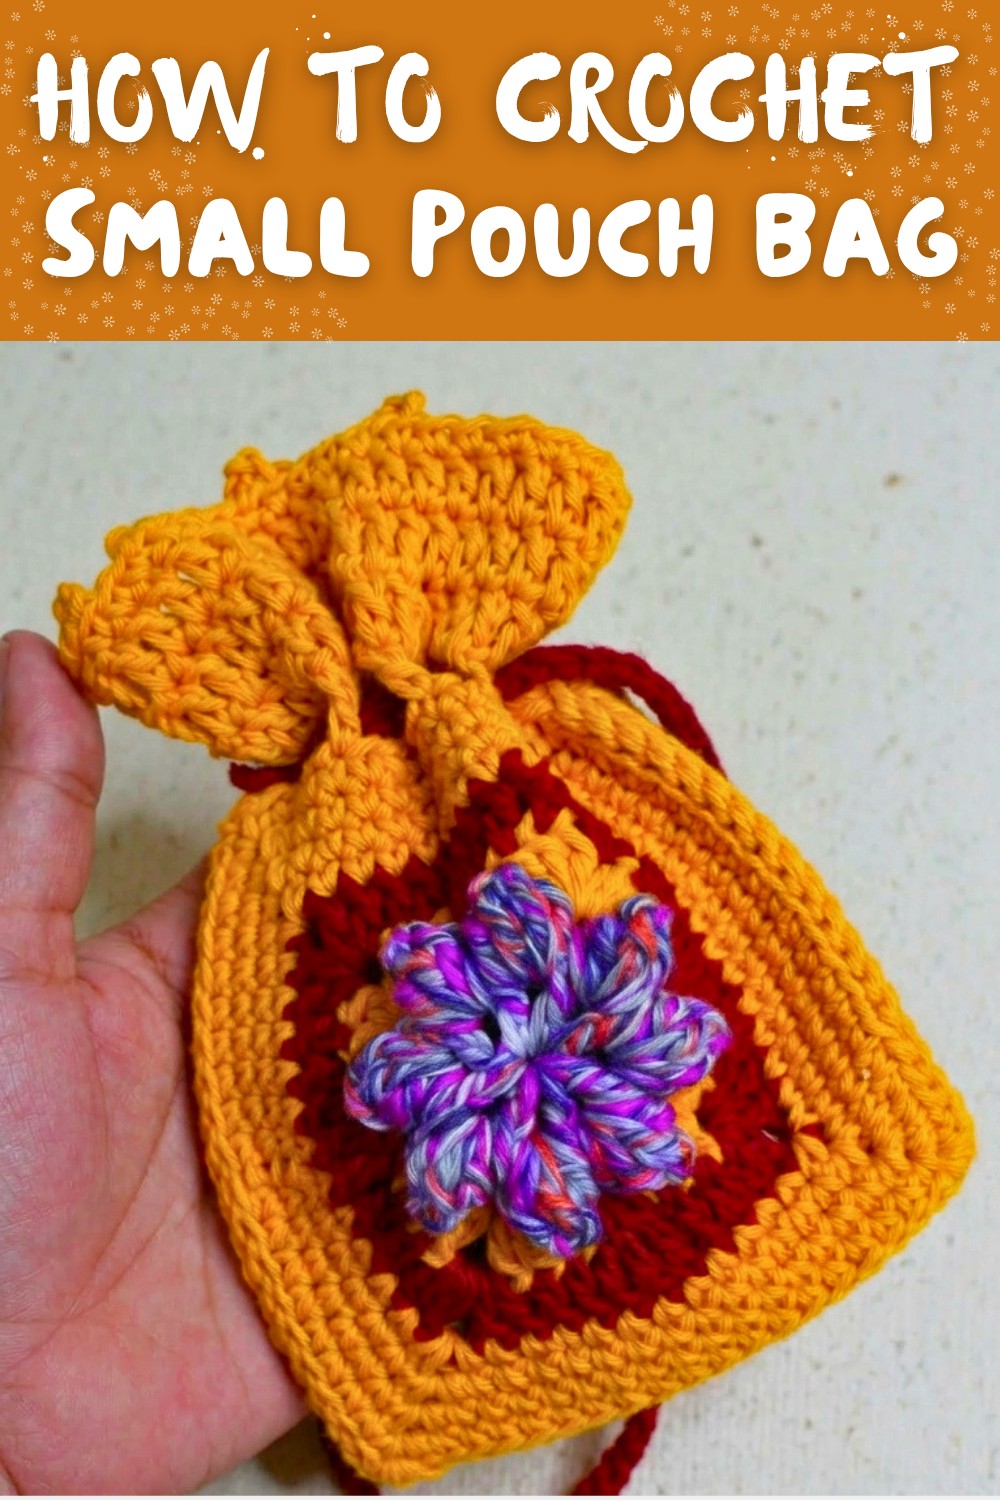
Store daily essentials in Free Crochet Small Pouch Bag Pattern featuring a compact accessory perfect for travel home storage & everyday use.
A small bag that fits comfortably in your hand can be very handy every day. It holds little things like keys, coins, or cards, keeping them safe and easy to find. Because it is light and compact, you can carry it anywhere without any hassle. You get to choose colors that suit your taste, making each bag special and unique. This project teaches easy steps anyone can follow, even without prior experience.
Free Crochet Small Pouch Bag Pattern for Coins & Accessories

The Crochet Small Pouch Bag pattern guides you to start with a small circle and gently build the sides up. Sometimes, special touches are added to make the surface look interesting and attractive. Working on this piece is a calm and enjoyable activity, giving your hands something to do while your mind relaxes. Finishing it gives a sense of pride and satisfaction because you have something both pretty and useful.

This tiny bag isn't just for personal use; it also makes a lovely gift for friends and family. Using leftover materials to create several pouches is a clever way to avoid waste and make good use of resources. Carrying a pouch you have completed yourself brings joy and shows care.
Overall, this pattern offers an easy and pleasant way to produce a beautiful and practical item for everyday life. It helps you gain confidence and skill while resulting in something you can treasure or share. This project is great for anyone who wants a simple, rewarding activity that ends with a useful product.
Mini Crochet Pouch Pattern
Getting Ready
- This pattern is perfect for using leftover cotton yarn (fine size number 2).
- Use a 3 mm crochet hook for accurate stitch coverage.
- Have multiple colors ready if you want to create a multicolored pouch as in the example.
- Prepare scissors, yarn needle, and stitch markers or stitch clips for assembly.
- Familiarize yourself with basic crochet stitches and techniques like slip stitch, single crochet, double crochet, treble crochet, popcorn stitch, and picot edging.
- Maintain consistent tension to ensure even stitches and neat shaping.
- This project is beginner-friendly but requires attention to stitch counts and joining motifs.
- Gauge is not critical but maintaining even tension is essential for neat results.
Pattern Notes
- The pouch is made by crocheting square motif units with colorful rounds and joining them later.
- Construction is done in rounds using various stitches and join-as-you-go techniques.
- Motifs are joined with slip stitches using front loop/back loop joining for flexibility.
- Pattern uses US crochet terminology.
- Color changes happen after every 2-4 rounds to add dimension and interest.
- Edges are finished with picot and decorative single crochet rounds.
- The pouch body is built from two identical motifs joined on three sides, leaving one side open for closure.
- A long braided or crocheted cord is made separately to function as a strap or handle.
Project Outline
- Start by creating a magic ring and work eight sets of two double crochet clusters separated by chain-2 spaces forming the base round.
- Close the ring and join with slip stitch.
- Work round 2 with single crochet, double crochet, and popcorn stitches to build texture and dimensionality.
- Change colors on rounds to produce a vibrant striped effect.
- Continue building rounds with a combination of treble crochets, double crochets, and chain spaces forming corners and edges.
- Work a few rounds of single crochet for reinforcing edges and shaping the pouch sides.
- Make two identical motifs and join them on three edges using slip stitches in front/back loop joins, leaving one side open.
- Crochet a separate chain for the strap and reinforce by slip stitching along the chain.
- Attach the strap to the pouch for a finished product.
Skill Level
Beginner-Intermediate: Basic stitches required; some experience with changing colors and joining motifs recommended.
Finished Size
Approximately 5 inches (13 cm) square for each motif; the finished pouch size depends on number of motifs joined but is roughly 5 inches wide and 3 inches deep when closed.
Materials
- Fine #2 cotton yarn leftovers in multiple colors (or desired colors)
- 3 mm crochet hook for main motifs
- Matching yarn needle for weaving ends
- Scissors
- Stitch markers (optional)
- Tape measure for sizing
Measurements / Sizing
- Magic ring base rounds create a small square approximately 5 inches across.
- Adjust foundation ring or add rounds for different sizes.
- The pouch in the video consists of two motifs joined on three sides.
Gauge
- 14-16 stitches roughly equals 4 inches in double crochet clusters.
- Consistent tension helps maintain proper pouch shape.
Stitch Abbreviations
- ch = chain
- sl st = slip stitch
- sc = single crochet
- dc = double crochet
- tr = treble crochet
- pop = popcorn stitch (details below)
- picot = chain 3, slip stitch into 3rd ch from hook
Special Stitches
Popcorn Stitch:
Work 5 double crochets into the same stitch or space, remove hook from the last loop, insert hook into the first double crochet of the group, grab the dropped loop and pull it through the first stitch, creating a raised bump.
Picot:
Chain 3, slip stitch into the 3rd chain from the hook forming a small decorative loop.
Crochet Pattern Instructions
Part 1: Foundation Round (Magic Ring Base)
- Begin with a magic ring.
- Ch 3 (counts as first dc), then make 1 dc, ch 2, 2 dc into the ring.
- Repeat 2 dc, ch 2, 2 dc sequence until you have 8 groups total (including starting 2 dc).
- You should have eight 2-dc groups separated by chain-2 spaces.
- Pull the ring tight to close the center.
- Join with slip stitch to the top of the first ch-3.
Explanation:
This round creates a small circular base with chain spaces to build the motif's shape.

Part 2: Round Two - Textured Popcorn Round
- Sl st into the top chain of the 2nd dc.
- Sl st into the first chain space.
- Ch 1, sc in the same chain space.
- Ch 2 (counts as first dc), make 4 dc into the same chain space.
- Sl st into the second chain of the previous ch 2 to create a tight join.
- Ch 3.
- Skip the next two dc, make 5 dc popcorn stitch into the next chain space.
- Sl st into the 4th dc of the previous popcorn (front loop).
- Ch 3.
- Repeat popcorn stitch and ch 3 in each chain space around, joining with sl st to the first sc at the end.

Explanation:
This round builds 3D popcorn stitches spaced by chain 3 loops for a textured look.
Part 3: Round Three - Color Change and Corners
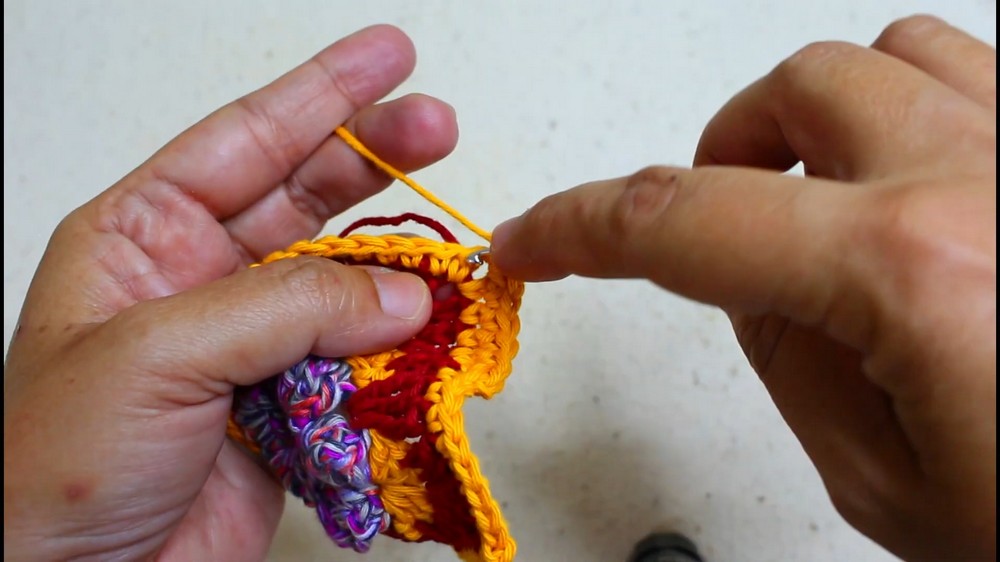
- Attach new color with a slip knot in any chain space.
- Sc in same chain space.
- Ch 2, 3 dc in the same chain space (corner made).
- Skip next chain space, repeat corner procedure (3 dc, ch 2, 3 dc) into every other chain space around, separated by chains/skips as per pattern.
- Join with slip stitch to first sc.
Explanation:
Creates corner clusters that shape motif edges.
Part 4: Round Four - Treble Crochet Detailing
- Attach new color.
- Skip first dc of previous round, sc in the next.
- Ch 2.
- Continue alternating double crochet and treble crochet stitches in chain spaces as per pattern.
- Repeat making 2 dc, ch 2, 2 dc corners on chain spaces.
- Join with slip stitch.
Explanation:
Adds height and open lacy sections for visual interest.
Part 5: Rounds Five and Six - Reinforcement and Edging
- Work single crochet stitches evenly all around the motif edges.
- Use picot edging (ch 3, sl st in 3rd ch from hook) on corners for a decorative finish.
- Cut yarn and fasten off.
Explanation:
Finishes motifs with neat, sturdy edges.
Part 6: Making Second Motif and Joining
- Repeat all steps for second motif.
- Align motifs with right sides facing.
- Join on three sides using slip stitch through back loop of the first motif and front loop of the second motif.
- Leave one edge open as pouch opening.
Explanation:
Creates pouch shape by joining motifs securely.

Part 7: Crochet Strap (Cord)
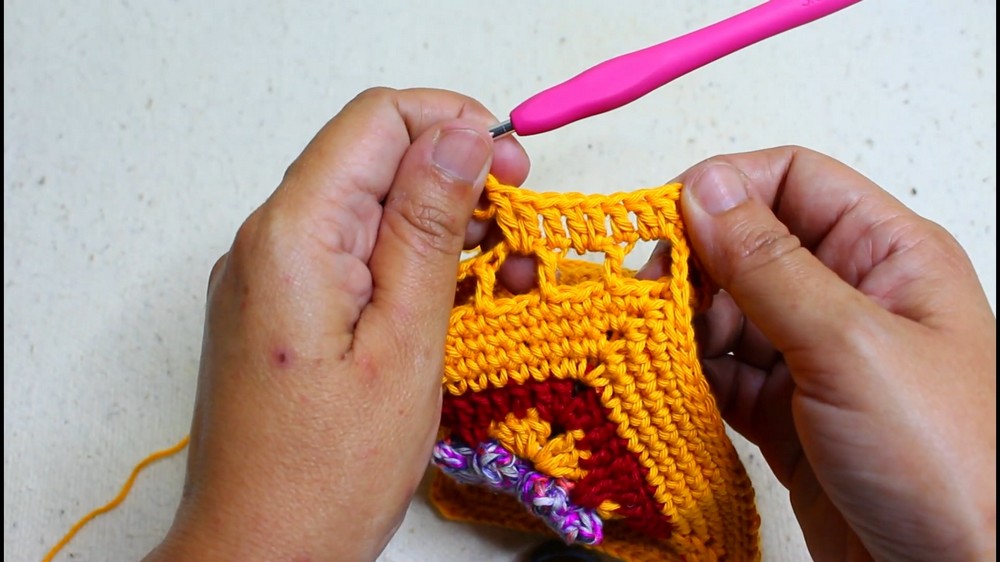
- Chain 100 loosely (or desired length).
- Turn and work slip stitches into each chain stitch back down.
- Fasten off and weave in ends.
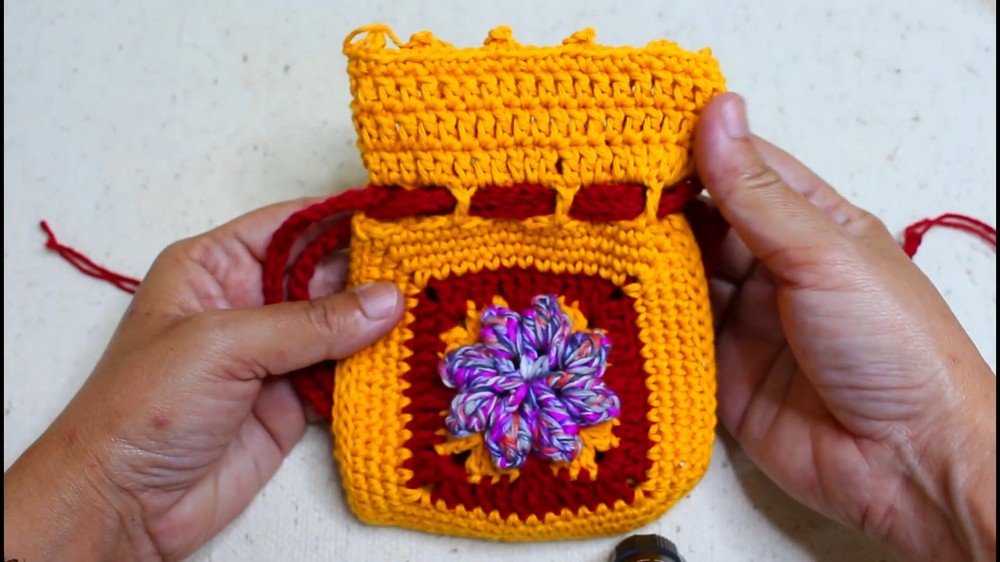
- Attach strap ends to pouch edges securely.
Explanation:
The thin strap is a slip stitched chain for both strength and comfort.
Assembly and Finishing
- Weave in all loose ends with a yarn needle to prevent fraying.
- Block motifs gently if needed to smooth stitches and shape.
- Join motifs carefully to ensure seam flexibility and avoid puckering.
- Attach the strap securely on both sides of pouch opening.
- Optionally add button, zipper, or drawstring closure as desired.

Troubleshooting Guide
- Problem: Popcorn stitches not forming correctly.
Solution: Carefully remove the hook from last loop after 5th double crochet and insert into the first stitch before pulling through loop. - Problem: Gaps appear uneven in the motif edges.
Solution: Ensure chain spaces and double crochet groups are consistent and tension is not too tight. - Problem: Joining motifs results in stiff seam.
Solution: Join motifs using back/front loop slip stitch method gently without pulling too tight.
Creative Uses
- Make multiple motifs joined together to form larger bags or tote purses.
- Create coasters or table mats following the motif pattern.
- Use smaller motifs for keychain pouches or coin purses.
- Produce colorful accessories like wristlets by adding wrist straps.
- Turn motifs into decorative pillow covers by joining multiple pieces.