
Easy Free Sunflower Top Crochet Pattern Is a Must-Try
Build a sunny sunflower top with this free crochet guide that's super easy, full of bright vibes, and perfect for rocking a cute and colorful look every day.
Making a bright and cheerful crochet top is a fun way to bring the beauty of sunflowers into your wardrobe. A Free Crochet Sunflower Top Pattern helps you create a stunning and unique piece that is full of color and charm. This top is designed with beautiful sunflower shapes that make it stand out and give it a fresh, nature-inspired look. It's perfect for warm weather, as it is lightweight, breathable, and comfortable to wear all day.
Charming Sunflower Crochet Top Free Pattern You'll Love
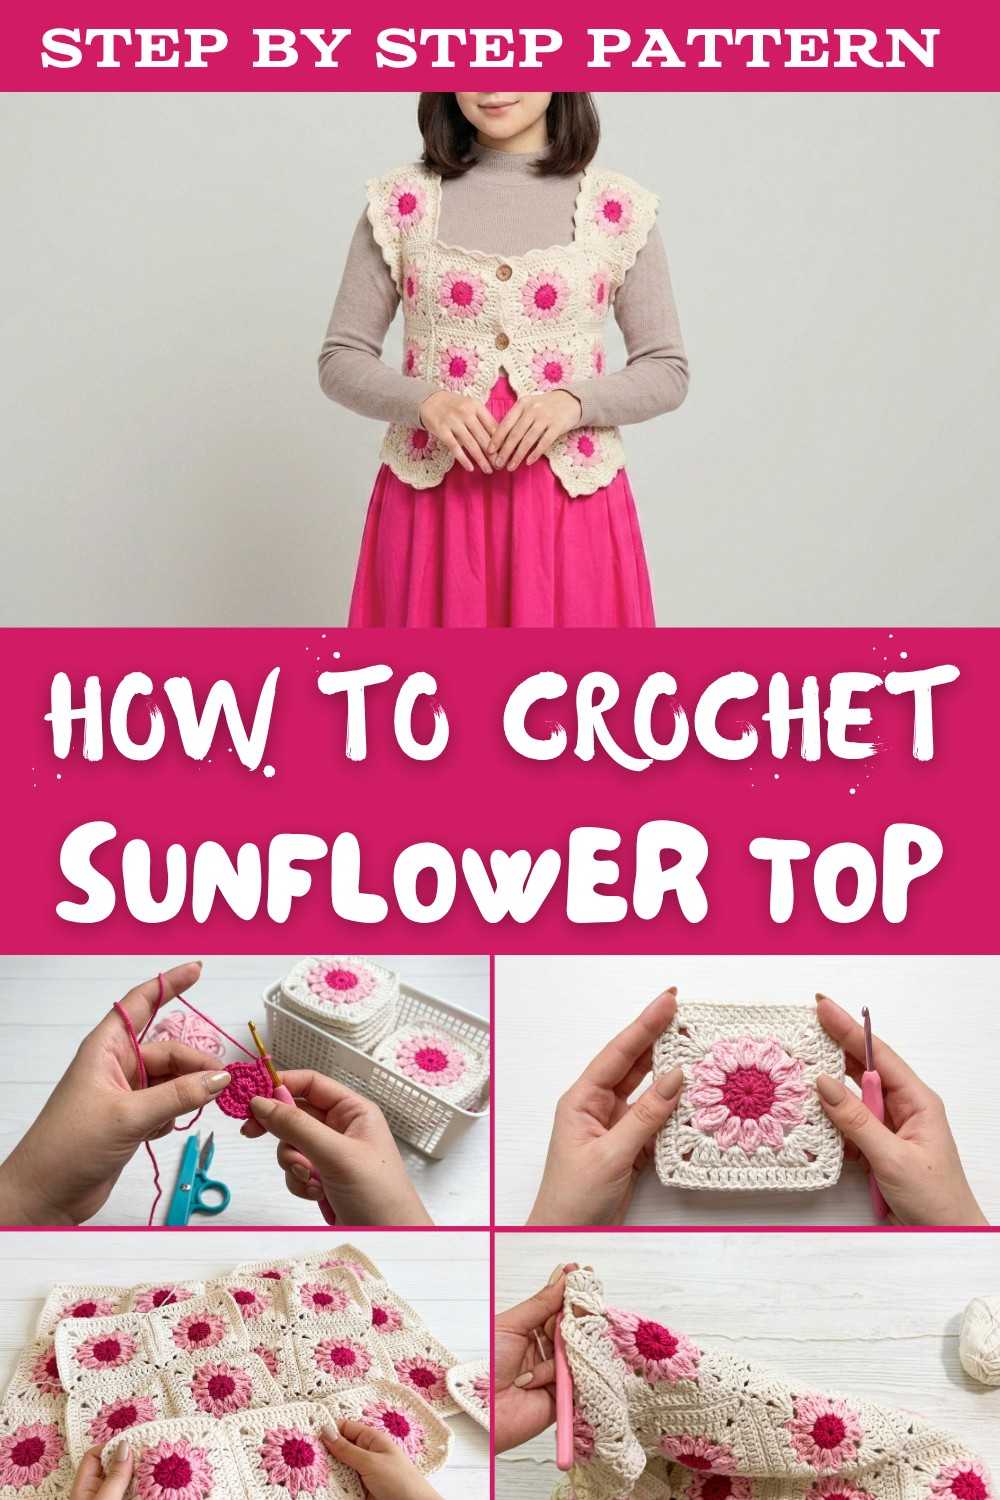
The pattern can be made in vibrant yellow and green tones to resemble real sunflowers, or you can choose your favorite colors to make it truly your own. Its versatility makes it great for casual outings, beach trips, or hanging out with friends. The combination of floral beauty and simple crochet techniques makes it a favorite for beginners and experts alike. It's more than a top, it's a joyful way to express creativity and style.

Flower Granny Square Vest Crochet Pattern
Overview
This vest combines the retro charm of flower granny squares with a modern palette and fit. The design is versatile, allowing you to layer for both warmer and cooler months. The vest features a series of granny squares-each centered with a flower motif-joined together to form the front, back, and straps, with a sweet scalloped edging and wooden buttons for a finished, artisanal touch.
Finished Size
- Fits: Women's Small to Medium (customizable; see Sizing Notes below)
- Finished length: Approximately 50 cm (from shoulder to hem)
- Finished width: Approximately 45 cm (underarm to underarm)
- Square size: Each square is about 14 cm (5.5") across

Materials & Tools
- Yarn: DK-weight, acrylic/cotton blends recommended, you will need:
- Red (center of flowers): Small amount, 1 ball (approx. 50g) (e.g., YarnArt Jeans)
- Pink (flower petals): 2 balls (approx. 100g) (e.g., Himalaya Anti-Pilling Acrylic)
- Beige (background & frame): 3 balls (approx. 150g) (e.g., YarnArt Jeans color 05)
- Crochet Hook: 4mm (US G-6)
- Scissors
- Yarn needle (for weaving in ends and joining, if desired)
- Wooden buttons: 2-3 large, as closure
- Stitch markers and blocking tools (recommended but optional)
Gauge
1 Flower Square (worked as pattern below) = approx. 14 cm x 14 cm (5.5" x 5.5") after light blocking.
If your squares are significantly smaller/larger, adjust hook/yarn accordingly.
Abbreviations & Special Techniques
- ch - chain
- sl st - slip stitch
- sc - single crochet
- dc - double crochet (UK: treble)
- tr - treble crochet (UK: double treble)
- beg - beginning
- sp - space
- st(s) - stitch(es)
- Special Techniques:
- 3-tr cluster: Yarn over twice, insert hook, yo, pull up loop, (yo, pull through 2 loops) twice, repeat 2 more times, then yo, pull through all loops on hook.
- Joining squares with crochet: Hold squares WS together; using matching yarn, crochet them together through front loop of one and back loop of other for a flat seam.
Pattern Instructions
Step 1: Flower Center
- Make a magic ring (or ch 4, sl st to form a ring).
- Ch 3 (counts as first dc), 11 dc into ring. (Total 12 dc, including beg ch-3)
- Join with sl st to top of ch-3.
- Fasten off and weave in the walnut yarn.

Step 2: Flower Petals
- Attach yarn in any dc.
- [Ch 2, tr into same st, tr into same st (3 tr total, leaving last loop of each tr on hook; yo and draw through all loops on hook-this is a cluster)], ch 2, sl st in next dc, repeat in each dc around-Forming 12 petal clusters, each separated by ch 2.
- At the end, sl st to first ch-2, fasten off.
Step 3: Making the Square
Round 1
- Join beige yarn in any ch-2 sp.
- Ch 3 (counts as dc), 2 dc in same sp, ch 2 (corner), 3 dc in next ch-2 sp, ch 1; repeat x2, 3 dc in next ch-2 sp, ch 2 (corner).
- Continue around, placing 3 dc in each ch-2 sp and forming corners with ch 2.
- At end, sl st to top of beg ch-3.

Round 2
- Ch 3 (counts as dc), dc in each st across to next corner sp.
- (2 dc, ch 2, 2 dc) in each corner sp, dc across sides as above.
- Join with sl st to top of beg ch-3.
- Fasten off and weave in ends.
Tip: If you want a smaller square, use only one round of the beige background; for larger squares, add further rounds.
Step 4: Making All The Squares
- For size small/medium vest as in the video, make:
- Front: 2 strips of 3 squares joined (6 squares per front panel)
- Back: 4 strips, same number of squares as front (see "Assembly" for guidance)
- Straps: Each shoulder uses 2 squares
- Total squares needed: ~20-22, adjust as per your desired length and width.
Step 5: Assembly of the Vest
Joining Squares
- Lay out the squares as desired (recommended: 2 strips for the front, 4 for the back, and straps as described).
- Join squares using the flat crochet join:
- Place squares WS together.
- Join yarn matching the border color.
- With hook, working through the front loop of the square facing you and the back loop of the square away from you, sl st evenly across the seam.
- Continue to assemble strips, then join strips to each other as needed for body and straps.

Fitting and Size Customization
- Try vest on (or drape on a dress form) before final side seam/joining.
- For larger/smaller sizes, add or subtract squares accordingly, and check fit before attaching straps.
Step 6: Adding the Border
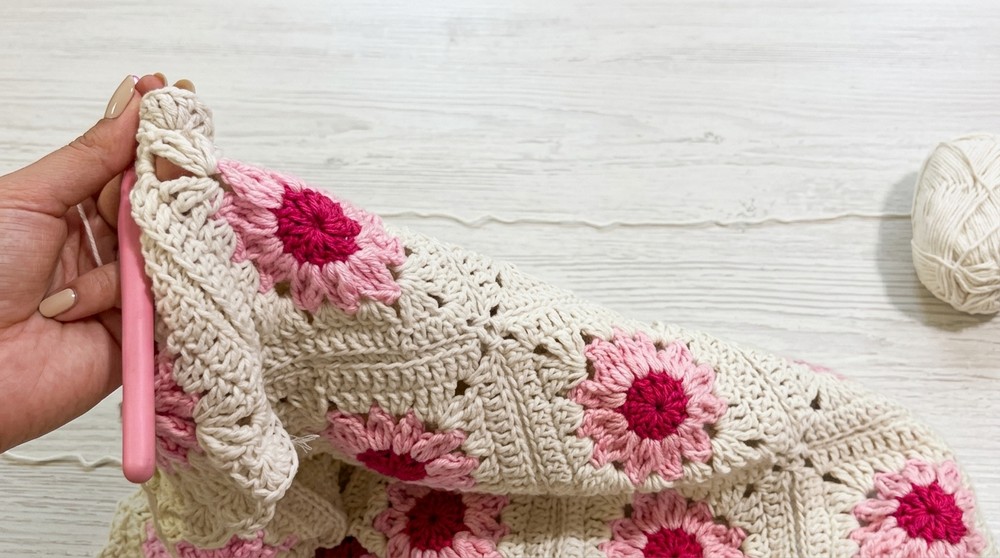
Scalloped Edge (around armholes and hem):
- Attach yarn at underarm or vest hem.
- Sc in next st, skip 1 st, 6 dc in next st, skip 1 st, sc in next st, repeat from * around entire edge.
- Adjust so scallops are even; you may occasionally need to skip 2 sts or add an extra sc for symmetry.
- Fasten off, weave in ends.
Step 7: Attaching Buttons
- Sew on 2-3 large wooden buttons along the front edge.
- Buttonholes can be made by skipping stitches in the border or simply by using gaps between granny square joins.
Tips and Customization Ideas
- Color: Try alternating flower colors for a patchwork look or keep uniform for a minimalist appearance.
- Fit: Add or remove strips of squares to alter width/length; straps can be made wider or narrower by changing the number of connecting squares.
- Closure: If you prefer ties or a belt, crochet a simple chain cord to string through the border and tie at the back, for waist shaping.
- Other uses: This square and flower motif can be adapted for blankets, bags, or pillow covers.
Special Techniques
- Flat Seam Crochet Join: This join links squares seamlessly for a professional finish and minimal bulk.
- Scalloped (Shell) Border: Softens edges and adds a sweet, finished look.
- 3-Tr Cluster (Petals): Creates dimensional "petal" effect; always ensure petal count is consistent for symmetry.
Finishing & Final Touches
- Weave in all threads securely.
- Block your finished vest to shape, using a warm, damp towel and gentle hand pressing, to ensure all squares are of equal size and seams relax.
- Attach buttons as described or add a bow for a whimsical touch (as in video).
- Try on your vest and adjust straps or sides if needed for desired fit.
Final Remarks
This vest embodies vintage charm with cozy, customizable flair-it's the perfect layering piece over summer dresses, autumn shirts, or winter knits. The large, vividly colored flower squares add artistic detail, while the soft edge and wooden buttons bring in a handmade warmth.