
Free Amigurumi Bee Crochet Pattern to Brighten Your Day
Decorate playful spaces with Free Crochet Amigurumi Bee Pattern, featuring a cute character perfect for decorations, and cheerful displays.
A small yarn figure can bring smiles and delight to anyone no matter their age. One such adorable little character looks like a busy honey-making insect. Following a Crochet Amigurumi Bee pattern makes it easy to turn simple yarn into this charming tiny toy. The instructions are clear and straightforward, guiding you step by step to complete a lovely bee that fits perfectly in the palm of your hand.
Free Crochet Amigurumi Bee Pattern: Perfect for Beginners

This miniature bee works well as a cute decoration for any spot in your home, adding a touch of fun and cheerfulness. It also serves as a meaningful gift, showing thoughtfulness and care through every stitch. For children, this tiny friend can become a favorite playmate that sparks creativity and helps them learn about the world around them naturally. The pattern is especially designed to be simple enough for beginners so everyone can enjoy making something delightful without stress.
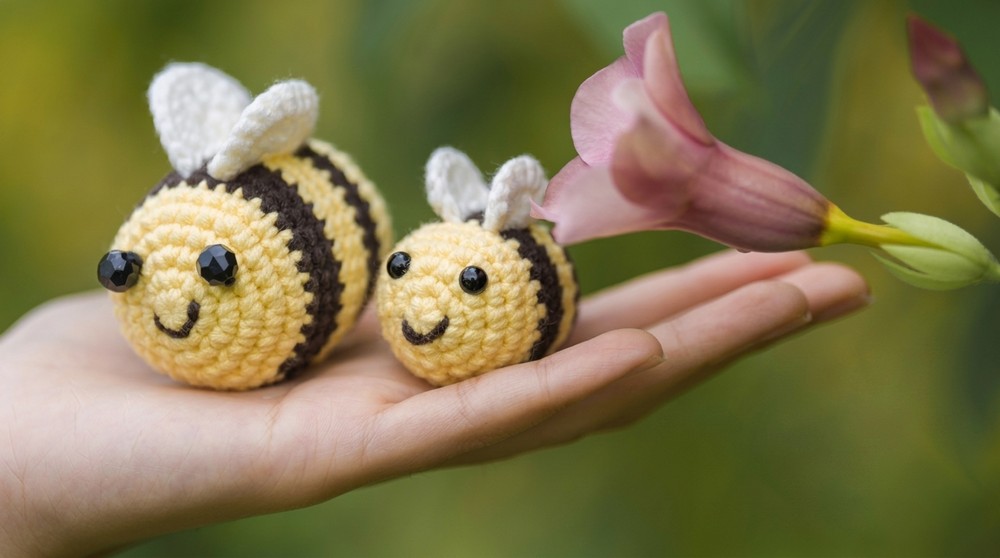
A wonderful feature of this pattern is the ability to use different colors and sizes, allowing the bee to be unique and special. This gives plenty of room for personal touches and imagination. The finished toy is light, sturdy, and easy to clean, making it perfect for play or display. Making one of these bees brings calmness and satisfaction while gently improving fine motor skills and concentration. The Crochet Amigurumi Bee pattern invites a chance to bring a small joyful figure into life, brightening days and warming hearts with its handmade charm.
Bee Amigurumi Keychain Crochet Pattern
A simple and adorable bee amigurumi designed as a keychain. Perfect for beginners, this project combines basic stitches with shaping techniques to create a cute little bee, complete with wings and a smile.
Before You Start
- Basic crochet skills needed: Magic Ring, Single Crochet (sc), Slip Stitch (sl st), Increase (inc), and Decrease (dec) stitches.
- Use 5 ply milk cotton yarn (approx. 125g total) in black and yellow colors to recreate the signature bee stripes.
- Recommended hook size is 2.75 mm (US C) for a tight fabric to hold stuffing securely.
- Prepare polyester or cotton stuffing.
- Gather scissors, darning needle, safety eyes or beads, stitch markers (optional), and a keychain ring.
- Have black yarn or embroidery thread for detailing the bee's mouth.
- Hold yarn comfortably and maintain consistent tension throughout.
Pattern Notes
- Worked in continuous rounds starting with a magic ring.
- Color changes between black and yellow yarn create classic bee stripes.
- Slip stitches are used to join rounds neatly and switch colors smoothly.
- Eyes and mouth are added after body completion for easy placement.
- Wings are crocheted separately and sewn onto the body.
- Stuff firmly before final decreases to shape the bee properly.
How This Crochet Pattern Is Made
- The bee's body is worked from the bottom up, increasing to form the round shape and then decreasing to close.
- Color changes alternate every few rounds to create stripes.
- After the main body, wings are crocheted separately and attached.
- Eyes and mouth are added as finishing details.
- A keychain is attached for functional use.
Skill Level
Beginner. This pattern uses simple stitches and clear instructions, making it perfect for new amigurumi makers.
Finished Size
- Approximately 7 cm (2.75 inches) tall, ideal for a keychain.
Materials
- Milk cotton yarn (5 ply). Black and yellow yarn approximately 125g total.
- 2.75 mm (US C) crochet hook.
- Polyester fiberfill for stuffing.
- Scissors.
- Darning needle.
- Two safety eyes or beads for eyes.
- Black yarn or embroidery thread for the mouth.
- Keychain ring or clasp.
Measurements / Sizing
| Part | Approximate Size |
|---|---|
| Bee Body Height | 7 cm (2.75 inches) |
| Wings | About 3 cm (1.2 inches) wide |
Gauge
- Gauge is not critical but a tight tension is important to prevent stuffing from showing.
- Approximately 8 single crochets = 2.5 cm (1 inch) with 2.75 mm hook.
Stitch Abbreviations
- ch = chain
- sc = single crochet
- sl st = slip stitch
- inc = increase (2 sc in one stitch)
- dec = decrease (single crochet two stitches together)
- st(s) = stitch(es)
Special Stitches
Magic Ring:
Creates an adjustable loop to start crocheting in the round, allowing the center hole to be closed tightly.
Increase (inc):
Make two single crochets into the same stitch to increase the stitch count.
Decrease (dec):
Crochet two stitches together to decrease the stitch count and shape the project.
Crochet Pattern Instructions
Body
Round 1:
- Make a Magic Ring.
- Ch 1, work 5 sc into the ring.
- Sl st to join.
- 5 stitches
Round 2:
- Ch 1.
- Inc sc in every stitch around (2 sc in each stitch).
- Sl st to join.
- 10 stitches

Round 3:
- Ch 1.
- Sc in next stitch, inc sc in next stitch; repeat 5 times.
- Sl st join.
- 15 stitches
Round 4:
- Ch 1.
- Sc in next 2 stitches, inc sc in next stitch; repeat 5 times.
- Sl st to join.
- 20 stitches
Round 5:
- Ch 1.
- Sc in every stitch around.
- 20 stitches
Change slip stitch join yarn to black.

Round 6:
- Ch 1.
- Sc in every stitch around.
- Sl st to join.
- 20 stitches
Rounds 7-8:
- Repeat Round 6 in black yarn.
- 20 stitches
Change slip stitch join yarn to yellow.
Rounds 9-10:
- Ch 1.
- Sc in every stitch around.
- Sl st to join.
- 20 stitches
Slip stitch join yarn to black.
Round 11:
- Ch 1.
- Sc in every stitch around.
- Sl st to join.
- 20 stitches
Slip stitch join yarn to yellow.
Round 12:
- Ch 1.
- Sc in every stitch around.
- Sl st to join.
- 20 stitches
End black yarn, cut with a long tail for mouth embroidery.
- Attach safety eyes between Rounds 11 and 12, ensuring slip stitch line stays at bottom.
- Sew mouth using black yarn or thread as preferred (smile or sad face).
- Stuff the body firmly.
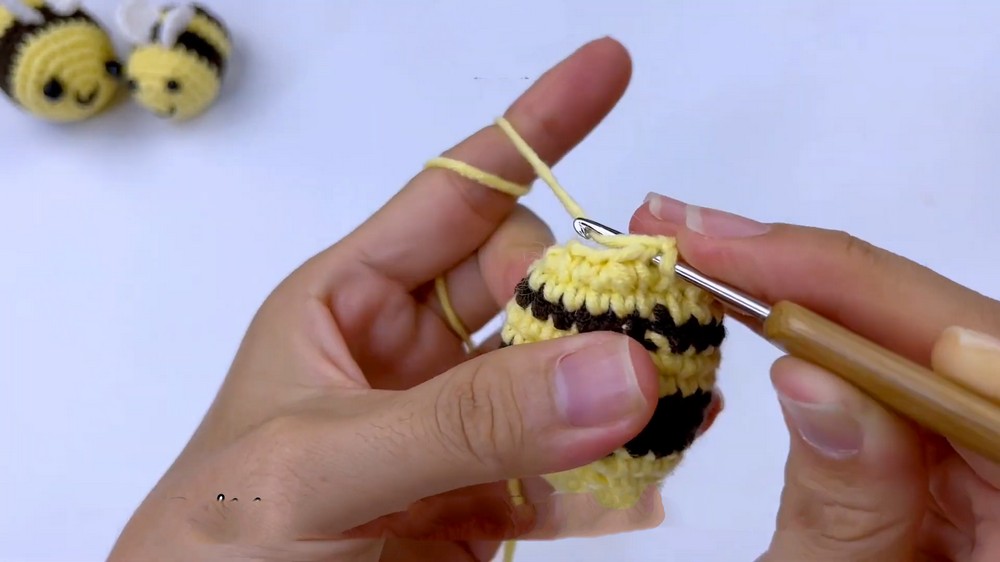
Round 13:
- Ch 1.
- Sc in first stitch, dec sc in next stitch; repeat 6 times.
- Make 2 sc.
- Sl st to join.
- 14 stitches
Round 14:
- Ch 1.
- Sc in first stitch, dec sc in next stitch; repeat 4 times.
- Make 1 sc.
- Sl st to join.
- 9 stitches
Round 15:
- Ch 1.
- Dec sc around repeat 4 times.
- Sl st to join.
- 4 stitches
- End yellow yarn and cut, leaving tail for closing.
- Stuff more if needed.
- Use yarn needle to sew closing tight.

Explanation:
The body grows from 5 to 20 stitches with increases, then decreases to close the shape at the bottom. Color stripes form with seamless color changes on slip stitches. Eyes, mouth, and stuffing complete the character before closure.
Wings (Make 2)
Round 1:
- Make Magic Ring, ch 1, work 5 sc into ring.
- Pull tail to close ring tightly.
Round 2:
- Ch 1.
- Flip chain, then increase sc in each stitch around (10 sc).
- Sl st join.
- Repeat the above for the second wing.
- Sew wings securely onto the bee's body.

Explanation:
Wings are small and flat, crocheted separately from the body and sewn on for a 3D effect.
Assembly and Finishing
- Attach safety eyes securely between rounds 11 and 12; check symmetry.
- Embroider the mouth using black yarn or embroidery thread; customize expression.
- Stuff the bee body firmly but avoid overstuffing to keep softness.
- Use yarn needle to sew the bottom closed tightly.
- Attach wings with secure sewing stitches on each side near the top body.
- Attach keychain hardware through a secure loop or directly sewn onto the head or body.
- Weave in all yarn tails neatly inside the bee for a polished finish.


Troubleshooting Guide
- Hole too large in magic ring start: Pull the magic ring tightly before joining first round.
- Color changes look messy: Always switch yarn on the slip stitch join to keep colors clean and ends manageable.
- Stuffing visible between stitches: Use smaller hook or tighten tension.
- Difficulty closing the bottom: Leave a long tail to sew with and use a yarn needle to pull tightly closed.
Creative Uses
- Make a matching bee family by adjusting sizes with this pattern.
- Create a bee-themed mobile by making multiple keychain bees.
- Customize wing shapes or add antennae for extra cuteness.
- Use the stitch technique to make other insect amigurumi like ladybugs or butterflies.
- Attach these as zipper pulls, backpack charms, or bag tags.