
Free Crochet Amigurumi Heart – Free Pattern That Looks So Adorable
Bring joy to your crochet time with this free crochet amigurumi heart pattern that turns into an adorable and cheerful creation effortlessly.
Make a spectacular love plushie to bring a sweet smile to your face. This adorable and lightweight toy features two soft rounded bumps at the top that flow smoothly into a neat pointed tip, just like a classic heart shaped token. Perfect for new crocheters and beginners, this free crochet amigurumi heart pattern lets you piece together a charming little gift for school backpacks, keychains, or even small decorative pillows. It's a joyful way to spend time making something special for yourself or someone you care about.
The heart showcases a bright red color and a smooth, clean stitch texture made with soft yarn, giving it a cheerful and cozy finish. One unique feature of this plushie is the hidden seam line that keeps the stuffing safely inside, so you can squeeze or play with it as much as you want without worrying about losing its fluffy core.
Free Crochet Amigurumi Heart Pattern for Keychains and Gifts

Using just a small amount of thin crimson yarn and a simple hook, you can watch your idea turn into a delightful, hand sized token that will surely brighten your day. This plush heart is not only lightweight and gentle to touch, but it is also durable, making it the perfect choice for thoughtful holiday gifts or keepsakes.
Its lovely loops and neat appearance offer a cute charm that will draw everyone's attention, whether it's hanging on your bag or sitting proudly on your desk. It fits easily into any pocket or drawer and adds a burst of life to your room's decor. Whether placed on a nightstand or tucked into a backpack for school, this soft and colorful plushie makes every moment feel a little more special. With a simple guide to follow, you can create this cute heart effortlessly and let it bring happiness wherever it goes.

Crochet Amigurumi Heart Pattern
1. Materials Required:
Here's everything you'll need to complete this project:
- Yarn: Amigurumi yarn was used in the video, but you can use any yarn of your choice. Medium weight (size 4) cotton yarn works great too. Feel free to select colors of your preference.
- Crochet Hook: 2.5mm crochet hook. (Adjust hook size if using a different weight yarn.)
- Tapestry Needle: For sewing and weaving in the ends.
- Stuffing: Acrylic stuffing or any fiber filling for the heart.
- Stitch Markers: To keep track of rounds.
- Scissors: For cutting yarn cleanly.
2. Gauge
Gauge is not critical for this project, but to ensure a neat finish, aim for tight stitches that hold the stuffing in place. Check that no gaps appear when you crochet. If gaps form, use a smaller hook or tighter tension.
3. Finished Size
The heart keychain, as described, measures approximately 6-8 cm (2.4-3.2 inches) in height, depending on tightness and the type of yarn used.
4. Instructions
Special Techniques
- Magic Ring (Adjustable Loop): To start your crochet circle without leaving a hole in the center.
- Invisible Decrease: For cleaner, less noticeable decreases.
Heart Base
- Start with the Magic Ring
- Wrap your working yarn around two fingers to form an "X."
- Insert your hook under the first loop on your fingers and grab the second loop to pull it through.
- Chain 1 to secure the loop.
- Round 1:
Work 6 single crochet stitches into the magic ring. Pull tight to close the ring. (6 stitches total) - Round 2:
Work 2 single crochet into each stitch around. (Increase in every stitch for a total of 12 stitches.) - Round 3:
- Work 1 single crochet in the first stitch.
- Work 2 single crochet (increase) in the next stitch.
- Repeat the pattern (1 single crochet, 1 increase) around.
- You should have 18 stitches at the end of this round.
- Round 4:
- Work 1 single crochet in each stitch around.
- Total 18 stitches.

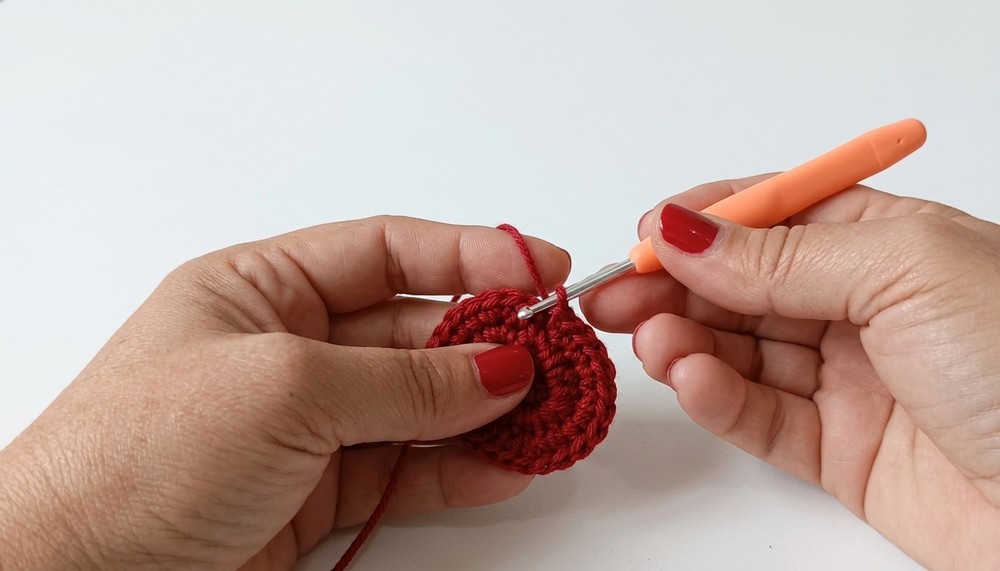
Repeat these steps to create two identical circular bases.
Connecting the Two Bases
- Position one base against the other with the right sides facing inward. The wrong sides (backs) should be on the outside. This ensures the neat side is outward after finishing.
- Without cutting the working yarn from the second base, insert your hook into any stitch of the first base.
- Work single crochet stitches through both layers as follows:
- Insert the hook into one stitch of the first base and one stitch of the second base at the same time.
- Yarn over and pull through both stitches.
- Yarn over again and pull through both loops on your hook.
- Continue working around the edge, leaving 2 stitches unworked on each base to maintain the heart shape.

Forming the Heart Shape
- Once the two circles are connected, crochet around the edge of both bases. You should have 32 stitches total.
- Crochet 5 rounds of single crochet with no increases or decreases, maintaining the circular shape.
Shaping the Bottom Point
- Decreasing to Create the Point
- Work 1 single crochet in the first stitch.
- Then work 1 invisible decrease over the next 2 stitches.
To perform an invisible decrease:
- Insert the hook under the front loop of the first stitch and then the front loop of the second stitch.
- Yarn over, pull through the two loops, and yarn over again to pull through the remaining loops on the hook.
- Repeat the decrease around. This reduces stitch count to 24.
- Stuff the Heart Before Fully Closing
- Add acrylic filling inside the heart evenly to form a plush shape.
- Do not overstuff; it should feel firm but not stretched.
- Final Rounds and Closure
- Work another decrease round: 1 single crochet, 1 decrease. (Stitch count reduces to 16.)
- On the next round, decrease all stitches until you have 6 remaining.
- Closing the Heart
- Use a tapestry needle to weave through the remaining stitches. Pull tight to close the hole at the bottom and secure with a knot.
- Weave the loose ends into the stuffed heart for a clean finish.
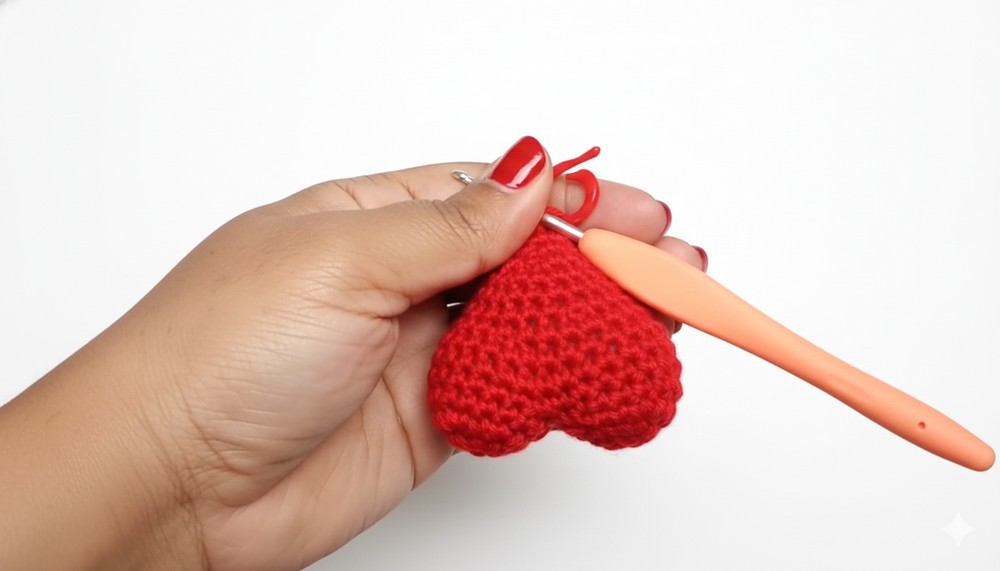

5. Customization Tips
- Color Variations: Use different colors for the top and bottom halves for a unique, bold look.
- Size Adjustments: For a larger heart, add more rounds to the circular bases before decreasing. For a smaller heart, skip the additional rounds.
- Embroidery: Stitch initials, patterns, or small details onto the heart before stuffing.
- Keychain Attachment: Use a metal keychain ring. Insert it at the top or through an attached string loop.

6. Conclusion and Final Look
This adorable crochet heart keychain is both sentimental and stylish. Its compact size makes it a great accessory for keys, bags, or as a handmade gift for loved ones. By following this adaptable pattern, you can create hearts in a variety of sizes and styles. It's a fantastic project for trying out new techniques and perfect for beginners due to its simplicity.
With its soft texture and customization options, this crochet heart is not only a project but a token of love handcrafted with care.
7. Important Notes
- Keep your stitches tight enough to avoid gaps that reveal the stuffing.
- If you're gifting the keychain, consider pairing it with a handmade gift tag for an extra personal touch.
- The video tutorial linked in the transcription provides additional visual cues that complement this pattern.