
Free Crochet Amigurumi Royal Danish Guard Pattern for Cute Collections
Turn simple yarn into a lovely guard doll with this Free Amigurumi Royal Danish Guard Pattern made for happy crochet moments.
Soft yarn and careful hands bring charm and pride into a tiny figure like no other. With a bright red uniform, crisp blue pants, polished black shoes, and a tall, fluffy hat, this little soldier stands proudly, ready to make any space more cheerful. Its small size, along with its perfect details, makes it a delightful piece that's hard to ignore. The magic lies in all the tiny features, from the shiny buttons on its shirt to the clean white lines on its cuffs. Each part of this figure reflects elegance and care, making it look lifelike yet friendly. Its soft and cheerful appearance brings smiles to anyone who sees it sitting gracefully on a shelf or guarding a favorite corner of a room.
Free Amigurumi Royal Danish Guard for Beginners

This lovable soldier isn't just for decoration-it spreads joy wherever it goes. Its lightweight design makes it fun to pick up and display, while its softness makes it perfect for children who want a special little toy. It's also a heartfelt gift idea for friends or family, bringing warmth and happiness through its adorable presence.
Add a personal touch by including medals, playful expressions, or even changing its colors to match your style. Whether kept as a cozy collectible or shared as a gift, this guard brings both tradition and charm into your life.
Amigurumi Royal Danish Guard Crochet Pattern
Finished Size
- Approximately 8-9 inches tall
(Note: The final size may vary depending on yarn type, hook size, and tension.)
Materials
For this project, you will need the following:
- Yarn Types:
- Blue yarn: For the pants/legs
- Red yarn: For the shirt/arms
- White yarn: For shirt details and cuffs
- Black yarn: For shoes and hat
- Skin tone yarn: For the head
- Yellow embroidery thread: For shirt buttons
- Red embroidery thread: For the lips
- Tools:
- 3 mm crochet hook: For a tight and sturdy fabric
- Polyester toy stuffing: For creating structure
- Crafting pipe cleaner: To stabilize the arms (optional)
- Stitch markers: To track your rounds
- Needle: For sewing details and assembling the parts
- Scissors: For cutting yarn cleanly
Gauge
Gauge is not critical for this pattern, but stitches should be kept tight enough to prevent stuffing from poking through. Adjust hook size if necessary.
Skill Level
Beginner to Intermediate. Basic knowledge of amigurumi (working in the round, increases, decreases) is required.
Techniques Used:
- Magic ring (MR): A circular foundation of stitches.
- Single crochet (sc): The primary stitch used throughout the pattern.
- Increase (inc): Two single crochet in one stitch.
- Invisible decrease (dec): A cleaner way to decrease stitches.
- Back loops only (BLO): Working into only the back loop of each stitch.
Pattern Instructions
The amigurumi is worked in sections: Head, Body, Legs, Arms, Shirt Details, Hat, and Assembly.
Head (Skin tone Yarn)
- Round 1: Start with a magic ring; crochet 6 sc into the ring. (6 sts)
- Round 2: Inc in every stitch around. (12 sts)
- Round 3: 1 sc, inc repeat around. (18 sts)
- Round 4: 2 sc, inc repeat around. (24 sts)
- Round 5: 3 sc, inc repeat around. (30 sts)
- Round 6: 4 sc, inc repeat around. (36 sts)
- Round 7: 5 sc, inc repeat around. (42 sts)
- Rounds 8-14: Sc around in each stitch. (42 sts for 7 rounds)

Decrease Rounds for the Head
- Round 15: 5 sc, dec repeat around. (36 sts)
- Round 16: 4 sc, dec repeat around. (30 sts)
- Round 17: 3 sc, dec repeat around. (24 sts)
- Round 18: 2 sc, dec repeat around. (18 sts)
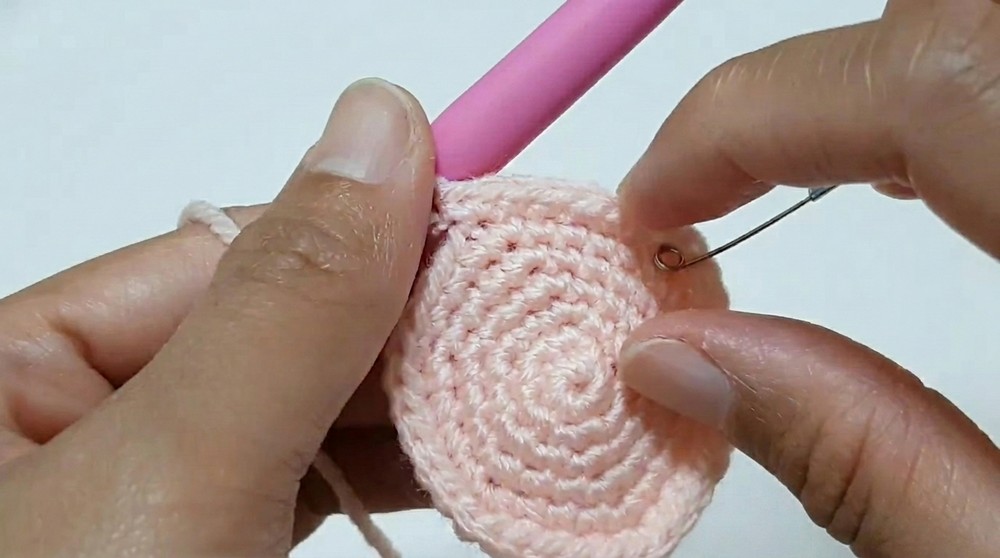
Step: Stuff the head with toy stuffing at this stage. Ensure it's firmly packed.
- Rounds 19-20: Attach white yarn and sc around. (18 sts for each round)
At the end of Round 20, fasten off the skin tone yarn and leave the white yarn attached to proceed with the body.

Body (Red Yarn)
- Round 21: Attach the red yarn. 2 sc, inc repeat around. (24 sts)
- Round 22: 3 sc, inc repeat around. (30 sts)
- Round 23: 4 sc, inc repeat around. (36 sts)
- Round 24: 5 sc, inc repeat around. (42 sts)
- Round 25: 6 sc, inc repeat around. (48 sts)
- Rounds 26-30: Sc around in each stitch. (48 sts for 5 rounds)
Shirt Hem
- Round 31: BLO, sc around. (48 sts)
- This creates the edge for the shirt hem.
- Rounds 32-36: Sc around in both loops. (48 sts for 5 rounds)

At this stage, stuff the body firmly and prepare to create Leg Partitions.
Leg Partitions
- Divide the stitches into two equal groups (24 sts each).
Leg 1:
- Work 24 sc for 12 rounds using blue yarn, stuffing lightly as you go.
- Switch to black yarn for the shoe:
- Rounds 13-15: Sc around with black yarn.
- Fasten off, close the leg, and sew the bottom shut.
Leg 2:
Repeat the steps for the second leg.

Arms (Red Yarn)
- Round 1: MR, sc 10 into the ring. (10 sts)
- Rounds 2-10: Sc around in each stitch. (10 sts for 9 total rounds)
- Change to white yarn:
- Rounds 11-12: Sc around.
Tip: Insert a small piece of pipe cleaner for structure before sewing closed.
Close the opening using invisible decreases and sew the arms securely onto the body.

Hat (Black Yarn)
- Round 1: MR, sc 6 into the ring. (6 sts)
- Round 2: Inc in each stitch around. (12 sts)
- Round 3: 1 sc, inc repeat around. (18 sts)
- Round 4: 2 sc, inc repeat around. (24 sts)
- Round 5: 3 sc, inc repeat around. (30 sts)
- Round 6: 4 sc, inc repeat around. (36 sts)
- Rounds 7-23: Sc around. (36 sts for 17 rounds)

Stuff the Hat: Add toy stuffing to maintain its puffy shape.
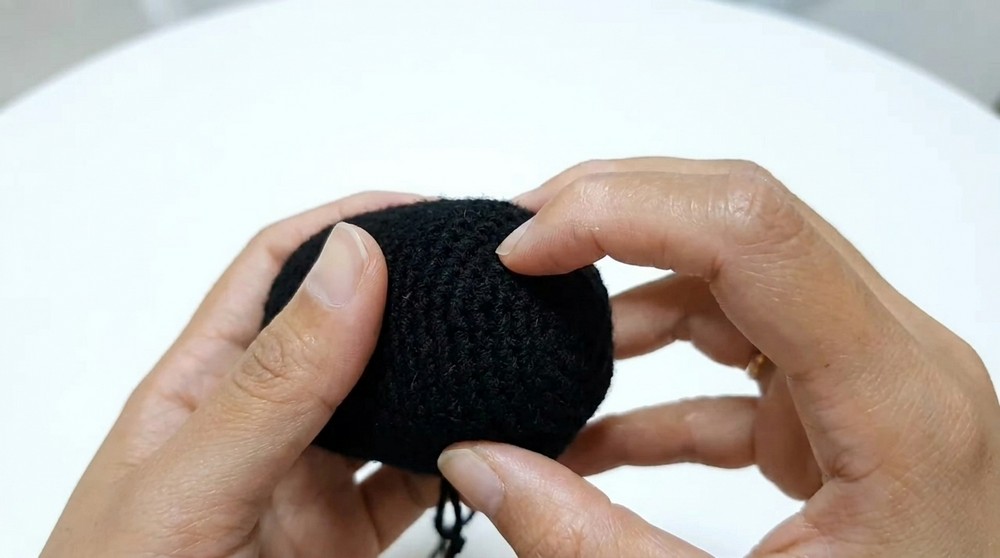
Hat Strap: Chain 20, fasten off, and sew securely at the base of each side under the chin.
Shirt Details
Adding Buttons
- With yellow embroidery thread, stitch 3-4 small buttons down the front of the shirt.
- Space the buttons evenly, starting just below the neckline.
Adding Straps
- Chain 50 sts with red yarn.
- Attach the straps from the back of the shirt over each shoulder, sewing them securely in place.
Shirt Hem Decoration
Using the front loops left from Round 31, create the edge of the shirt:
- Round 1: Attach red yarn, work 1 sc per front loop. (48 sts)
- Rounds 2-3: Sc in both loops.
- Fasten off and sew in the loose ends.
Assembly
- Assemble the Body: Sew the arms onto each side of the torso, positioning them slightly forward.
- Attach the Hat: Place the hat on the head and sew it firmly into place. Ensure it sits symmetrically.
- Adjust the Stuffing: Make sure all sections are evenly stuffed and well shaped.

Customization Ideas
- Color Options: Change the uniform colors for festive themes or unique customization. For example, green for Christmas or purple for fun decor.
- Accessories: Add tiny medals, epaulettes, or embellishments with metallic or contrasting threads.
- Facial Features: Experiment with different expressions using embroidery thread to give your guard a unique personality.
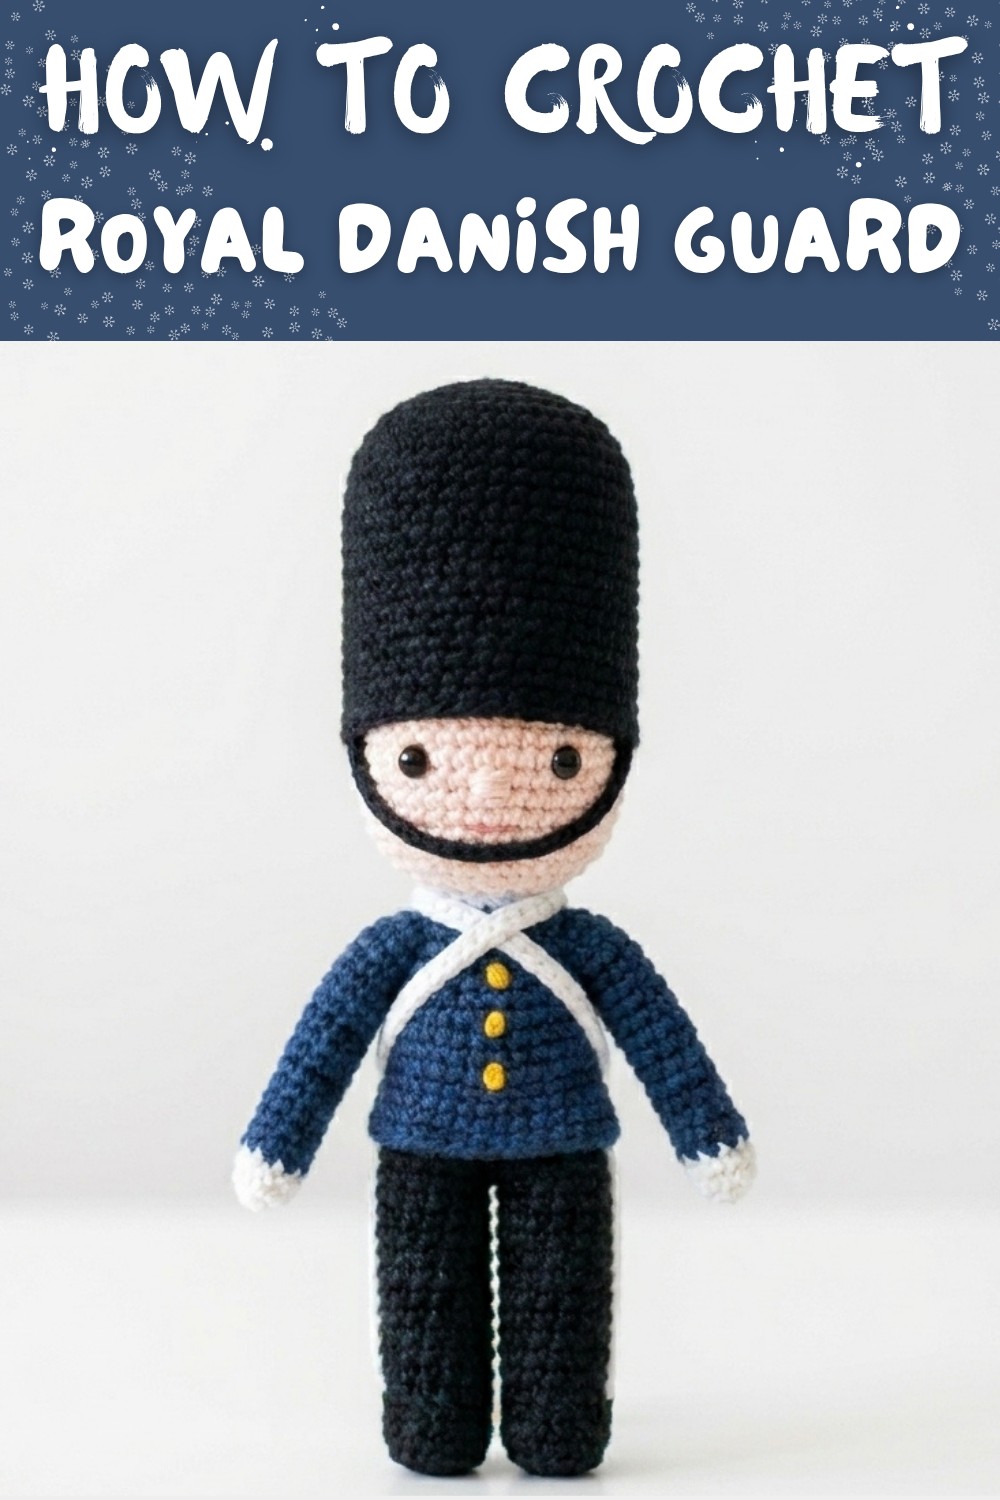
Final Appearance
The Amigurumi Royal Danish Guard stands stately with:
- A detailed red shirt adorned with yellow buttons.
- Smart blue pants with black shoes.
- A tall, iconic black hat.
This makes a great decoration, collector's piece, or even a gift that will bring smiles to those who see it.
Important Tips
- Ensure Proportion: Focus on evenly dividing the legs and arms for a balanced look.
- Stuff Firmly: Properly stuffed components improve the structure and appearance.
- Sew Neatly: Use secure sewing techniques to ensure durability.
Congratulations, Your Royal Danish Guard is complete. Enjoy displaying or gifting this handmade creation.