
Free Crochet Bag with Amigurumi Yarn Pattern for Every Occasion
Revive your wardrobe with this free crochet Bag with Amigurumi Yarn pattern, perfect for your essentials in colorful and creative style.
Turn everyday essentials into a showcase of style with this modern crochet bag pattern made using vibrant Amigurumi yarn. Designed for effortless chic, it combines functionality with a splash of color, making it perfect for any outing. The beauty of this project lies in its adaptability; you can customize it to match your personal taste, from bold statement colors to muted tones that complement your wardrobe seamlessly.
Elegant Crochet Bag with Amigurumi Yarn Pattern for All Skill Levels

Lightweight yet durable, this pattern is ideal for carrying phones, wallets, or other daily items in a way that feels fashionable and unique. Its structured pattern uses square motifs, making it easy to assemble, even for beginners looking to build confidence in their crochet skills. For seasoned crocheters, it offers a wonderfully relaxing and visually striking project to add to your collection.
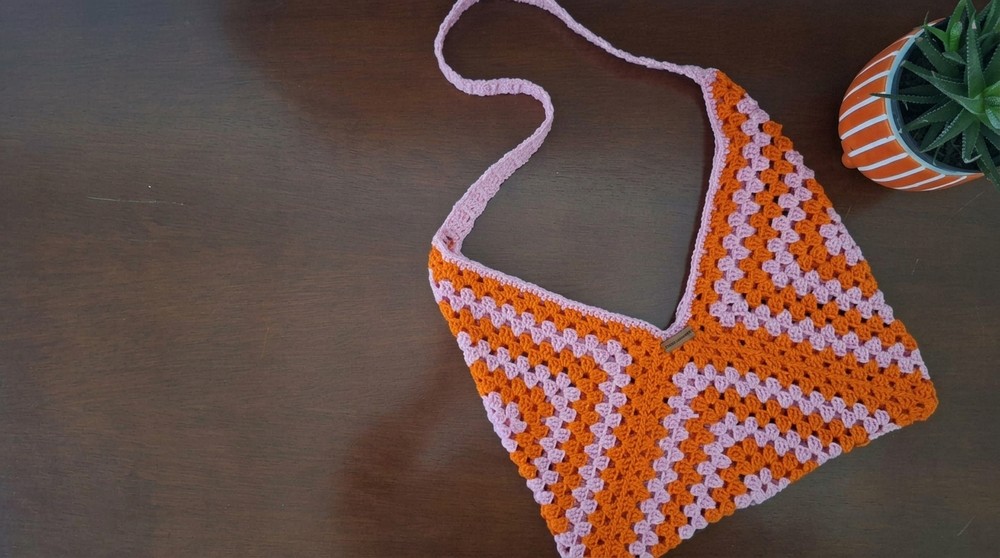
Whether used as an everyday accessory, a handmade gift, or a standout piece at crochet fairs, this crochet bag pattern is more than practical-it's a canvas for creativity. The detailed pattern ensures you'll achieve beautiful results, while the versatility of Amigurumi yarn adds an elegant touch to every stitch. Innovate and inspire with this project that balances style, simplicity, and purpose.
Special Features
- Made using square motifs (granny squares), which are combined to create a design that easily folds into a structured bag.
- Uses vibrant Amigurumi yarn, allowing customization with more or fewer colors for a personalized look.
- Incorporates simple stitches that beginners can easily master while also offering a relaxing project for advanced crocheters.
Materials Needed
- Amigurumi Yarn: Two vibrant shades (instructor used pink quartz and tangerine orange from Círculo brand).
- Crochet Hook: Size 2.0 mm.
- Tapestry Needle: To sew and secure ends during assembly.
- Stitch Markers: To hold squares in place while sewing.
- Scissors.
Step-by-Step Instructions
Skill Level: Beginner
Step 1: Creating the Magic Ring (Start of Each Square)
- Using the first yarn color, create a magic ring.
- Insert the crochet hook into the center of the ring, pull the yarn through, and create your first chain stitch.
- Make 3 chains to form the height of the first double crochet stitch.
- Crochet two double crochets into the magic ring. This forms the first cluster (set of three double crochets).

Step 2: Building the First Round of the Square
- Create 3 chains to establish the corner of the square.
- Crochet three double crochets into the magic ring.
- Repeat this sequence (three double crochets and three chains) two more times to create four corners overall.
- Tighten the magic ring by pulling its tail.
- Slip stitch into the top of the third chain from the start to close the round.
Step 3: Adding Additional Rounds
- Optionally switch yarn color for vibrant styling.
- Attach the new yarn in any corner space.
- Create 3 chains to mimic the height of a double crochet, then crochet two more double crochets into the same corner space.
- Create 1 chain between clusters along the sides and 3 chains in corner spaces to maintain the square shape.
- Continue crocheting around the square until all sides and corners are completed.


Step 4: Completing Additional Squares
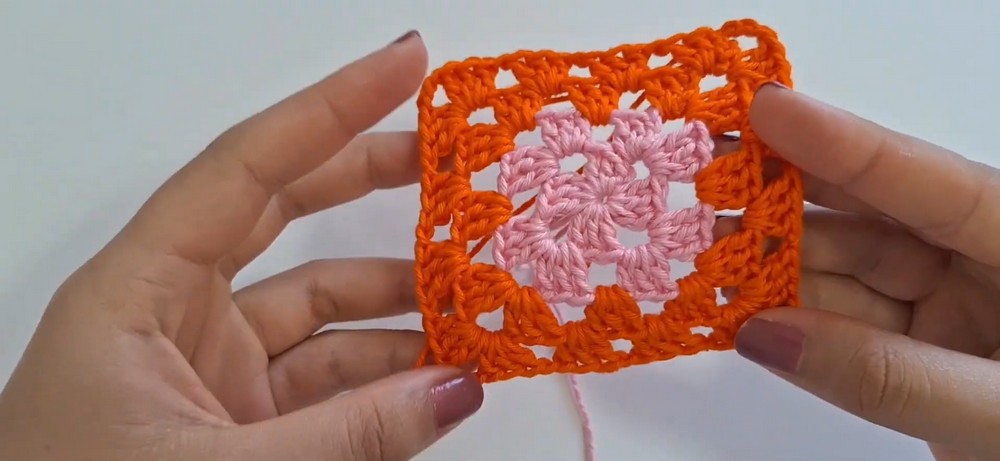
- Repeat steps 1-3 to make three identical granny squares of desired size.
- Suggested Size: 12 total rounds for each square.
Assembly Instructions
Step 5: Folding and Positioning the Squares
- Fold each square into a triangle.
- Arrange squares to form the bag:
- Two folded squares on each side.
- One square at the base, forming the bottom of the bag.
Step 6: Sewing the Squares Together
- Use a tapestry needle with yarn matching the final round of your squares.
- Join squares by sewing along the edges, ensuring the folds align correctly.
- Stitch one side of each square, then flip and complete the seam to reinforce the edges.

Adding Finishing Details
Step 7: Edging the Bag
- Work half double crochets all around the bag opening to create a clean and polished edge.
- For corner edges, use three half double crochets in the same space for flexibility.
Step 8: Creating the Straps
- Choose the strap width (suggested: five stitches).
- Crochet 50 cm or desired strap length with rows of double crochets.
- Attach straps securely at opposite ends of the bag, sewing them using a tapestry needle for durability.

Uses
- Daily Use: Perfect for carrying essentials like wallets, phones, or small items.
- Gift Idea: Unique handmade accessory for birthdays or celebrations.
- Craft Sale: Great for selling at craft fairs or as part of an online shop.
Tutor Suggestions
- Utilize vibrant, contrasting colors for a youthful and fresh look.
- If making it larger or smaller, adjust the number of rounds accordingly.
Tip
When sewing the squares together, use stitch markers to align edges for a flawless finish. This simple trick ensures consistency and prevents uneven seams.

Conclusion
This Crochet Bag with Amigurumi Yarn Pattern offers endless possibilities for customization while being beginner-friendly. With vibrant yarn and your creativity, this pattern will become a standout accessory. Whether made for personal use or shared with others as a gift, it's guaranteed to impress with its perfect balance of style and practicality!
Remarks:
A truly approachable project! It's not only rewarding for beginners to learn fundamental crochet techniques but also enjoyable for experienced crocheters seeking a relaxing project. We hope you enjoy bringing this beautiful design to life.