Bear Head Keychain Simple Free Crochet Pattern for Daily Use Items
Grab this Free Crochet Bear Head Keychain Pattern & stitch a cute charm that adds joy to keys, & bags with a soft look everyone loves.
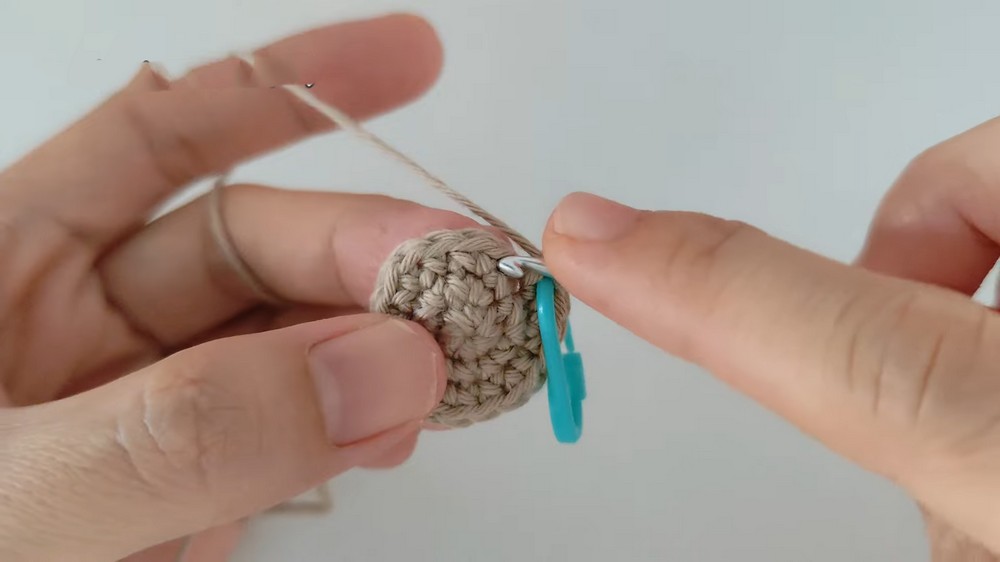
Come closer and see a tiny handmade treasure that feels soft and full of charm. The Free Crochet Bear Head Keychain pattern turns simple yarn into a cute bear face that looks calm and friendly. It has a round shape, small ears, and sweet eyes that give it a gentle and happy look.
Free Crochet Bear Head Keychain Pattern for Handmade Accessories

Its beauty lies in its soft touch and neat design, making it pleasing to hold and see. This keychain is useful for holding keys, decorating a bag, or hanging on a zipper to add a lovely touch. It is light, easy to carry, and makes everyday items feel more special. Its simple yet eye-catching appearance brings joy, and it can be made in different colors to match personal choice while also helping beginners learn basic crochet skills.

Crochet Halloween Bear Head Pattern
1. Materials List
Yarn
- Recommended Yarn: Any medium-weight (#4) yarn such as acrylic or cotton.
- Main Color: For the bear's head (commonly orange, black, white, or brown).
- Accent Color: For scars and mouth embroidery (black is recommended).
Hook
- Crochet Hook Size: 4mm (G-6) or as recommended for your yarn weight.
Optional Items
- Safety Eyes: Two (6-8 mm) or yarn to embroider eyes.
- Polyester fiberfill: For stuffing the head.
- Yarn needle: For sewing and embroidery.
- Scissors.
2. Skill Level
Intermediate
This pattern requires familiarity with basic crochet stitches, increasing, decreasing, and assembling the details.
3. Key Abbreviations
All terms are in US crochet terminology.
- ch: Chain
- sc: Single Crochet
- hdc: Half Double Crochet
- sl st: Slip Stitch
- inc: Increase - Work 2 single crochet stitches in the same stitch.
- dec: Decrease - Work 2 stitches together using single crochet (sc2tog).
- yo: Yarn Over
Special Note: The bear's ears are crocheted directly onto the head, eliminating the need for sewing additional pieces.
4. Special Techniques
Magic Ring:
- Make a loop with the yarn, insert the hook into the loop, pull up a loop, and chain 1 to secure. Work stitches directly into the ring, then pull the tail to tighten.
Single Crochet Decrease (sc2tog):
- Insert the hook into the next stitch, yo and pull up a loop (two loops on the hook).
- Insert the hook into the next stitch, yo and pull up a loop (three loops on the hook).
- Yo, pull through all three loops.

5. Step-by-Step Pattern Instructions
Head
Round 1:
- Start with a magic ring.
- Work 6 sc into the ring. Pull the tail to close the ring.
- [6 stitches]

Round 2:
- Inc in each stitch around: Work 2 sc in each stitch for a total of 12 stitches.
- [12 stitches]
Round 3:
- Repeat the sequence: 1 sc, 1 inc (2 sc in the next stitch).
- [18 stitches]
Round 4:
- Repeat the sequence: 1 sc, 1 inc, 1 sc.
- [24 stitches]
Round 5:
- Work 1 sc in each stitch around (no increases).
- [24 stitches]
Round 6:
- Repeat the sequence: 3 sc, 1 inc (2 sc in the same stitch).
- [30 stitches]
Rounds 7-8:
- Work 1 sc in each stitch around (no increases).
- [30 stitches per round]
Round 9:
- Repeat the sequence: 2 sc, 1 inc, 2 sc.
- [36 stitches]

Rounds 10-12:
- Work 1 sc in each stitch around (no increases).
- [36 stitches per round]
Round 13:
- Repeat the sequence: 2 sc, 1 dec (sc2tog), 2 sc.
- [30 stitches]
Round 14:
- Repeat the sequence: 3 sc, 1 dec (sc2tog).
- [24 stitches]

Round 15:
- Repeat the sequence: 1 sc, 1 dec (sc2tog), 1 sc.
- [18 stitches]
Round 16 & Stuffing:
- Begin stuffing the head with small pieces of polyester fiberfill as you go.
- Round 16: Work 9 decreases (sc2tog) evenly around.
- [9 stitches]

Closing the Head:
- Use a yarn needle to sew through the front loops only of the final 9 stitches.
- Pull tight to close the head.
- Secure with a knot and weave the yarn tail into the stuffing inside the head before trimming.
Ears (No-Sew, Crocheted Directly)
The ears are worked directly onto Round 5 or 6, ensuring symmetry:
- Attach Yarn at the chosen stitch. Ch 1 to secure.
- Work 5 hdc into the next stitch.
- Sl st in the next stitch to complete the ear.
- Cut yarn and weave in the ends.

Note: Place the second ear on the opposite side of the head, ensuring both are symmetrical. Work it the same way.
Details and Embellishments
Eyes:
- Place safety eyes (or embroider) around Round 10, leaving about 4 stitches of space between them.
Mouth:
- Embroider a simple smile around Round 12 using straight stitches or scar-like diagonal stitches. Use black yarn for contrast.
Scars and Stitches:
- Add small decorative stitches across the face for a spooky effect. These can be straight or diagonal embroidery stitches.

6. Conclusion
Your spooky-cute Halloween Bear Head is now complete.
Whether used as a Halloween décor item, keychain, or just for fun, this bear will surely delight spooky season enthusiasts.

7. Tips & Customization Ideas
- Yarn Colors:
- Choose Halloween-themed colors like black, orange, green, and purple for a festive feel.
- Stuffing:
- Stuff the head gradually and evenly to maintain a round shape.
- Symmetry:
- Pin or mark the positions of the ears and eyes before attaching to ensure they are symmetrical.
- Custom Scars:
- Get creative with embroidered scars! Make stitches in bold X shapes or zigzags for extra spookiness.
Pattern Corrections
- Ensure stitch counts are carefully followed in the increase and decrease rounds to maintain proper shaping.
- If the head starts to look uneven, recheck your decreases or stuffing distribution.