
Free Crochet Cute Cat Hat Pattern to Make Pets Look Adorable
Dress your furry friend in style with this Free Crochet Cute Cat Hat Pattern and enjoy creating an adorable accessory full of charm.
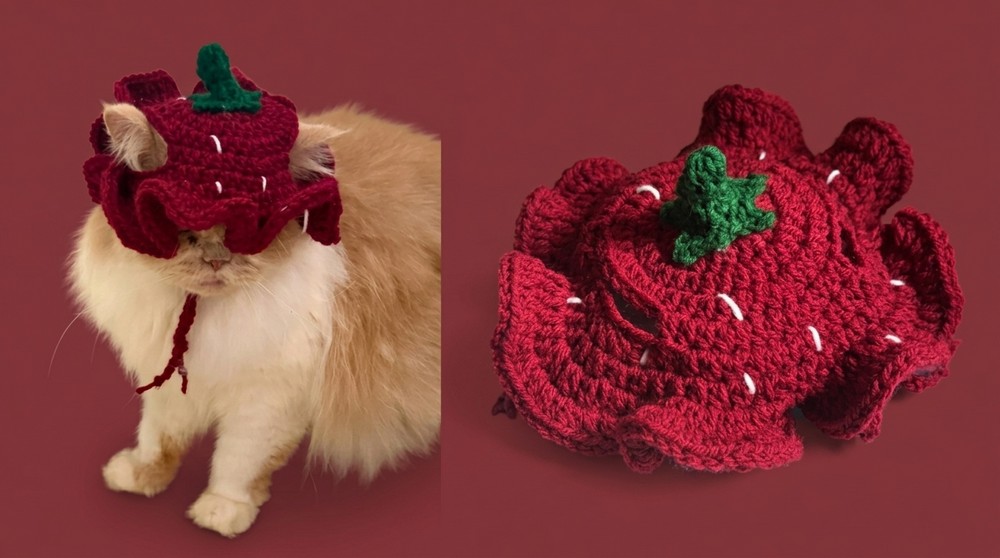
Designed to make your furry friend look adorable, this pattern helps you create a delightful strawberry themed hat with ear holes for comfort, a soft snug fit, and fun decorations. The end result is not just a hat but a fun and playful accessory that everyone will admire. Using just red, green, and white yarn and some simple tools like a 4.5 mm crochet hook, scissors, and glue, you can create this cute masterpiece.
Free Crochet Cute Cat Hat Pattern for Cozy Pet Fashion
The foundation starts with a magic ring, which gives the hat its round shape. Rows of half double crochets and fun increases shape the body of the hat, while chains form comfy gaps for your cat's ears. What makes this hat unique is the tiny hand stitched white seeds and the crocheted green stem on top, which makes the hat look exactly like a strawberry.

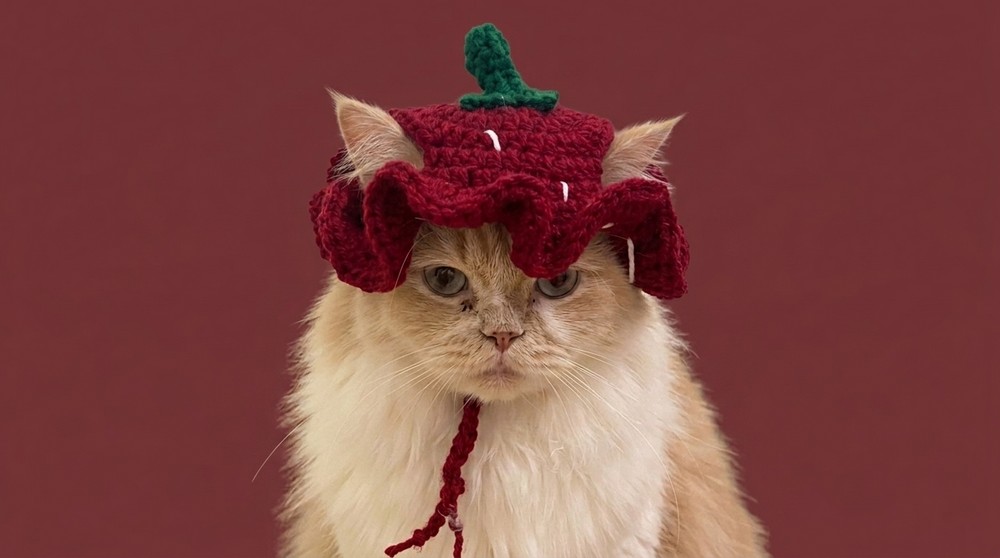
This beautiful handmade cat hat is great for many occasions. Whether you want to dress your cat up for a cute photoshoot, celebrate a festive event, or simply add some charm to your furry friend, this hat is perfect. It is soft, lightweight, and easy for your cat to wear, thanks to the adjustable straps crocheted with simple chains.
The pattern is not just about functionality-it's about creativity. With this hat pattern, you can customize the size, colors, or even add extra leaves to the stem to make it truly your own. It's a unique, fun, and interesting crochet project that brings you closer to your pet while creating something special.
Crochet Cute Cat Hat Pattern
Project Overview
- Skill Level: Beginner to Intermediate
- Finished Size: Fits an average sized cat. Hat diameter: ~5 inches. Use a smaller or larger hook (or adjust the pattern) to customize the size.
- Time to Complete: ~2 to 3 hours, depending on experience level.
Materials Needed
- Yarn:
- Red yarn (for the hat body)
- Green yarn (for the stem)
- White yarn (for the strawberry seeds)
- Hook Size: 4.5 mm crochet hook
- Other Tools:
- Scissors
- Glue (optional, for attaching the stem)
- Yarn needle (for weaving ends and adding decorative seeds)
Gauge
- 10 half double crochets (hdc) = 2 inches
- 8 rows = 2 inches
- Adjust your hook size if necessary to match the gauge and ensure a proper fit.
Abbreviations (US Terminology)
- ch: Chain
- hdc: Half Double Crochet
- hdc inc: Half Double Crochet Increase (2 hdc in the same stitch)
- sc: Single Crochet
- sl st: Slip Stitch
Pattern Instructions
Hat Body
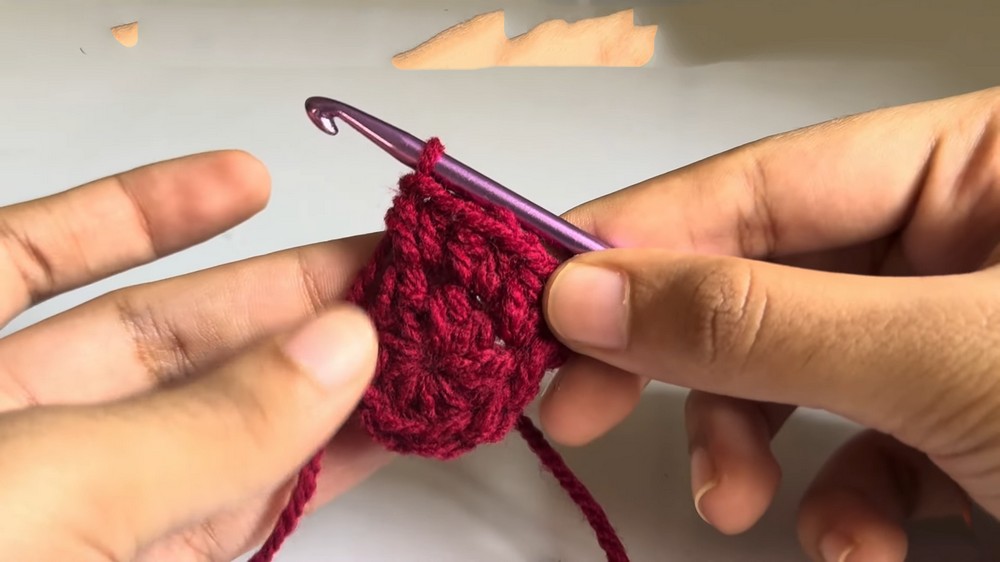
- Start with the Magic Ring:
- Using red yarn, create a magic ring.
- This method ensures the opening is tight and adjustable, laying the foundation for a neat circular base.
- Row 1:
- Chain 2 (counts as the first hdc).
- Work 10 hdc into the magic ring.
- Pull the thread to close the ring tightly.
- Join with a sl st into the first stitch.
- Chain 2.
- Row 2:
- Work an hdc inc in every stitch (2 hdc in one stitch).
- You'll have 20 stitches at the end of this round.
- End the row with a sl st and chain 2.
- Row 3:
- Alternate between 1 hdc in the first stitch and an hdc inc in the next stitch.
- Repeat this pattern all the way around.
- End with a sl st and chain 2.
- Row 4:
- Work 1 hdc into each of the next 2 stitches.
- In the third stitch, work an hdc inc.
- Continue this pattern (2 hdc, hdc inc) all around the circle.
- End with a sl st and chain 2.
- Row 5:
- Work 1 hdc into each of the next 3 stitches, followed by an hdc inc in the fourth stitch.
- Repeat this pattern until the end of the round.
- Finish with a sl st and chain 2.
- Row 6:
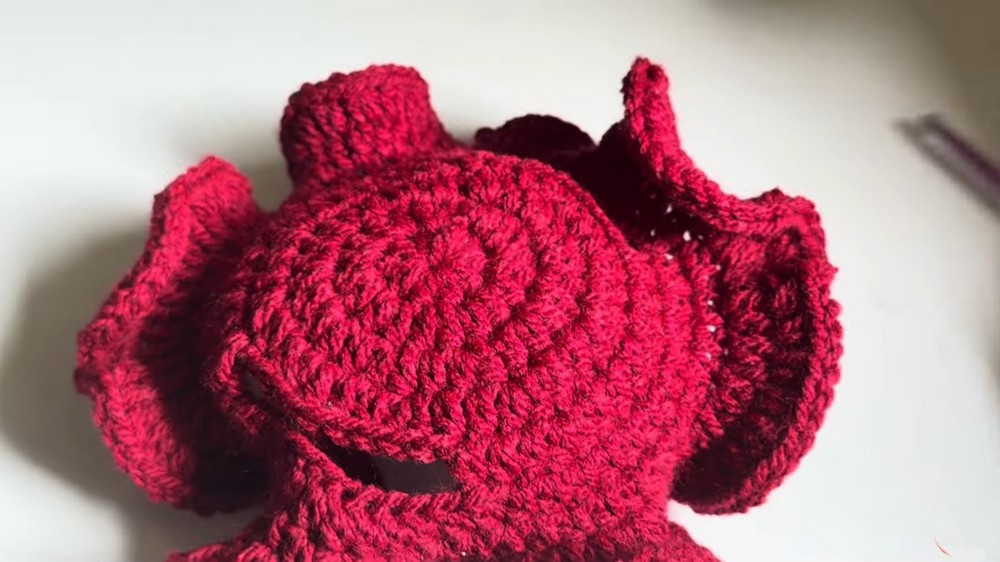
- Chain 13 (this will form one side of the ear gap).
- Skip 8 stitches along the edge. Attach the chain with an hdc, creating the ear hole.
- Work 13 hdc in a row, starting from this point. (This section creates the back of the hat.)
- Chain 13 again to form the second ear gap, and secure with a sl st into the first stitch.
- Rows 7-8:
- Work 1 hdc into each stitch or chain all the way around the hat for these two rows.
- This includes both the chains and the regular stitches.
- End each row with a sl st and chain 2.
- Row 9 (Brim Expansion):
- Work an hdc inc in every single stitch around the brim area to give the hat extra flair.
- End this row with a sl st, cut the red yarn, and fasten off securely.


Hat Straps
- Create the Straps:
- For each strap, attach the red yarn to one end of the ear gap.
- Chain 30 to create the string for tying.
- Fasten off and secure the knot at the end of the chain to prevent unraveling.
- Repeat for the second strap on the other side of the ear gap.
- Finishing Touch:
- Trim any excess yarn and use a yarn needle to weave in loose ends.
Green Stem
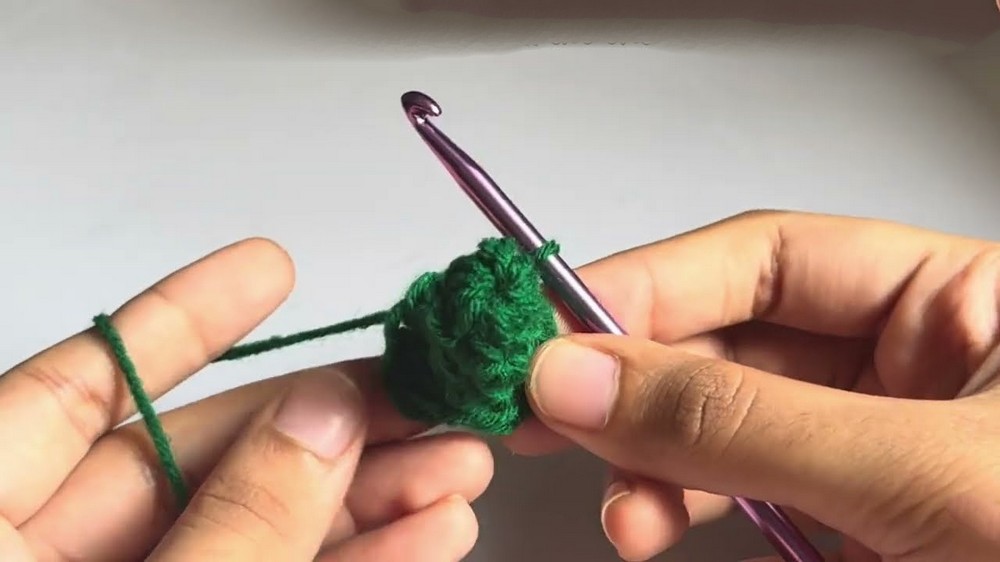
- Magic Ring for the Stem:
- Using green yarn, create a magic ring.
- Chain 2 (counts as the first hdc).
- Crochet 5 hdc into the ring.
- Pull the ring closed tightly and join with a sl st. Chain 2.
- Rows 2-3:
- Work 1 hdc into each stitch for both rounds (5 stitches total).
- End each row with a sl st and chain 2.
- Row 4:
- Work 1 sc into each stitch using sc increases (i.e., 2 sc in each stitch). This will slightly enlarge the base of the stem.
- End the row with a sl st.
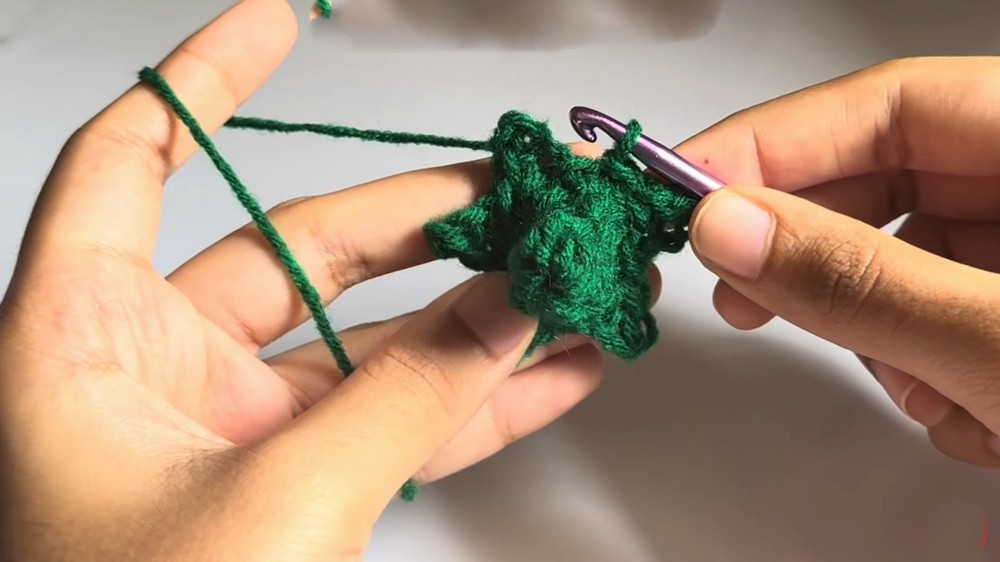
- Stem Texture (Optional):
- Chain 3. In the second chain from the hook, make a sl st.
- In the third chain, make an sc, then sl st into the next base stitch.
- Repeat this texture pattern 4 more times around the base of the stem to mimic small leaf-like shapes.
- Attach the Stem:
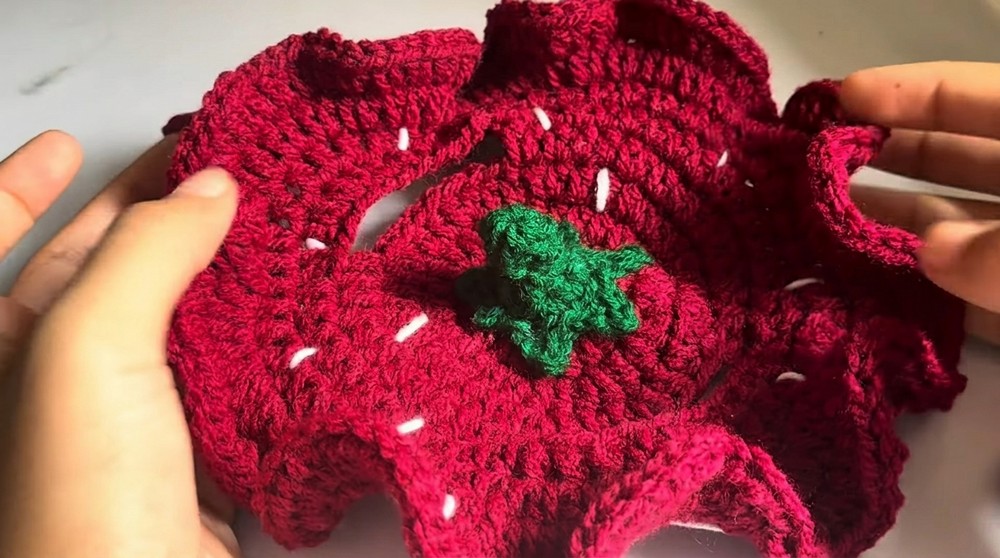
- Align the green stem at the top of the hat.
- Use glue or a yarn needle to attach it firmly.
Decorative Seeds
- Add the Seeds:
- Cut a long piece of white yarn and thread it onto a yarn needle.
- Insert the needle into the red hat body and create tiny seed like stitches scattered all over. These should mimic the look of strawberry seeds.
- Keep the stitches evenly spaced for a neat design.
- Secure Ends:
- Once complete, tie off the end of the white yarn and weave it into the inside of the hat for a clean finish.
Tips and Customization Ideas
- Adjust the Size:
- For a smaller or larger pet, modify the number of stitches in each round. Reduce the increase rows for smaller hats, or add additional rounds for larger ones.
- Use Different Colors:
- Switch out the red base for pink or even orange for a fun, fruity twist.
- Add Leaves:
- Crochet small green leaves to attach near the stem for extra detail.
- Give It a Festive Look:
- Add festive decorations, like small bells or bows, to make the hat suitable for holidays.

Conclusion
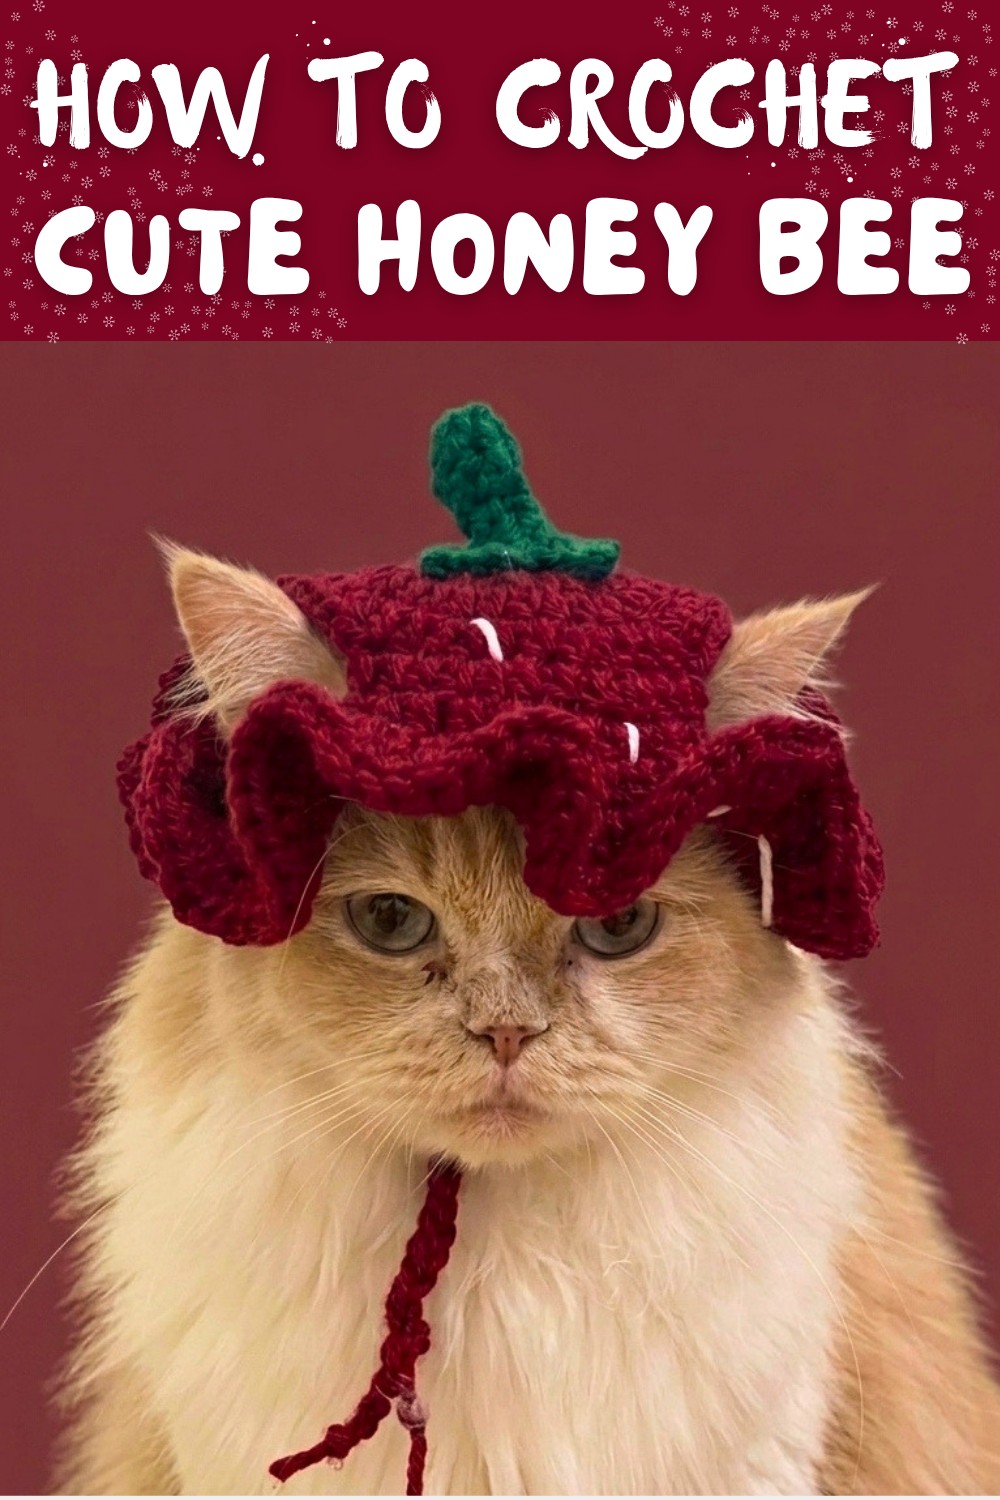
Congratulations, Your Strawberry Cat Hat is now complete. This charming little accessory is not only fun to make but also a stylish and comfortable addition to your pet's wardrobe. Its playful strawberry design, complete with realistic seeds and a green stem, brings personality to your furry friend. Whether you choose to customize it or follow the classic recipe, this project promises joy and creativity throughout.
Important Details Before You Finish
- Comfort First:
While adorable, ensure the hat fits comfortably on your cat without feeling too tight or irritating their ears. - Safety:
If your cat tries to pull at the hat or ties, supervise them during wear to ensure safety. - Feedback:
If creating this for your own pet or gifting it, don't forget to share pictures of your unique work with fellow crochet enthusiasts!
Your Cute Cat Hat is ready to turn heads and become the highlight of your cat's look.