Daisy Floral Bralette Free Crochet Pattern You’ll Want to Try
Relax in style with this Free Crochet Daisy Floral Bralette Pattern that's for summer days, festivals, offering charm, & comfort.
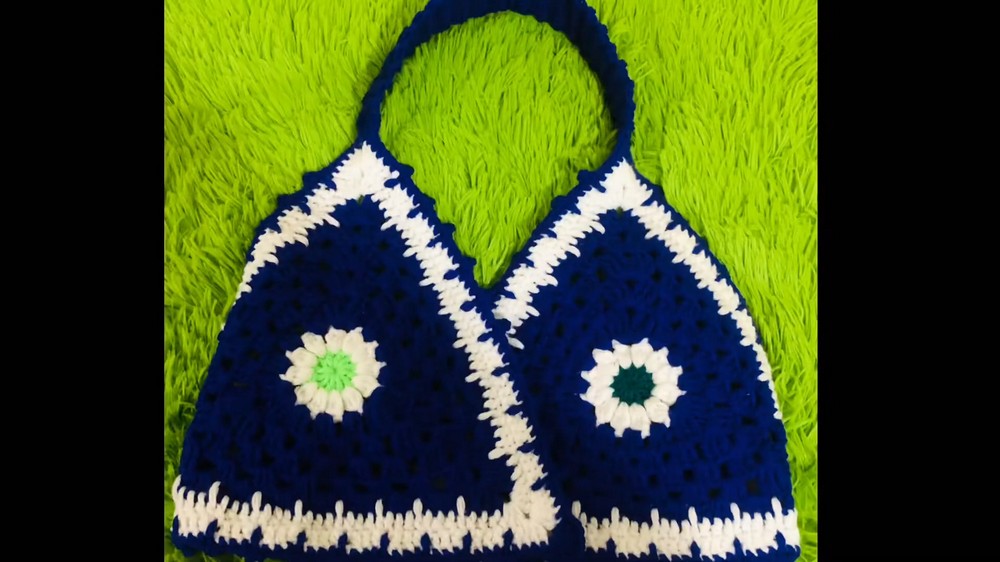
A breezy summer afternoon calls for something lightweight, stylish, and versatile. With a Free Crochet Daisy Floral Bralette Pattern, it's easy to introduce a touch of bohemian flair into your wardrobe. This bralette offers a unique and breathable fit, making it ideal for warm weather outings like festivals, beach trips, or casual daytime looks.
Free Crochet Daisy Floral Bralette Pattern That's Easy to Make

Pair it with high-waisted shorts, flowy skirts, or layer it beneath a loose jacket for a balanced mix of cute and edgy. The intricate daisy motif acts as a charming focal point, while the soft crochet texture ensures comfort all day. Customization possibilities allow you to choose colors and personalize the style to suit any occasion or mood. A practical and stylish accessory, it enhances any outfit while also becoming a one-of-a-kind addition that can't be found elsewhere.

Crochet Daisy Bralette Pattern
Skill Level
Intermediate
Materials
- Yarn: Medium Weight Yarn (#4) - Three colors of your choice. If using lightweight yarn, you can double the strands to achieve medium weight. Suggested fibers: cotton or cotton-blend for comfort.
- Crochet Hook: 3.5mm crochet hook.
- Notions:
- Scissors
- Tape measure
- Darning needle (for weaving in ends).
- Optional: Stitch markers to mark corners.
Key Abbreviations
- Ch: Chain
- Sl St: Slip Stitch
- SC: Single Crochet
- DC: Double Crochet
- Tr: Treble Crochet
- YO: Yarn Over
- Cluster (3 DC Together): Yarn over, insert hook into space, pull up a loop, YO, pull through two loops; repeat two more times, then YO and pull through all loops on the hook.
- Picot: Ch 4, Sl St into the first chain of the Ch-4 to create a small loop.
Special Notes
- The final cup size measures 10 inches across and 11 inches from point to base. The row counts and chains provided are for this size. Adjust yarn weight, hook size, or increase rows for a larger cup.
- Colors can be adjusted to your preference; this pattern uses three colors for the bralette.
- Work in US crochet terminology throughout this pattern.
Pattern Instructions
Cup (Make Two)
- Start with a Magic Ring:
- Create a magic ring and pull up a loop. Ch 3 (counts as a DC).
- Row 1:
- Make 11 DC into the magic ring. (12 DC total, including the Ch-3).
- Pull the ring tight to close. Sl St into the 3rd chain of the Ch-3 to join.
- Row 2 (Clusters):
- Change to your second color. Join yarn between any two DC stitches. Ch 3.
- In the same space, work a cluster (3 DC together).
- Ch 2, skip to the next space, and work another cluster.
- Repeat cluster + Ch 2 in all spaces around. Sl St into the top of the Ch-3 to join. (12 clusters total).
- Row 3 (Treble Corners):
- Change to your third color. Attach yarn into any Ch-2 space. Ch 3.
- 3 DC into the same space.
- Ch 1, skip to the next cluster, and work 3 DC into the Ch-2 space.
- Repeat 3 DC in every Ch-2 space until reaching the corner. At the corner:
- Work 3 Tr, Ch 2, 3 Tr into the same Ch-2 space to create the point of the triangle.
- Continue working 3 DC into each Ch-2 space across, creating corners as described above for all three corners. Sl St into the top of the Ch-3 to join.
- Rows 4-6:
- Slip stitch to the next Ch-1 space and Ch 3. Work rows of 3 DC into each Ch-1 space.
- For each corner: Work 3 Tr, Ch 2, 3 Tr into the Ch-2 space.
- Continue until you've worked 6 total rows (rows 1-6).
- Row 7 (Elongated Double Crochet):
- Attach your original color (white). Create elongated double crochets (DC) at the base of the triangle by working into the Tr from the previous rows:
- Yarn over, insert hook into the stitch below the Ch-1, pull up a loop, pull loop to match DC height, complete the DC as normal.
- Between elongated DC stitches, SC on top of regular DC stitches from the row below.
- Attach your original color (white). Create elongated double crochets (DC) at the base of the triangle by working into the Tr from the previous rows:
- Row 8-9 (Chain-1 spaces):
- Work alternating clusters and chain spaces, skipping stitches to create space for the airy design.
- Final Row (Picots):
- Around the edge of the bralette (except the base), work single crochet stitches.
- Create picots (Ch 4, Sl St into the first Ch) approximately every 3 stitches.


Neck and Back Straps
- Neck Straps:
- Attach yarn to the top point of the cup.
- Chain 120 for the neck strap (or longer if preferred).
- Slip stitch into every chain back down to the starting point for a neat finish. Securely fasten off.
- Back Straps:
- Along the bottom edge of each cup, attach yarn to the outer corners.
- Chain 120 for the back strap. Slip stitch back into each chain.

Assembly
- Join Cups:
- Using the darning needle, sew the two corners of the cups together at the base for about 1-2 inches.
- Finishing Touches:
- Block your bralette slightly (if using non-synthetic yarns) to ensure crisp corners and smooth edges.

Pattern Corrections
In Row 7, if the elongated double crochets feel too loose with your chosen yarn, use regular double crochets instead for more stability. Ensure yarn tension stays consistent to prevent gaps.

Conclusion
The Daisy Bralette offers a trendy, lightweight, and customizable design for sunny days or layering. Its clusters and trebles create a textural style, while the straps make it fully adjustable. This pattern is versatile and can also serve as a foundation for halter tops or swimwear.
Tips
- Custom Fit: Adjust chain lengths for straps depending on your body measurements. You can also add more rows to increase the cup size.
- Secure Knots: Make sure all color changes or joins are secure to avoid unraveling during wear.
- Experiment with Colors: Use ombre or gradient yarns for a unique look.