
Free Crochet Flower Granny Square Using Magic Ring Technique
Settle in with your favorite yarn and a comfortable hook, this free crochet flower granny square pattern is gentle on beginners and rewarding for those seeking a quick result. Working through this design brings calm and satisfaction as you watch each floral motif come together right in your hands. The process is easy to follow, making it approachable even for those just starting to crochet, and every completed square is a lovely accomplishment that's ready for further projects or personal enjoyment.
Free Crochet Flower Granny Square Pattern (Step-by-Step)
This granny square is recognized for its charm: the layered, petal-like center sits perfectly within clean borders, making each block feel fresh and modern. You'll only need basic stitches, such as the double crochet and chains, so there's no worry about complicated instructions. Choose yarns that match your style.
Change colors as you wish, making every square just a little different. With a few small alterations, your squares can become throws, cushions, bags, or even cozy garments-a great way to use up leftover yarn while making something functional and beautiful.

Keep these essentials in mind for a polished result. A firm magic ring is the best way to start, as it keeps the center neat and tight. Count your stitches regularly to ensure petals are spaced correctly. Avoid pulling too tightly, since this can cause curling, steady, even tension helps a lot. It's useful to measure your work as you go, especially when planning to join several squares for a larger item.
Minor issues like lopsided petals or uneven edges sometimes occur. Fix these by checking your stitch count, adjusting your hook or tension, or switching to a smoother yarn if splitting becomes a problem. Gently steam and shape your finished squares to give them a crisp, uniform look.

Most squares come out to about 5 inches by 5 inches, but you can change this by adding or removing rounds or using a different hook size. Every time you finish a square, you add another touch of color and texture to your space or to gifts for friends and family. With a little patience, each finished square will be neat, bright, and full of personality, inviting you to keep going and imagine the next creative use for your work.

Flower Granny Square Crochet Pattern (Step-by-Step)
Materials List
- Yarn: Two colors of DK or worsted weight yarn (e.g., mustard yellow and gray)
- Hook: 4.0mm (G-6) crochet hook
- Notions: Scissors, yarn needle
- Optional: Stitch marker for rounds
Skill Level
Intermediate
(Basic crochet knowledge required - suitable for ambitious beginners)
Key Abbreviations (US Terms)
| Abbreviation | Stitch Name |
|---|---|
| ch | chain |
| sl st | slip stitch |
| sc | single crochet |
| dc | double crochet |
| hdc | half double crochet |
| tr | treble crochet |
| ext-dc | extended double crochet |
| st(s) | stitch(es) |
| rep | repeat |
Special Notes
- Pattern is written in US crochet terminology.
- Extended double crochet: yarn over, insert hook, pull up a loop, yarn over and pull through one loop, (yarn over and pull through two loops) twice.
- Standing stitches are worked at the start of new rounds without joining, for a neater color change.
Pattern
Round 1: Magic Ring & Double Crochet Petals
- With Color A (mustard yellow), make a magic ring.
- Ch 1. Work 11 dc into the ring.
(Count your beginning chain-2 as your first dc-making 12 dc total.) - Pull the magic ring tight and join with a sl st to the top of the beginning ch-2.
- Ch 1 and fasten off Color A.
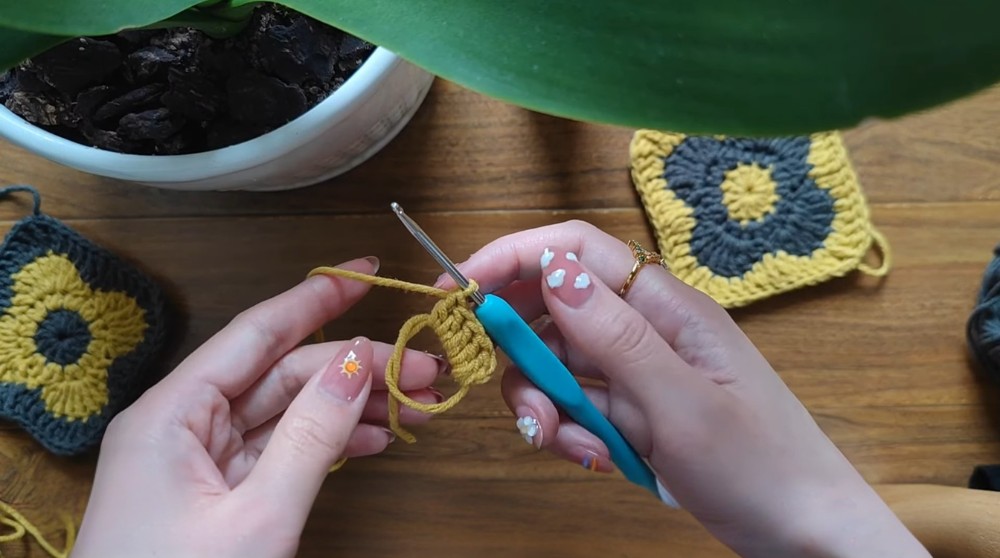
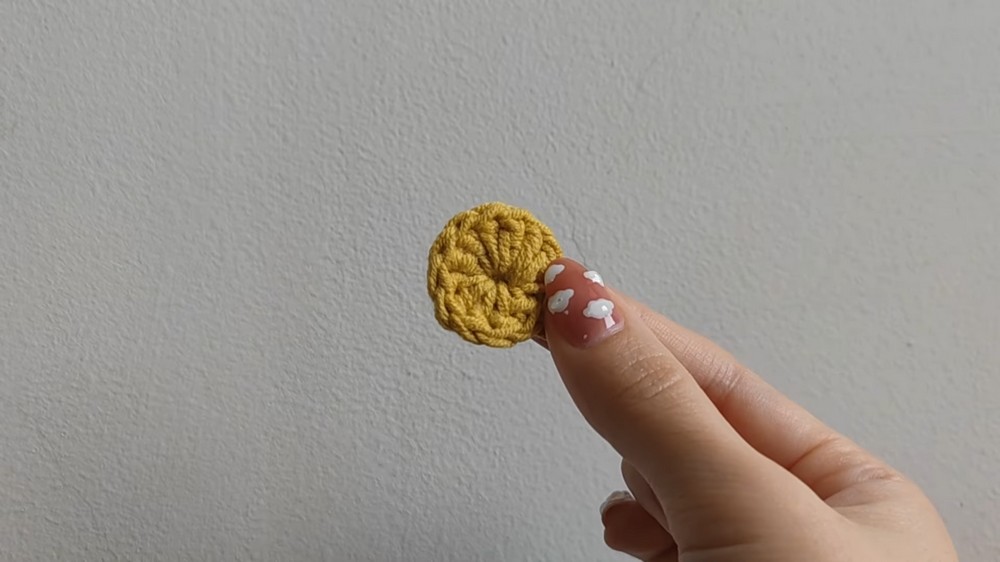
Beginner tip: Magic ring starts the circle. Double crochets fill the center and create a full base for petals. If magic rings are hard, replace with ch 4, sl st to form a ring, then work 12 dc.
Round 2: Two Half Double Crochets in Each Stitch
- Attach Color B (gray) to any stitch with a standing hdc.
- Work 2 hdc in each stitch around (24 hdc). Hide yarn tails as you go.
- Join with a sl st to the top of the first hdc.

Beginner tip: You are simply working two stitches in every space for a flat, fuller round. This expands your circle in a neat, even way. Make sure to count-you should have 24 hdc.
Round 3: Petal Formation (Varying Stitches for Petal Shape)
- Skip the next stitch, in the next stitch work as follows:
- 1 dc, 1 ext-dc, 1 tr (all in same st)
- In the next stitch: 3 tr
(All in the same st.) - In the next stitch: 1 tr, 1 ext-dc, 1 dc (all in same st)
- Skip the next stitch, sl st in the following stitch to anchor the petal.

Repeat Steps 1-4 three more times to complete 4 petals total (work until end of round).
Fasten off and finish with a sl st to your standing stitch.
Beginner tip: Each petal sits over five stitches with a slip stitch skip in between. If stitches seem confusing, go slowly and repeat the actions for each petal. You're making the top, sides, and pointy tip of each petal for a 3D look.
Round 4: Shaping the Square (includes extended and treble stitches for corners)
- Attach Color A in the second (center) tr of any petal with a standing tr.
- [Corner]: In the same stitch: tr, ch 1, tr.
- Next stitch: ext-dc, dc
- Next 2 stitches: dc in each
- Next stitch: ext-dc
- In slip stitch at dip between petals: tr
- Next stitch: ext-dc
- Next 2 stitches: dc in each
- Next stitch: dc and ext-dc (in same st)
- Next stitch (center tr of next petal): tr, ch 1, tr (corner)

Repeat pattern from step 3 for each side, working around the granny square.
Join with a sl st to top of standing tr, ch 1, and fasten off.
Beginner tip: The highest point (middle stitch in 3 tr) of every petal forms the corner. All other stitches fill out the sides, turning your circle into a neat square. Take it slow and count - if unsure, lay out your work to spot the four even corners.
Conclusion
This flower granny square showcases 3D petals with beautiful texture. Each round builds on the last, turning a simple center into an intricate floral square. Use these motifs to make blankets, bags, hats, or more!
Pattern Corrections & Tips
- Petal unevenness: Double-check counts for each petal-work all stitches in the same spot for bold petals.
- Square not lying flat: Gently steam block your finished square or stretch by hand to shape.
- Tight joins: When adding a new color, keep stitches loose to prevent bunching.
Expert tip: Always fasten off and weave ends as you go to keep the square tidy.