
Free Crochet Koala Pattern That’s for Cozy Room Décor
Start crocheting this cute and cuddly koala, a fun and easy project that's perfect for spreading smiles, decorating rooms, or gifting to loved ones.
Without a charming and unique addition like this adorable koala crochet project, your handmade collection might feel incomplete. This cozy creation stands out with its soft, rounded ears, sweet button nose, and cuddly appearance that's hard to resist. It's not just a decorative piece but also wonderfully versatile. You can use it to brighten up a child's room, as a heartfelt handmade gift, or even as a playful companion for little ones. Its fluffy texture and lovable features are sure to bring smiles wherever it's placed.
Fun & Simple Free Crochet Koala Pattern to Try at Home

The project is designed to be simple yet captivating, making it enjoyable for both beginners and experienced crafters. The finished koala holds a special charm that instantly draws attention and adds warmth to your handiwork.
It feels more like a creative expression than just another craft project-it's a piece filled with heart and personality. If you're looking to create something meaningful, beautiful, and full of character, this is the perfect crochet project to try.
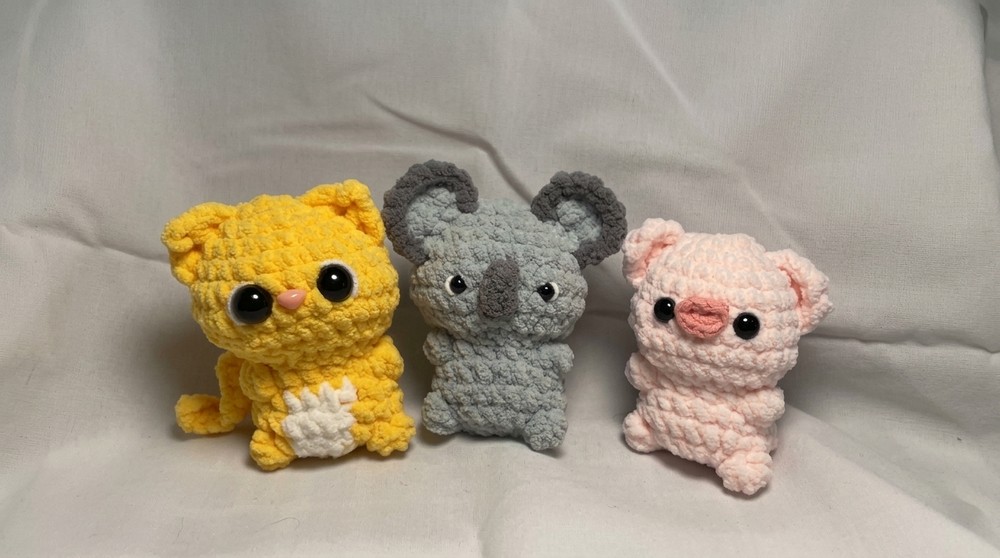
Amigurumi Koala - Step-by-Step Crochet Pattern
Skill Level
Intermediate (familiar with amigurumi and basic shaping)
Materials
- Light gray sport/DK weight yarn (main color)
- Dark gray sport/DK weight yarn (nose, ear edges)
- 2.5-3.5 mm crochet hook
- Polyfil stuffing
- 6-8 mm safety eyes
- Stitch markers
- Darning needle
- Scissors
Abbreviations (US Terms)
- MR: Magic Ring
- sc: Single crochet
- inc: Increase (2 sc in one stitch)
- dec: Decrease (sc 2 together, invisible decrease recommended)
- ch: Chain
- st(s): Stitch(es)
- sl st: Slip stitch
- FLO: Front loop only
- BO: Bobble stitch (see Special Stitches section)
Special Stitches
Bobble Stitch (BO):
(Yarn over, insert hook in stitch, yarn over, pull up a loop, yarn over, pull through 2 loops) repeat 4 times (5 loops on hook), yarn over, pull through all loops.
Pattern
BODY AND HEAD
Work in continuous rounds. Use a stitch marker.
Round 1: 6 sc in MR. (6)
Round 2: Inc in each st (2 sc in each) around. (12)

Round 3: [Sc, inc] x6. (18)
Round 4: [Sc, inc, sc] x6. (24)
Round 5: Sc in each st around. (24)
Round 6: 7 sc, inc x3, 4 sc, inc x3, 7 sc. (30)
Round 7: Sc in each st around. (30)
Round 8: Sc in each st around. (30)

Round 9: 7 sc, dec x3, 4 sc, dec x3, 7 sc. (24)
Round 10: [Dec] x12. (12) - Pause to stuff the head firmly.
Round 11:
Inc, sc, inc, BO (FLO), inc, 2 sc, inc, BO (FLO), inc, sc, inc. (18)
- Work the bobble stitch in FRONT LOOP ONLY for texture (used for cheek or leg shaping).
Round 12:
[Sc, inc] x3, 6 sc, [inc, sc] x3. (24)
Round 13:
Sc in each st around. (24)
Round 14: Incorporate tail and more bobbles
- At round start: Ch 2, work bobble in second ch from hook, attach to the next st on body as start of round ("Tail" made).
- 8 sc
- BO (FLO)
- 7 sc
- BO (FLO)
- 7 sc (24)
Round 15: [Dec] x12. (12)
Cut yarn, use needle to weave yarn through front loops to close the opening. Fasten off securely.
EARS (make 2, crocheted directly onto the head)
Left Ear:
- Insert hook between Rounds 3 & 4 of head, about 4 sts away from center midpoint.
- Attach light gray yarn with slip knot.
- Ch 1.
- Sc in insertion point (same st).
- Sc between Rounds 4 & 5.
- Sc between Rounds 5 & 6. (3 sc across)
- Turn, ch 1.
- In first st: 2 sc (inc).
- Sc in next st.
- In last st: 2 sc (inc). (5 sts)
- Turn, ch 1.
- Dec over first 2 sts.
- Sc in next st.
- Dec over last 2 sts. (3 sts)
- Finish off, leaving a tail. With needle, weave tail over edge to base of ear; bury ends.

Ear Edging:
- With dark gray, insert hook at ear base.
- Attach yarn, ch 1.
- Sc EVENLY around ear edge to other side.
- Sl st to finish, fasten off, weave in end.
Right Ear:
Work as for left, but start between Rounds ⅚ and finish between ¾.

NOSE
- In dark gray, ch 4.
- Sl st in 2nd ch from hook.
- Sc in next 2 ch.
- Fasten off, leave long tails for sewing.

To Attach:
- Curl into an oval and use tails to sew one end above and one below, securing nose to face between eyes.
FINISHING & ASSEMBLY
- Insert safety eyes between Rounds 8-9, about 7 stitches apart, before closing head stuffing.
- After closing body, attach ears symmetrically.
- Sew nose in place centered above the mouth/cheeks.
- Weave in all ends and shape as desired.
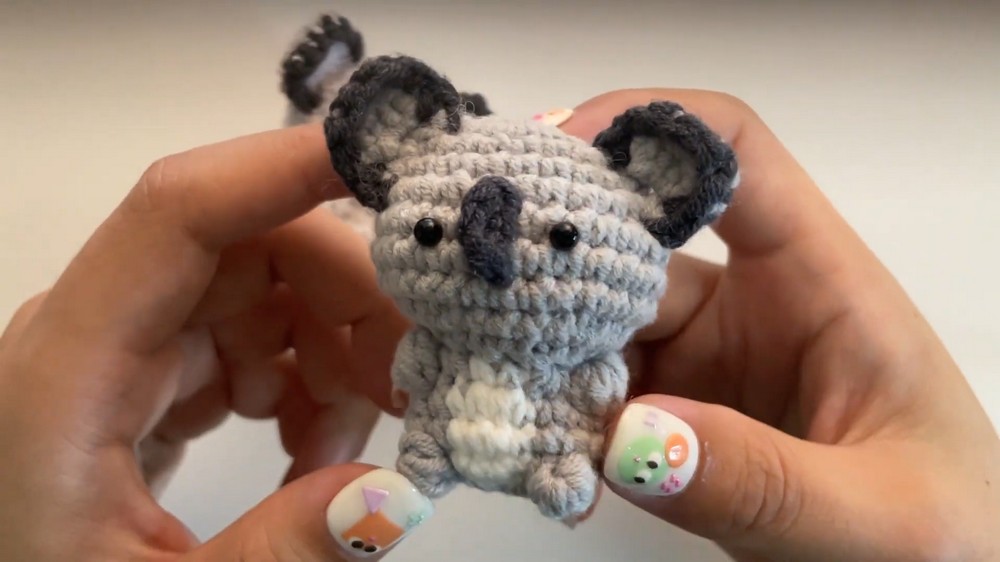
Finished Size
- Approx. 3.5-4" (9-10 cm) tall with sport/DK yarn and 3 mm hook.

Tips & Customization
- For more expression, embroider a small mouth under the nose.
- Use fuzzy or mohair-blend yarn for a fluffy look.
- Add a bow, hat, or scarf for personality.
- Stuff firmly for a neat, plump shape.
Conclusion
You have now made an adorable amigurumi koala with a shaped tail, big floppy ears, and a classic oval koala nose! The bobbles and careful placement of features give this koala a distinctive and expressive look.