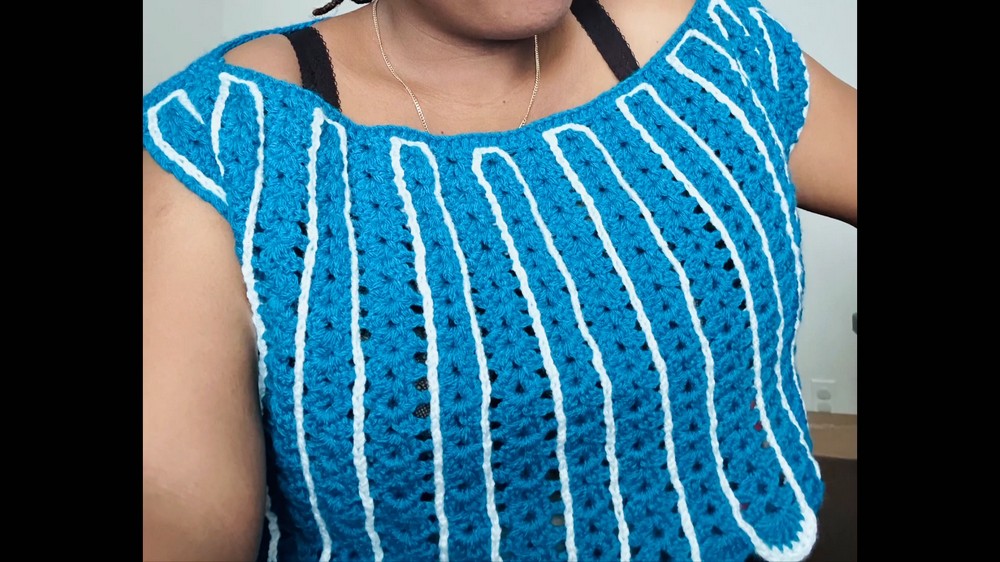
Free Crochet Off-shoulder Crop Top Pattern for Summer Vibes
Style your summer wardrobe with this Free Crochet Off-shoulder Crop Top Pattern that's a breezy option for casual outings and festival vibes.
Warm sunny days call for outfit choices that balance comfort, style, and a personal touch. Nothing says summer quite like a breezy off-shoulder crop top, and with a Free Crochet Off-shoulder Crop Top Pattern, you can easily create one that's uniquely yours. Perfect for beach trips, casual brunches, music festivals, or even layered with a jacket on cooler evenings, this piece blends versatility with effortless charm.
Free Crochet Off-shoulder Crop Top Pattern for Any Occasion

Pair it with high-waisted jeans, flowy skirts, or shorts for a chic look that suits any occasion. Crocheting your own crop top lets you customize the fit, color, and style, giving you a sense of accomplishment and a wardrobe staple that's as unique as your personality. Lightweight and breathable, it's the perfect addition to your handmade collection while highlighting your creativity and passion for crochet.
Easy Crochet Crop Top Pattern
Materials Needed
- Yarn:
- Big Twist Acrylic Yarn (Worsted Weight, Category 4).
- Approximately 1.5 skeins.
- Choose contrasting colors if you prefer multicolor detailing.
- Hook Size:
- 5 mm crochet hook.
- Notions:
- Tape measure for checking measurements.
- Darning needle for weaving in ends and joining sides.
- Scissors for trimming yarn.
- Stitch markers for sleeve openings and shoulder seam alignment (optional).
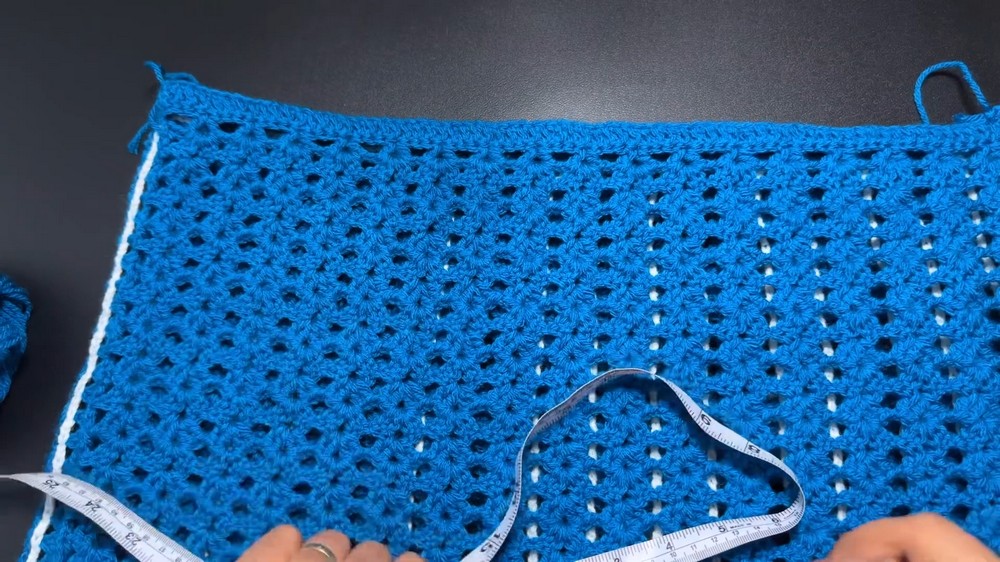
Gauge
Gauge is measured across foundation rows:
- 4 rows of shell stitches = 3 inches in height.
- 10 double crochet stitches = 4 inches wide.
Finished Size
Sample Measurement:
- Shoulder-to-shoulder width: Total chain base equals 20 inches (18 inches shoulder measurement +2 inches for ease).
- Length: 25 rows (approximately 16 inches long).
- Sleeve opening: 7 to 7.5 inches (adjustable).
Customization is possible by altering the base chain size, number of rows, or sleeve measurements.

Skill Level
Intermediate.
Key Abbreviations (US Terminology)
- ch: chain.
- dc: double crochet.
- hdc: half double crochet.
- sl st: slip stitch.
- sp: space.
- sk: skip stitch.
- st: stitch.
- rep: repeat.
Special Notes
- Shoulder-to-shoulder Measurement: Foundation chain should equal shoulder-to-shoulder width + 2 inches for ease. Adjust based on your size.
- Right and Wrong Side: Note the right side of the panel and ensure the last row is worked on the right side for both panels.
- Joining: Panels are joined at the shoulders and sides with single crochet. Create sleeve openings by leaving gaps at the sides.
Pattern Instructions
Step 1: First Panel
Row 1: Foundation Row
- Start with a slip knot.
- Make a chain:
- Chain your desired width, based on measurements (e.g., 80 chains for a 20-inch width).
- Add 3 extra chains for proper row turning.
- Work 1 dc into the 4th chain from the hook (working into the back bump of the chain).
- Work 1 dc in each chain across. For 80 chains, you should have 80 dc.
- Turn your work, and proceed to the next row.
Row 2: V-Stitch Row
- Ch 4 (counts as the first dc).
- Yarn over, sk 3 stitches, and work the V-stitch into the 4th stitch:
- V-stitch: (1 dc, ch 2, 1 dc in the same stitch).
- Chain 1, yarn over, sk 3 stitches, and work another V-stitch into the 4th stitch.
- Repeat the V-stitch (1 dc, ch 2, dc) pattern across the row.
- At the end: Chain 1, place 1 dc into the top of the last stitch.
- Turn your work, and proceed to the next row.

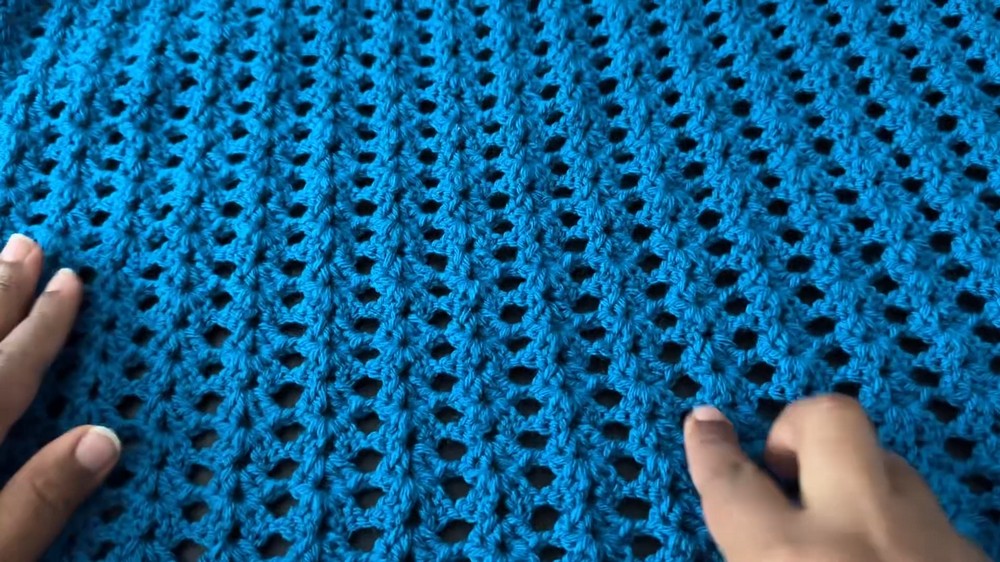
Row 3: Shell Row
- Ch 4 (counts as 1 dc).
- Yarn over and work a shell into the first chain-2 space:
- Shell stitch: (2 dc, ch 2, 2 dc in the same chain-2 space).
- Chain 1, yarn over, and work a shell stitch into the next chain-2 space.
- Repeat the shell stitch pattern across the row, ch 1 between shell stitches.
- To finish the row: Chain 1, place 1 dc into the 3rd chain from the previous row's start.
- Turn your work, and proceed to the next row.

Row 4 and Beyond:
For the remainder of the panel, repeat Rows 3 (shell row) and 4 until the panel's desired length is achieved.
- Example: The sample features 24 rows (12 shell rows).
- Ensure the panel ends on row 24 (a shell row).
Step 2: Last Row of Panel
Row 25: Double Crochet Edging Row
- Ch 4 (counts as your first dc).
- Work 8 dc into each chain-2 space across the row.
- At the end of the row, chain 1, and place 1 dc into the 3rd chain of the previous row.
- Fasten off.
Step 3: Create Second Panel
Follow the instructions for the first panel to create the second panel. Ensure both panels are identical in width, length, and stitch pattern.
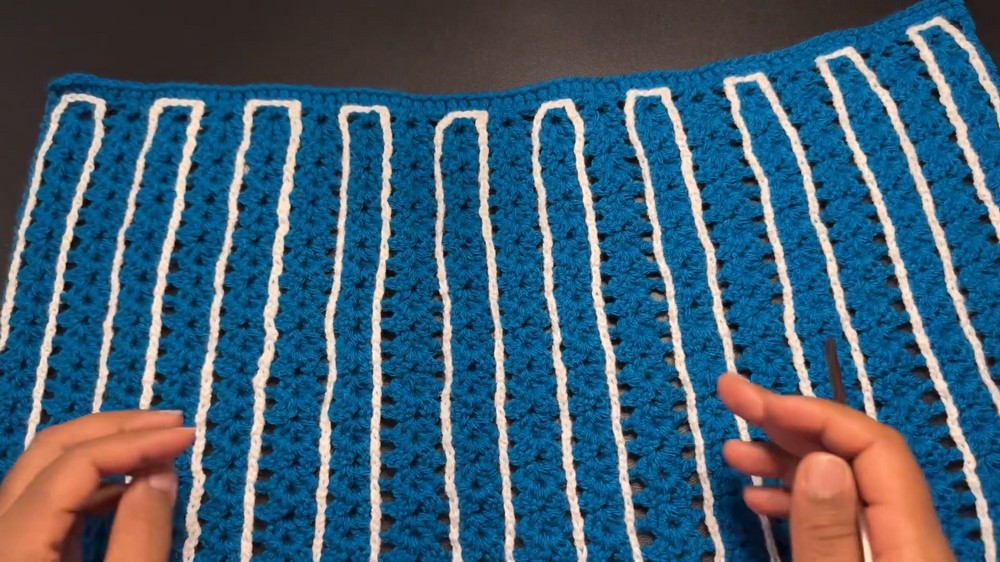
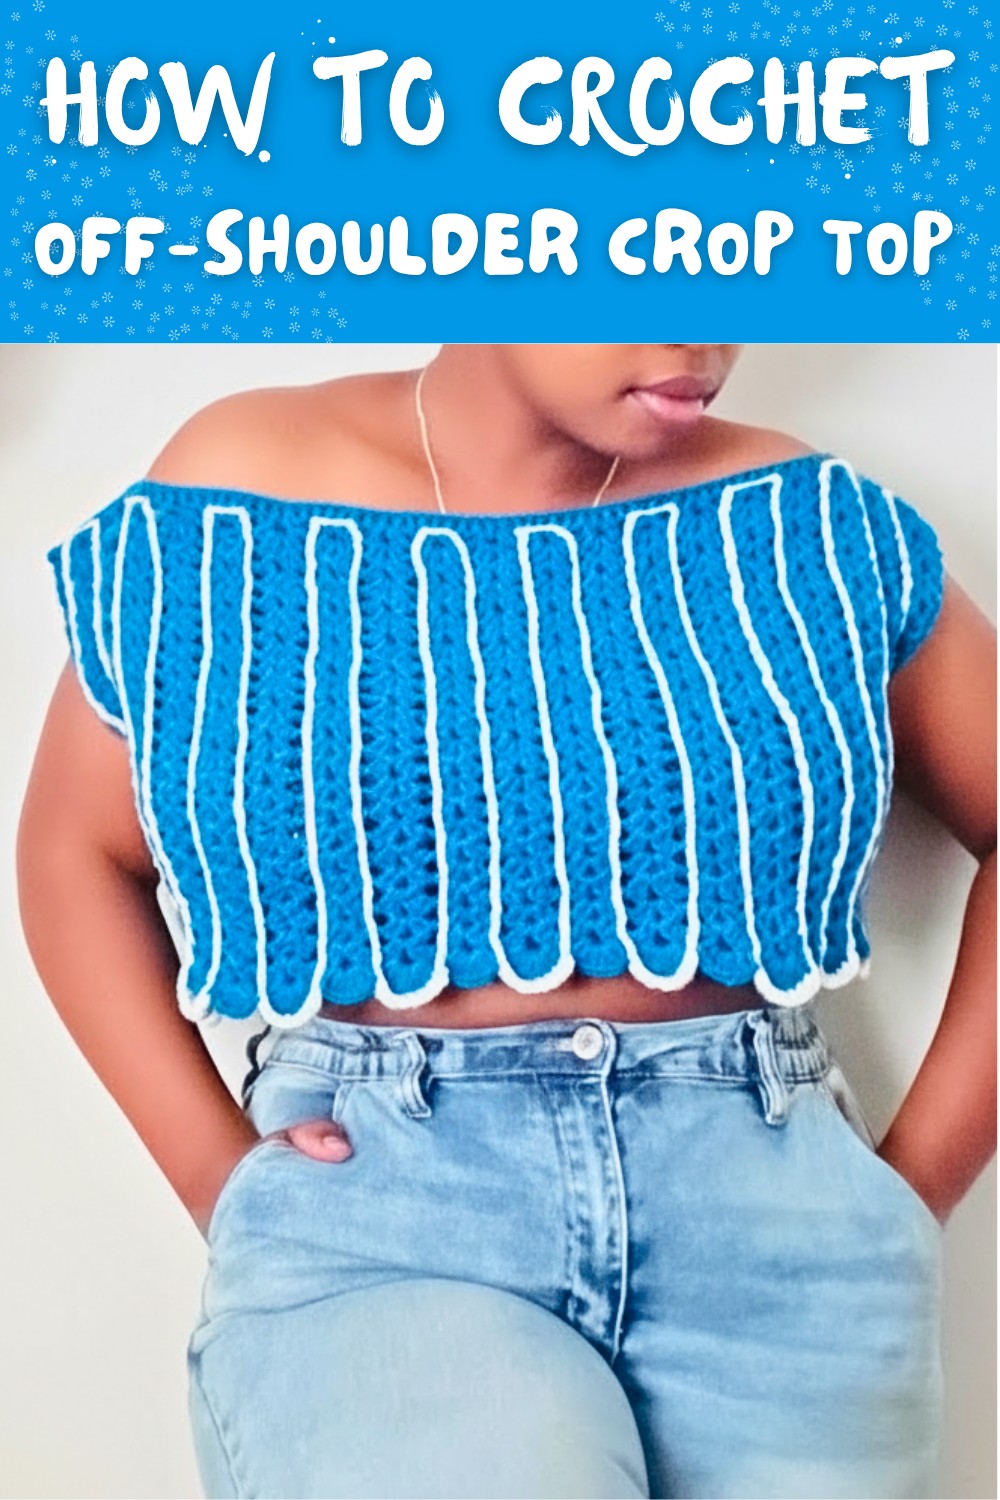
Step 4: Add Decorative Chains (Optional)
This step applies only to the front panel for decorative detailing.
Pattern for Chains
- Attach yarn to any chain space at the edge of the rows.
- Work 3 chains in each space across the edge of the panel.
- Slip stitch to secure as needed.
- Repeat this process along desired edges or across the entire panel for decorative detailing.

Step 5: Joining at Shoulders
Instructions:
- Align both panels with the right sides facing.
- Use a stitch marker to mark 3 inches from each edge for shoulder seams.
- Join:
- Single crochet across the width of the shoulder seam securely.
- Repeat for both shoulders.
Step 6: Sleeve and Side Joining
Sleeve Opening:
Leave 7 to 7.5 inches at the top of each side for sleeves.
- Use a tape measure to mark sleeve openings.
- Stitch markers can help you ensure even openings.
Side Seams:
- Starting below the sleeve openings, work single crochet in spaces across the side seams.
- Repeat for both sides.
Customization Ideas
- Length: Add more rows for a longer top or fewer rows for a cropped look.
- Sleeve Style: Modify sleeve openings for larger or smaller armholes or add short sleeves.
- Color Detailing: Use contrasting yarn for edges or decorative chains on the front panel.
Tips for Success
- Check Stitch Counts: Ensure you keep consistent stitch counts when working V-stitch or shells to maintain alignment.
- Block Panels: Lightly block your panels for even tension before joining.
- Neckline Modification: Adjust the width of the shoulder seams to create a wider neckline or off-shoulder style.
Conclusion
Congratulations on completing your crochet crop top! This lightweight and customizable design can be styled in numerous ways, making it versatile for any wardrobe. Whether you follow the pattern exactly or add your own flair, enjoy your new handmade creation.