
Free Crochet Pattern: Baby Socks for 0-6 Months
Crocheting your own baby socks can be a fun and rewarding experience, even if you're just starting out. With an easy free pattern, you'll discover how relaxing and creative the process can be. The satisfaction of making something special for a baby, whether it's for your own family or as a heartfelt gift, is hard to match. Plus, crochet baby socks don't need a lot of yarn or time, so you can see quick results and feel proud of your accomplishment.
Free Crochet Baby Socks Pattern: Simple & Fun
These baby socks stand out for their adorable shape, cozy fit, and soft texture. You can choose gentle pastel shades like pink, blue, yellow, or a bright rainbow color for each pair. The pattern often uses basic stitches like single crochet and double crochet, making it friendly for beginners. With a few changes in size or style, you can also use this pattern to make matching slippers, baby mittens, or even little booties. This means you have a versatile base for lots of cute projects.

Important Steps You Shouldn't Forget:
- Always start with a slip knot and a chain to set the length of the sock
- Follow the increase rows carefully to get the right shape for the toes
- Count your stitches at the end of each round to make sure the socks are even
- Switch to a smaller or bigger hook if your yarn tension is too tight or loose
- Seam the sock neatly for a comfortable finish
You might face a few common issues, like socks being too tight or loose, uneven stitches, or a gap at the heel. To fix these, try these tips:
- Double-check your stitch count and use stitch markers for accuracy
- Adjust hook size for better tension and fit
- Rewatch tricky parts of instructional videos or ask in online crochet groups for help

Size Guide
As you reach the last steps, make sure to weave in all loose yarn ends for a neat look and check the socks against a baby's foot. Here's a simple sizing guide to help you get the perfect fit:
- Newborn: About 3 to 3.5 inches long (7.5-9 cm)
- 3 Months: About 3.5 to 4 inches long (9-10 cm)
- 6 Months: About 4 to 4.5 inches long (10-11.5 cm)
- Adjusting Size: Add or subtract a few stitches or rows for larger or smaller socks

With practice and these helpful steps, your socks will turn out soft, cute, and ready to be cherished. This pattern is a wonderful way to build your crochet skills, make practical items, and enjoy making handmade baby gifts.

Crochet Baby Socks/Booties Pattern
Materials
- Baby wool or your chosen soft yarn (main color & contrast for heel/cuffs)
- 2 mm crochet hook
- Scissors
- Tapestry needle
Toe
Round 1
- Make a magic ring.
- Ch 3 (counts as first double crochet - dc).
- Work 9 dc into the ring (10 dc total including beginning chains).
- Pull the ring closed tightly.
- Slip stitch into the top of the starting ch-3 to close.
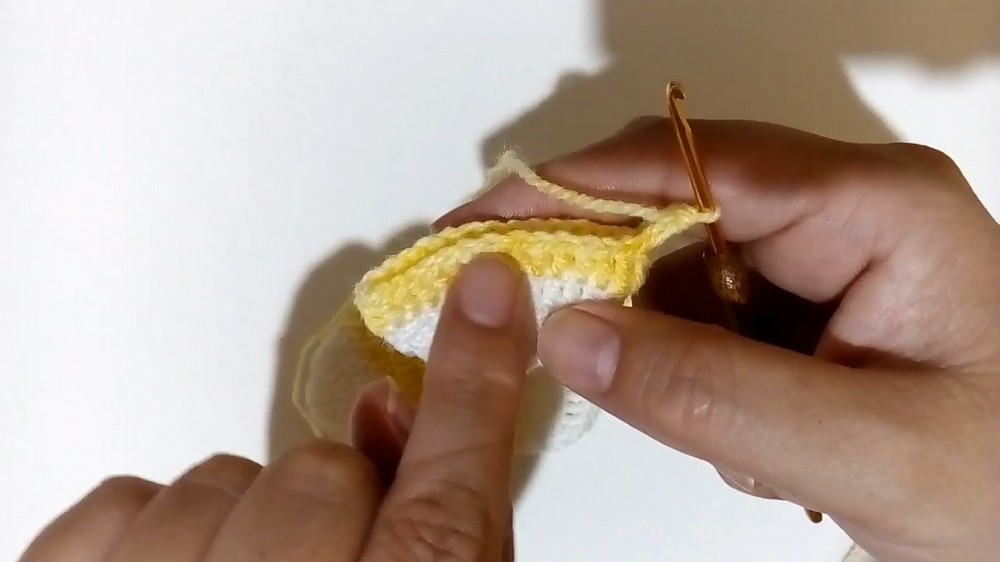
This is the beginning of the sock. The circle you make here is the very tip for tiny toes!
Round 2
- Ch 3.
- In the same stitch: dc 1 (increase).
- Work 2 dc in each dc from the previous round (increase in each stitch) - you will have 20 dc at the end.
- Slip stitch to join.
By making 2 dc into each stitch, you double your stitch count to grow the toe and shape it like a small disc.
Round 3
- Ch 3.
- In the same stitch: dc 1 (increase).
- In the next stitch: dc 1.
- Repeat around: (2 dc in next st, 1 dc in next st) around. (You'll have 30 stitches at the end.)
- Slip stitch to join.

This round increases the toe further, alternating increases and regular stitches for a smooth, slightly domed shape.
Foot
Change Color (Optional)
- Cut the yarn if you wish to switch to your main color.
- Join new yarn at any stitch with a slip knot.
Round 4
- Ch 3.
- Dc in each stitch around (no increases).
- Slip stitch to join.
Now you'll just add height. No more increasing means the sides of your sock will start to turn upwards, forming a "cup".
Rounds 5-9 (6 rounds with color)
- Repeat Round 4 - dc in every stitch around for 5 more rounds (6 in total here in your main color).
- Slip stitch to join at the end of each round.

These rounds build the length of the sock to fit the foot. It starts looking more like a tiny tube or boat!
Heel
Begin Heel Rows
- Fasten off if needed, and join white yarn after counting 10 stitches from your last seam/join (to center the heel under the foot).
- Ch 3.
- Work dc in next 19 stitches for a total of 20 dc.
You now work back and forth in rows (not rounds). This creates a "flap" that folds to make a space for the heel to fit.
Row 1 (Heel)
- Ch 3, turn.
- Dc in next 6 stitches (7 dc total).
- Sc in next 6 stitches.
- Dc in last 7 stitches to end of row.

You have double crochets at the sides for height and single crochets in the middle to gently taper under the foot.
Row 2 (Heel Shaping)
- Ch 3, turn.
- Dc in next 6 sts (7 dc).
- Decrease over the next 3 stitches:
- Yarn over, begin a dc and pull up a loop, do not finish (leave last loop on hook).
- Repeat this for three stitches (you'll have 4 loops on the hook).
- Yarn over and draw through all 4 loops (this is a decrease over 3 stitches).
- Dc in last 7 sts.
The decrease bunches the heel so the sock cups the back of the foot-your first "turn" at the heel.
Row 3 (Heel Finish)
- Ch 3, turn.
- Dc in next 6 sts.
- Slip stitch into the decrease "gap" (skip all the middle remaining stitches).
- Dc in last 7 sts.
This finishes shaping the heel "cap". You're ready to seam the back of the sock and close the heel.
Seam the Heel
- Fold the sock, matching edges.
- Slip stitch or sew heel edges together to close, matching stitch-for-stitch.
- Fasten off.
This step closes up the heel neatly so you have a little foot "pocket." You can sew with a tapestry needle if you prefer.
Sock Cuff (Ankle)
Attach Main Color
- Join main color on the heel seam or middle back of the sock.
- Ch 3.
- Dc evenly all the way around opening (if needed, add 2 dc in the heel corners to keep the circle smooth).
- Slip stitch to join.

This creates the tube going up the baby's ankle. Try to work evenly around the opening, picking up stitches in row ends as needed.
Cuff Rounds
- Ch 3, dc all the way around for a total of 4 cuff rounds (this includes your first round).
- Slip stitch to join at the end of each round.
This little "tube" forms the top of your sock. Work more or less rounds if you want a longer or shorter sock cuff.
Ribbed Edge (for stretchy cuff)
Ribbing Rounds
- Join contrast (white) yarn in any stitch at cuff edge.
- Ch 3.
- Alternate:
- Front post double crochet (FPdc): Yarn over, insert hook from front to back around the post of the next dc, complete dc.
- Back post double crochet (BPdc): Yarn over, insert hook from back to front around the post of the next dc, complete dc.
- Repeat [FPdc, BPdc] around.
- Slip stitch to join.
The ribbed edge makes the cuff stretchy so it holds onto the ankle gently but firmly. It looks decorative and professional, too!
Repeat Ribbing (Optional)
- Do 1 or 2 more rounds as above (always FPdc into FPdc below, BPdc into BPdc below).
- Fasten off and weave in all ends.

Ribbing can be made deeper if you wish. Two or three rows is plenty for a baby sock!
Finishing
- Tidy up loose ends with a tapestry needle.
- Turn the sock right side out, shape the heel and toe, and admire your adorable work.
- Make the second sock to match.
Take time now to make sure your sock's ends are secure and not scratchy inside. Repeat all steps for a perfect pair!
What's Happening at Each Main Step?
- You make a circle for the toe, growing larger with increases.
- Change yarn for color if you like, build up the length of the foot.
- Work the heel in rows-this makes a little cup for the back of the foot.
- Seam the heel to close.
- Work the ankle/cuff in rounds.
- Finish with ribbing for style and stretch.