Free Crochet Pom Pom Top Pattern for All Seasons
Upgrade your summer style with this Free Crochet Pom Pom Top Pattern, perfect for casual outings, vacations, or layering effortlessly.
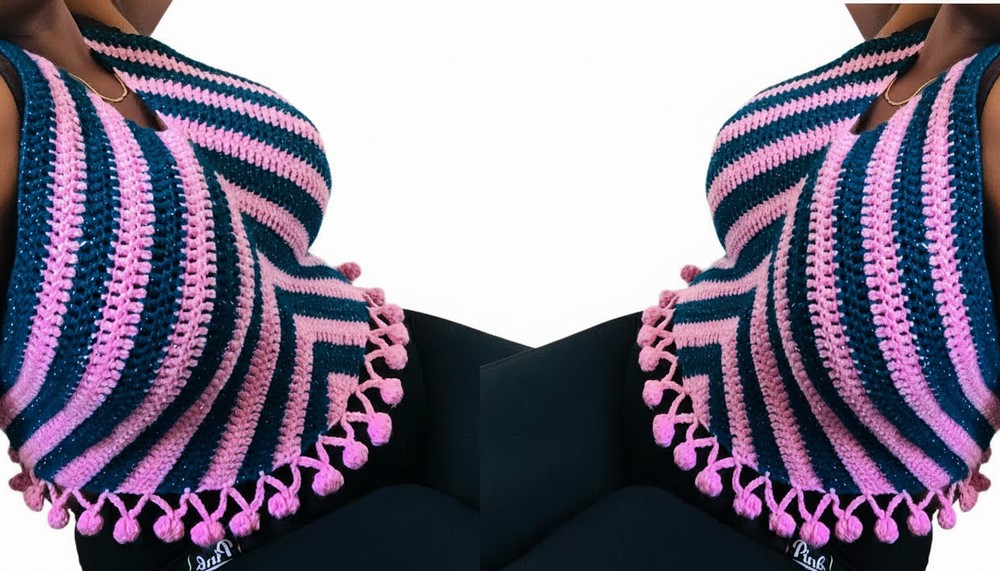
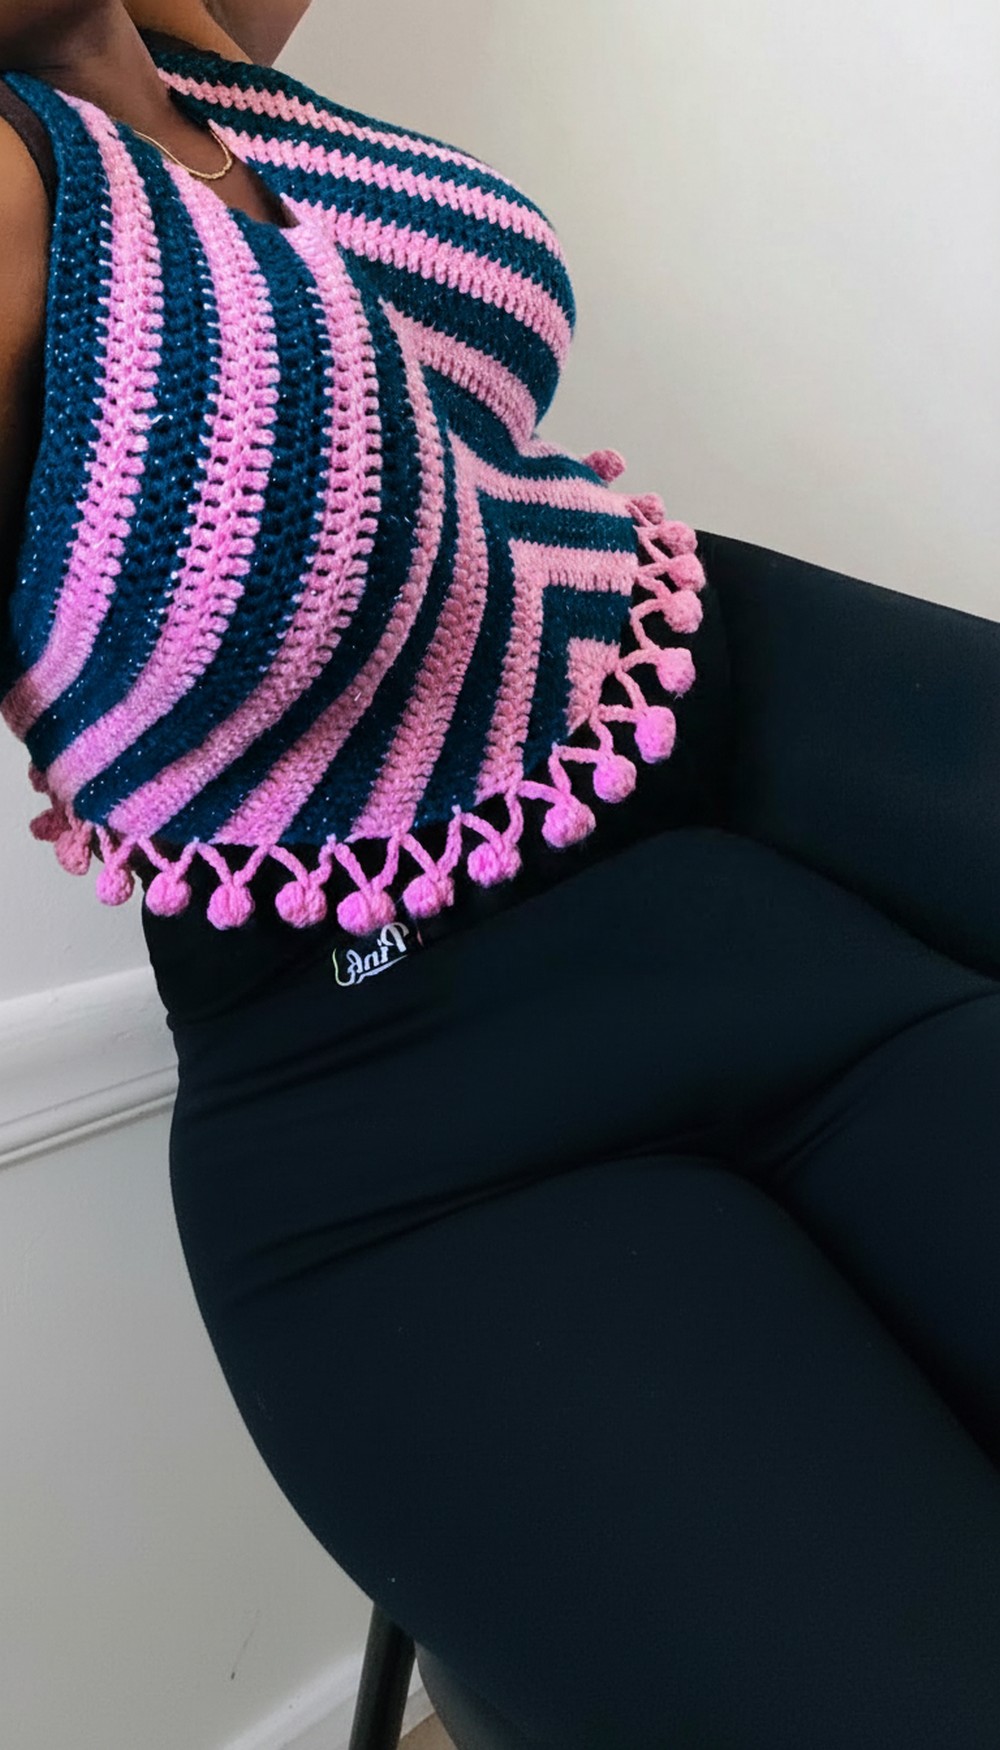
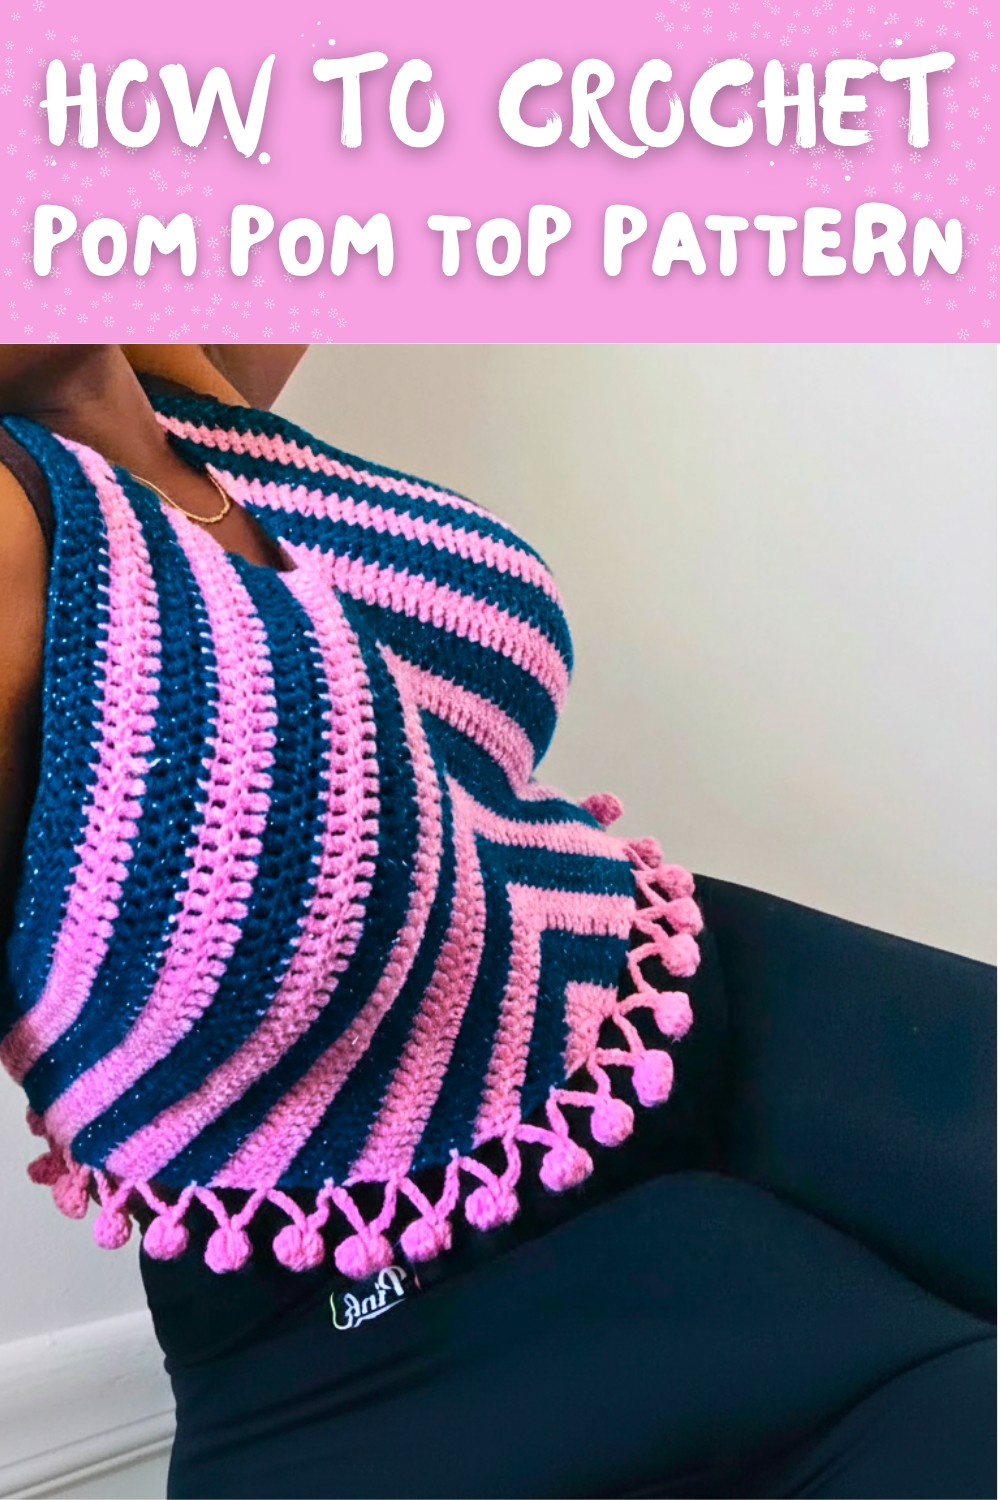
A summer wardrobe essential that balances elegance with playful charm, the Free Crochet Pom Pom Top pattern offers versatility and effortless style for any occasion. Lightweight and breathable, this top features intricate textures complemented by whimsical pom-pom details, making it perfect for beach days, casual brunches, or layered festival looks. Pair it with high-waisted shorts for a relaxed vibe, or wear it over a camisole for a more polished appearance.
Free Crochet Pom Pom Top Pattern for Any Style
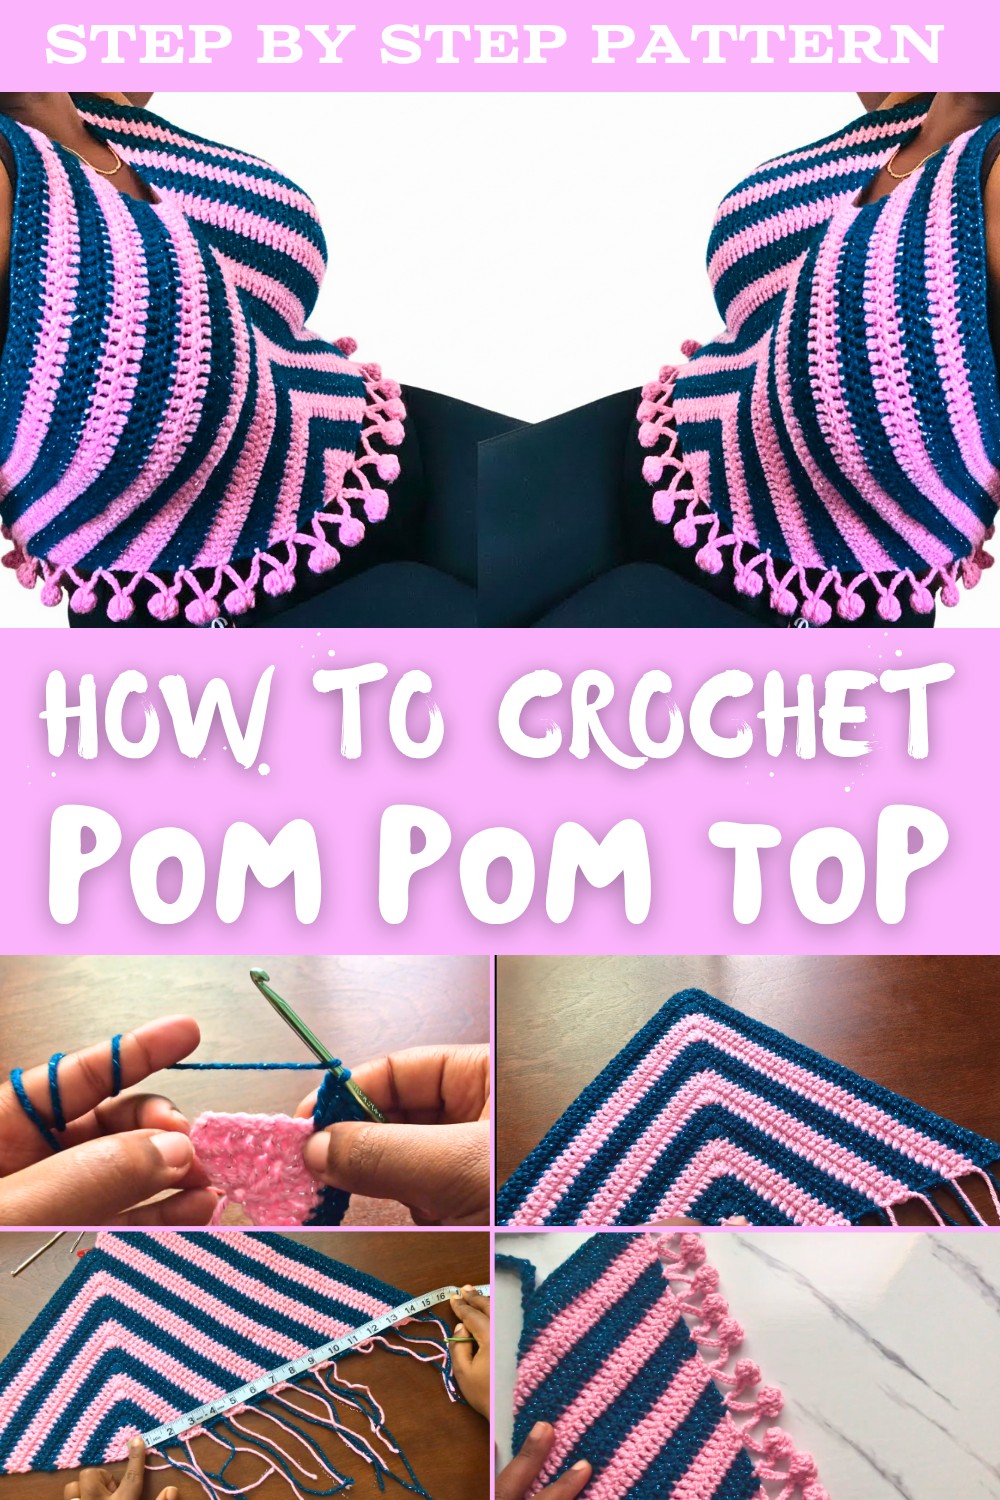
The fun pom-poms add character to an otherwise timeless silhouette, giving it an eye-catching flair. Suitable for those looking for easy fashion that's both functional and personal, this piece not only serves your styling needs but also saves you the hassle of finding something unique. Practical and trendy, the top is a reminder that simple garments can still steal the spotlight.
Crochet Pom Pom Top Pattern
Materials Needed
- Yarn:
- Lightweight yarn (#3 or similar). For exact yarn details, refer to the description if matching the tutorial's look.
- Multiple colors if desired (optional for color changes).
- Hooks:
- Main crochet hook: 4mm (for body).
- Smaller crochet hook: 3.75mm (for pom-pom details).
- Other Tools:
- Stitch markers (to mark center stitches).
- Darning needle (for weaving in ends).
- Scissors.
Gauge
Using 4mm hook:
- Start with a swatch of 10 rows of double crochets and measure. Suggested gauge: 10 double crochets x 10 rows = 4"x4".
- Adjust hook size as necessary to match gauge.
Finished Size
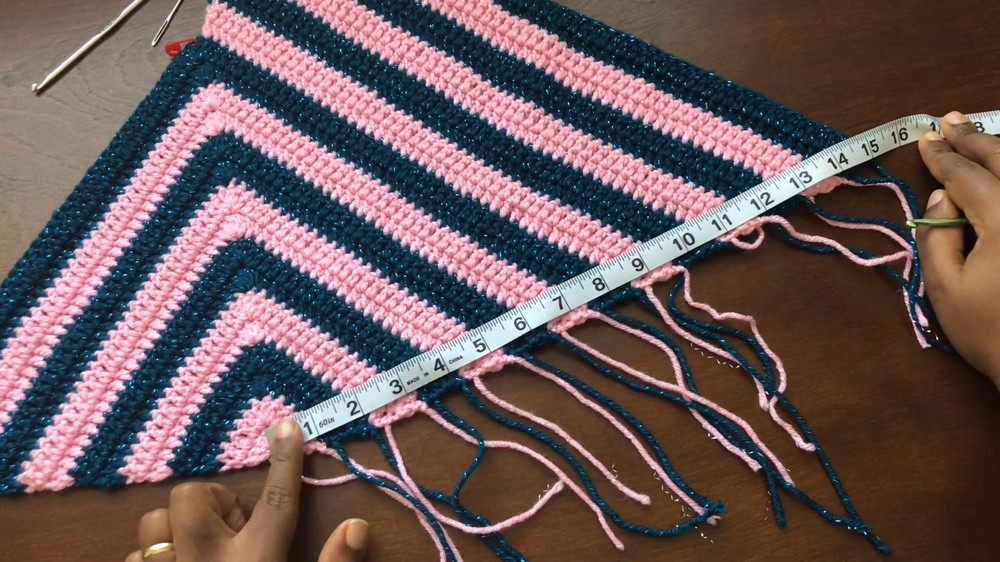
- Width: 30 inches across (15 inches for each triangle half).
- Length: Start to desired top length and adjust measurements based on the v-neck depth at 10.5 inches (or preference).
Pattern Instructions
1. Top Triangle Base:
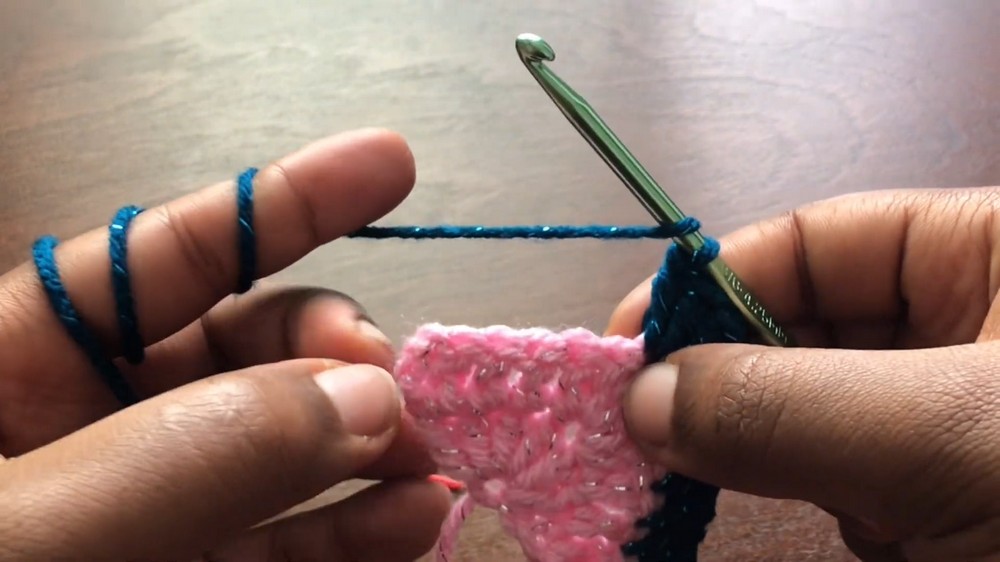
Step 1: Foundation Chain & First Row
- Create a slip knot and chain 4.
- Yarn over, skip three stitches, and double crochet (DC) in the fourth chain from the hook.
- Chain 3 (counts as the first double crochet of the row) and add 6 more double crochets into the same space. You now have 7 DCs total.
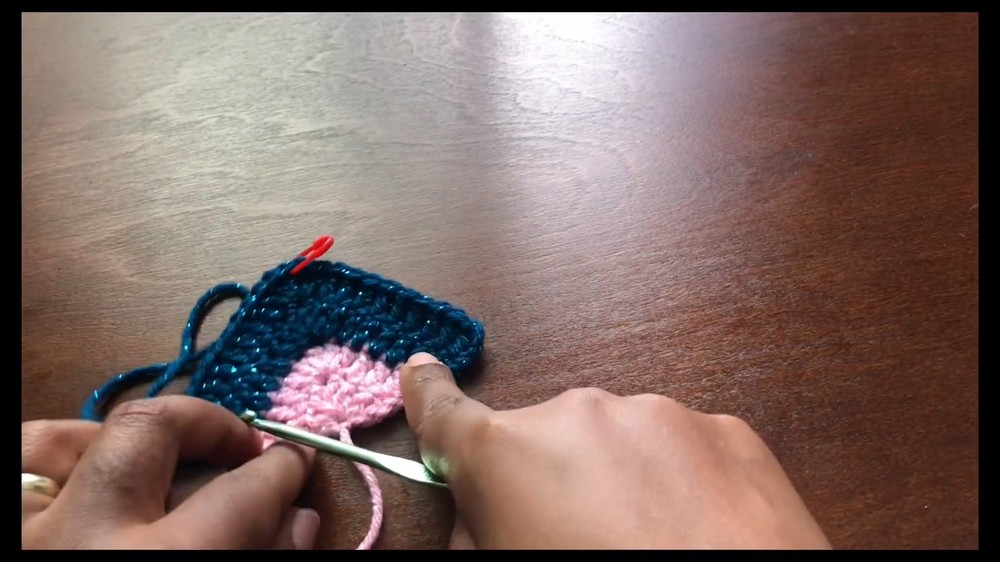
- Mark the 4th double crochet with a stitch marker as your center.
2. Increasing Rows to Create Triangle Shape:
- Row 2:
- Chain 3, turn your work, and make a DC into the same space where the chain is coming from (this creates an increase).
- Continue making 1 DC each stitch until the stitch marker.
- Remove the stitch marker and make 5 DCs into the marked stitch space (creating increases at the center).
- Mark the 3rd stitch of the 5 DC cluster with a stitch marker.
- Continue making 1 DC on each stitch until the last one, and make 2 DC into the last stitch (to increase at the edges).
- Row 3:
- Start by attaching the new color (if applicable).
- Repeat Row 2 instructions. Note: Always remember to mark the center stitch within your 5 DC cluster.
3. Continue Increasing Rows Until Desired Width:
- Repeat the same process until your triangle base reaches the desired measurement.
- Example from tutorial: 16 rows = 10.5 inches (adjust row count for size preference).
4. Separating for V-Neck:
Once your triangle base is wide enough, you will split into two parts to form the v-neck line.
- Left Side of V-Neck:
- Attach yarn to the starting stitch.
- Start with chain 3 and make an increase at the beginning.
- Continue following the increasing method from Row 2.
- Stop at the stitch marker (center stitch), and leave the next stitch unworked. Continue increasing at the outer edge only.
- Complete the desired number of rows for your v-neck. Example: The tutorial followed 12 rows on each side, measuring about 15 inches wide.
- Right Side of V-Neck:
- Using the same method, repeat for the opposite side to ensure symmetry.
5. Create Chains for Ties:
At the edges of the v-neck triangle points, you'll create chains to make a tie-back closure.
- Attach yarn at the edge of the triangle.
- Chain 3, make a DC into the same space.
- Chain 3 again, then yarn over and make 1 DC between the previous chain & DC.
- Repeat this process to form a clustered chain long enough to wrap around your waist or tie behind your back.
6. Pom-Pom Bottom Edge:
For the pom-pom design at the bottom:
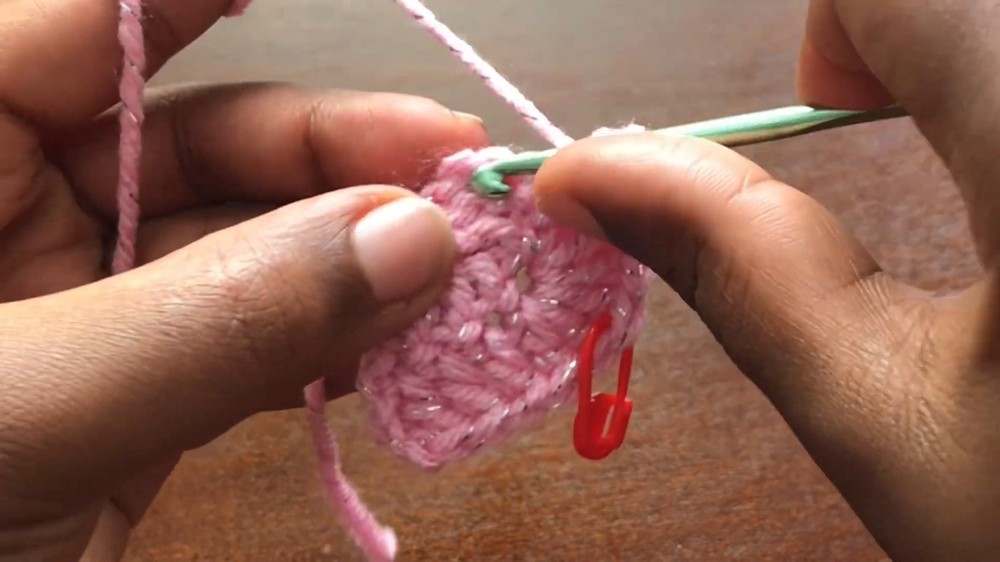
Step 1:
- Switch to the smaller hook (3.75mm) for precise pom-poms.
- Attach yarn at the second cluster of chains along the bottom edge.
Step 2:
- Pom-Pom Formation:
- Chain 6 and hold the last chain.
- Add 3 additional chains.
- Yarn over and skip 2 chains, insert hook into the 3rd, and pull up a loop to create 4 DCs in the same chain (leave the last loops on hook).
- Once you have 5 loops on hook, yarn over and pull through all.
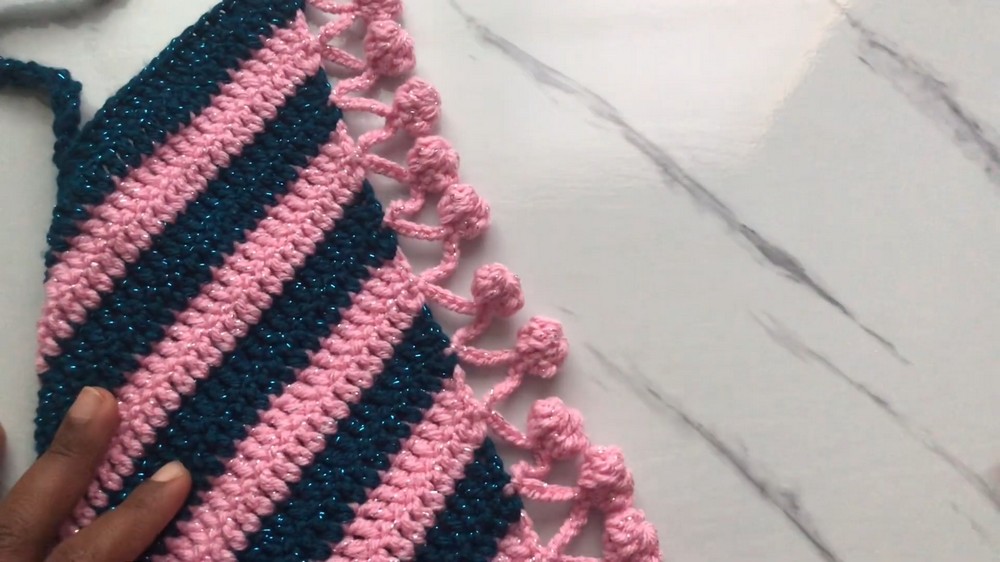
Step 3:
- Chain 3, yarn over, and make 4 DC together in the last chain of the pom-pom cluster. Pull through all loops to create the second side of the pom-pom.
Step 4:
- Slip stitch to secure and chain 6 again to skip to the next row cluster.
- Repeat pom-pom creation until you finish the bottom edge.
Customization and Tips:
- Change Colors: Experiment with color blocks or ombre effects for a personalized touch.
- Adjust Size: Add or decrease rows depending on preferred width or depth.
- Shorten V-Neck: If deeper coverage is preferred, reduce the v-neck row count.
- Pom-Poms: For larger pom-poms, increase chain lengths during formation.
Special Techniques
- Cluster Stitch for Pom-Poms (4 DC together in same stitch).
- Use stitch marker to keep track of center increases throughout, especially for beginners.
- Secure slip stitches tightly to avoid unraveling.
Conclusion
This free crochet pom-pom top pattern produces a lightweight, customizable, and playful design suitable for summer outfits or layered looks. Whether you're crafting this for yourself or as a thoughtful handmade gift, the unique pom-pom details and flattering v-neck will stand out in any wardrobe.
Important Remarks:
- Final Look: Lightweight, symmetrical top with charming pom-pom details along the bottom edge and adjustable tie-back strands.
- Care Instructions: Wash your top gently to maintain the pom-pom texture.