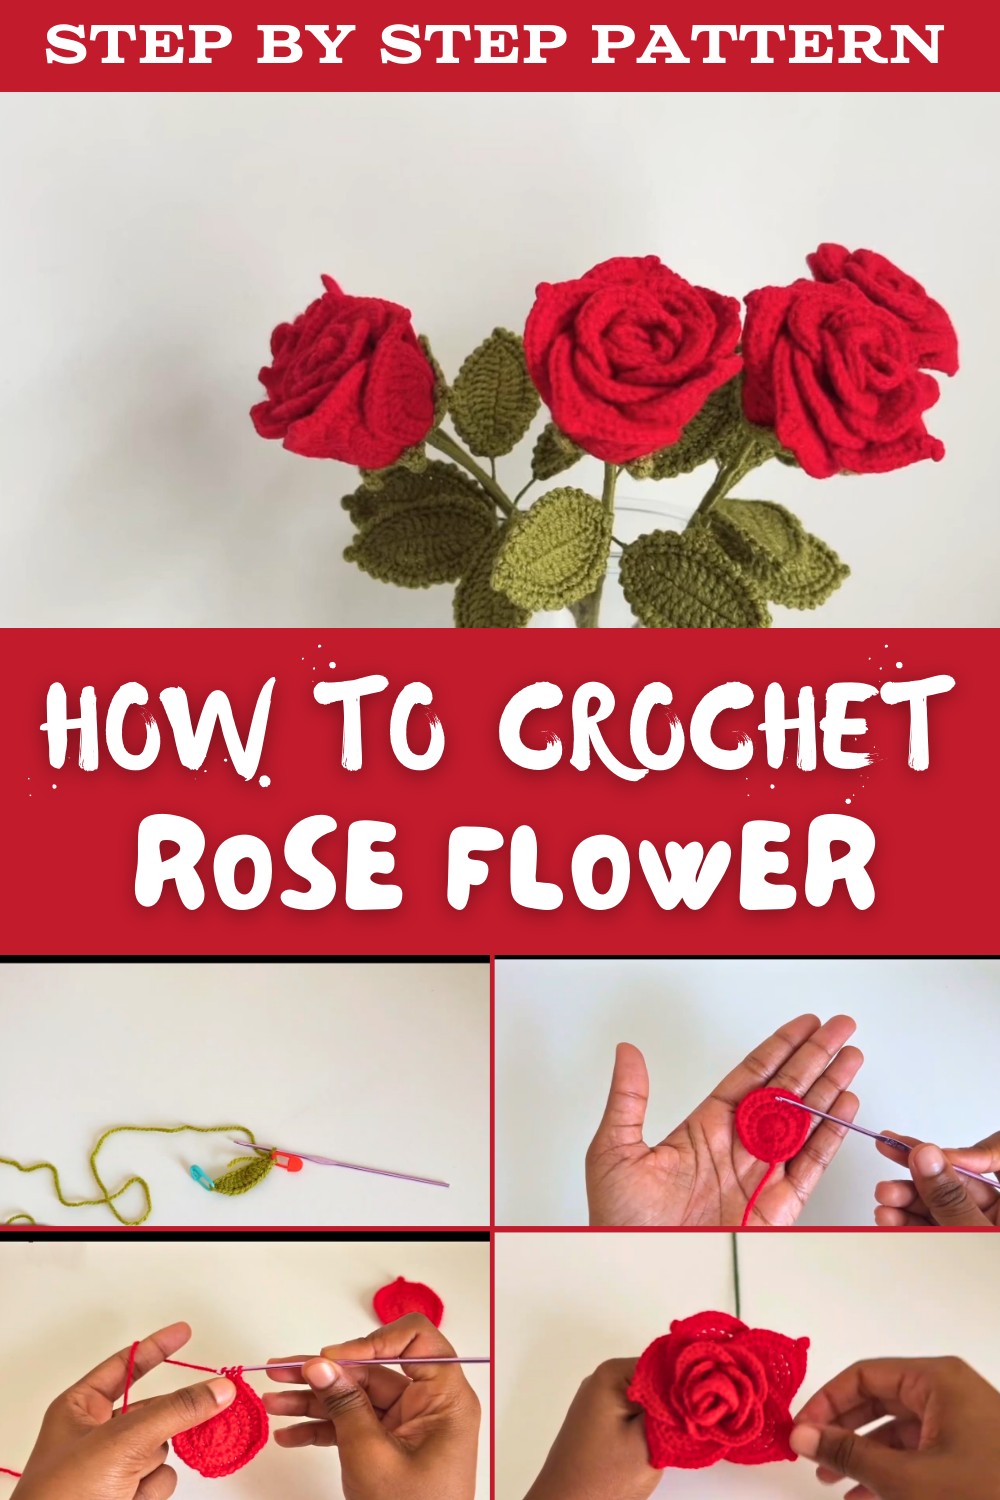
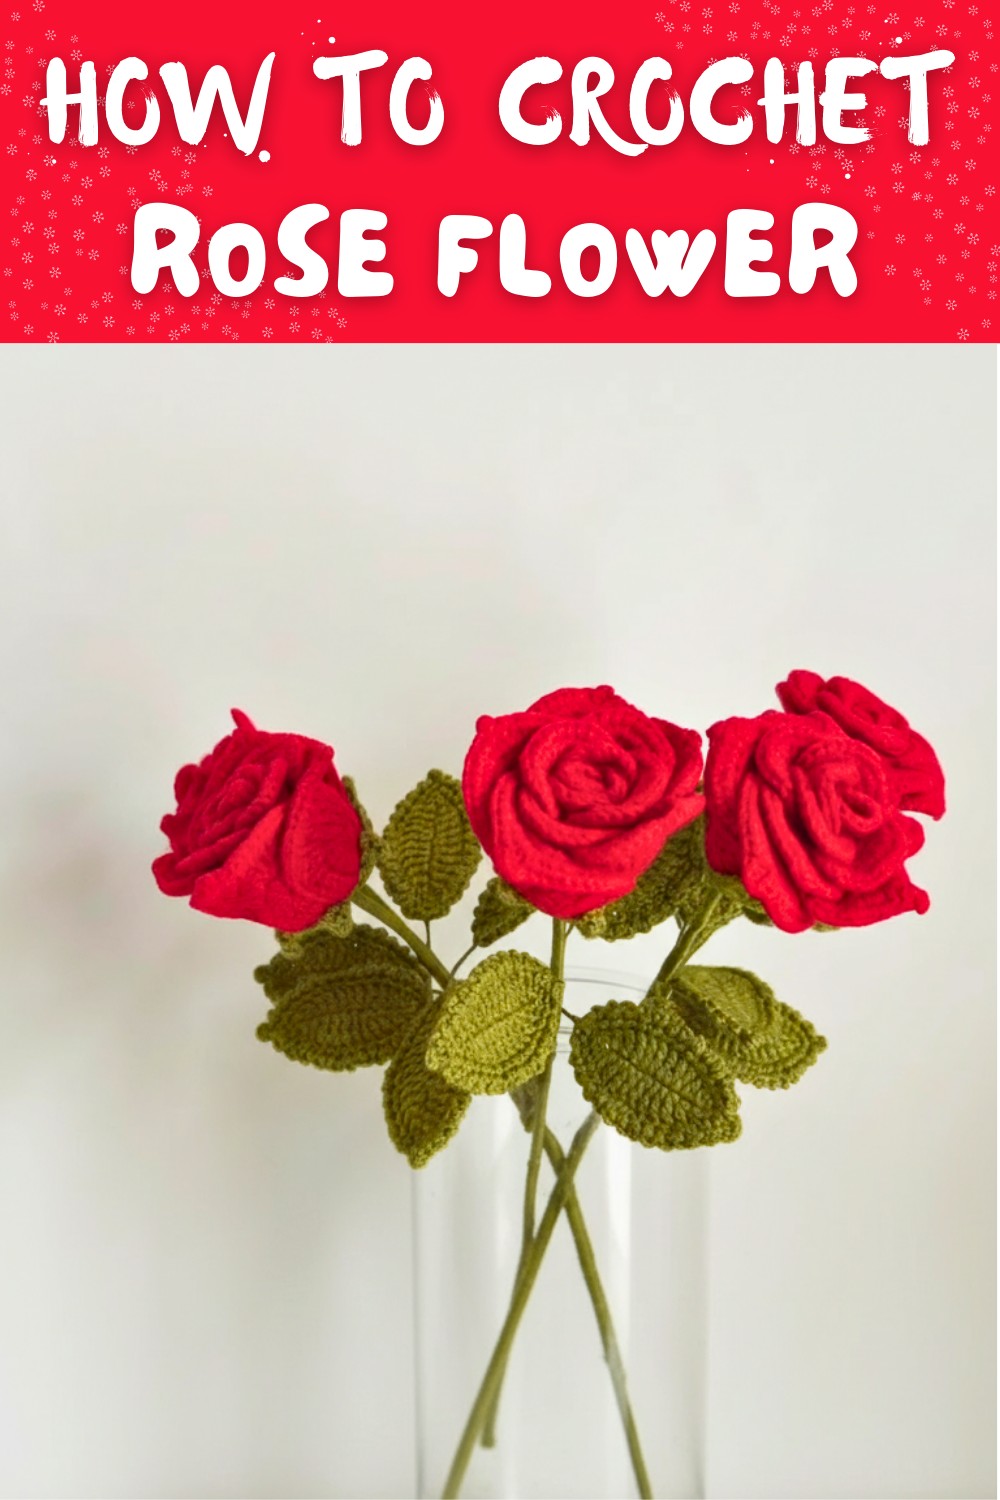
Free Crochet Rose Flower Pattern for Cute Accessories
Try this FREE Crochet Rose Flower Pattern to turn leftover yarn into charming accents for gifts, accessories, and simple home décor.
A small bundle of leftover yarn once turned into something unexpectedly beautiful on a quiet afternoon, showing how simple materials can hold real charm. While experimenting with textures and stitches, the idea of a Free Crochet Rose Flower pattern naturally came together, offering a quick and satisfying project for both beginners and experienced crocheters.
How to Crochet a Rose Flower Free Pattern Home Decor
This idea works well for adding a handmade touch to everyday items, hair clips, scarves, gift wrapping, or even home décor like cushion covers and wall hangings. It also fits perfectly as a thoughtful gift or a relaxing weekend activity. Using soft cotton yarn or bold acrylic shades helps style each rose differently, from soft, realistic tones to eye-catching accents.
Crochet Rose and Leaves Assembly Pattern
Skill Level
- Intermediate to Advanced
Finished Size
- Rose diameter: Approximately 4-5 inches, depending on your tension and yarn thickness.
- Leaf length: Approximately 4 inches.
- Floral stem length: 20 cm (customizable).
Materials Needed
Yarn:
- Two brands of yarn (familiar to South Africa):
- Choose any DK weight cotton or cotton blend yarn.
- Colors: Green for leaves/stem, Red or desired color for petals.
Hook Size:
- 3mm crochet hook.
Floral Wire:
- Craft Wire: Approx. 20 cm per leaf and 60 cm for floral stem (easily cut to size).
Additional Tools:
- Pair of scissors.
- Tapestry needle for weaving ends and sewing parts together.
- Stitch markers (optional for beginners but useful for marking rounds).
- Optional: Glue gun/glue sticks for assembly.
Gauge
- Pattern is forgiving, and specific gauge measurements are unnecessary due to the nature of its design. Simply maintain consistent tension for each component.
Key Abbreviations (US Terminology):
- ch: Chain
- sc: Single Crochet
- hdc: Half Double Crochet
- dc: Double Crochet
- tr: Treble Crochet (or Triple Crochet)
- inc: Increase (work 2 stitches into the same stitch)
- sl st: Slip Stitch
- sp: Space
- st(s): Stitch(es)
Special Notes:
- Craft Wired Leaves:
- Adding wire to leaves gives them structure and ensures they hold their shape when attached to the stem.
- Assembly Options:
- If glue guns are unavailable, yarn can be used to attach pieces securely.
- Customization:
- Petals can be made smaller/larger by adjusting the number of rounds or stitches.
- Add extra petals for a fuller rose.
Step-by-Step Crochet Pattern
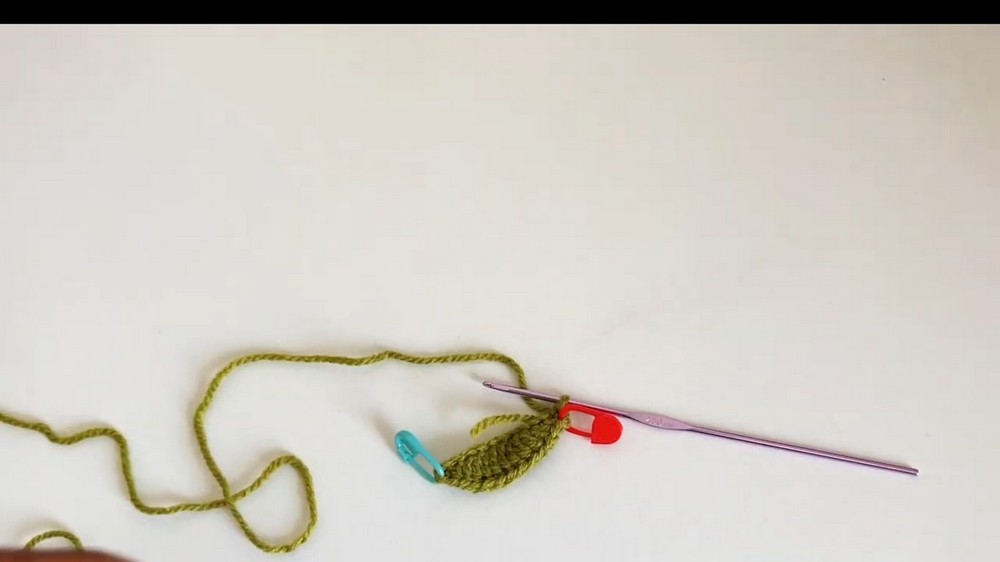
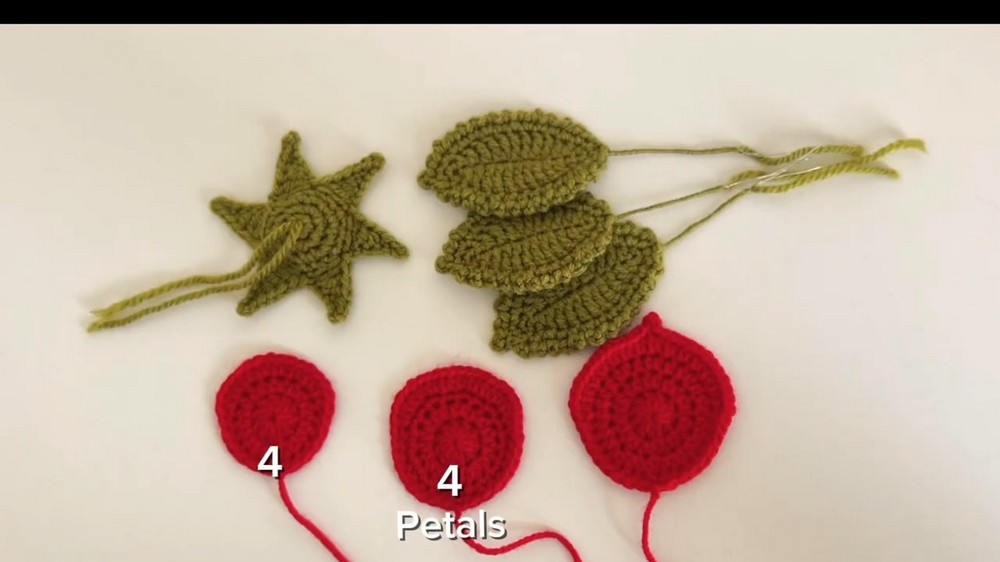
Part 1: Crochet Leaf
You will need to make 2-3 leaves.
Leaf Base (First Half):
- Start: Create a slip knot, then ch 12.
- Row 1: Work into chains as follows:
- 1 sc in the 2nd ch from the hook.
- 1 hdc in the next ch.
- 1 dc in the next ch.
- 1 tr in the next ch.
- 1 tr inc (2 tr in same ch) in the next ch.
- 1 tr in the next ch.
- 1 tr inc in the next ch.
- 1 dc in the next ch.
- 1 hdc in the next ch.
- For the last ch: Work 3 sc, marking the middle sc with a stitch marker.
Leaf Base (Second Half):
- Mirror the stitches you worked on the first half (over the loose yarn for clean finish):
- 1 hdc in the next ch.
- 1 dc in the next ch.
- 1 tr inc in the following ch.
- Continue the sequence until the end.
- Row Completion: Slip stitch into the first sc to close the round.
Leaf Border and Wire Insertion:
- Cut a piece of 20 cm floral wire. Insert it into the loop and fold it along the outline of the leaf.
- Work the border as follows:
- Ch 1, work 1 sc followed by ch 2 in each st until the tip of the leaf.
- Remove stitch marker. In the leaf tip, work:
- 1 sc, ch 3, sl st in the front loop of the sc (this creates the picot point).
- Continue the border pattern (1 sc followed by ch 2) along the other side.
- Upon reaching the base, bind off and leave a long tail. Wrap the wire with the leftover yarn for neatness.

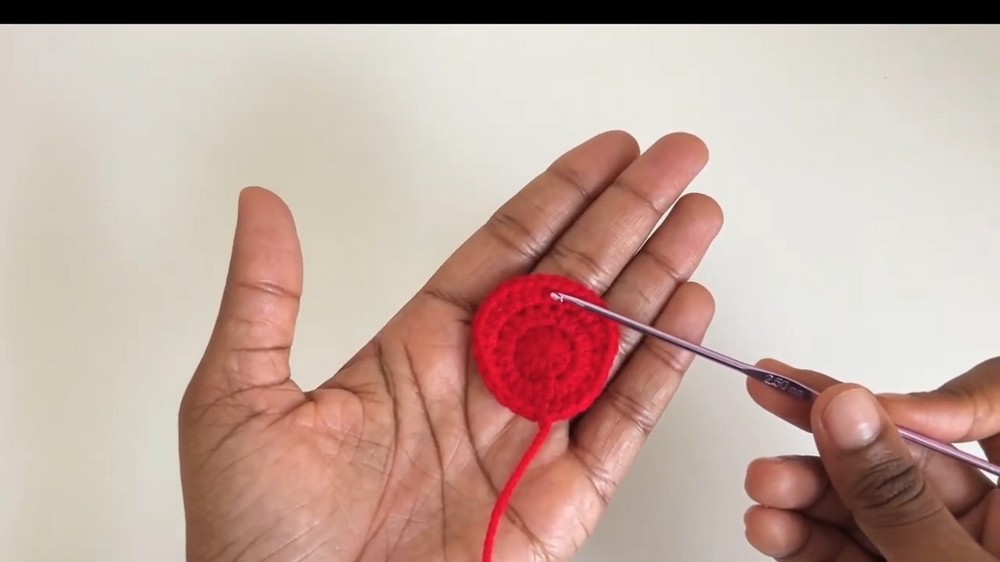
Part 2: Center Taurus
- Start with Magic Ring: Work 6 sc into the ring.
- Round 1: Increase in each stitch (12 sc total). Place a stitch marker in the first stitch for each round.
- Round 2: (1 sc in next st, 1 inc in next st); repeat until end of round (18 sc total).
- Round 3: (1 sc, 1 sc, inc) pattern until end (24 sc total).
- Round 4: Work 1 sc into each st, stopping after a smooth, flat surface is created.
- Bind off and weave in ends.
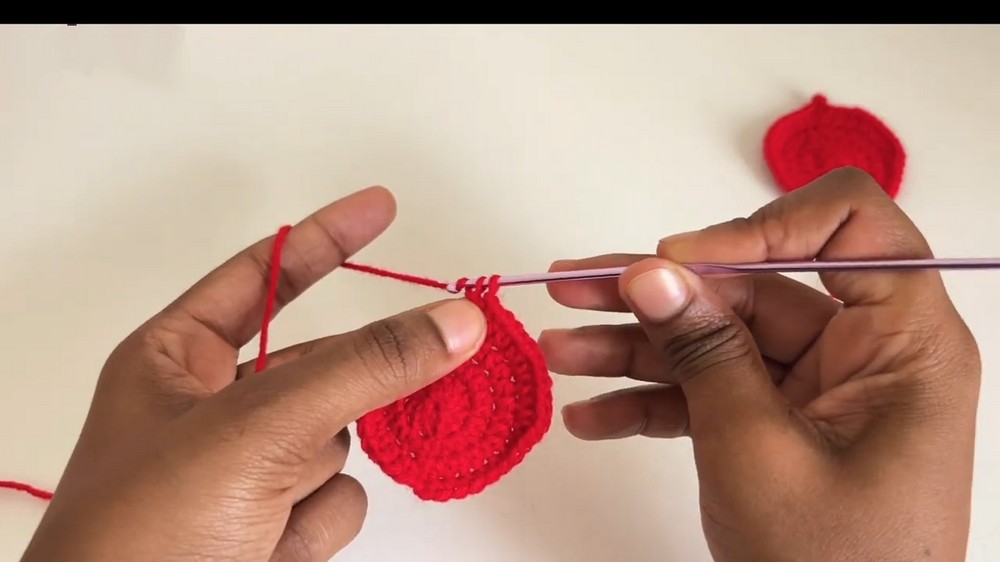
Part 3: Petals
Small Petals:
- Magic Ring: Start with a magic ring, ch 2, and work 10 dc inside. Close with a sl st into the first dc.
- Round 2: (1 hdc into same st, 1 hdc inc in next st) around (20 hdc total).
- Round 3: Begin with 6 sc, then (1 hdc inc in next 8 sts), followed by 6 sc.
- Bind off and leave a tail for assembly.
Make 4 small petals.
Medium Petals:
- Repeat the first 2 rounds of Small Petals.
- Round 3: (1 sc in next 2 sts, 1 sc inc in next st) for 8 reps, then 1 sc in each remaining st.
- Round 4: Work 9 sc, then (hdc inc in next 10 sts), followed by 9 sc.
Make 4 medium petals.
Large Petals:
- Repeat the first 3 rounds as for Medium Petals.
- Round 4: Begin with 8 sc, (1 hdc, 1 dc in the next st, chain 3, 1 sl st in the front loop of the dc, 1 dc and 1 hdc in the same st) in subsequent stitches, making the picot point.
- Bind off and leave a tail for sewing.

Make 5 large petals.
Part 4: Assembly Instructions
- Prepare the Stem: Use a piece of floral wire (60 cm) and bend one end to secure.
- Attach Petals: Start with small petals and wrap (or sew) them carefully around the stem's top. Progressively add medium and large petals, securing tightly with yarn or glue.
- Position Leaves: Secure leaves slightly down the wire stem using yarn or glue.
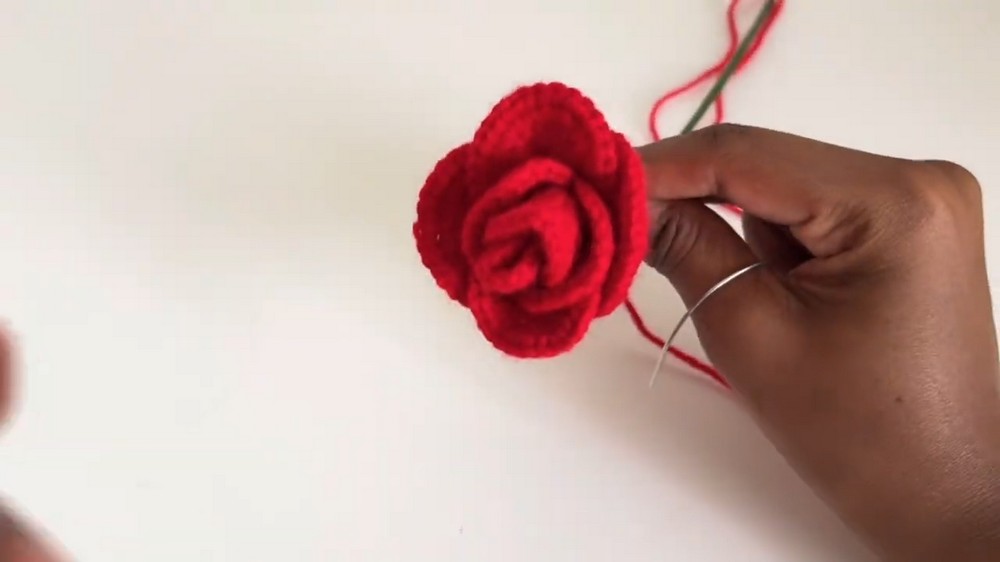
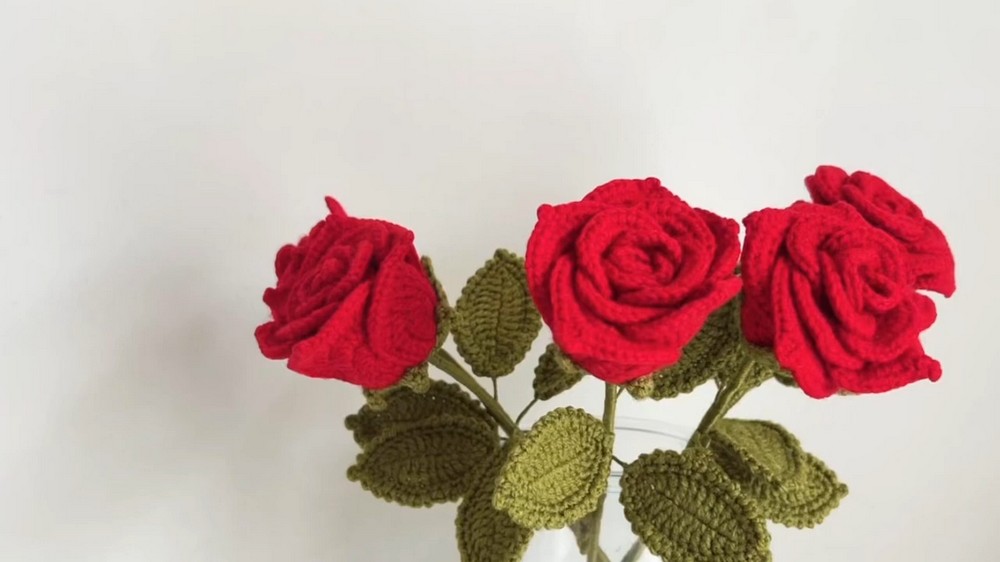
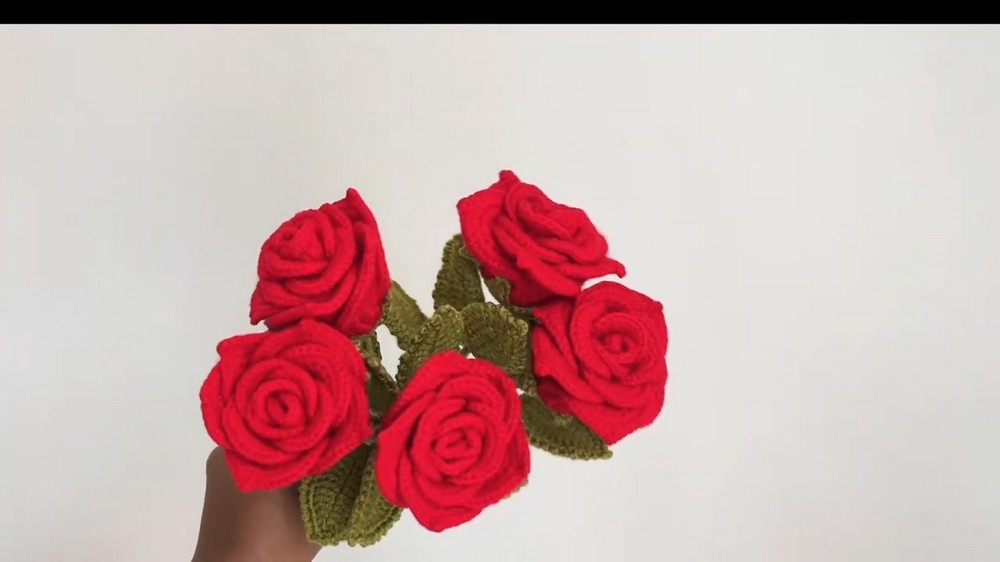
Conclusion
The Crochet Rose is now complete! This lifelike project is stunning for bouquets, home décor, or gifts. The structured petals and leaves provide the perfect combination of beauty and utility. Completing this project will leave you with an elegant and everlasting rose.
Pattern Adjustments and Tips
- Size Variations: Adjust the number of rounds or stitches to customize petal size.
- Stem Wrapping: Wrap floral wire with leftover green yarn for a natural look.
- Use Starch for Stiffness: Lightly spray petals and leaves to give them a firm shape!