
Free Crochet Ruffle Mesh Hat Pattern That Feels Fresh and Fun
Let your summer outfits bloom with this Free Crochet Ruffle Mesh Hat Pattern that blends playful ruffles with effortless handmade beauty.
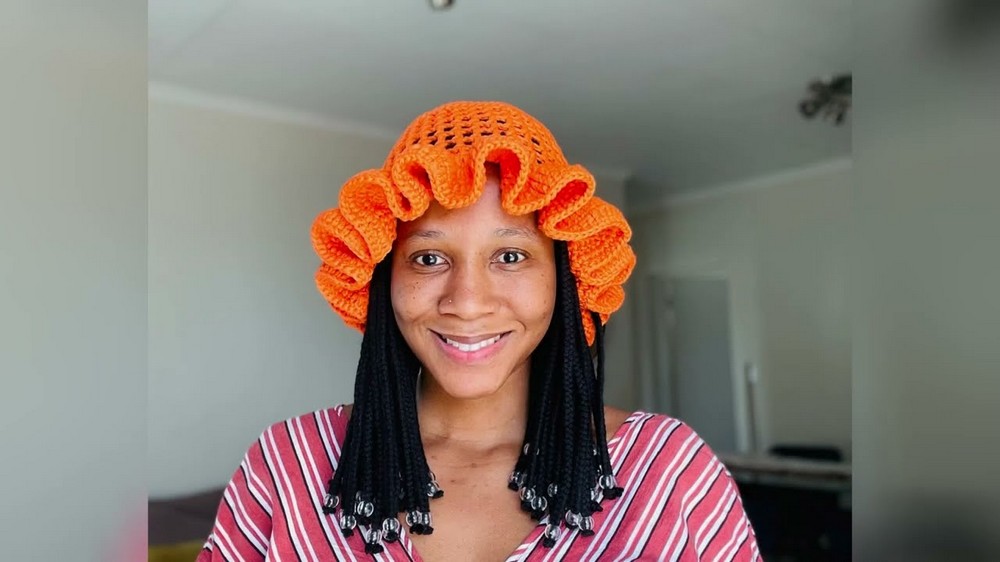
Light, soft, and absolutely gorgeous, this hat is perfect for bright, warm days. It has a delightful ruffle edge and a cozy, airy mesh design that feels playful and keeps you cool. With fresh, cheerful colors like orange and pink, it's a stylish way to add some brightness to your outfit. And the best part? You can choose your own favorite colors to make it uniquely yours. The flowing ruffles add a touch of elegance, giving it a fun, trendy vibe, while the breathable mesh ensures it's never too hot to wear. Whether you're heading to the beach, strolling in the park, or relaxing outside, this hat is the perfect companion for sunny adventures.
Free Crochet Ruffle Mesh Hat Pattern to Complete Warm Weather Looks

The pattern is beautifully simple and easy to follow, making it perfect even if you're new to crochet. All you need is some yarn, a crochet hook, scissors, and a little creativity. You'll love how quickly it comes together, thanks to the use of doubled yarn strands, which speed up the process. And don't worry about sizing - you can adjust it to fit anyone, from kids to adults.
With its light feel, fashionable look, and versatility, this hat is more than just a fun project - it's a piece of art you can wear. Whether you're making it for yourself or as a thoughtful gift, the ruffle mesh hat is a delightful way to brighten up any sunny day. Give it a try and enjoy creating something truly unique and beautiful.
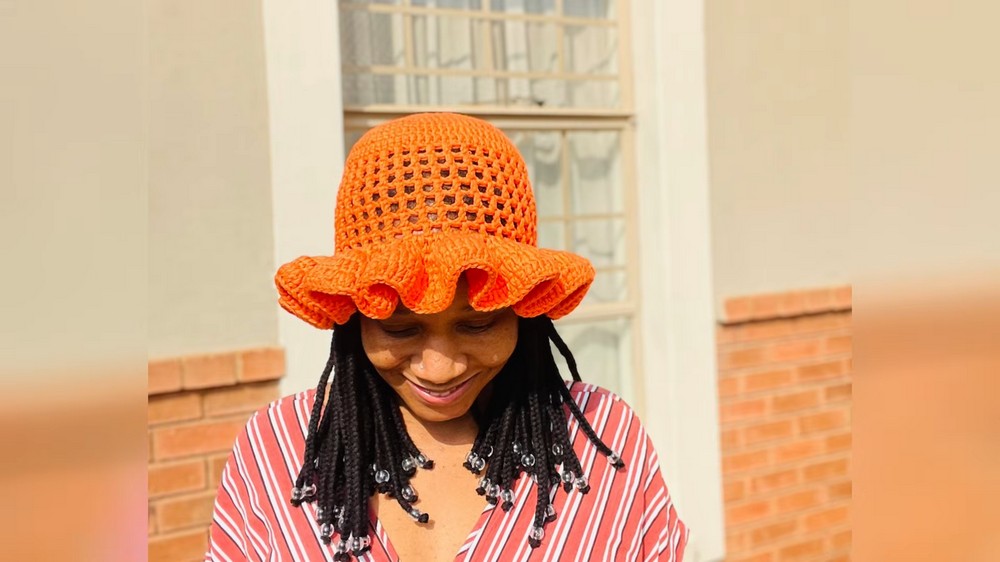
Crochet Ruffle Mesh Hat Pattern
Finished Size
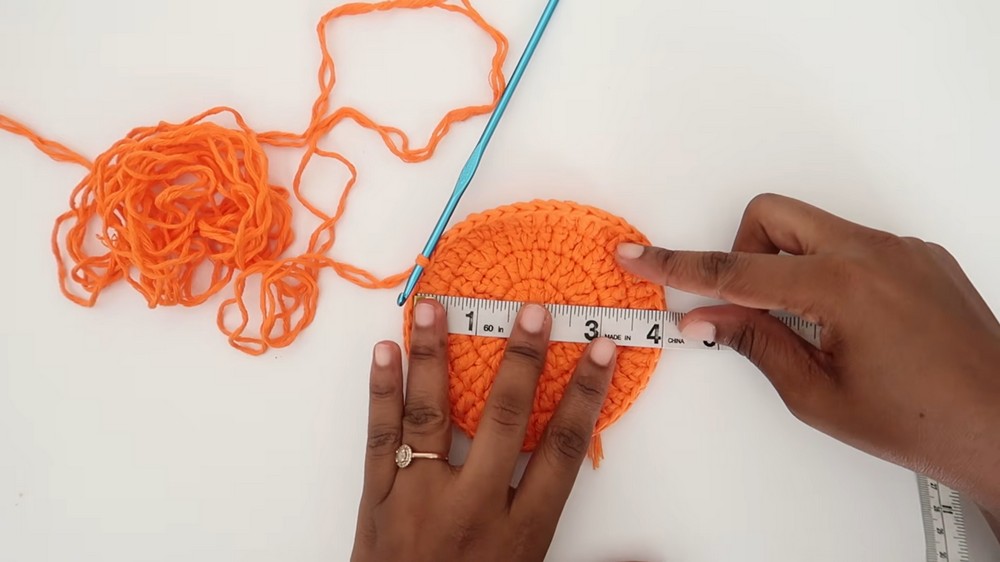
The hat is designed to fit a standard adult head circumference of approximately 22-23 inches (56-58 cm). The crown diameter measures 7 inches (18 cm), and the brim width can be adjusted based on personal preferences. This design is also customizable for different head sizes (instructions included in the customization tips).
Gauge
Gauge is not absolutely necessary but provides an estimate for accurate results.
- 16 double crochet (dc) in 8 rows = 4 x 4 inches (10 x 10 cm) using a 4 mm hook and doubled yarn strands. Adjust the hook size if your stitches are too loose or too tight.
Materials Needed
- Yarn:
- Sparkle Yarn (85% cotton, 15% polyester) or any suitable lightweight yarn.
- Colors used: Orange and Pink (two tone design), but feel free to customize with a solid or other combinations.
- Crochet Hook:
- 4 mm crochet hook (slightly larger than the recommended size if doubling yarn strands).
- Additional Tools:
- Measuring tape (to check dimensions).
- Pair of scissors.
- Tapestry needle (for weaving in ends).
Special Techniques Used
- Magic Circle:
A method to start crocheting in the round with a tightly adjustable ring. This technique makes the top of the hat neat and cohesive. - Double Crochet (dc):
The primary stitch used for creating the body, brim, and ruffle effect. - Slip Stitch (sl st):
Employed to join rounds seamlessly. - Increases:
Adding multiple stitches in one space to create a larger diameter or the ruffled edge on the brim.
Pattern Instructions
Crown (Top of the Hat)
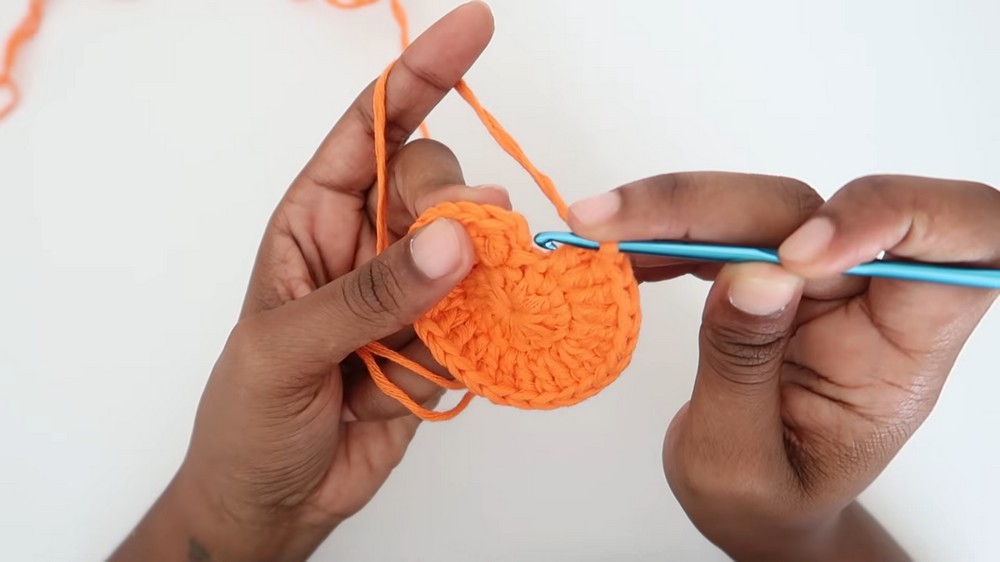
- Start with a Magic Circle:
To create the base, make a magic circle. Tighten it securely. - Round 1:
- Chain 2 (does not count as a stitch).
- Work 12 double crochet (dc) into the ring.
- Pull the tail of the circle to close the ring tightly.
- Join the round with a slip stitch (sl st) to the first dc. (12 stitches).
- Round 2:
- Chain 2.
- Work 2 dc in each stitch around the circle (increase in every stitch).
- Join with a slip stitch. (24 stitches).
- Round 3:
- Chain 2.
- Work 2 dc in the first stitch (increase), followed by 1 dc in the next stitch.
- Repeat the pattern of 2 dc, 1 dc around the circle.
- Join with a slip stitch. (36 stitches).
- Round 4:
- Chain 2.
- Start with 2 dc in the first stitch (increase), followed by 1 dc in the next 2 stitches.
- Repeat the pattern of 2 dc, 1 dc, 1 dc around the circle.
- Join with a slip stitch. (48 stitches).
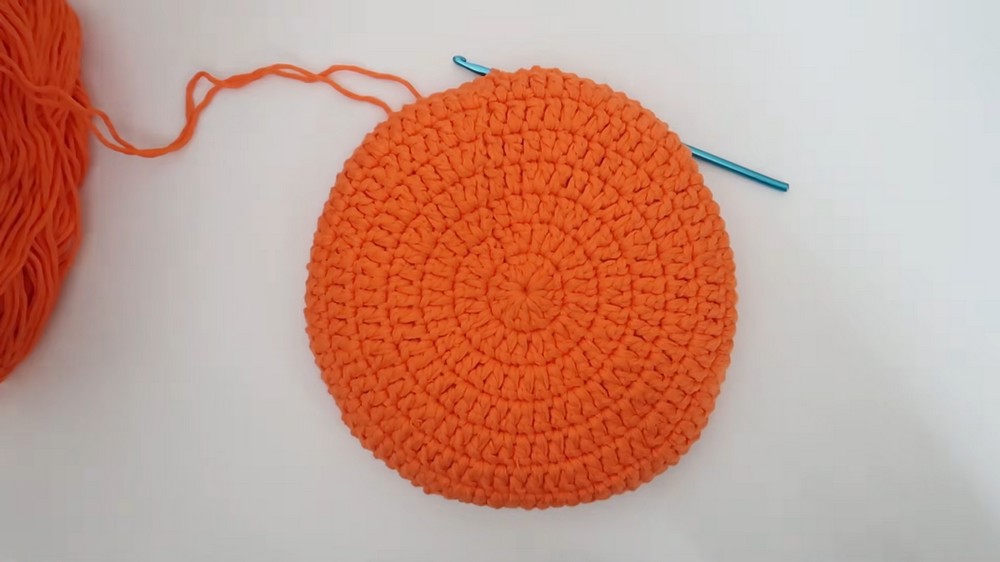
- Continue Increasing:
- Repeat the same pattern, adding one more single dc between increases for each subsequent round. For example:
- Round 5 = 2 dc in one stitch, 1 dc in the next 3 stitches.
- Round 6 = 2 dc in one stitch, 1 dc in the next 4 stitches, and so on.
- Measure the diameter after each round. Stop increasing when the diameter reaches 7 inches.
- Repeat the same pattern, adding one more single dc between increases for each subsequent round. For example:

Body (Mesh Section)
The mesh section creates the breathable and lightweight design.
- Round 1 (Solid Base):
- Chain 2.
- Work 1 dc in each stitch around (no increases).
- Join with a slip stitch.
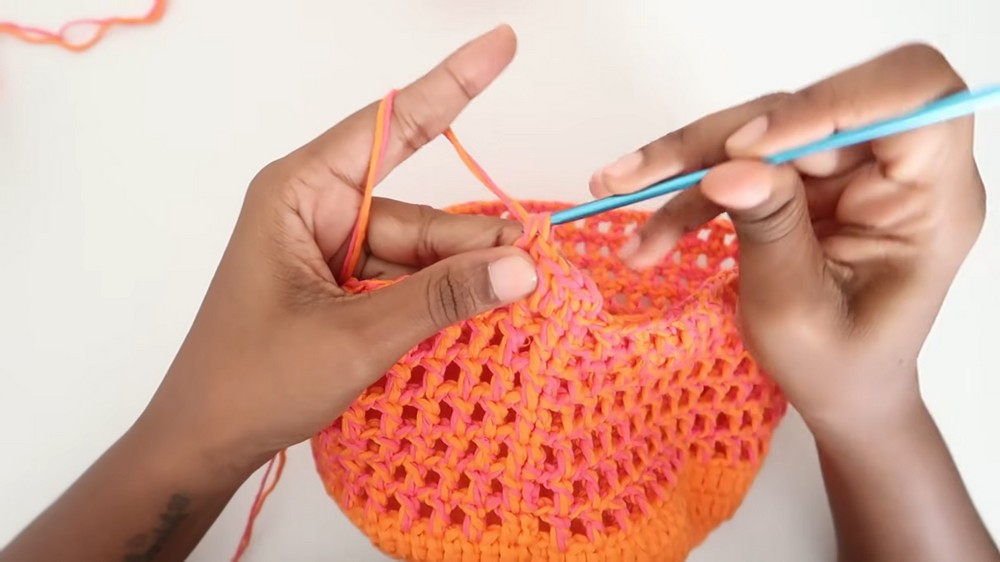
- Round 2 (Start Mesh Pattern):
- Chain 2.
- Work 1 dc in the same stitch, chain 1, skip the next stitch, and dc in the next stitch.
- Repeat the pattern (dc, chain 1, skip 1 stitch) for the entire round.
- Join with a slip stitch.
- Rounds 3-6:
- Chain 2.
- Work 1 dc on top of the previous dc, chain 1 to continue the mesh pattern.
- Repeat for four rows or until the body section measures 4 inches.
- Optional Color Change:
- Switch to the second color if desired by fastening off one strand of the original yarn and tying in the new color.
Brim (Ruffles Section)
- Round 1:
- Chain 2.
- Work 1 dc in the first stitch, then 2 dc in the next stitch (increase).
- Alternate 1 dc, 2 dc for the entire round.
- Join with a slip stitch.
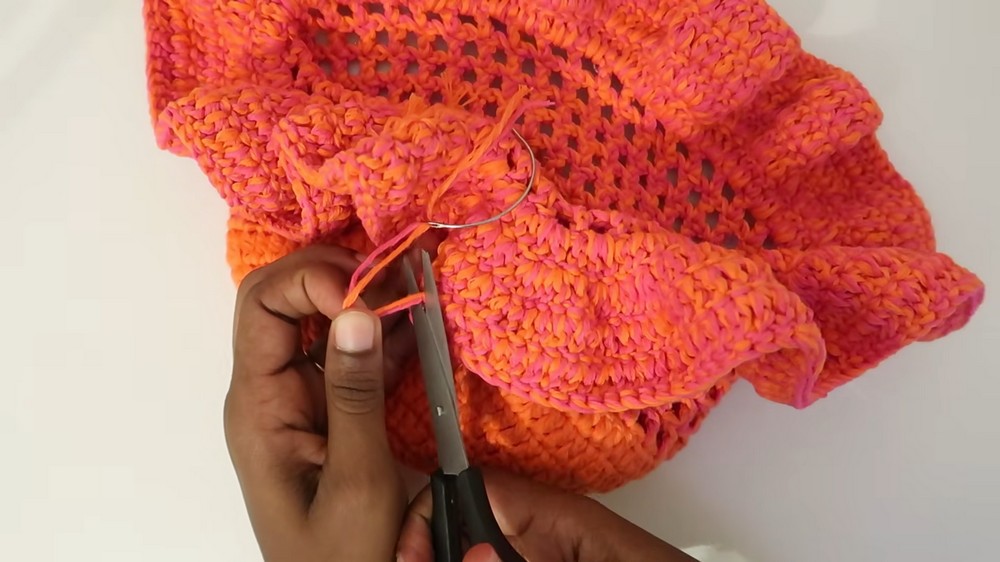
- Round 2 (Waves for Ruffles):
- Chain 2.
- Start with 1 dc in the first stitch, 2 dc in the next, and 3 dc in the third stitch.
- Repeat the pattern (1 dc, 2 dc, 3 dc) around to begin forming waves.
- Slip stitch to join.
- Rounds 3-4:
- Chain 2.
- Work 1 dc in each stitch with no increases.
- These rounds help enhance the structure of the ruffles and balance the design.
Finishing Instructions
Weaving in Ends:
- Use a tapestry needle to secure all the loose ends. Be sure to weave in the ends from the magic circle and where the color change occurs to prevent unraveling.
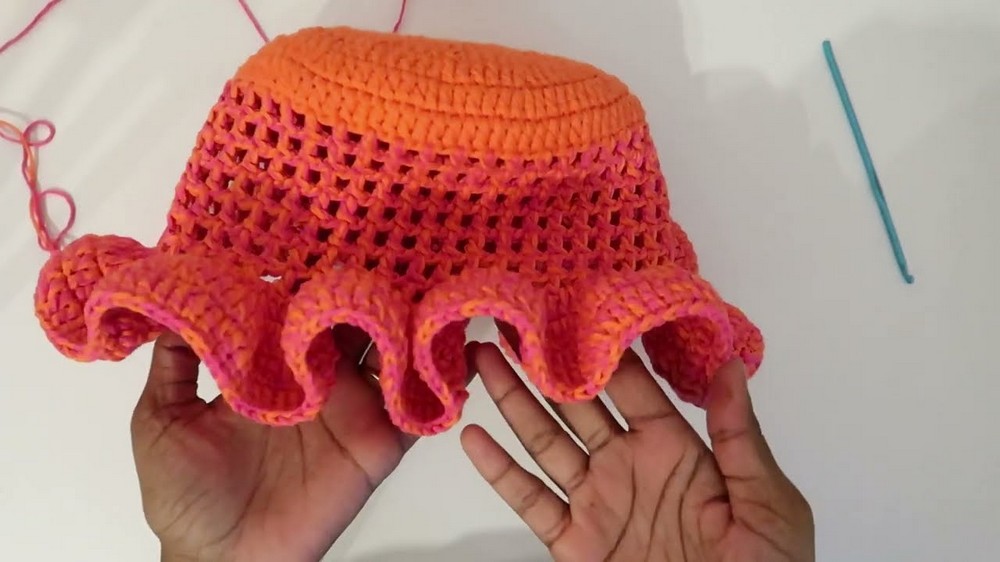
Blocking the Hat:
- Lightly steam or wet block the ruffles to shape them evenly and give the brim a neat curve. This simple step enhances the hat's overall appearance.
Tips for Customization
- Brim Width:
- To create a wider brim, add more rounds, following the pattern of 1 dc in each stitch (with no increases) after Round 4.
- Crown Size:
- Adjust the size of the crown by increasing more rounds (for larger heads) or fewer rounds (for smaller heads).
- Color Variations:
- Experiment with gradient yarns or multicolor schemes for a vibrant look, or stick to a single shade for a classic style.
- Thicker Yarn Option:
- Using a thicker yarn will speed up the process and create a chunkier, more textured aesthetic. Adjust the hook size accordingly.
Important Remarks
- Maintenance:
- Hand wash the hat in cool water with mild detergent, and lay flat to dry. Avoid using a dryer to keep the ruffles intact.
- Practical Use:
- The lightweight mesh and wide brim make this hat ideal for hot summer days, providing shade while allowing airflow.
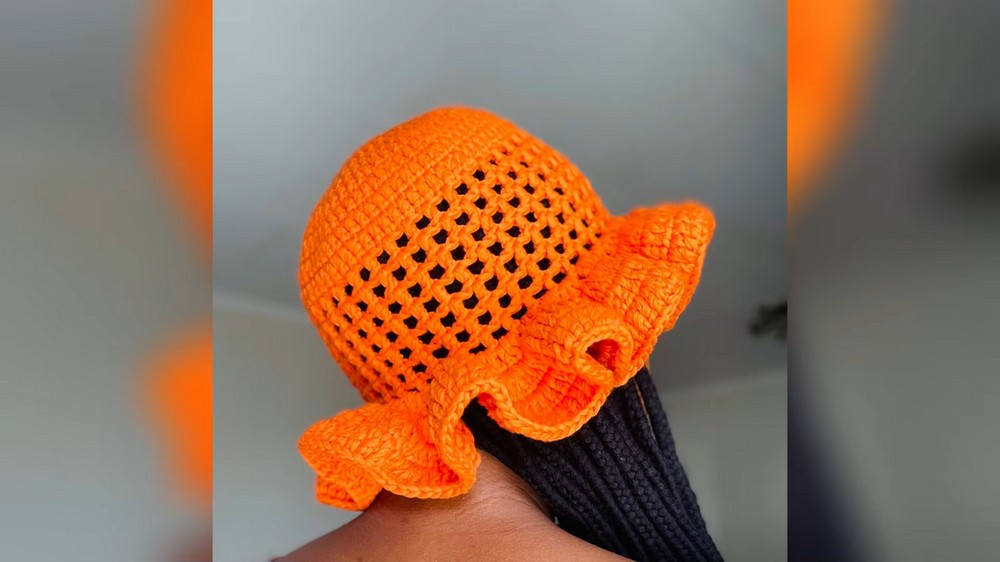
- Final Look:
- When complete, the Ruffles Sunny Hat has a unique, whimsical appearance with its dramatic brim and delicate body texture. It's the perfect accessory for picnics, beach outings, or even casual garden strolls.
Conclusion
The Ruffles Sunny Hat is a charming combination of style and simplicity. Its breathable mesh design, elegant ruffle brim, and customizable features make it an excellent project for crochet enthusiasts of all levels. Whether for yourself or as a thoughtful handmade gift, this hat is certain to turn heads and receive countless compliments.
By following this detailed guide and adding your personal flair, you'll create a charming accessory that is both fun to make and practical to wear.