
Free Crochet Tulip Vest Pattern With Simple Instructions
Bring tulips to life with this free crochet vest pattern that's easy, playful, and perfect for adding a colorful touch to your favorite outfits.
Making a lightweight and charming vest is a delightful way to capture the beauty of tulips with yarn. A Free Crochet Tulip Vest Pattern lets you craft an eye-catching outfit that blends floral-inspired designs with comfort and style. Known for its delicate tulip motifs, this vest adds a touch of nature to any wardrobe and is perfect for layering during the mild seasons.
Free Crochet Tulip Vest Pattern That's Easy & Fun to Make
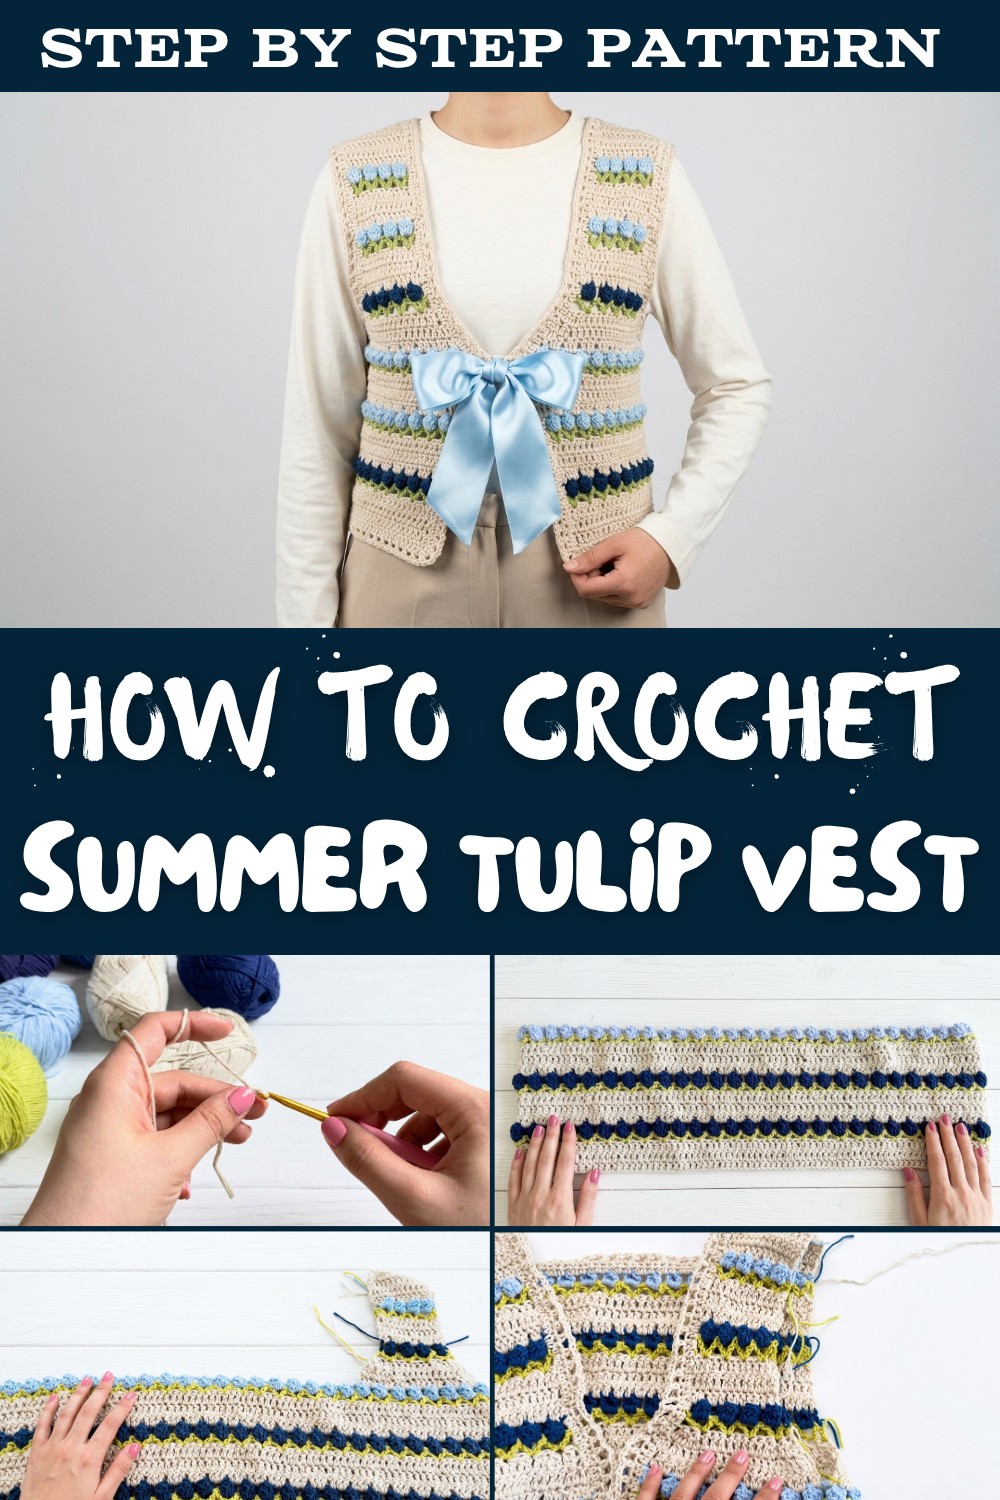
The vest is often made using simple yet elegant stitching techniques, making it easy for both beginners and experienced crocheters to enjoy the process. Its appearance can be enhanced with various colors, creating a vibrant or muted look depending on your preference. This piece is versatile, fitting casual outings or special occasions.
One of its unique features is the way it combines softness, breathability, and floral charm, making it a fashionable yet cozy addition to any outfit, whether worn with jeans or over a dress.

Tulip Stitch Crop Vest
Materials
- Yarn: Sport (Fine)/DK/Light Worsted weight Cotton or Cotton-Acrylic blend yarn in:
- Main color (MC - Beige/off-white): ~150g for size S/M
- Green (Tulip Leaves): Small amount
- Blue (3 shades, for tulip flowers): Small amounts each for tulip rows
- Crochet Hook: 4.0 mm (US G-6) (or size for gauge)
- Scissors
- Yarn needle
- Stitch markers (optional)
- Ribbon: ~1.5 meters (your color choice, 1 cm wide)
Gauge
18 dc x 8 rows = 10 x 10 cm (4" x 4") slightly stretched
(Adjust hook/yarn to match this gauge. Vest is designed to be slightly loose and cropped-add or subtract chains in multiples of 2 to adjust width.)
Vest Sizing & Fit
- Written for finished bust circumference of approx. 92 cm (Small/Medium).
- For a custom size: work a foundation chain in even number of stitches to desired bust or underbust measurement plus ease.
- Length is easily customizable by adding/removing rows.
Abbreviations & Special Techniques
- ch: chain
- sl st: slip stitch
- sc: single crochet
- hdc: half double crochet
- dc: double crochet
- rep: repeat
- st(s): stitch(es)
Special Techniques:
- Tulip Cluster (Flower): 5 half double crochet (hdc) worked into a "V" space (ch1-sp), then the working loop is drawn through the first hdc st (making the flower pinch to the base).
- V-stitch (Leaf row): (dc, ch1, dc) all in the same st or ch-sp.
Step-by-Step Instructions
1. Body Foundation & Lower Band
- Identify bust circumference. For 92 cm, make foundation chain of 124 ch (or any even number to fit your measurement, slightly stretched).
- Row 1: In 4th ch from hook, dc. Dc in each ch to end. Turn.
- Rows 2-3: Ch 3 (counts as dc), dc in each st across. Turn.
(You have 3 rows of dense double crochet; this forms the lower band.)

2. Tulip Leaf Row (Green)
- At end of Row 3, before last yarn over, change to green.
- Row 4: Ch 3, turn. Skip 1, (dc, ch1, dc) in next st (V-stitch made), skip 2 sts, rep across. Last st: dc in final st.
- Tip: Take the beginning tail with you to weave in as you go.

3. Tulip Flower Row (First Blue Shade)
- Switch to darkest tulip color on last y/o of previous row.
- Row 5: Ch 4 (3 for height, 1 to move over). Work tulip cluster in each ch-1 sp:
a. (5 hdc) into ch-1 sp
b. Remove hook from working loop, insert hook into the first hdc made, pick up working loop and pull through-forming a "pinched" petal/cluster.
c. Ch 2, work next cluster in the next ch-1 sp.
d. Continue across.
e. End with one dc in last st.
4. Body Section (Beige, Filling)
- Change back to main color (beige/off-white).
- Rows 6-8: Ch 3, turn. Dc in each st and in each ch-sp (ensure you're working "around"/through the flower base spaces as needed).
- Repeat for a total of 3 rows plain dc, maintaining st counts.
5. Repeat Tulip Motif Sequence
- Work another leaf row (Green), another row of tulip flowers (Medium or Light blue, or use the same/different colors for an ombre or multi-color effect), then 3 rows plain dc between each tulip row.
- Repeat sequence as necessary to build the height of your vest.
- Example: 3-4 motifs for a cropped vest; add more for extra coverage.
6. Shaping Front "V" & Armholes
(After completing body height and desired number of tulip rows)
A. Splitting for the Fronts and Armhole shaping:
- Mark ¼ of the width on both sides for armhole opening.
- Work each front section separately.
- On row after last full dc row, work front with decreases for the V and underarm as follows:
- Ch 3, turn. Work "dc2tog" (decrease, see below) into first, second and third sts, dc to last 3 sts, "dc2tog" over last three.
- Repeat 2-3 times, then continue even for a few rows (about 14 sts remain for each shoulder).

dc2tog: Yarn over, insert into next st, draw up loop, yarn over pull through 2; repeat into next st. Yarn over, pull through all loops.
- The front sections are made separately; repeat shaping/sizing so they match. Repeat on opposite front from opposite side (work from WS).
B. Back:
- Returning to main panel, skip same number of sts on each side as fronts.
- Work in pattern (dc) to match row count, maintaining same number of stitches as finish of each front.
- Shape shoulders as per desired length-should be equal to front.
7. Joining Shoulder Seams
- With RS facing, join front and back shoulder seams using slip stitch, single crochet, or whip stitch, making sure the "V" angle and shoulders match.
- Only join top 14 sts (or your final shoulder count) on each end.
8. Edging & Armhole Borders
A. Lower Border and Body Edging:
- Attach beige yarn at any lower edge seam.
- Round 1: Work hdc or dc evenly around all edges including hem, armholes, and neckline.
- In corners, work 2 hdc/dc in same st for smooth turn.
- Tip: For a clean finish and a little more width, work 2 hdc in each side-row end.
- Optional (for ribbon threading): On neckline and front edges, work a second round as [(hdc, ch 2, skip 1)] repeatedly; this forms small spaces for threading a ribbon closure or bow.
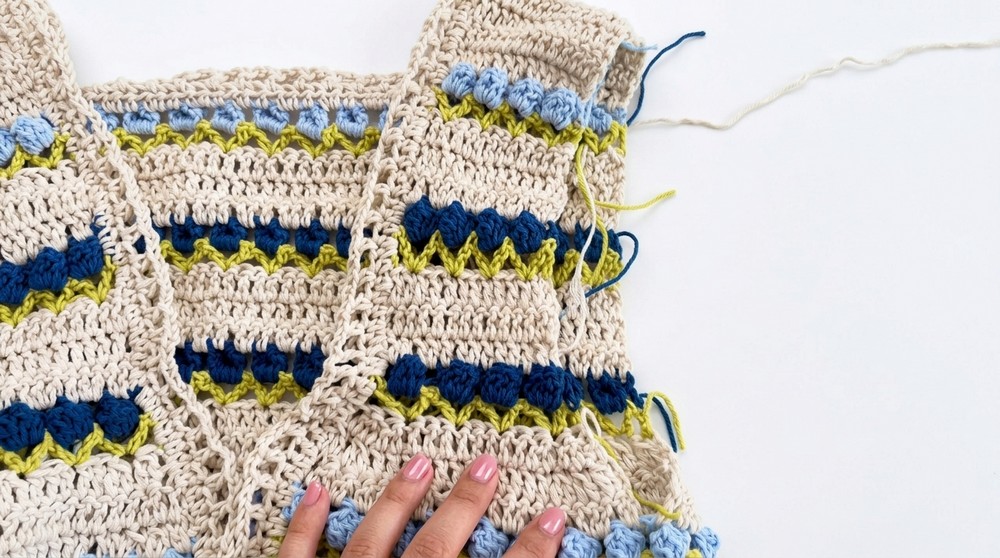
B. Armholes:
- Work 1 round of hdc or sc evenly around each armhole; increase as needed at bottom corners for a smooth shape.
- If desired, add a second round as for body, or a simple scallop (see suggestions).
9. Finishing Touches
- Weave/weft in all ends neatly.
- Block vest using steam-hold iron above fabric, shape edges and corners with hands to set the border and square the vest for a professional finish.
- Thread ribbon through the front eyelet/space edging, center as desired, and tie in a bow.
- Add additional ribbons for closure at hem, armholes, or sides for an adjustable fit.
- Try on and adjust.
Final Words & Tips for Maintenance
- Washing: Handwash or gentle cycle with cold water. Lay flat to dry; do not wring or twist.
- Blocking: After every wash, steam or reshape the vest to maintain crisp tulips and straight, neat borders.
- Storage: Fold loosely; do not hang for long term to avoid stretching.
- Customization: Use any color palette; modulate number of rows for desired length. The "V" can be made deeper or higher as preferred.
- Border Variations: Try a shell, crab stitch, or picot edge for added charm.
- Got yarn tails? Weave them into the border rounds for extra security.
Special Techniques Referred
- Tulip Cluster:
- Five hdc into next ch-1 sp, drop loop from hook, insert into first hdc of cluster, pull dropped loop through to complete petal.
- Decreasing for V-neck/armhole:
- Work "dc2tog" or "dc3tog" (double crochet 2 or 3 together) for elegant sloping.
- Eyelet Band for Ribbon:
- (hdc, ch 2, skip 1) along edge to create regular holes for ribbon threading.
Result
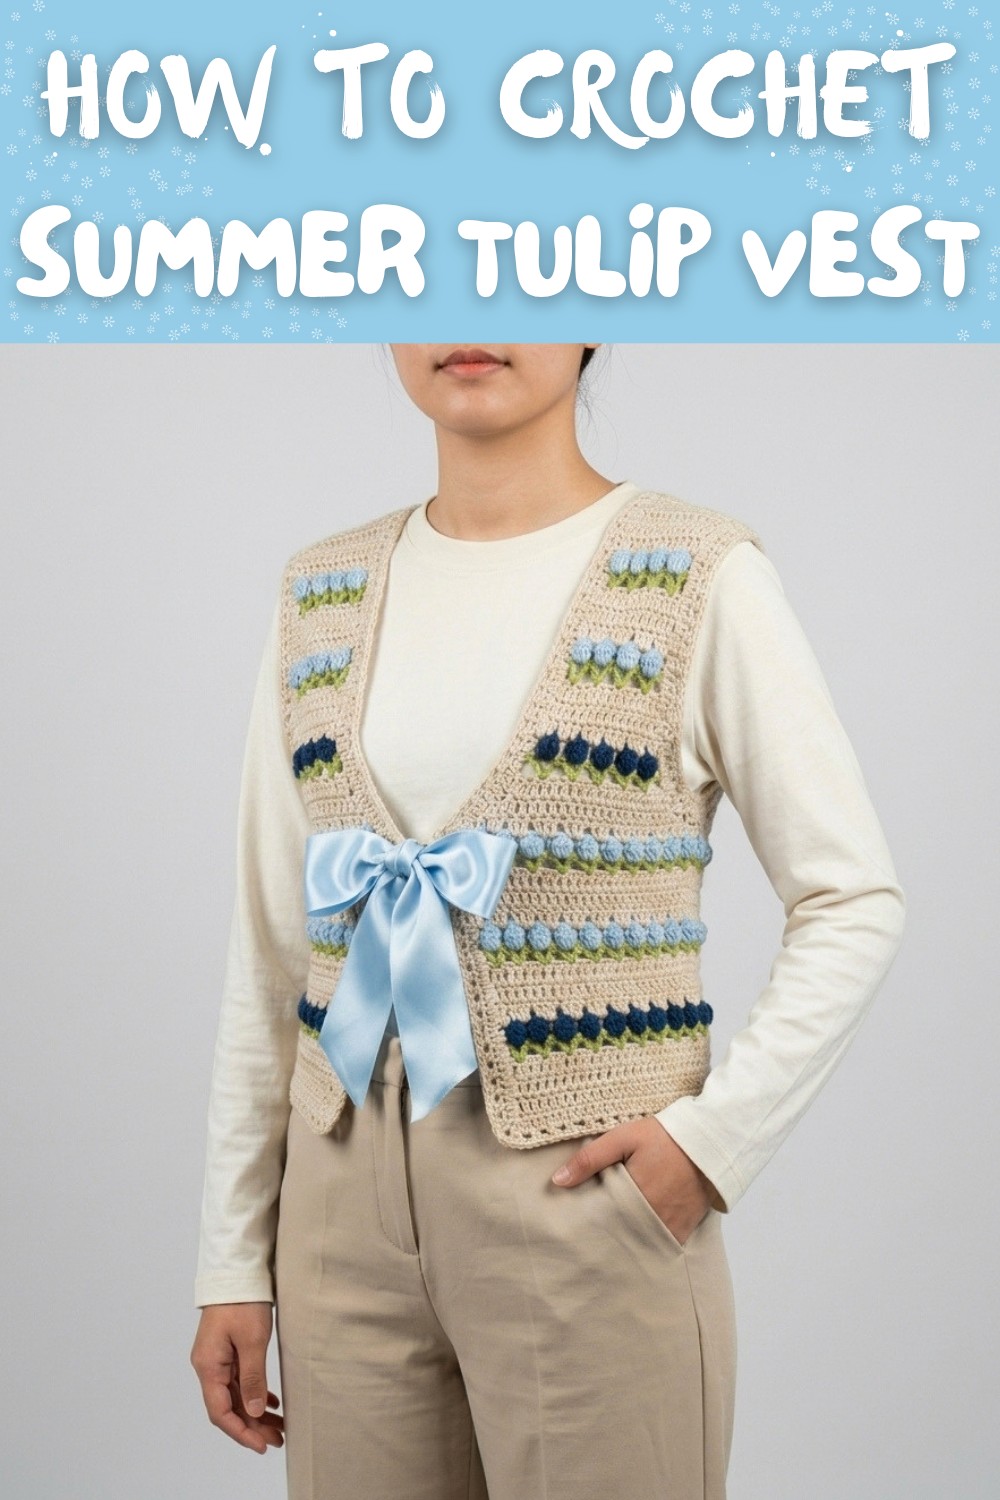
You now have a soft, light, and beautifully textured tulip vest, perfect for layering over shirts, dresses, or wearing alone on spring days. The raised flowers and ribbon closure add a sweet, vintage touch and can be adapted to your favorite color combinations. Handcrocheted items like this grow softer and more beautiful with care-wear and cherish yours for seasons to come.