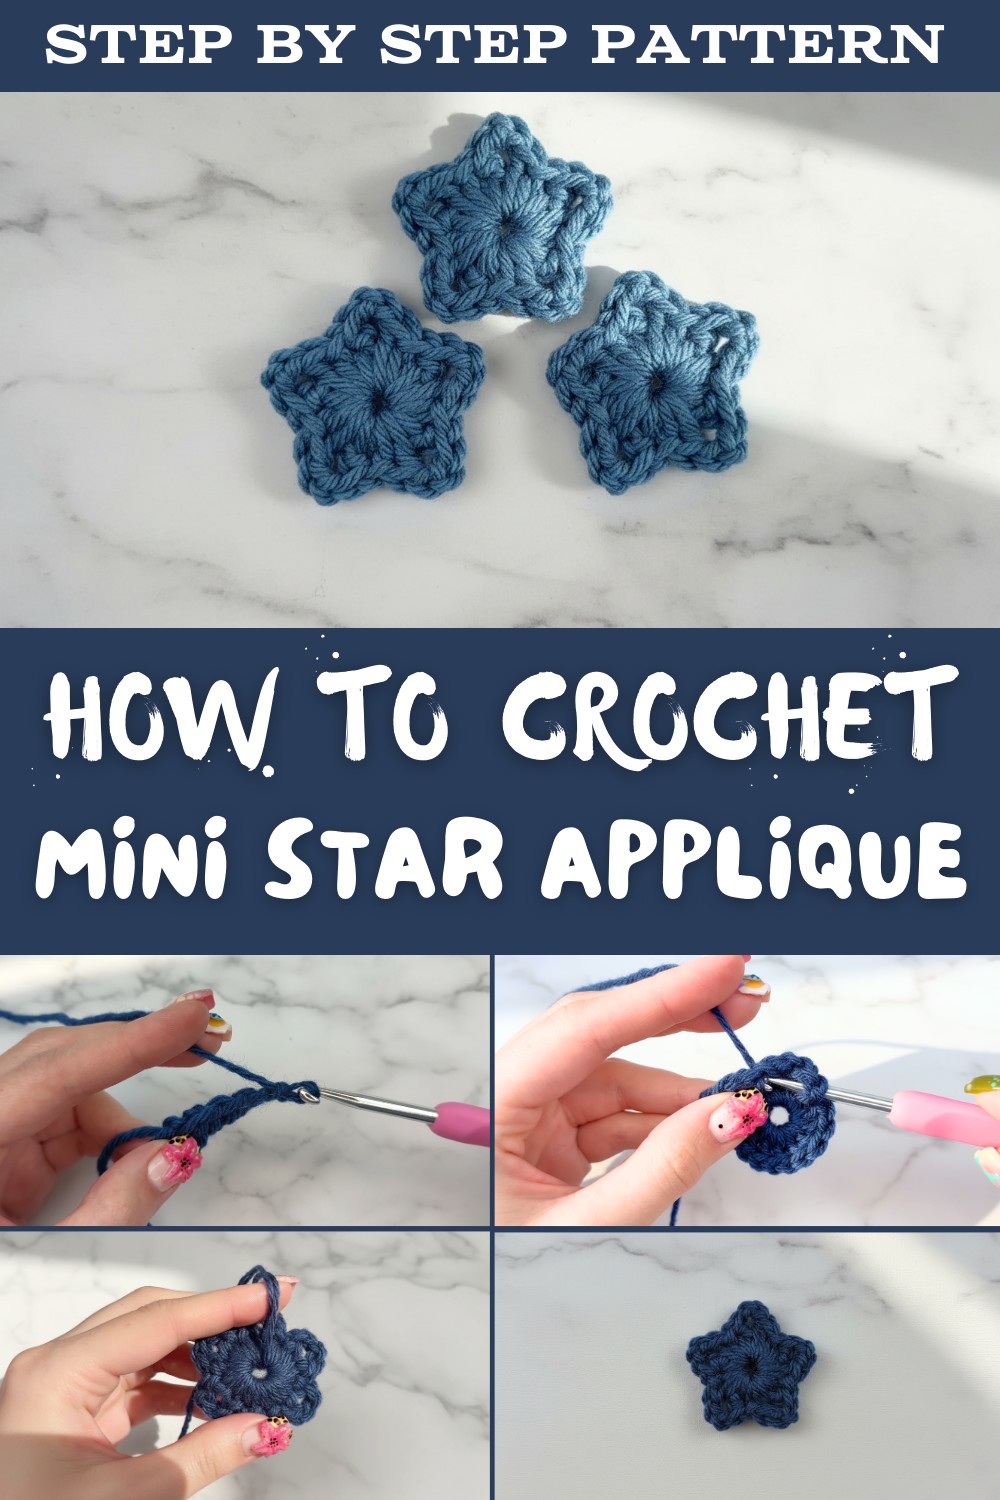
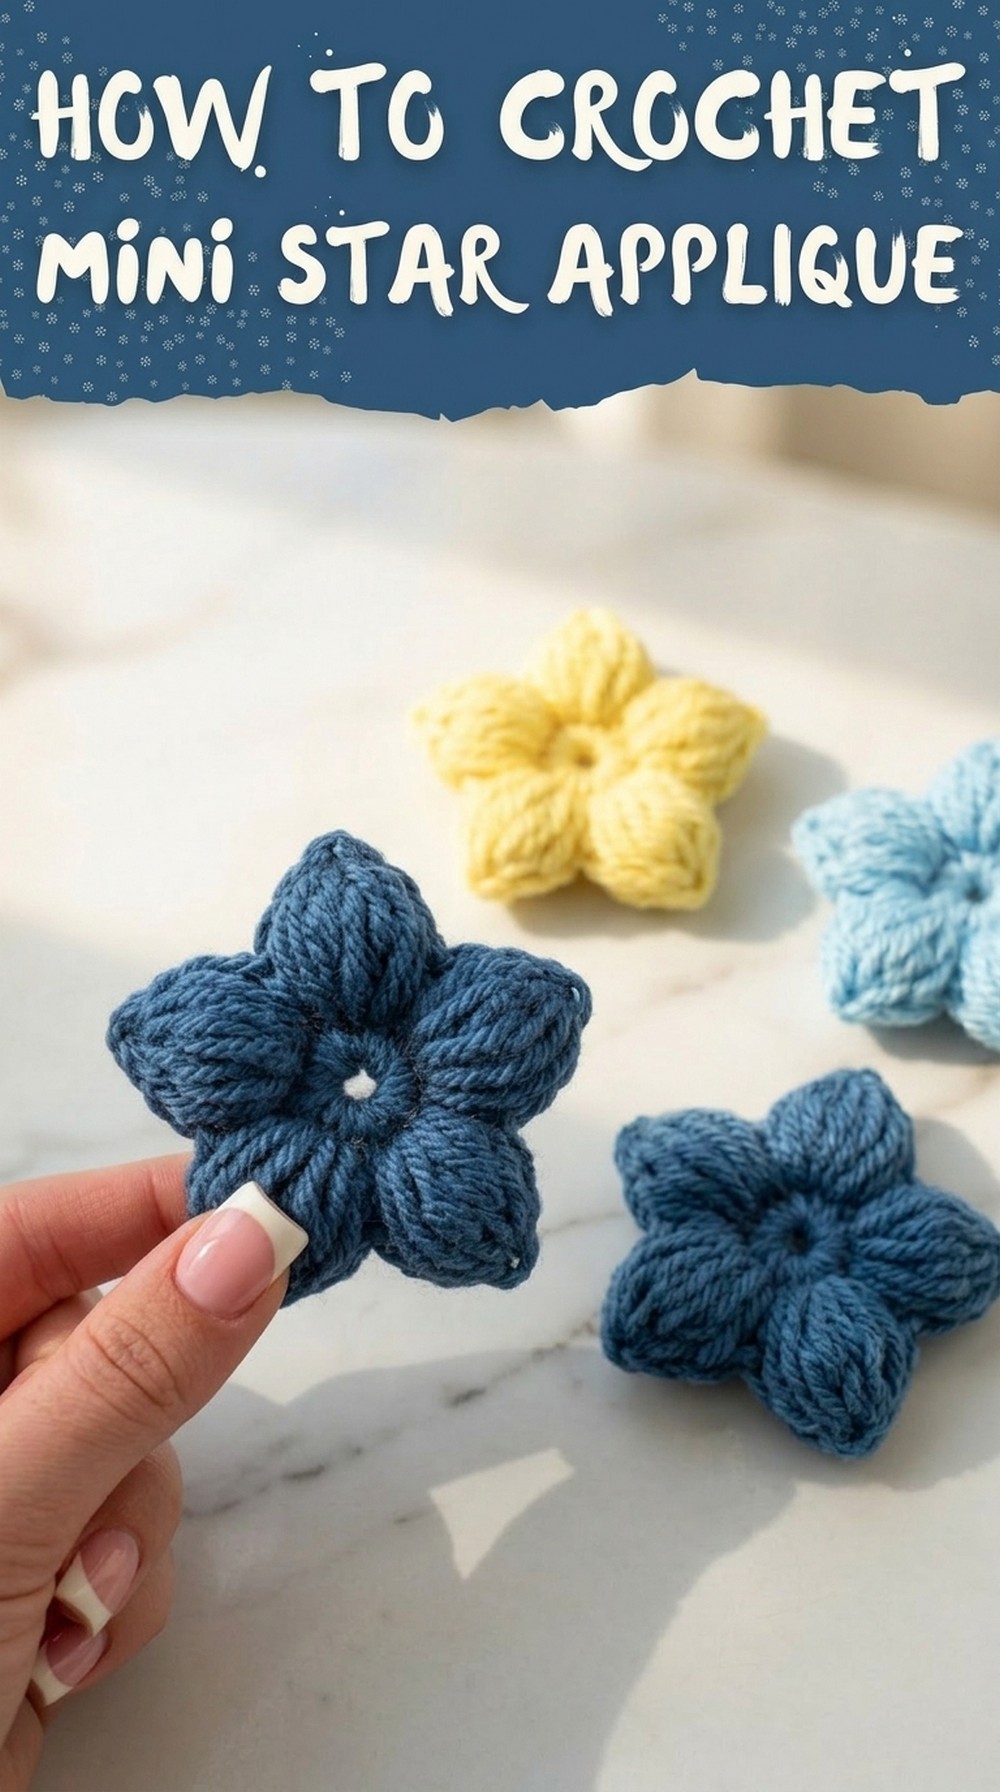
Handmade Free Crochet Star Applique Pattern for Accessories
Shine brightly with this Free Crochet Star Applique Pattern, that's perfect for adding sparkling, handmade stars to clothing, décor, or playful projects.
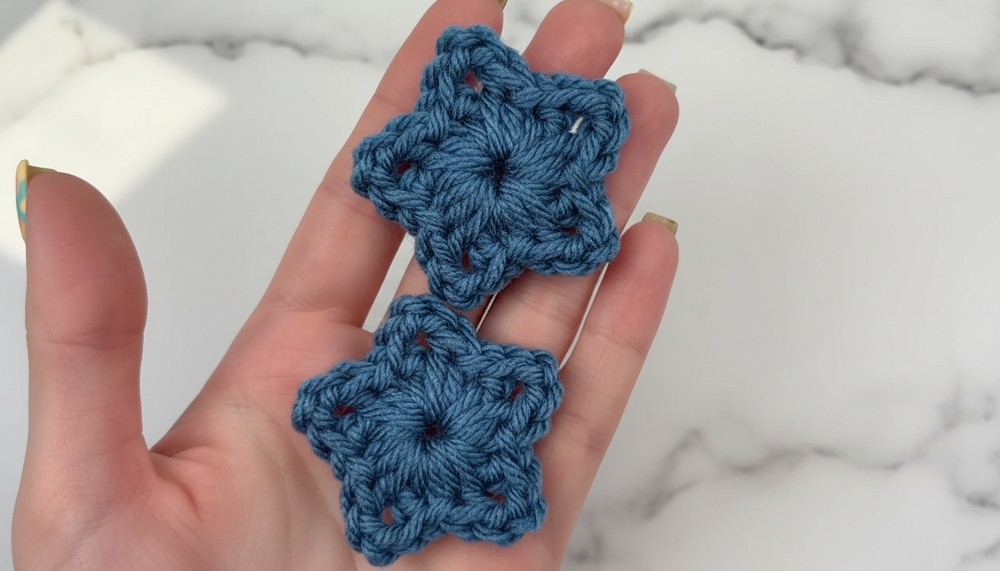
A small detail can brighten up anything, and that's exactly what a star applique does. Crafted from soft yarn, this crochet creation forms a delicate star shape that instantly catches the eye. Its beauty lies in its simple yet elegant design, making it perfect for adding charm to clothing, bags, blankets, or even home decor. The star applique can be made in any color, letting it complement your style or stand out as a bold accent.
Quick Free Crochet Star Applique Pattern for Clothes & Decor
Its soft texture and handmade look give every project a unique personal touch, turning something ordinary into something truly special. Whether it's decorating children's items or enhancing your favorite accessories, this crochet design brings warmth and creativity wherever it goes. Easy to create and full of character, it's the perfect way to share a little love and make everyday objects feel brighter and more meaningful.
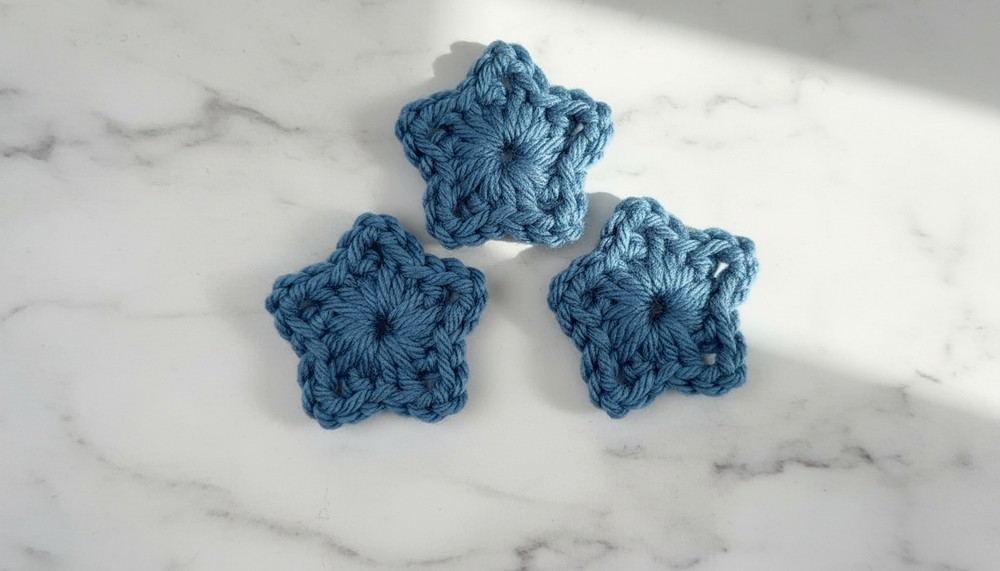
Mini Crochet Star Applique Pattern
Materials Required
- Yarn: Worsted weight (4) acrylic yarn (or any yarn you prefer).
- Hook: 5mm crochet hook (or the hook size that corresponds to your yarn type).
- Scissors: For trimming yarn ends.
- Tapestry Needle (optional): For weaving in ends.
Gauge
Gauge is not critical for this project as the finished size depends on the yarn and hook used. Use the recommended size or experiment with different yarns and hooks for varied sizes and effects.
Finished Size
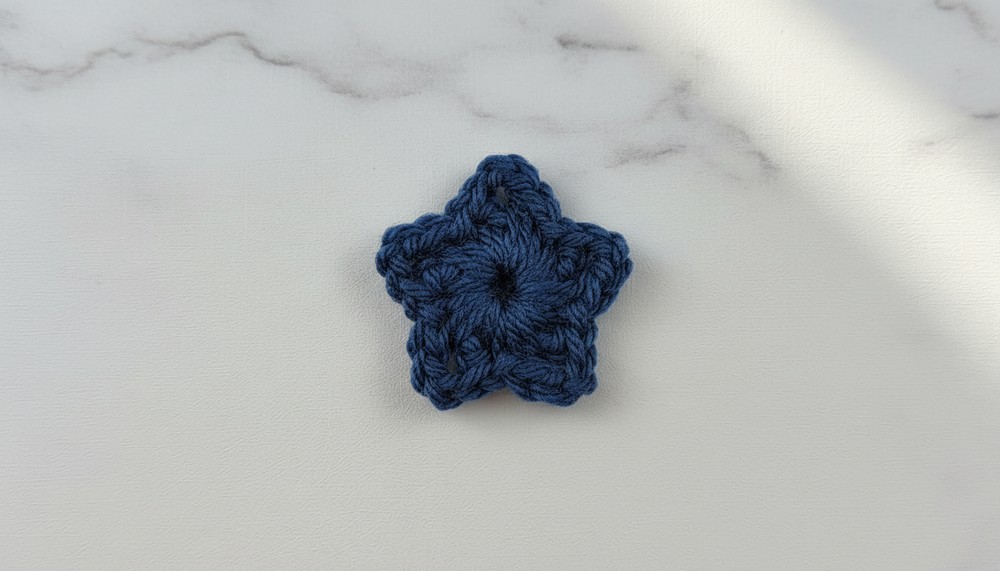
Using worsted weight yarn and a 5mm crochet hook, the star will measure approximately 2-3 inches in diameter. Adjustments in yarn and hook size will alter the final size.
Special Notes
- This project is designed without requiring a magic ring.
- The entire star is worked in a circle.
- Adjust the color of yarn for customization or consider multi-colored stars by alternating yarns for each point.
Crochet Stitches Used
- Chain (ch): Yarn over, pull through the loop on your hook.
- Single Crochet (sc): Insert hook, yarn over, pull up a loop, yarn over, pull through both loops on the hook.
- Double Crochet (dc): Yarn over, insert hook, yarn over, pull up a loop (3 loops on hook), yarn over, pull through 2 loops, yarn over, pull through remaining 2 loops.
- Slip Stitch (sl st): Insert hook, yarn over, pull up a loop, pull through the loop on your hook.
Pattern Instructions
Step 1: Make a Slip Knot
- Wrap the yarn loosely around two fingers and form a small loop.
- Cross the working yarn over the tail, creating an "X."
- Use your hook or index finger to go under the first strand and bring up the second strand.
- Tighten the loop by pulling both ends of the yarn to form your slip knot.
Repeat this step if necessary until comfortable with the process.
Step 2: Start the Foundation Chain
- Insert the hook into the slip knot and tighten.
- Chain four (ch 4).
- Yarn over and pull through the loop on the hook, repeating this step until you have 4 foundation chains.
- Trim the excess yarn tail to avoid tangling during the project.
Step 3: Form a Circle
- Connect the last chain to the first chain with a slip stitch (sl st).
- Insert your hook into the first chain, yarn over, pull up a loop, and pull directly through the loop on your hook.
- This forms a small circle, the base for your star.
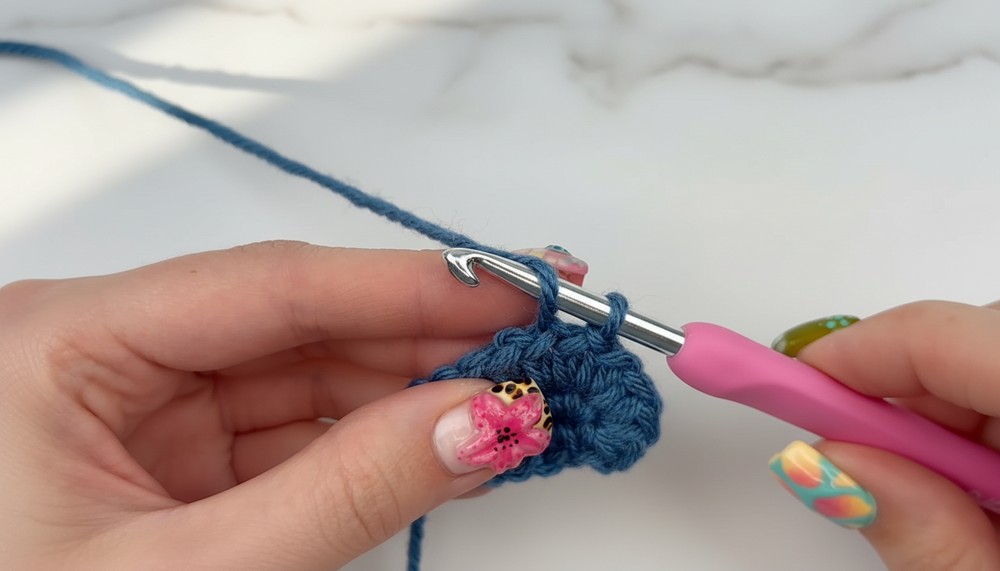
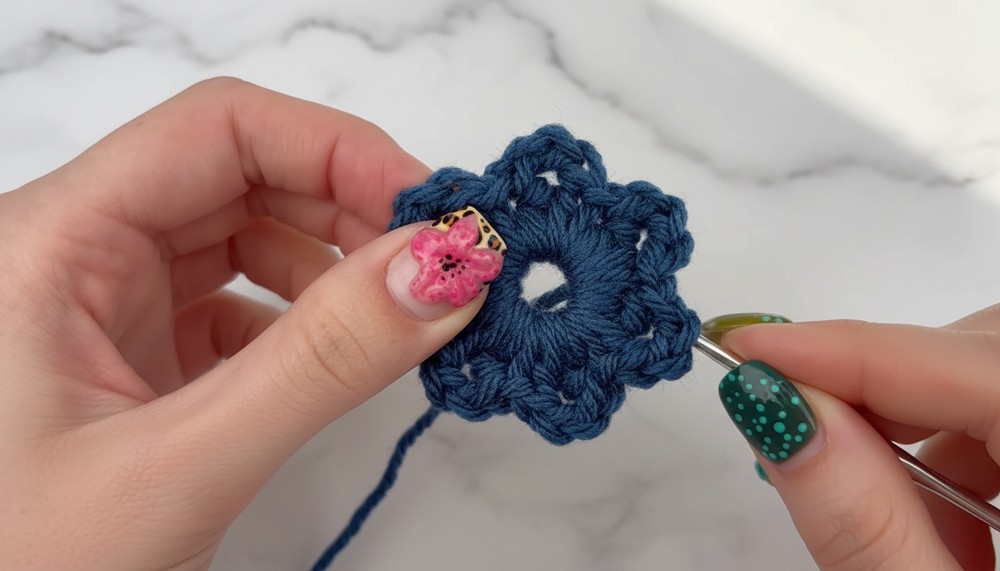
Step 4: Start the First Star Point
- Begin with a Single Crochet (sc) into the circle:
- Insert your hook into the center of the circle.
- Yarn over, pull up a loop (2 loops on hook).
- Yarn over again and pull through both loops.
- Work a Double Crochet (dc):
- Yarn over, insert the hook into the circle, yarn over, and pull up a loop (3 loops on hook).
- Yarn over, pull through the first two loops (2 loops remain).
- Yarn over again and pull through the last two loops.
- Chain Two (ch 2) for the tip of the point.
- Yarn over and pull through the loop on the hook twice.
- Work another Double Crochet (dc):
- Follow the same steps as the first dc.
- You now have a completed section: sc → dc → ch 2 → dc.
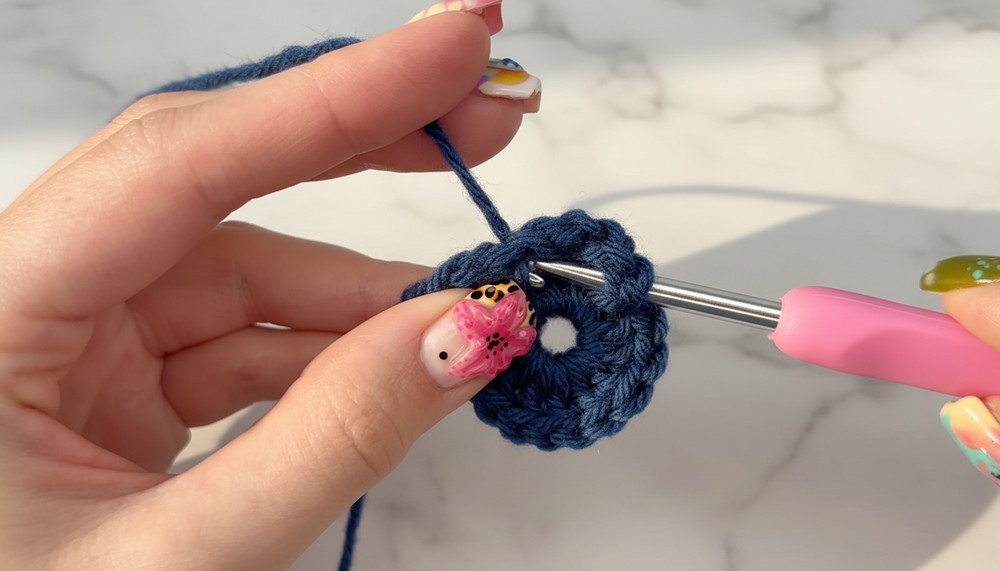
Step 5: Repeat for Five Points
- Push your stitches gently toward the starting single crochet to ensure room in the circle.
- Repeat the following steps 4 more times into the circle for the next points:
- Single Crochet (sc).
- Double Crochet (dc).
- Chain Two (ch2).
- Double Crochet (dc).
- Ensure you have a total of 5 points.
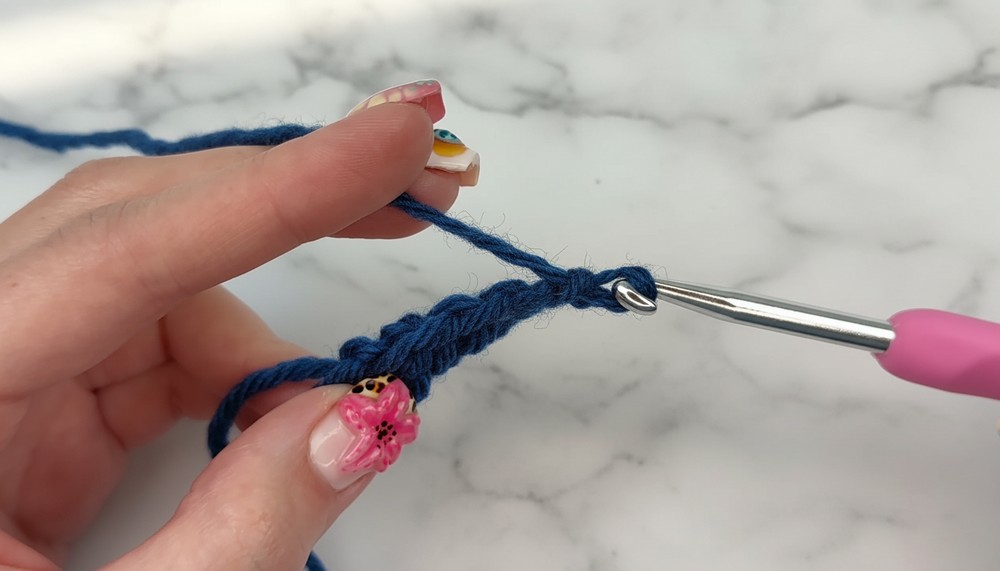
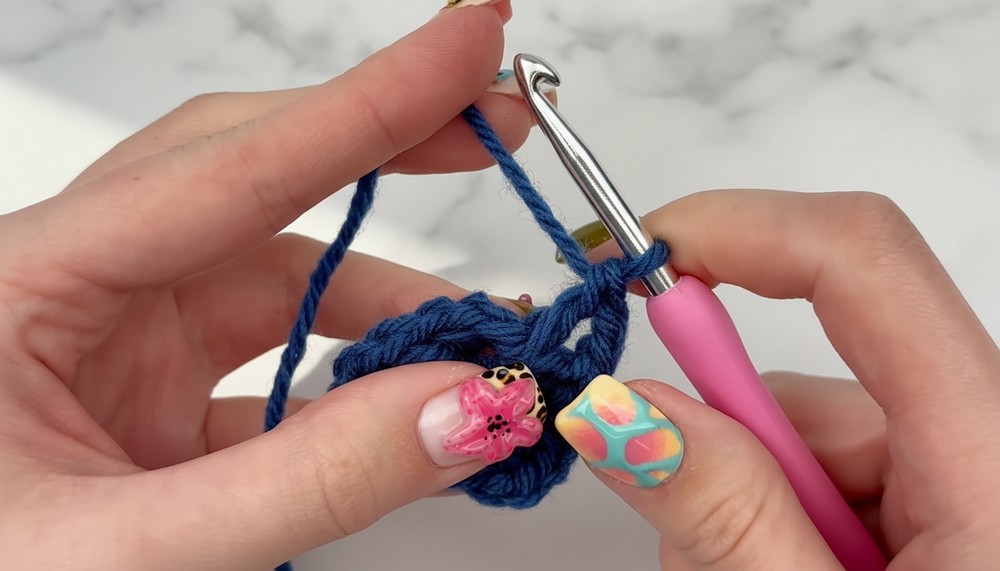
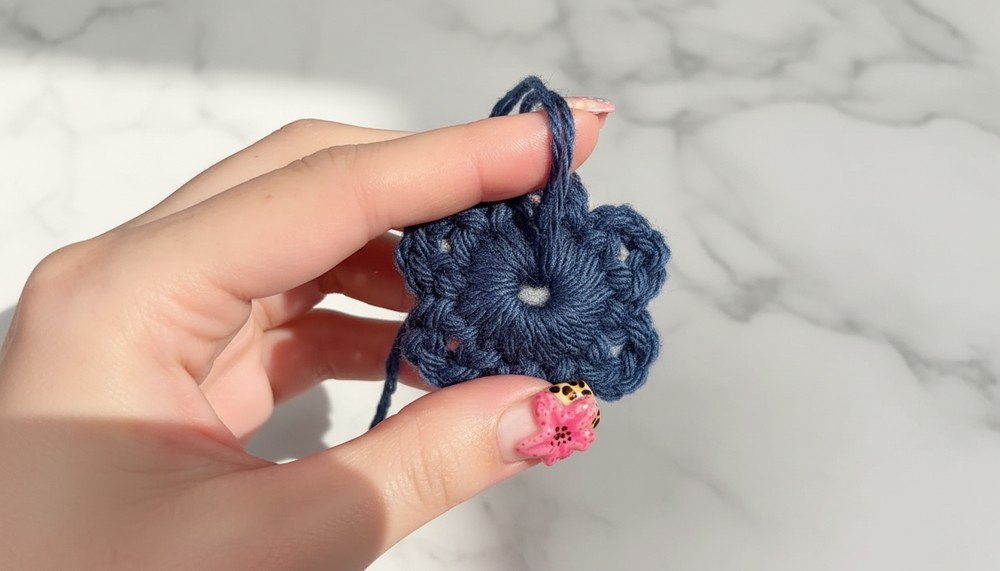
Step 6: Finish the Star
- To close your star, work a final Single Crochet (sc) into the circle.
- Tie Off:
- Chain one (ch 1), then cut the yarn (leave a tail for weaving).
- Pull the yarn end through the last chain and tighten to secure.
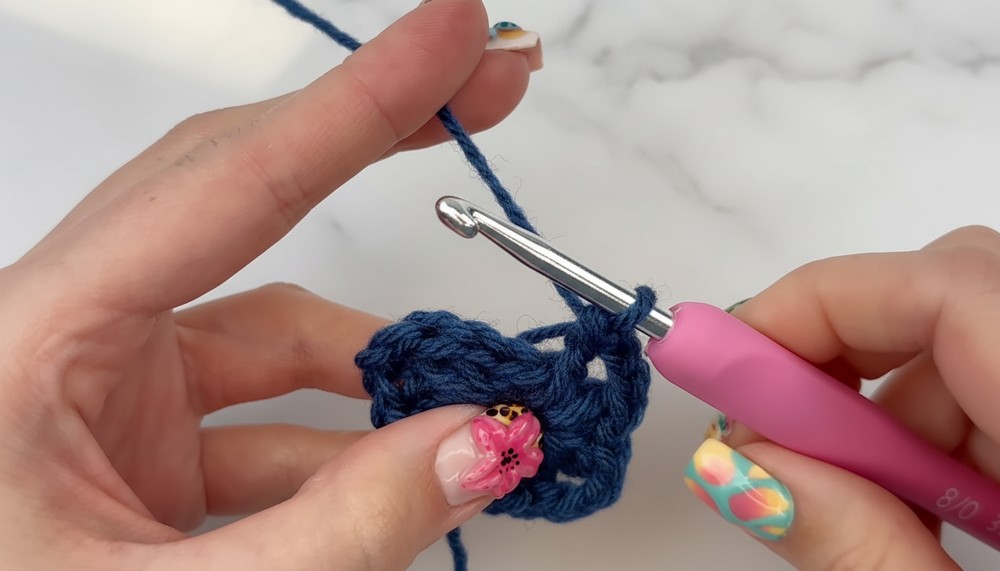
- Close the Circle:
- Flip the star over and gently pull the starting yarn tail to close the hole in the center of the circle.
- Trim and weave in excess yarn tails at the back. Use a needle if desired, or simply tie the tails together securely before trimming.
Tips for Customization
- Use Different Yarn Weights: Experiment with lighter or bulkier yarns for mini or oversized stars.
- Color Variations: Create vibrant stars by switching yarn colors after each row or point.
- Embellishments: Add glitter yarn, beads, or embroidery for a festive touch.
Final Look & Conclusion
Once complete, your star will have 5 beautifully distinct points with a neat circular center. These stars can be used in various creative ways:
- Appliqués for crochet bags, scarves, hats, or blankets.
- Holiday ornaments or garlands.
- Decorative gift wrap elements or keychains.
Take pride in creating these charming little stars and use them to add a personal touch to your next crafty endeavor!
Important Remarks
- Keep your tension consistent to maintain a tidy look.
- Always ensure the center hole is securely closed to prevent unraveling over time.
- Experiment with different hook sizes and yarn types for varied results.