
Headband With Ribbon Free Crochet Pattern – Perfect for Beginners
Style your look with this Free Crochet Headband With Ribbon Pattern, featuring a simple 70-row textured band, easy ribbon weaving, and beginner-friendly instructions.
A charming and practical accessory that adds flair to any outfit is easy to create with simple crochet techniques. The Free Crochet Headband With Ribbon pattern offers a beginner-friendly opportunity to make an elegant piece for casual wear, gifting, or special occasions. By using basic materials like a 4 mm crochet hook, yarn, scissors, and a darning needle, you'll stitch 70 rows of single crochet stitches, resulting in a soft, textured band that fits comfortably. The highlight of this design is the ribbon, delicately woven through the stitches, creating a unique and graceful touch.
Crochet Headband With Ribbon Pattern - Quick & Simple!

This accessory stands out for its versatility, allowing customization with various yarn colors and ribbon styles to match your preferences. It's lightweight, making it perfect for everyday use, and the ribbon ends are sealed to prevent fraying, ensuring durability over time. Its simplicity doesn't compromise on beauty, making it suitable for people of all ages.
The timeless design and functionality of this headband make it a thoughtful gift or a stylish way to express personality. Its ease of assembly combined with the elegant ribbon detail transforms it into a practical yet eye-catching item that can complement outfits in any season or setting.

Crochet Headband with Ribbon - Detailed Pattern
Skill Level
Beginner - This pattern uses basic stitches (single crochet) and simple assembly techniques.
Finished Size
- Length: Approximately 16-18 inches (stretches slightly to fit most head sizes).
- Width: Approximately 1.5 inches.
- Note: Adjust the number of rows depending on desired head circumference or yarn elasticity.
Gauge
- 6 single crochet (sc) = 1 inch
- 7 rows = 1 inch
Gauge is measured using single crochet stitches with a 4 mm crochet hook. Adjust hook size if needed to match the finished size.
Materials
- Yarn:
- Approximately 10g lightweight yarn (e.g., DK or sport-weight yarn).
- Choose soft, stretchy yarn for comfort.
- Tools:
- 4 mm crochet hook
- Scissors
- Tapestry needle (for weaving in ends).
- Ribbon (approximately 24 inches long, 0.5 inches in width, or adjust according to preference).
- Optional lighter or matches (to seal ribbon ends and prevent fraying).
Abbreviations (US Terminology)
- ch: Chain
- sc: Single Crochet
- sl st: Slip Stitch
- st(s): Stitch(es)
Special Techniques
Weaving the Ribbon
The ribbon is woven horizontally through the headband, skipping 8 rows between each pass. This adds visual interest and improves elasticity.
Sealing the Ribbon
Use a lighter or matches to gently melt and seal the ribbon ends. This prevents fraying and ensures the ribbon stays secure.
Pattern Instructions
Step 1: Crocheting the Headband Base
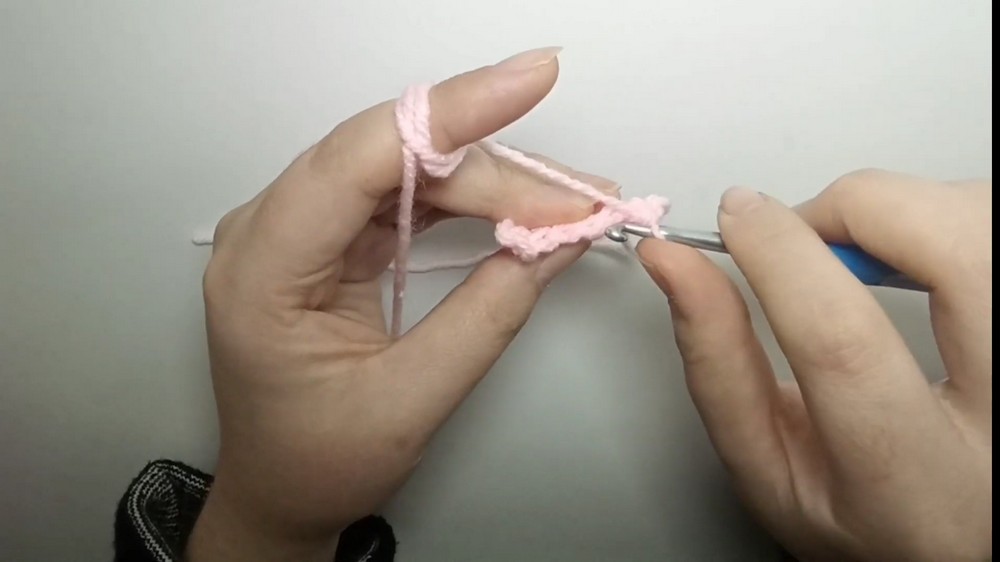
- Slip Knot and Foundation Chain:
- Begin with a slip knot.
- Chain 7 (this forms the width of the headband).
- Row 1:
- Ch 1 (turning chain).
- Starting in the second chain from the hook, work 1 sc in each chain across.
- You should have 7 sc at the end of Row 1.
- Rows 2-70:
- Ch 1, turn, and work 1 sc in each stitch across.
- Repeat until you have completed 70 rows of sc.
Tip: Ensure consistent tension for an even, uniform texture.
- Fasten Off:
- After completing Row 70, leave a long tail for finishing (approximately 6 inches).
- Weave in the yarn tail from the starting slip knot using a tapestry needle.
At this stage, you will have a simple rectangular band.
Step 2: Adding the Ribbon
- Prepare the Ribbon:
- Cut a length of ribbon approximately 24 inches long (adjust as needed).
- Use a lighter or matches to gently seal the ribbon ends and prevent fraying.
- Thread the Ribbon:
- Insert one end of the ribbon through the eye of a tapestry needle.
- If the ribbon is wide, twist and pinch it slightly to feed it through the needle easily.
- Weaving the Ribbon:
- Begin by inserting the needle into the 4th row from one edge of the headband, passing it horizontally through the middle of the stitches.
- Skip 8 rows and insert the needle in a similar fashion into the 9th row.
- Repeat this process, weaving the ribbon through every 8th row horizontally until you reach the end of the headband.
Tip: Ensure the ribbon lies flat and isn't twisted for a clean appearance.


Step 3: Final Adjustments
- Secure the Ribbon:
- Once the ribbon is fully woven, center it neatly on the headband.
- Adjust the ribbon's length as necessary for a balanced look.
- Finishing the Ribbon Ends:
- Seal the ends of the ribbon again (if needed) to secure them and prevent fraying.

Customization Ideas
- Wider Headband:
- Adjust the foundation chain to make the headband wider. For instance, chain 10-12 stitches instead of 7.
- Longer or Smaller Headband:
- Add or reduce the number of rows to customize the length. Measure as you go to ensure a good fit.
- Ribbons and Embellishments:
- Use ribbons in contrasting colors or textures for a pop of style.
- Add beads, sequins, or buttons along the ribbon for additional decoration.
- Alternate Stitch Patterns:
- Experiment with textured stitches like half double crochets (hdc) or double crochets (dc) for a different look.
Finished Look
The completed headband features a minimalist, elegant design with a woven ribbon for added style. The single crochet texture provides durability and stretch, while the ribbon enhances the visual appeal.

Tips for Success
- Ribbon Selection:
- Choose a soft, flexible ribbon that complements your yarn color. Wider ribbons may require fewer weaves, while narrower ribbons allow more passes.
- Consistent Tension:
- Use even tension during crochet to prevent misshapen rows.
- Secure Ribbon Ends:
- Sealing the ribbon ends with a lighter is highly recommended for durability.
- Prompt Finishing:
- Weave in ends immediately after completing the project to prevent unraveling.
Conclusion
Congratulations on completing this crochet headband with ribbon. This easy-to-make yet charming accessory is great for personal use or as a gift, and it can be customized to match any outfit or occasion. Its straightforward construction and the woven ribbon detail make it a beautiful blend of function and fashion.