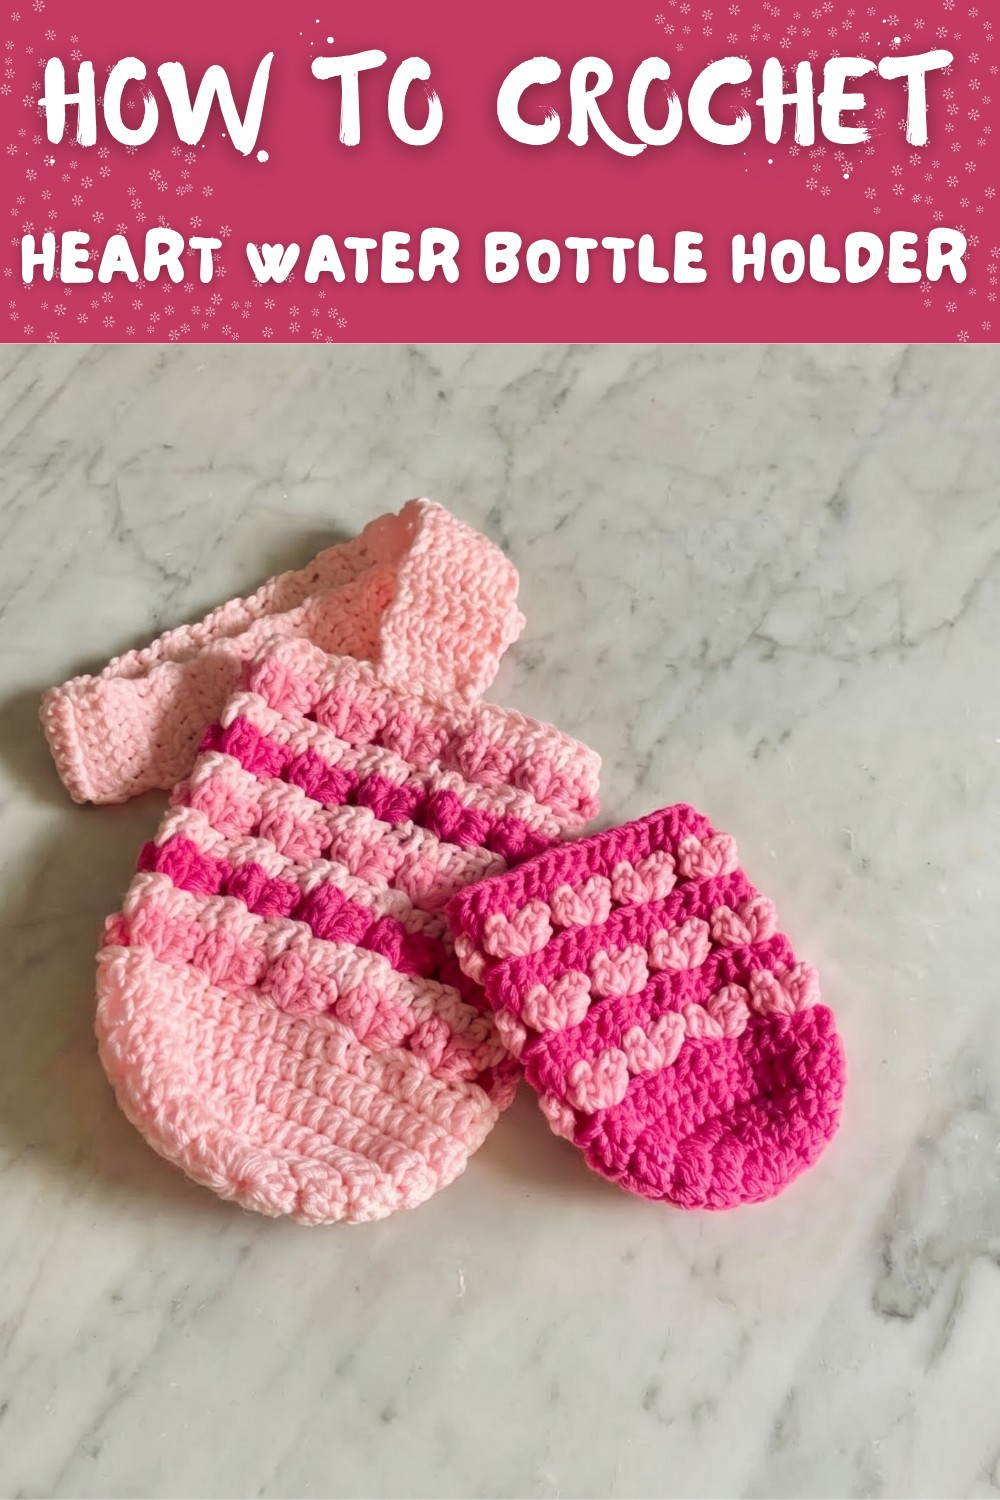
Heart Water Bottle Holder Crochet Pattern with Popcorn Stitch
Bring a practical yet stylish Free Crochet Heart Water Bottle Holder Pattern to life with sturdy construction, adorable heart accents, and a comfortable strap.
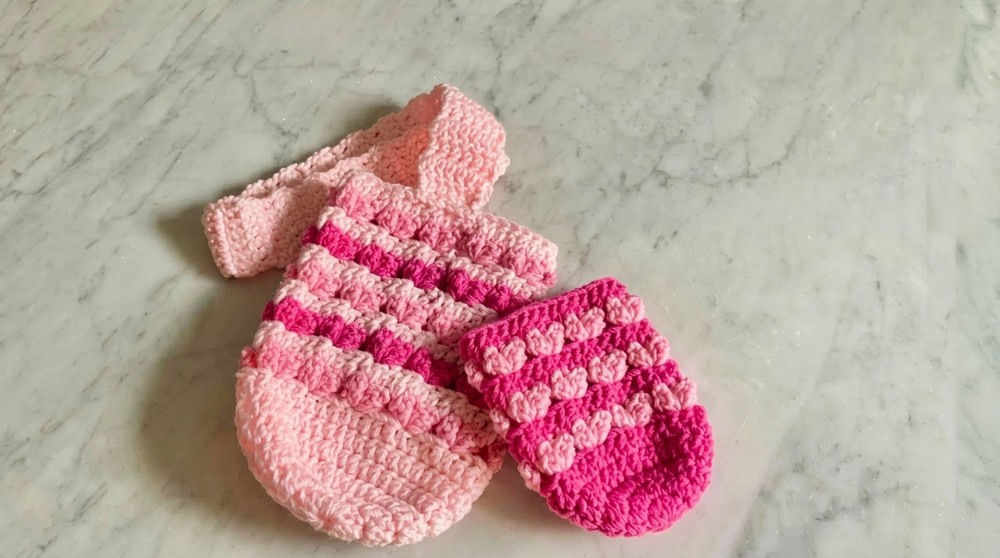
Looking for a cute and functional way to carry your water bottle? This project brings both style and practicality together with a gorgeous heart design that's perfect to show off your crochet skills. The Free Crochet Heart Water Bottle Holder pattern combines creativity and utility, featuring charming heart shapes worked with a fun popcorn stitch. Its snug fit works great for standard 32-ounce bottles like Nalgene or Hydro Flask, keeping your drinks safe and on hand.
Heart Water Bottle Holder Free Crochet Pattern for Any Length
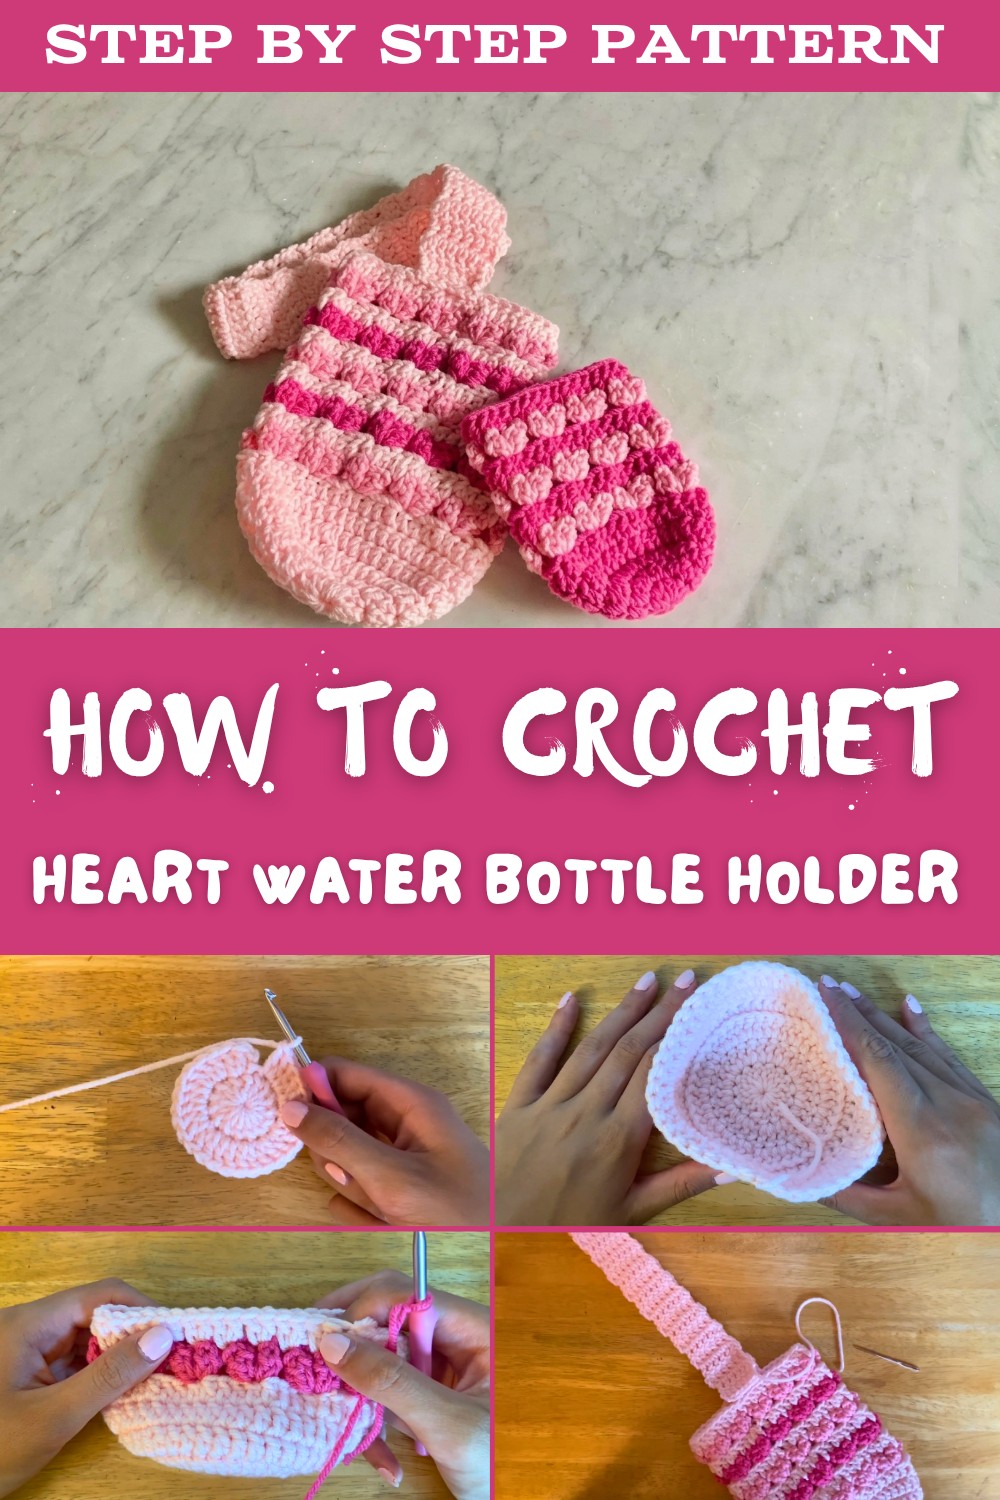
The holder starts with a sturdy base made using a magic ring and double crochet stitches, ensuring durability. The hearts are crocheted with a second yarn color, giving the design a standout appearance. For convenience, the pattern also includes a step-by-step method to create an adjustable strap so you can carry it comfortably on your shoulder or cross-body. Not only can you use this for bottles, but it's also adaptable for making can cozies!
This pattern is easy enough for beginners to follow while offering a charming result. It's ideal for personal use, gifting, or even craft fairs. Colorful, creative, and practical, this water bottle holder is perfect for staying hydrated on the go while adding an adorable handmade touch to your daily life.
Crochet Pattern: Heart Water Bottle Holder and Can Cozy
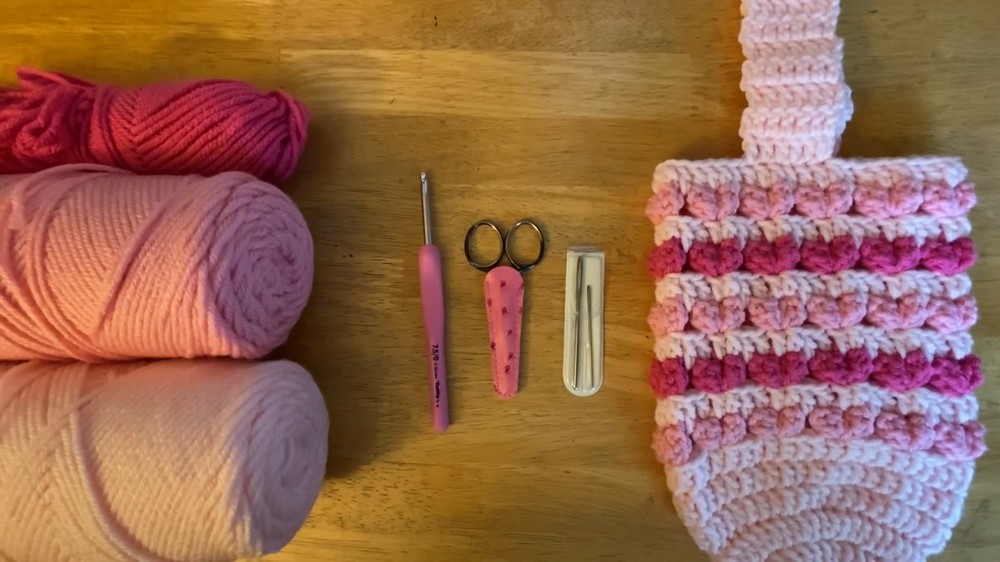
Materials Needed
- Yarn:
- Background Color: Medium-weight (#4) acrylic yarn.
- Heart Color: Medium-weight (#4) acrylic yarn in a contrasting shade for the hearts.
- Crochet Hook: 4.5 mm (US 7) hook.
- Accessories:
- Scissors
- Yarn needle (for sewing and weaving ends).
Skill Level
Beginner to Intermediate.
While the basic stitches used are simple, the popcorn stitch and the seamless join require some practice.
Key Abbreviations (US Terms)
- ch: Chain.
- dc: Double Crochet.
- hdc: Half Double Crochet.
- sc: Single Crochet.
- sl st: Slip Stitch.
- st: Stitch.
- popcorn: Popcorn Stitch (explained in special techniques).
Special Techniques
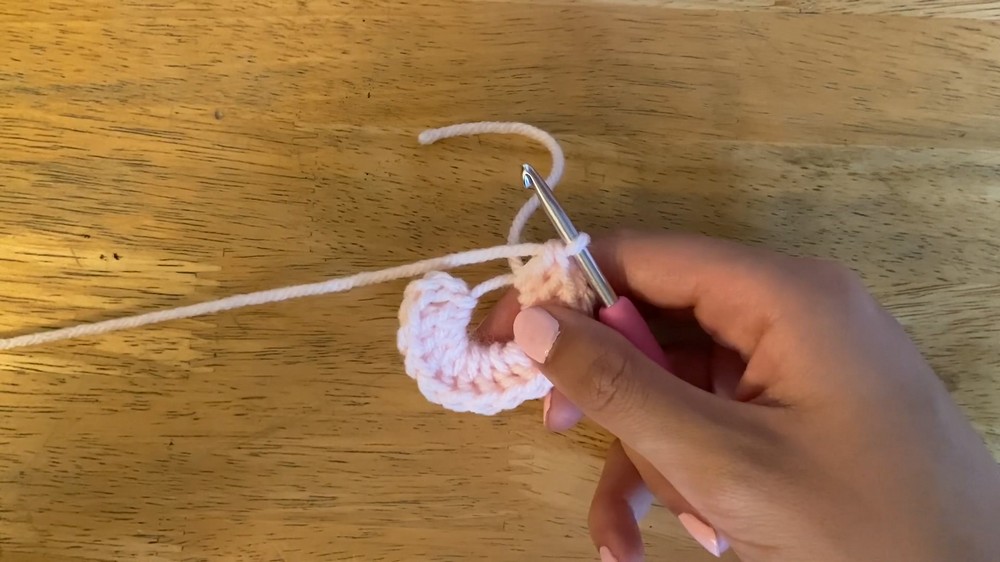
- Magic Ring:
- Start with a loop of yarn, leaving a tail. Insert your hook into the loop, yarn over, and pull up a loop. Continue as instructed. After the stitches are made, pull the starting yarn tail tight to close the ring.
- Popcorn Stitch:
- Work 3 double crochets into the same stitch.
- Remove the hook from the working loop and reinsert it through the first double crochet of the set.
- Reinsert the hook back in the working loop, yarn over, and pull through both loops on the hook.
Pattern Instructions
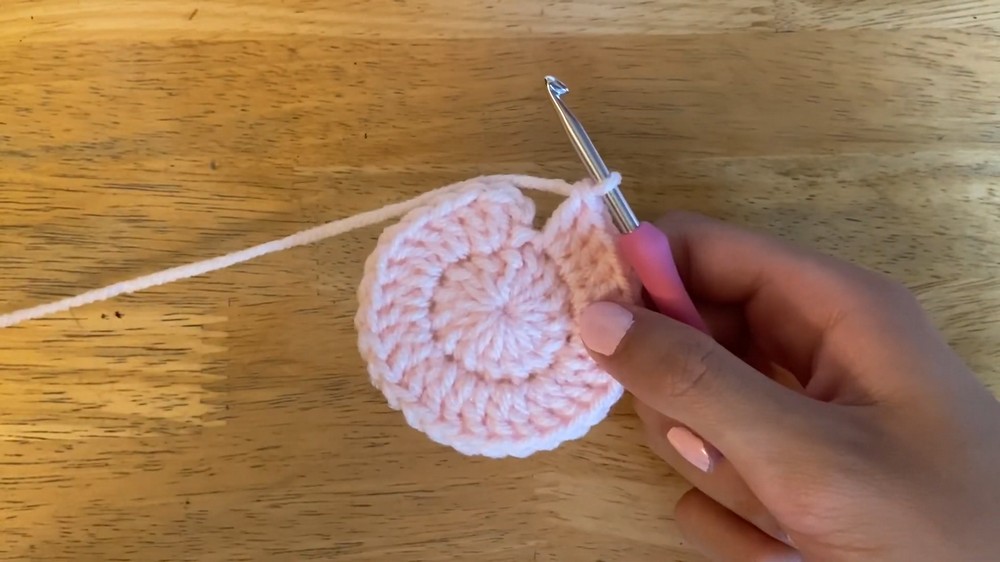
Part 1: Base of the Bottle Holder
Step 1: Start the Magic Ring
- Begin with a magic ring.
- Chain 3 to count as your first double crochet.
Step 2: Create the Base
- Work 14 double crochets (dc) into the magic ring.
- Pull the tail to tighten the loop.
- Slip stitch (sl st) into the first double crochet (not the chain-3) to close the round.
Step 3: Increase for Round 2
- Chain 2.
- Work 2 double crochets into each stitch all the way around, increasing evenly (28 stitches total).
- Slip stitch into the top of the first double crochet.
Step 4: Increase for Round 3
- Chain 2.
- Alternate between:
- 1 dc in first st, 2 dc in next st.
- Repeat this pattern all around the round (42 stitches total).
- Slip stitch into the first dc.
Step 5: Back Loop Only (Round 4)
- Chain 2.
- Work 1 dc in each stitch, using only the front loops of each stitch (this will create a ridge on the base for better structure).
- Slip stitch into the first dc to finish the round.
Step 6: Build up the Base Walls
- Work 1 dc into each stitch for the next 2 rounds.
- Finish the 6th round with a slip stitch and fasten off.
- Flip your work inside out so the ridge from Round 4 becomes the base's edge.
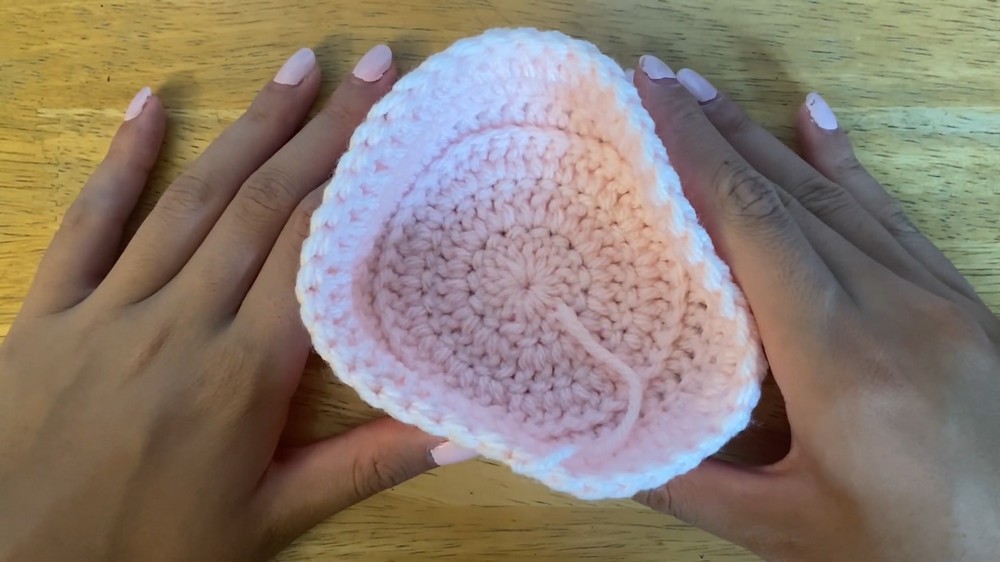
At this point, your bottle holder base is complete.
Part 2: Base of the Can Cozy
The steps are nearly identical to the water bottle holder base, with a few differences:
- Begin with a magic ring.
- Chain 2 instead of 3 (for half-double crochets).
- Work 11 half double crochets (hdc) into the magic ring for Round 1.
- Follow the same pattern of increasing as the bottle holder base:
- Round 2: 2 hdc in each stitch (22 sts).
- Round 3: Alternate 1 hdc, 2 hdc in each st (33 sts).
- Work Round 4 in front loops only with hdc stitches.
- Fasten off, flip inside out, and your can cozy base is complete.
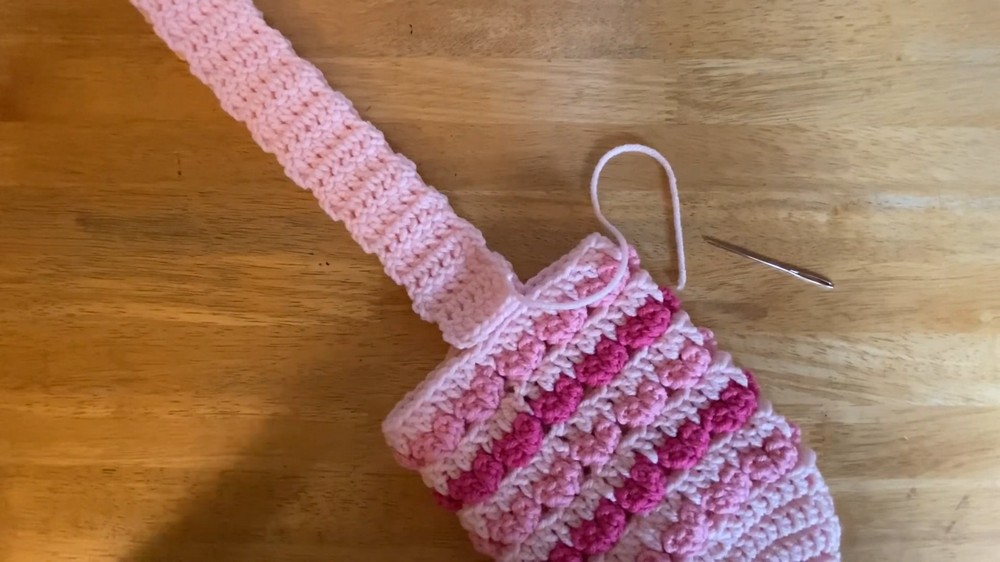
Part 3: Heart Motif and Body for Both Projects
Both the water bottle holder and can cozy use the same body pattern.
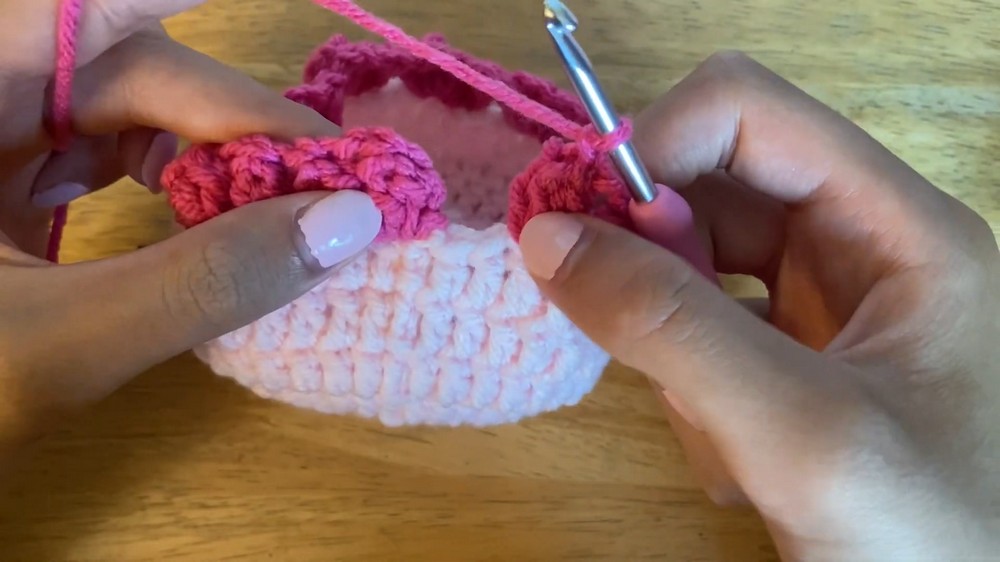
Step 1: Start the Hearts
- Attach the heart-colored yarn to the base:
- Use a slip stitch where the last round ended.
- Chain 2.
Step 2: Work Popcorn Stitch Hearts
- In the same stitch:
- Work 3 double crochets.
- Remove the hook, reinsert it into the first dc, grab the loop, and pull through both loops to form the popcorn.
- Chain 2 and create another popcorn stitch in the same base stitch.
- Chain 1 to finish the first heart.
Step 3: Position the Hearts
- Skip 3 stitches and start the next heart in the 4th stitch.
- Repeat the popcorn + chain combination to form the next heart.
Step 4: Finishing the Round
- For the last heart in the round:
- Start the heart in the 3rd last stitch instead of the 4th stitch.
- Slip stitch into the side of the first heart to finish the round.
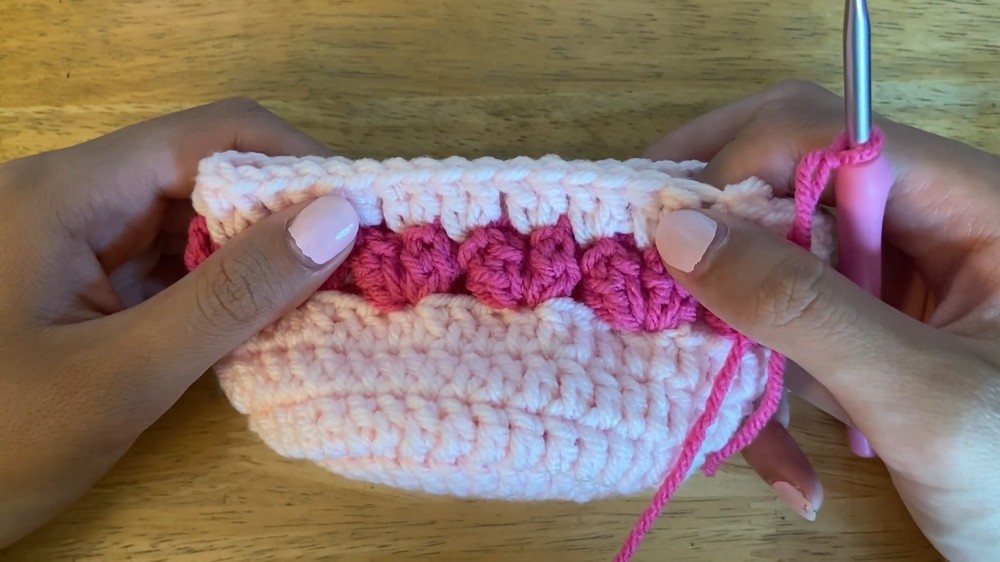
Part 4: Carrying Yarn Over and Filler Round
Filler Round
- Switch back to the background yarn.
- Work 1 dc in the top of each popcorn stitch and 1 dc in each chain space between hearts.
- This fills in the gaps between hearts, preparing for the next round.
Repeat Heart and Filler Rounds
- Alternate between Heart Rounds and Filler Rounds until the desired height is reached.
- For a water bottle holder, aim for 6-8 heart rounds.
- For a can cozy, 3-4 heart rounds are sufficient.
Part 5: Adding the Strap
Step 1: Strap Foundation
- Using the background yarn, attach with a slip stitch where you want the strap to begin.
- Chain 2.
- Work 6 double crochets (dc) into the next 6 stitches.
Step 2: Build Strap Length
- Chain 2, turn your work, and crochet 6 dc into the 6 stitches from the previous row.
- Repeat this until the strap reaches your desired length (approx. 36 inches for a crossbody strap).
Step 3: Attach the Strap
- Ensure the strap isn't twisted.
- Attach the other end of the strap to the opposite side of the holder using a yarn needle.
- Sew through one st on the strap and one st on the holder.
- Go back and forth twice for secure attachment.
Finishing
- Weave in all loose ends using the yarn needle.
- Block the piece if necessary to straighten the hearts and stitches.
Tips for a Better Crochet Experience
- Colorwork Tip: Crochet over excess yarn ends to avoid weaving later.
- Use Markers: Mark the beginning of each round to avoid confusion.
- Heart Placement: Align hearts consistently with guiding stitches from prior rounds for a uniform design.
Final Words
Your Heart Water Bottle Holder or Heart Can Cozy is now ready! This project is not only functional but also a wonderful way to showcase your crochet skills. The hearts bring a playful and charming touch to your accessory while making it a perfect gift for loved ones.