
Hook Crochet Lavender Flowers with Free Pattern
Chic lavender blooms bring cozy charm to life with this free crochet lavender flower pattern, offering a perfect blend of soft style and playful creativity.
Lavender has a peaceful and soothing appearance, and this crochet replica is just as delicate and stunning. This free crochet lavender flower pattern is a simple yet creative way to add beauty to your home or gift to someone special. This handmade flower is not only easy to make but also brings a unique charm that lasts forever, unlike real flowers that fade away.
The realistic design of this crochet lavender is what makes it stand out. The soft, colorful lavender buds made using simple picot stitches create a beautifully textured look, while the leaf and stem add a natural touch. Wrapped in elegant green yarn, the floral wire stem gives the flower sturdiness and a lifelike appearance. Together, these features make it look like it's just been picked from a lavender field.
Crochet Lavender Flowers to Elevate Your Home Decor

This crochet lavender flower is more than just a decoration. You can create it to place in a vase, use it to add flair to a gift box, or even make it part of a centerpiece for events. It also makes a thoughtful handmade gift for occasions like Mother's Day, birthdays, or anniversaries. By using different shades of lavender or adjusting the size, you can customize the flower to suit your style.
The best part is that this pattern is easy and fun to follow, with step by step instructions using basic stitches like chain crochet, single crochet, and picot. Whether you're just starting or love creating relaxing projects, you'll enjoy every moment of making it.
Bring the timeless beauty of lavender into your life with this free crochet pattern, and enjoy the satisfaction of crocheting something unique, lasting, and utterly beautiful.

Crochet Lavender Flowers Pattern
Finished Size:
Each lavender flower stem measures approximately 35 cm (13.8 inches) in height, including the floral wire and the crocheted elements.
Gauge:
- Gauge is not critical for this pattern.
- Use consistent tension for an even look across your project.
Materials Needed:
- Yarn:
- Amigurumi cotton yarn in the following shades:
- Lavender (light purple) - Color code: 6201
- Dark purple (or any slightly darker lavender color you have, as it is optional)
- Light lilac (soft pastel lavender for variation)
- Green (light moss green, color code: 5398)
- Note: You can substitute with other colors if you wish to create a unique arrangement.
- Amigurumi cotton yarn in the following shades:
- Hook:
- 2.5 mm crochet hook
- Wire:
- Floral wire, 1 mm thick (Cut to 34 cm per stem. If the wire is too thin, double it for sturdiness.)
- Accessories:
- Scissors
- Tapestry needle
- Craft glue
- Pliers for cutting and shaping the wire
- Clothespins to hold items in place while the glue dries
Special Techniques Used:
- Chain Stitch (ch): Creates the foundation of many crochet projects.
- Slip Stitch (sl st): Used to join the elements or finish off parts of the project.
- Single Crochet (sc): A short, compact stitch perfect for making tight, small details.
- Picot Stitch: Used to create tiny decorative loops resembling lavender flowers.
Lavender Flower Stem Instructions:
Step 1: Creating the Foundation Chain
- Start with a slip knot on your hook.
- Work 51 chains (ch 51).
Step 2: Adding Picot Flowers
- Skip the first chain closest to the hook, and insert your hook into the second chain.
- Work a single crochet (sc).
- Create a picot stitch by chaining 6 chains (ch 6).
- Insert your hook back through the base of the sc you just made and work another single crochet (sc) to secure the picot.This forms the first tiny "flower" on your lavender strand.
- Move to the next chain on the foundation row, work a single crochet (sc), and repeat Steps 3 and 4. Continue forming picots along the length of the foundation chain.
- Once you've reached the end of the chain, cut the yarn, leaving a small tail, and secure the end with a knot.
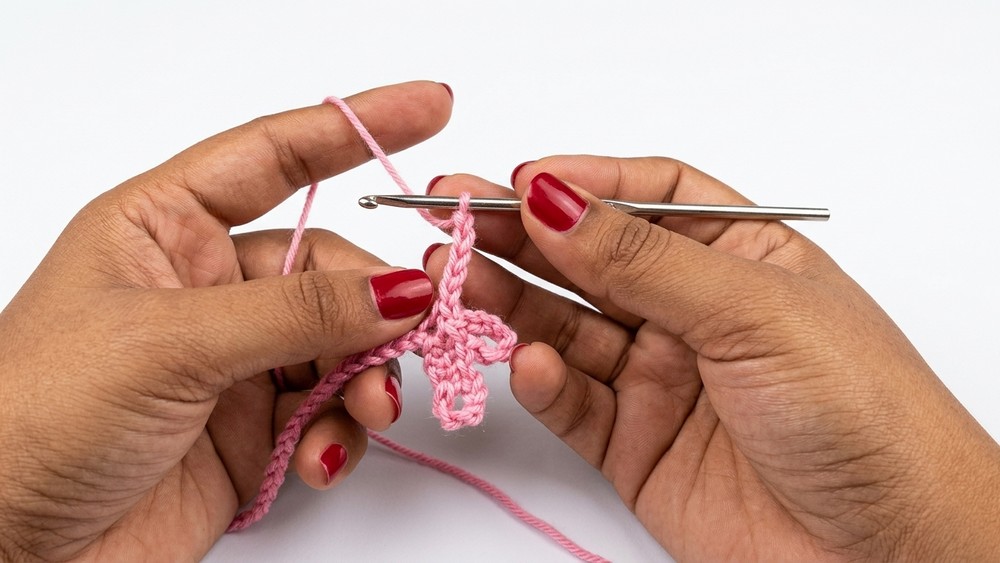

Step 3: Preparing the Wire Stem
- Cut a piece of floral wire to 34 cm (13.4 inches). If the wire is thinner than you would like, cut two identical pieces and twist them together for added strength.
- Apply a small amount of craft glue at one end of the wire for extra grip.
- Take green yarn and begin wrapping it tightly around the wire from top to bottom. Keep the wraps close together to ensure full coverage of the wire.
- At the bottom, add another dab of glue to secure the yarn in place, then trim the excess yarn.

Step 4: Attaching the Lavender Piece to the Wire
- Place the crocheted lavender strand at the top of the wrapped wire (the side where you started wrapping).
- Apply a small amount of craft glue to the top part of the wire and secure the beginning of the lavender strand to it.
- Wrap the lavender strand spirally around the wire, moving downward. Add dabs of glue as needed to keep the lavender firmly attached.
- Once you reach the end of the strand, secure it with a clothespin to hold it in place until the glue dries completely.
Leaf Instructions:
Step 1: Making the Base of the Leaf
- Create a slip knot and chain 16 chains (ch 16).
Step 2: Crocheting the First Side
- Skip the first chain, and work a half double crochet (hdc) into the second chain.
- Work a half double crochet into each remaining chain across.
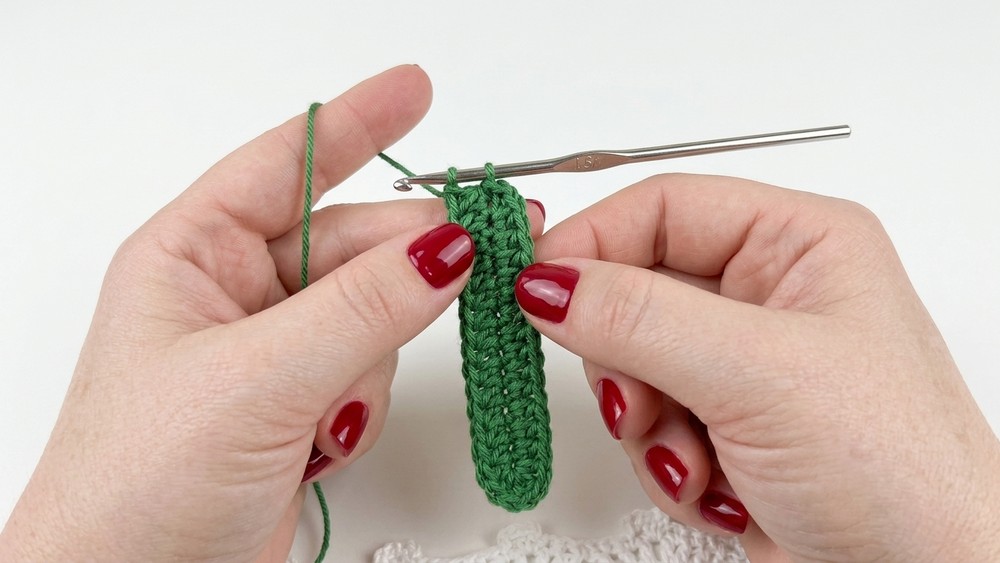
Step 3: Turning and Working on the Other Side
- At the end of the row, chain 2 to turn.
- Continue down the other side of the chain, working half double crochet (hdc) stitches into the foundation row.
- Once you've made a full circle around the foundation chain, secure the final stitch with a slip stitch into the beginning stitch.
Step 4: Adding a Ridge for Realism
- To give the leaf a more defined structure, make a row of slip stitches down the center of the leaf. Insert your hook into the back loops along the leaf stem and work slip stitches from one tip to the other.
Step 5: Finishing the Leaf
- Fasten off the yarn, weave in the ends with a tapestry needle, and secure with a small dab of glue if necessary.
- Repeat the above steps to create additional leaves. Each lavender stem needs two leaves.
Final Assembly:
- Attach the leaves to the wire. Start just below the lavender flowers and secure the leaves with glue, spacing them about 2 to 3 cm apart along the stem. Use a clothespin to hold each leaf in place until the glue sets.

Customization Tips:
- Color Variations: Use different shades of lavender or create a mixed bouquet with other colors like pink, blue, or white.
- Stem Lengths: Vary the wire lengths to create different stem heights for a more natural, layered arrangement.
- Leaf Size: Experiment with longer or broader leaves to make your flowers more lifelike.
- Bouquet Size: Create more stems for a fuller arrangement. You can make up to 20 to 30 stems for a rich, luxurious bouquet.

Conclusion:
Once all stems are complete, arrange them in a vase or jar and enjoy your handcrafted lavender flowers. This arrangement looks stunning as a centerpiece or on a shelf and makes a memorable, thoughtful gift.
Important Remarks:
- Ensure you use craft glue suitable for fabric and yarn to avoid issues with drying or adhesion.
- Be patient while attaching elements; let the glue dry fully before handling the stems.
- Always check for even tension in your crochet stitches to achieve a polished look.