
Luxury Free Crochet Bag Pattern for a Unique Organizer
A stylish handmade bag awaits with this free crochet bag pattern made for daily use on shopping trips and casual adventures.
Try this fun project, and you'll have a unique, graceful bag that adds both style and functionality to your daily life. It's perfect for anyone who enjoys creating something with their own hands while staying on a budget. This Crochet bag is special because of its beautiful design and modern look. The pattern combines simple stitches like half double crochet and split stitches to create a sturdy yet elegant texture. Its size is perfect for carrying everyday items such as groceries, books, or even personal essentials. What makes this bag even more remarkable is the additional reinforcing net inside, which gives it strength and durability without making it heavy.
Ultimate Free Crochet Bag Pattern for Shopping Made Simple
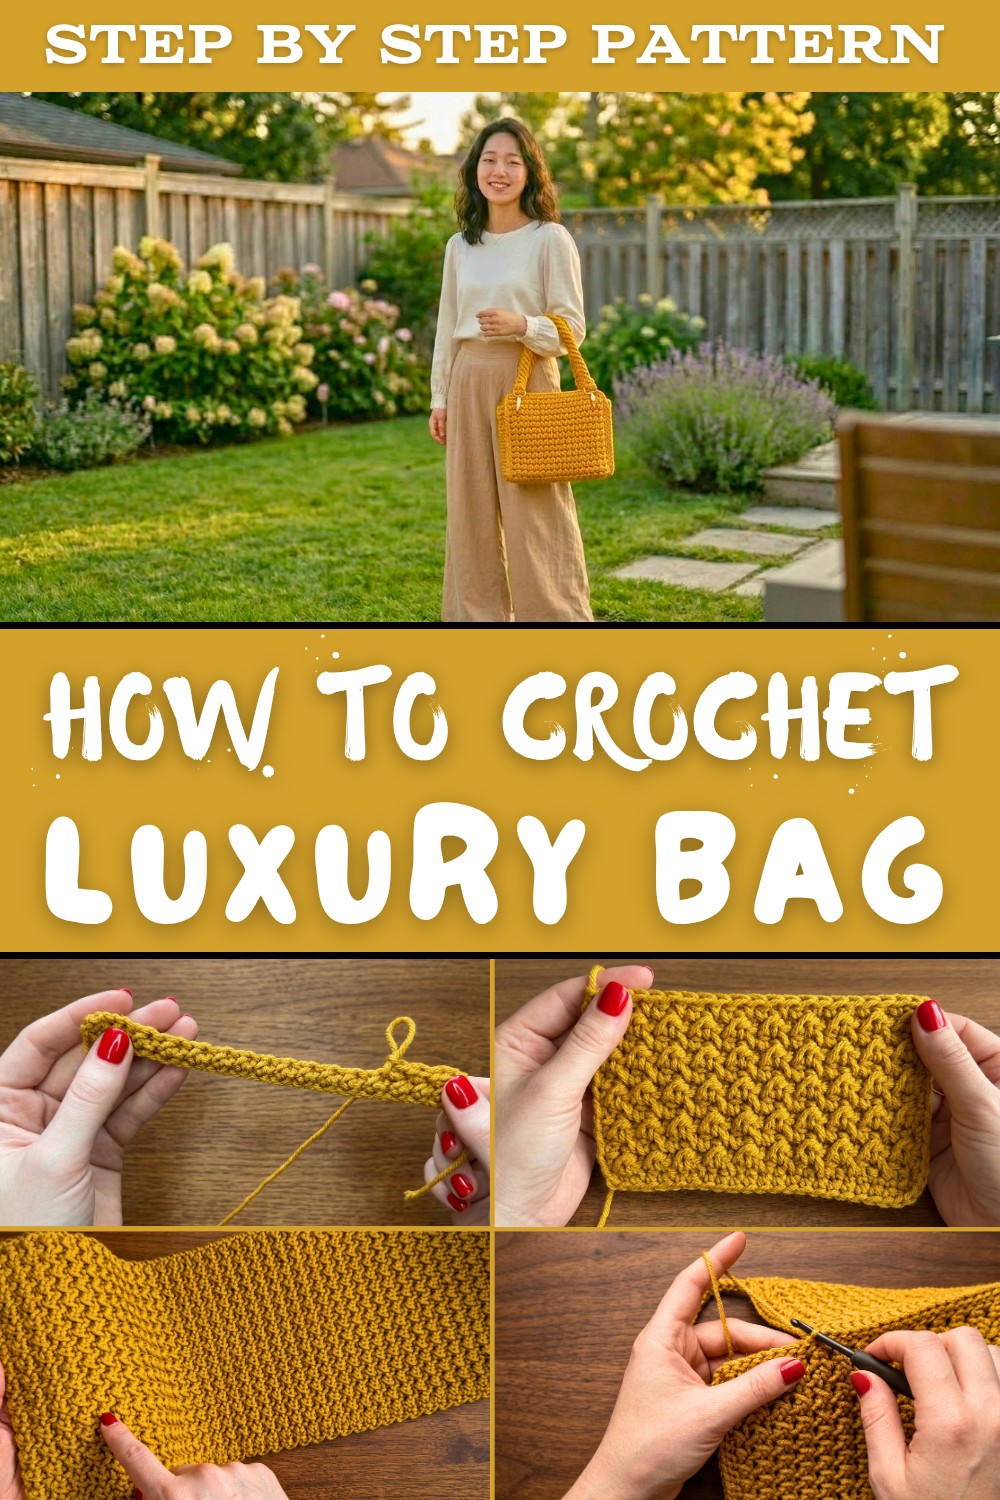
One of the unique features of this crochet bag is the fabric lining added inside. This lining ensures that your smaller items won't slip through the holes, making the bag practical for daily use. The pattern also includes instructions for crocheting strong straps with loops, so you can easily carry this bag over your shoulder or by hand. To add even more convenience, you'll learn how to incorporate a zipper, offering security for your belongings.
With clear steps, like making chains for the base, adding neat edges, strengthening the sides with a net, and finishing touches like zippers, this bag is versatile and fun to crochet. It's not just a bag-it's a creative expression of your skills and style. Let the simplicity and beauty of this project inspire your creativity.
Impressive Crochet Bag Pattern
Materials Required
- Macrame Yarn: Marine blue color (or any color of your choice).
- Crochet Hooks: Sizes 4.5 mm for the main body and 3.5 mm for the straps.
- Fabric: To line the bag and provide a clean inner finish.
- Plastic or Reinforcement Net: To provide structure and strength to the bag.
- Metal Loops: Required for the straps (you need 4 loops, 2 for each strap).
- Zipper: A black zipper to close the bag securely.
- Scissors: For cutting yarn, fabric, and net.
- Sewing Needle and Thread: To sew the lining and the zipper in place.
- Stitch Markers: For marking edges and aligning components.
Key Techniques
- Slip Knot: The starting knot of your crochet work.
- Half Double Crochet (HDC): Yarn over, insert hook, pull up a loop, yarn over, and pull
- through all loops on the hook.
- Split Stitch: Insert hook into only one strand or loop of the stitch for a decorative finish.
Pattern Instructions
Step 1: Crochet the Main Body
- Foundation Chains
- Start with a slip knot on the 4.5 mm crochet hook.
- Chain 32 chains for the base of the bag.
- Row 1
- Begin with a stitch in the first chain.
- Work a half double crochet (HDC) in the next chain.
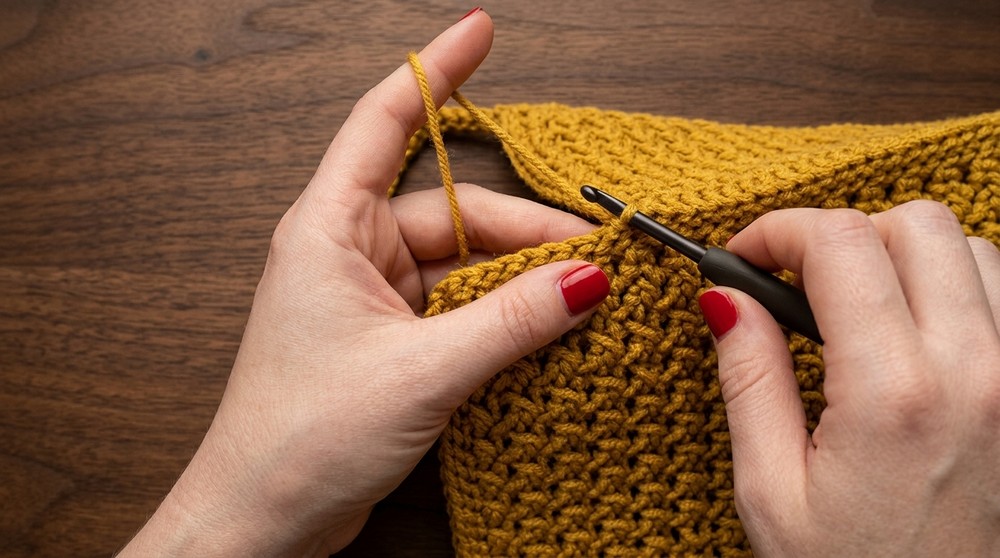
- Alternate between splitting the stitch (inserting the hook between the two threads of the chain) and working HDC across the row.
- End the row with a stitch.
- Chain 1, turn your work.
- Subsequent Rows
- Repeat the same pattern: Start each row with a stitch, alternate HDC and split stitches, and finish with a stitch.
- Row Count
- Continue the pattern until you have 40 rows (count the visible, raised lines on the crochet fabric to confirm).
- Final Row
- Crochet one additional row following the same pattern and end with a stitch.
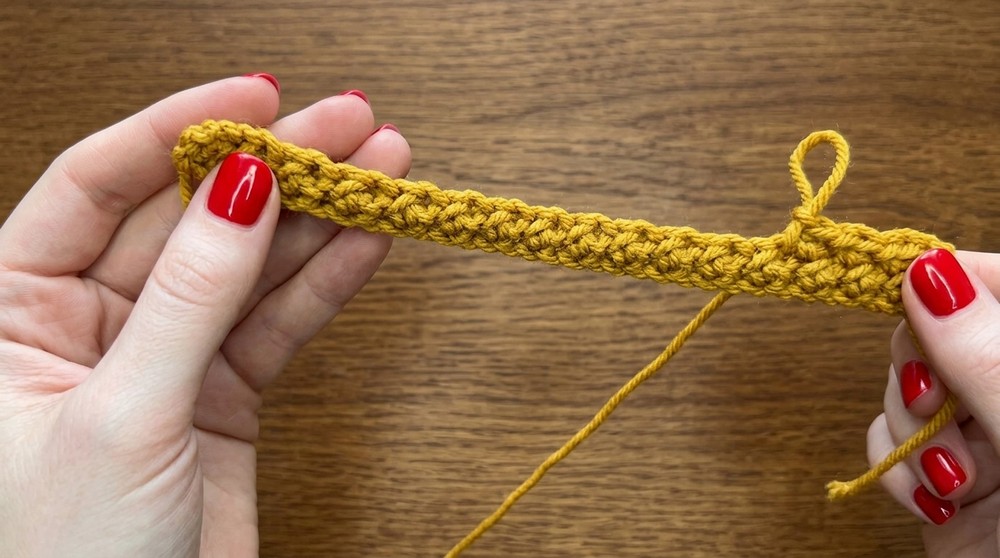

Step 2: Work on the Edges
- Edge Round 1
- Chain 1 after completing the last row.
- Work into the "up and down" edges of the crochet pattern: Insert your hook into the raised (up) stitches and perform a split stitch.
- Alternate between the raised and lower stitches as you work around the edges of the entire fabric.
- Edge Round 2
- Work another row around the edges by taking only the back loops of the previous round's stitches.
- Finishing the Edge
- Cut the yarn, fasten off, and weave in the loose ends for a neat finish.
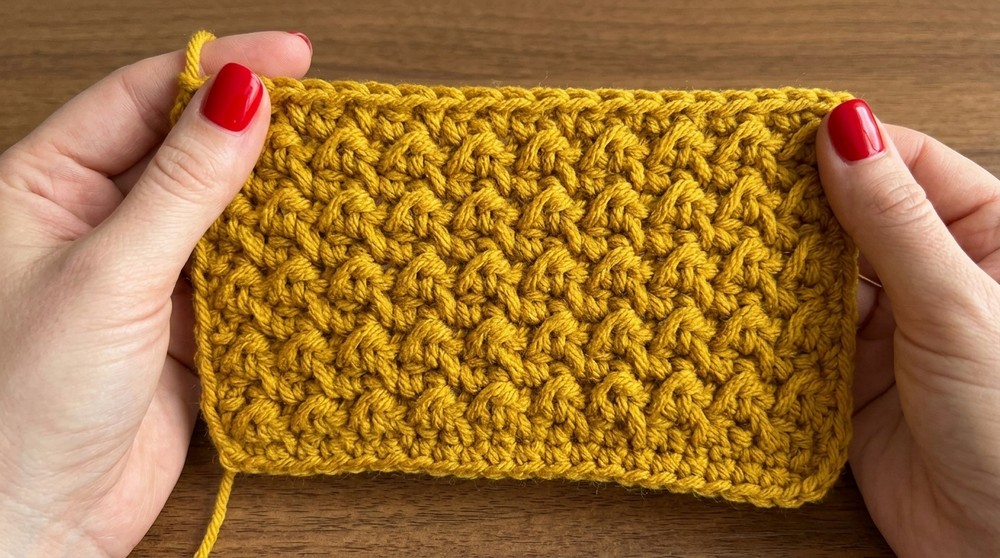
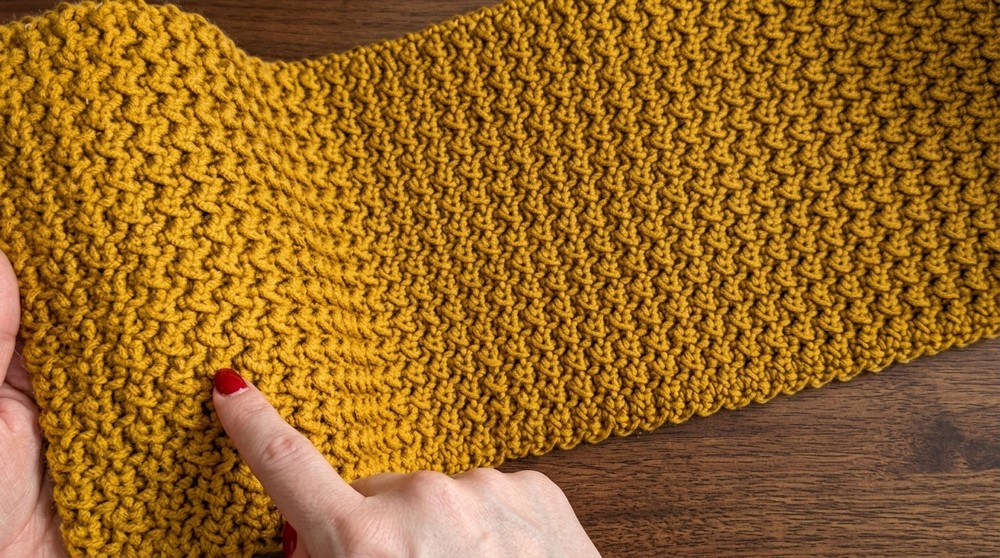
Step 3: Crochet the Bag Sides
- Foundation Chains for Sides
- Chain 16 chains to start the bag side pattern.
- Work the Rows
- Follow the same pattern as the main body: Start with a stitch, alternate between HDC and split stitches, and end with a stitch. Chain 1 and turn after each row.
- Crochet 12 rows, ensuring that the visible lines (raised stitches) total 12 rows in height.
- Edge Finishing for the Sides
- Perform an edge round following the same method as in the main body, but only work 1 round of split stitches.
- Reinforce the Sides
- Cut a plastic or reinforcement net to the size of the side pieces.
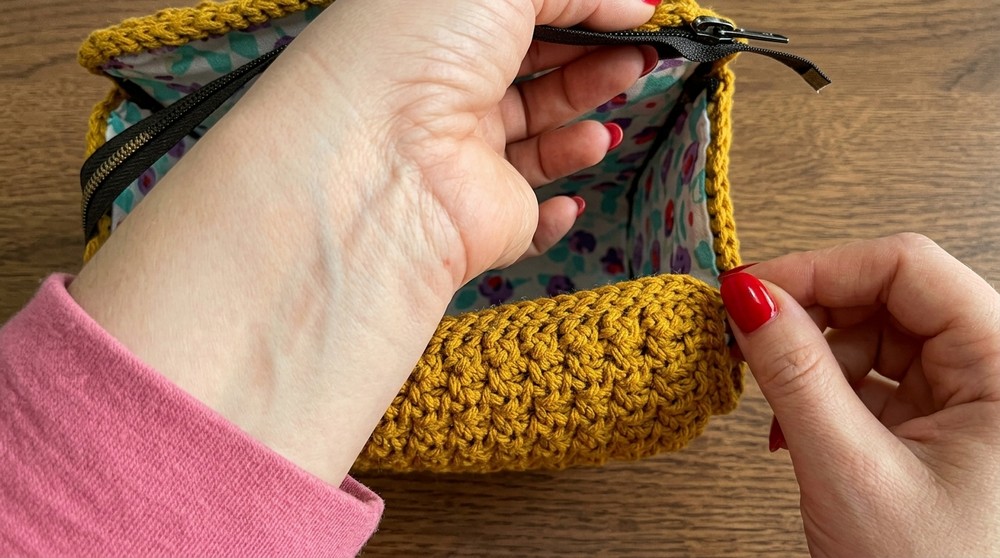
- Place the net in between, and sew a fabric lining over it for both sides.
Step 4: Assemble the Bag
- Align Horizontally
- Mark the center points along the width of the main body using 15 stitches on each side.
- Align the side pieces vertically with the marked center points.
- Attach the Sides
- Using the 4.5 mm hook, attach yarn to the edge of the bag. Use split stitches to join the side pieces to the main body, ensuring alignment with the stitch markers.
- Work carefully around each side to ensure a tight, secure join.
Step 5: Make the Straps
- Start with Loops
- Switch to the 3.5 mm hook for tighter stitches.
- Attach yarn to a metal loop and work 4 foundation chains onto it.
- Strap Rows
- Work only stitches (single crochet) for each row.
- After completing 3 rows, insert and secure the second metal loop at the other end of the strap by folding the strap over the loop and stitching it securely in place.
- Strap Length
- Continue crocheting rows until you reach your desired strap length. Make sure to attach loops on both ends securely.
Step 6: Attach the Straps
- Sew or crochet the straps onto the bag, ensuring they are evenly spaced and aligned for weight distribution.
Step 7: Add the Zipper
- Sew the zipper along the top edge of the bag using a sewing needle and thread. Ensure it is aligned properly and securely attached for smooth function.
Finishing the Pattern
- Inspect the Bag
- Check all seams, edges, and the zipper to ensure everything is tightly fastened.
- Trim any loose threads or yarn ends.
- Final Touches
- Press the fabric lining gently (if needed) to remove wrinkles.
- Adjust the straps to ensure they are symmetrical and secure.
- Bag Dimensions
- Approximate finished dimensions (depending on tension and yarn type):
- Body: 14 inches wide × 12 inches high.
- Sides: 12 inches high × 3 inches wide.
- Approximate finished dimensions (depending on tension and yarn type):

Tips for Success
- Yarn Tension: Keep your tension consistent to ensure even rows and a polished look.
- Alignment: Proper placement of the side panels is crucial for the bag's shape. Double-check positioning before attaching.
- Zipper Choice: Choose a zipper that complements your bag. Black, white, or a matching colored zipper works well for a seamless design.
- Storage: Store your bag with light tissue paper stuffing to help maintain its structure.
Final Words and Tips
- Customization
- Experiment with different colors of yarn and lining to create unique combinations.
- Adjust the bag size by increasing or decreasing the initial foundation chains and rows.
- Maintenance
- Handwash the bag to maintain the yarn's texture and strength.
- Avoid overloading the bag to prevent stretching or damage.
- Skill Level Note
- This pattern is suitable for beginners with basic knowledge of stitches such as chains, single crochet, and half double crochet.
Enjoy your handmade crochet bag, Perfect for errands, shopping, or as a thoughtful gift.