
Modern Crochet Bandana Pattern with Easy Steps
Turn yarn into a stylish bandana that's versatile and unique, offering a fun way to showcase creativity while making a functional accessory easily.
Lightweight, stylish, and endlessly customizable, this project is a delightful way to combine practicality with creativity. A handmade bandana can serve multiple purposes, wear it as a fashionable hair accessory, tie it around your neck for a chic look, or add it to a tote bag for a pop of personality. This manageable project is ideal for all skill levels, requiring minimal materials and offering quick results.
Free Crochet Bandana Perfect for Hair or Neck Styling
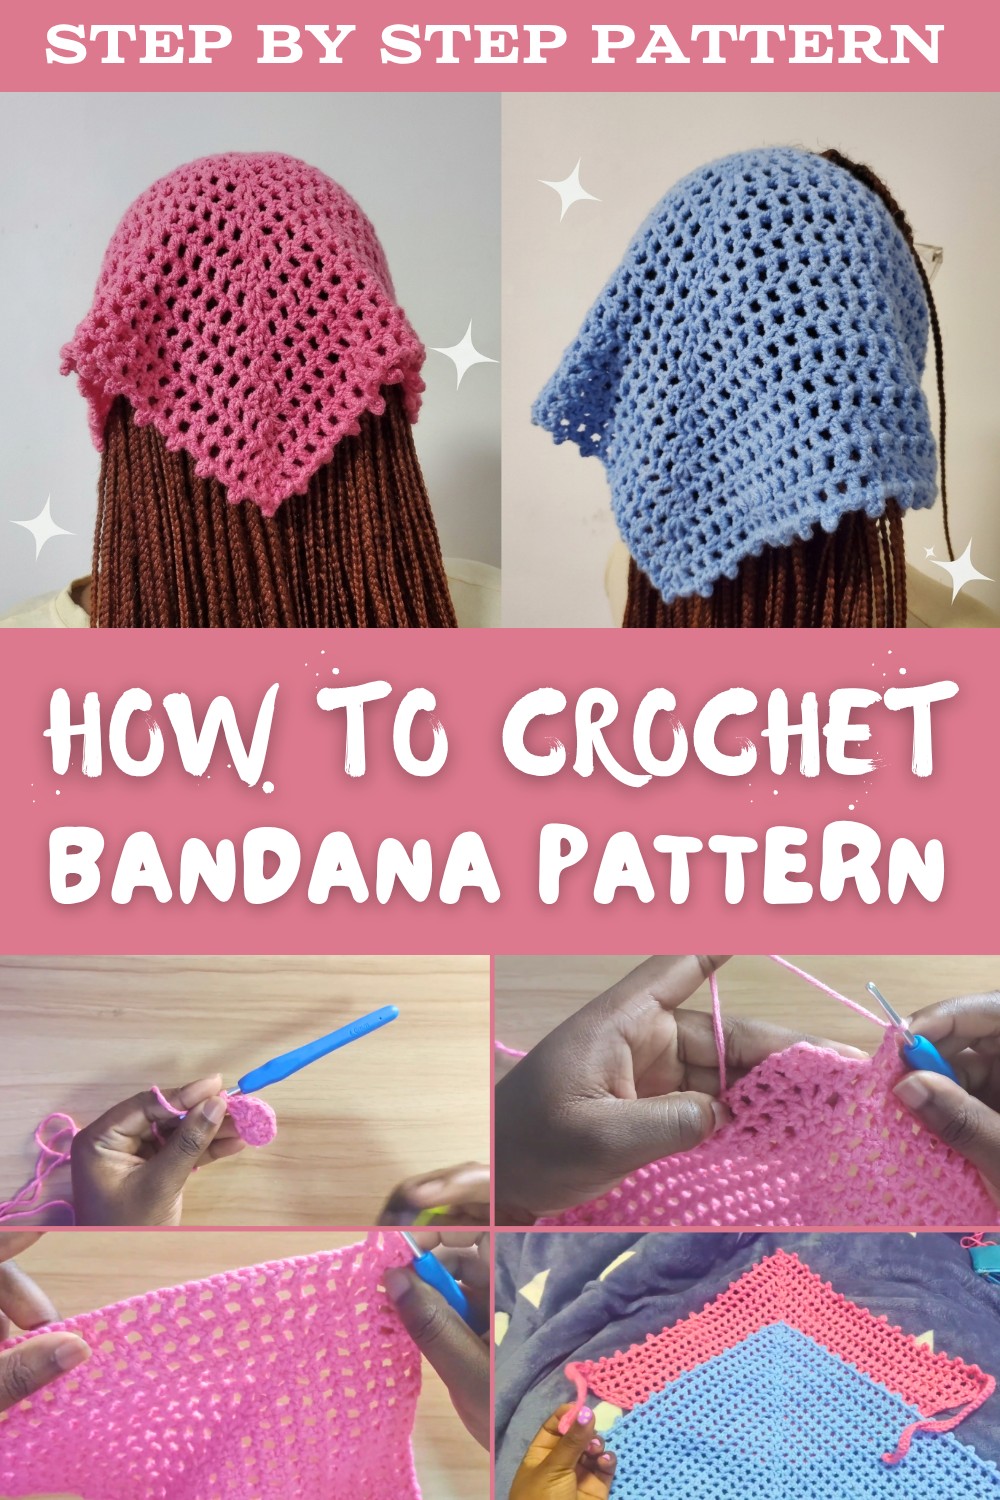
It's also an excellent opportunity to experiment with intricate stitch designs, explore eye-catching color combinations, or even repurpose yarn scraps from your stash. Beyond its aesthetic appeal, a bandana crocheted by hand is surprisingly versatile, fitting into seasonal wardrobes and making thoughtful, one-of-a-kind gifts.
Whether your style leans playful, minimalist, or boho-inspired, this is the perfect project to express individuality while creating something both functional and fashionable.

Detailed Crochet Pattern: Easy Bandana
Materials Needed
- Yarn: Choose any type of yarn in your preferred color or thickness. For regular worsted-weight yarn, one skein should be sufficient.
- Crochet Hook: A 4mm crochet hook.
- Stitch Marker: To mark the center stitch.
- Yarn Needles: For weaving in ends.
- Scissors: For cutting yarn.
Skills and Techniques Used
- Slip Knot: To start your project.
- Chain Stitch (CH): Basic stitch to form the foundation chain and spacing in the project.
- Double Crochet (DC): Yarn over, insert hook in stitch, yarn over and pull through, yarn over, pull through two loops, yarn over, pull through last two loops.
- Slip Stitch (SS): Insert hook, yarn over, pull through all loops. This is used for joining or moving across stitches.
- Single Crochet (SC): Insert hook, yarn over, pull up a loop, and yarn over, pull through both loops.
- Picot Stitch: A decorative stitch made with slip stitches and chains.
Finished Size
- Approximately 17-20 rows complete a medium-sized bandana. The size can be adjusted based on your preference by increasing or decreasing the number of rows.
Step-by-Step Instructions
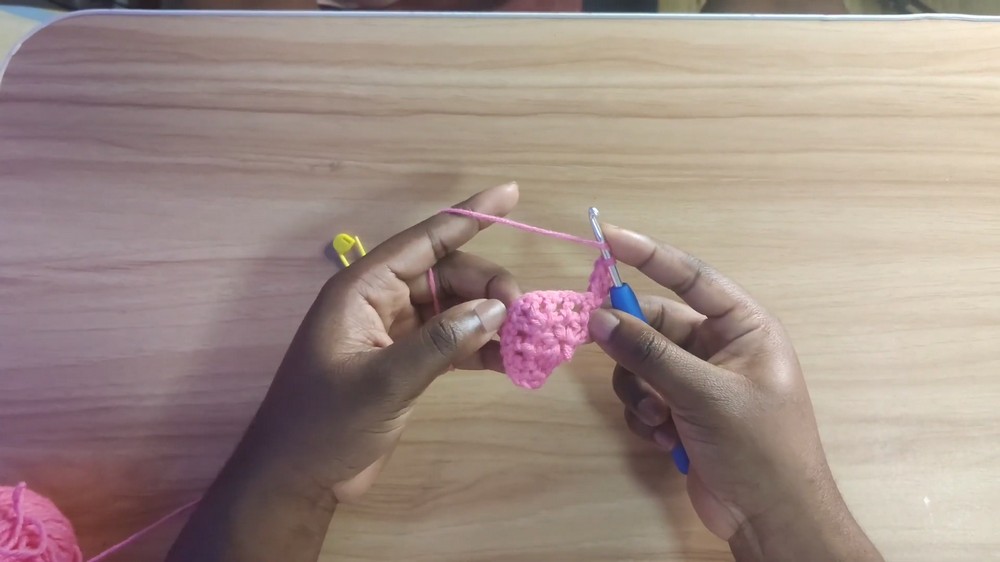
Step 1: Create the Foundation Circle (Row 1)
- Begin with a slip knot on your hook.
- Chain 4 (CH4) and join the first chain to form a ring using a slip stitch (SS).
- Inside the ring, work as follows:
- Chain 3 (counts as the first DC).
- Work 2 Double Crochets (DC) into the center of the ring.
- Chain 1 (CH1).
- Work 2 DCs, Chain 1.
- Repeat this process until there are 7 posts in total (including the chain-3 at the start).
- Do not chain after the final DC post.
- Mark the middle post (4th post) with a stitch marker.

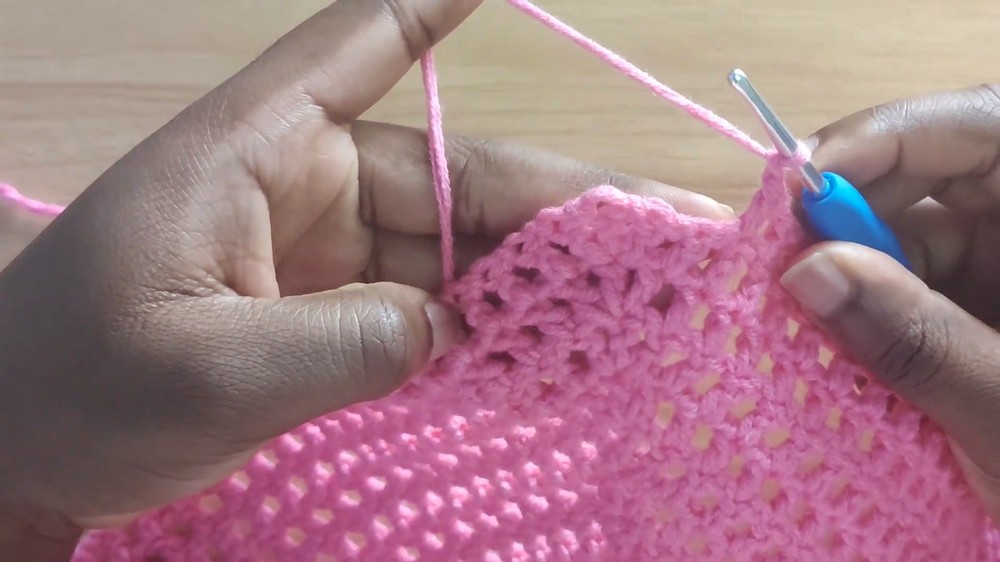
Step 2: Continue the Bandana Shape (Row 2 and Beyond)
- Chain 3 (this acts as the first DC) and turn your work.
- Work 1 DC into the same first stitch (no chain between the chain-3 and this DC). You now have 2 DCs at the start.
- For the remaining stitches in the row:
- Chain 1 (CH1), work 1 DC into the top of each DC from the row below. Skip the spaces between posts.
- When you reach the middle post (marked):
- Chain 1 (CH1) before the middle post.
- Work 3 DCs into the middle post, with CH1 between each DC in this cluster:
- DC, CH1, DC, CH1, DC.
- Continue your way down the other side, working CH1, 1 DC into each post.
- At the very last stitch of the row:
- Add 1 DC directly into the final post of the row (no chain before this).
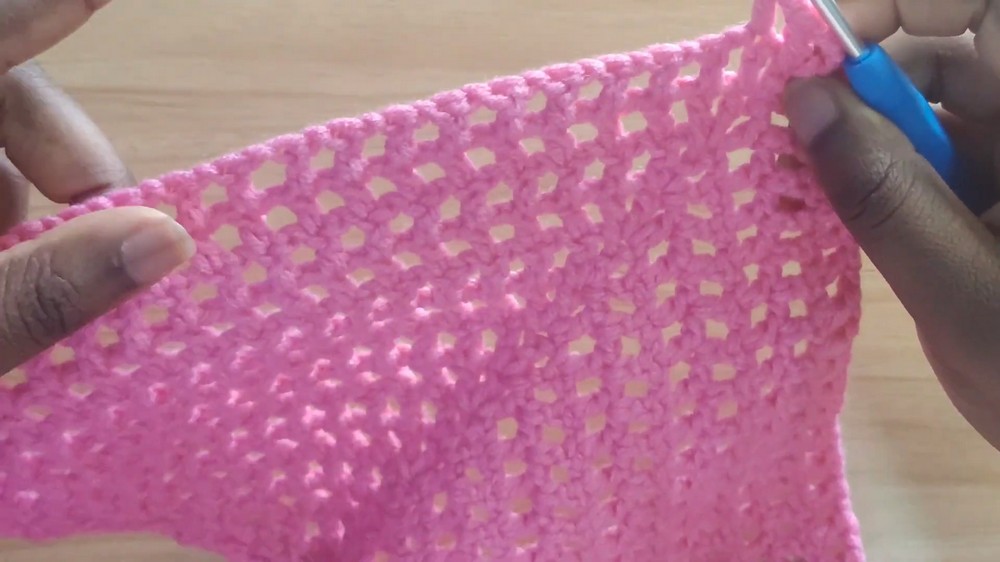
Step 3: Repeat Rows Until Desired Size
- Repeat Row 2 for each subsequent row, ensuring you:
- Work DCs with CH1 across the edges.
- Place 3 DCs (with CH1 in between) into the marked middle post each time.
- Continue this pattern for 17-20 rows (or your desired size).
- Once you reach your desired size, fasten off your yarn.
Step 4: Create the Tie Straps
- Attach your yarn to the corner edge of the wide end of your bandana.
- Chain 30 (CH30) to form the first strap.
- Turn your work and single crochet (SC) into each chain in the CH30 back toward the bandana's edge.
- This thickens the strap and makes it durable.
- Repeat this process on the opposite corner of the wide bandana edge to create the second strap.

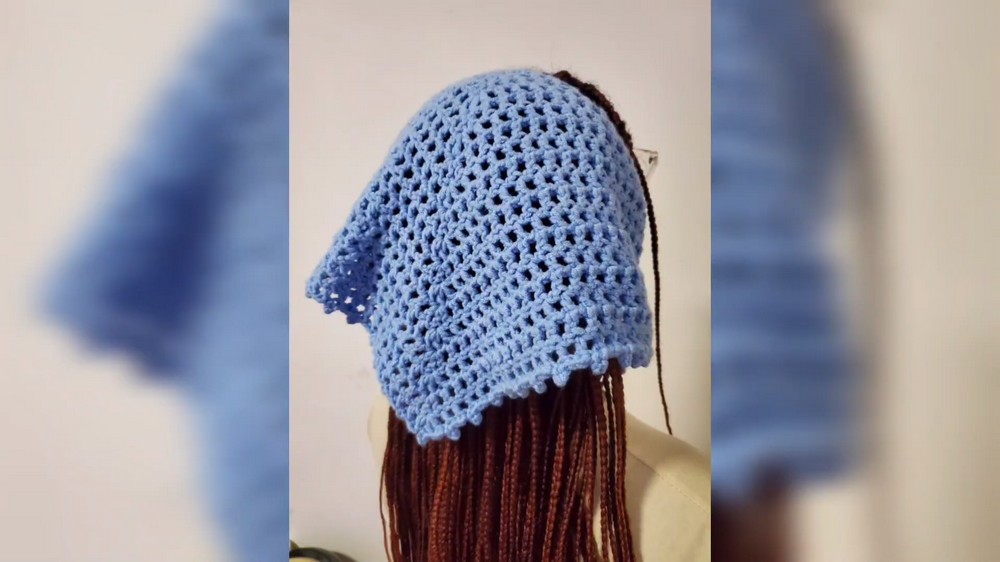
Step 5: Add a Picot Edge (Optional)
- Reattach your yarn to the bandana's edge using a slip stitch (SS).
- Work a decorative Picot Edge as follows:
- Slip Stitch into the first double crochet.
- Chain 3 (CH3).
- Insert your hook into the first chain and work a slip stitch (SS) to form the small "bump" of the picot.
- Skip the next DC stitch on the edge, and work another picot (SS, CH3, SS) into the following DC.
- Continue this pattern: Slip stitch, skip 1 DC, picot across the edges of the bandana.
- Fasten off and weave in all ends.
Final Finishing Steps
- Once all parts are complete, block the bandana gently (optional) if your yarn calls for blocking. This helps to flatten and shape the bandana neatly.
- Inspect your work for any loose ends and securely weave them in with the yarn needle to prevent unraveling.

Tips for Success
- Mark Your Stitches: Use the stitch marker consistently at the middle post to maintain proper alignment. Missing this step can distort the triangular shape of the bandana.
- Customize Size: Feel free to adjust the number of rows in your bandana to suit your preferences. Larger rows create more coverage, while fewer rows create a smaller, lighter bandana.
- Experiment with Colors: Use multiple colors either as rows or as accents in the picot edging for a bright, personalized touch.
- Choose Durable Yarn: Since this bandana involves ties and edges, use a durable yarn that will not fray or pill with time.
- Carry Your Stitch Marker: If you forget where the center is, count the stitches in the row (always odd-numbered with the middle stitch).
Final Words
Congratulations on completing your crochet bandana! This project is perfect as a stylish accessory for everyday use, and your creativity can truly shine through with color and design variations. The triangular shape paired with a clean picot edge and sturdy tie straps makes this a versatile and beautiful hand-made piece.