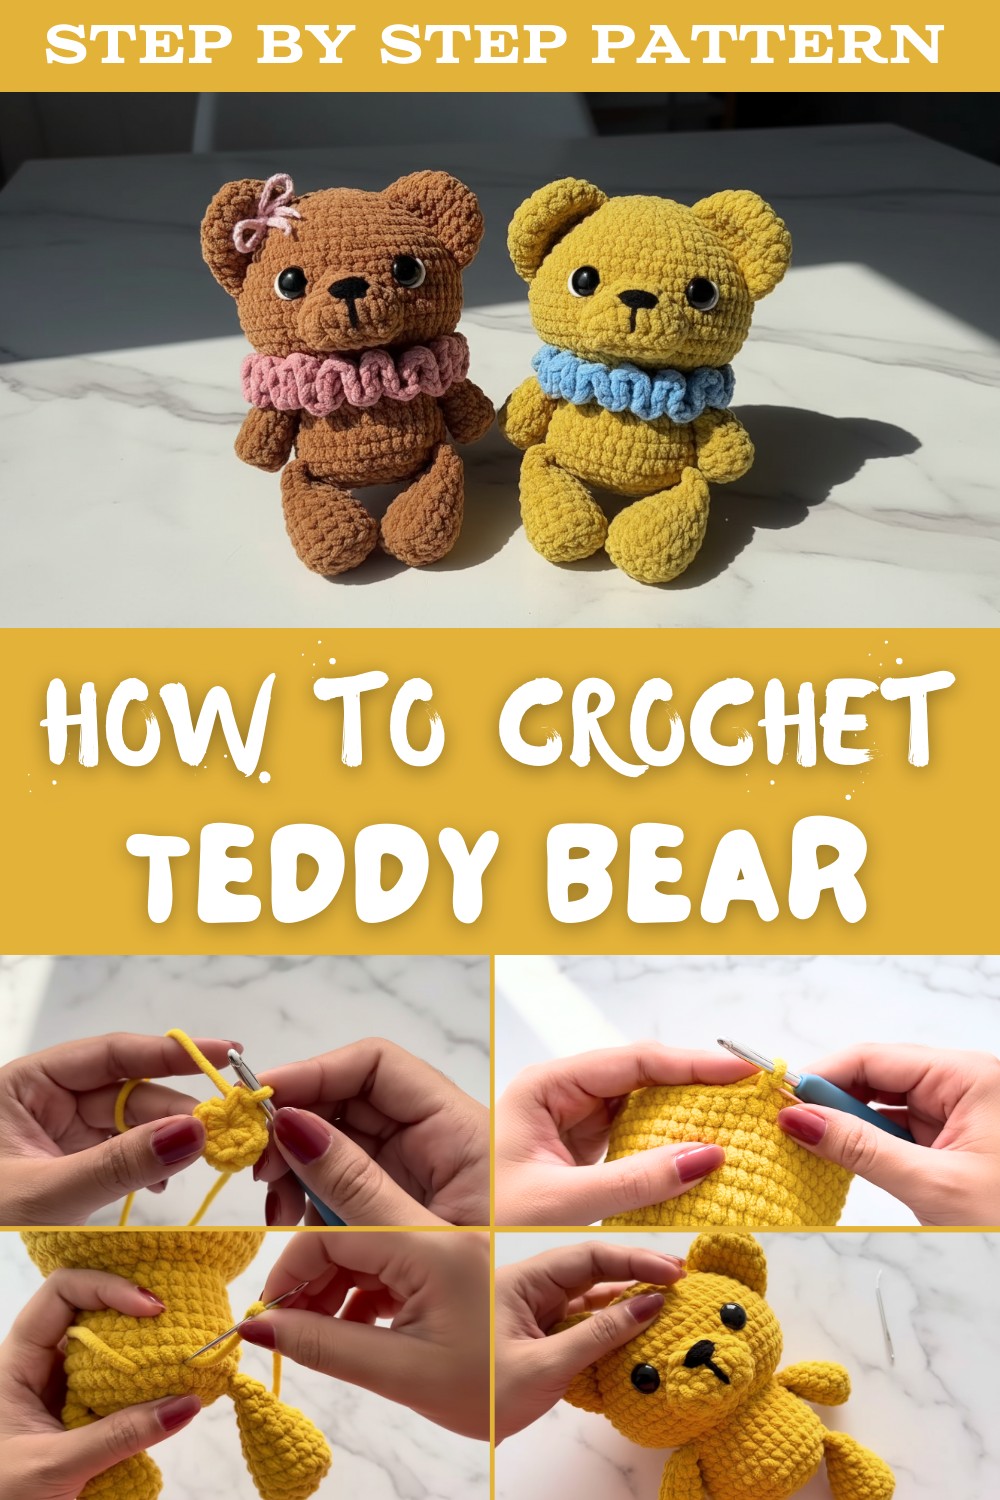
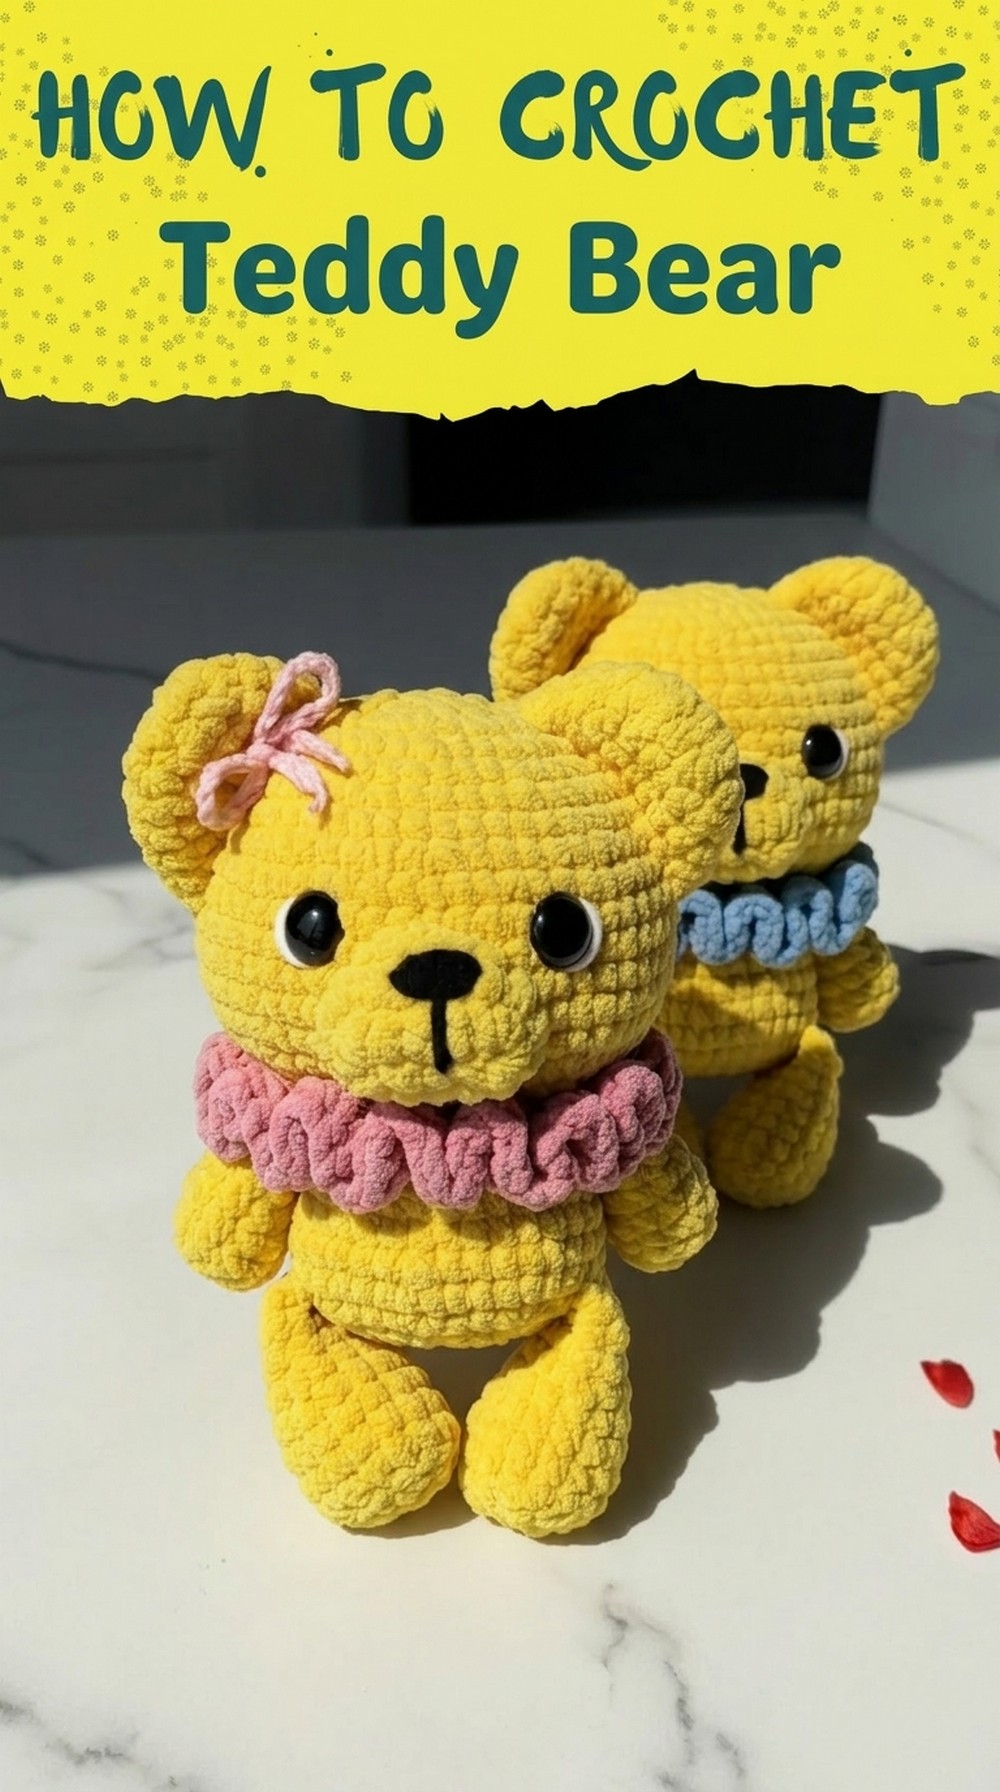
Perfect Free Crochet Teddy Bear Pattern for Baby Showers
Stitch your own joy with this Free Crochet Teddy Bear Pattern, turning simple yarn into a lovable companion that brightens any room or gift bag.
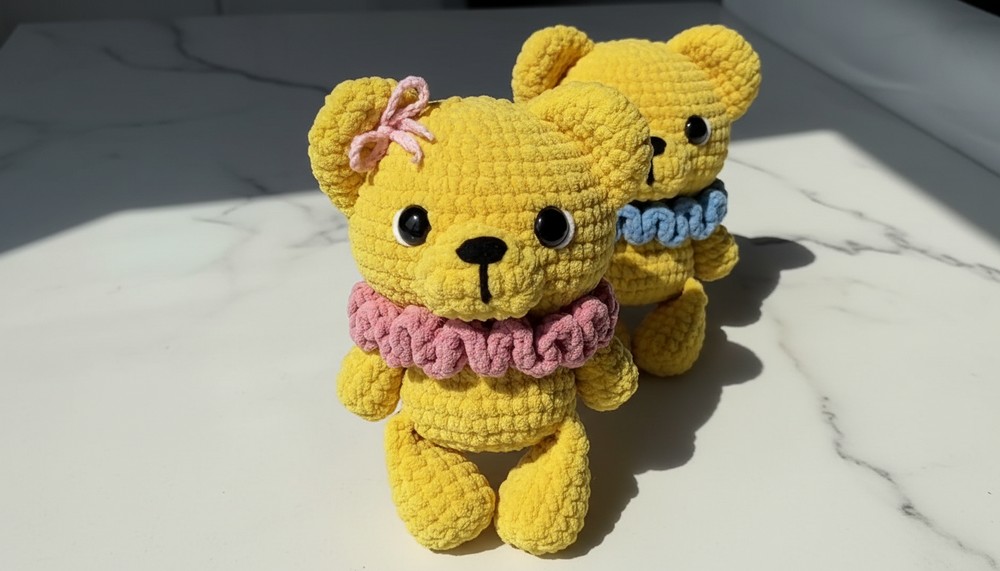
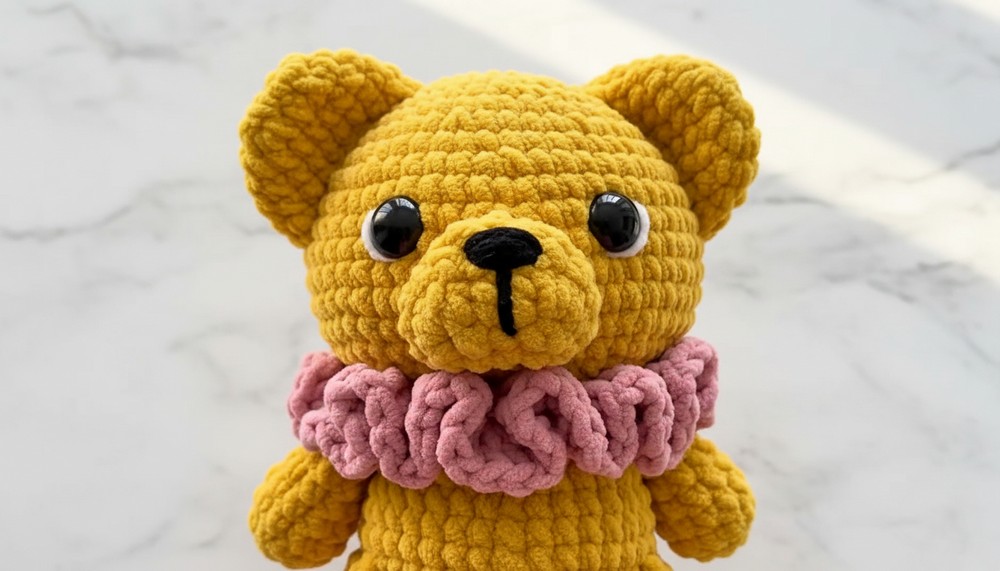
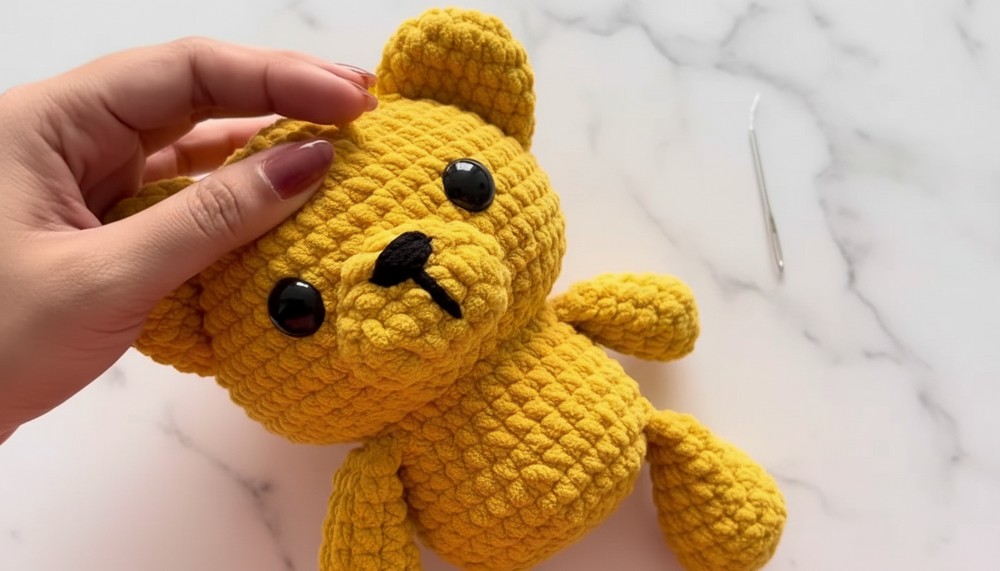
There's something special about a tiny teddy bear that warms the heart and brings smiles. This soft and cuddly crochet teddy bear is cute, simple, and full of charm, making it perfect for children or anyone who loves sweet decorations. With rounded arms, legs, and a cheerful face, its appearance feels joyful and inviting. It works wonderfully as a small gift, a toy, or even as a thoughtful keepsake.
Free Crochet Teddy Bear Pattern Pattern for Maximum Cuteness
The teddy bear's design allows it to fit comfortably in the palm of your hand, and its tiny size makes it easy to carry or display anywhere. It can be made in soft or bold colors, giving it a unique look every time. This lovable teddy bear holds a special warmth and becomes an instant favorite for anyone who sees it. It's more than just a little decoration-it's a pocket-sized piece of love and happiness.
Crochet Teddy Bear Pattern With Removable Accessories
Finished Size
The completed teddy bear is approximately 10-12 inches tall, depending on your tension and the yarn used. Accessories like the ruffle collar and scarf are designed to fit snugly and enhance the teddy bear's look.
Materials Needed
- Yarn:
- Chanel Yarn: For the main body and limbs. Use yellow, brown, beige, or any color of your choice.
- Black Yarn: For embroidering the nose and subtle facial details.
- White Yarn: For adding details around the eyes.
- Accessory Yarn: For the ruffle collar (color of choice) and scarf (t-pink or any contrasting color).
- Optional: Colorful yarn for additional embellishments.
- Hook:
- 5 mm crochet hook.
- Stuffing:
- Polyester fiberfill to stuff the teddy bear.
- Safety Eyes:
- Two 16 mm safety eyes.
- Tapestry Needle:
- For sewing parts together and hiding yarn tails.
- Scissors:
- For neatly cutting yarn ends.
- Pins:
- For positioning parts before sewing.
Gauge
Not critical for this project, but for reference:
10 single crochet stitches x 10 rows = 4 inches.
Abbreviations (US Terminology)
- ch: Chain
- sc: Single Crochet
- hdc: Half Double Crochet
- dc: Double Crochet
- sl st: Slip Stitch
- st(s): Stitch(es)
- MC: Magic Circle
- inc: Increase (2 sc in the same stitch)
- dec: Decrease (join 2 stitches into 1)
Special Techniques
Magic Circle (MC):
- Wrap the yarn around two fingers to create a loop.
- Insert the hook into the loop, yarn over, and draw through.
- Chain 1 (or more as needed for the round) and work the required stitches into the loop.
- Pull the yarn tail tightly to close the circle.
Invisible Decrease:
- Insert the hook into the front loops only of the next two stitches.
- Yarn over, pull through the two front loops.
- Yarn over again and pull through both loops on the hook.
Crochet in Back Loop Only:
- Insert the hook under the back loop only of the stitch, yarn over, and complete the stitch as normal.
Pattern Instructions
Head and Body
- Magic Circle Base:
- Round 1: Make 8 sc into the MC. (8 sts)
- Pull the yarn tail tightly to close the circle.
- Increase Rounds (Round 2-5):
- Round 2: Make 1 inc in each stitch around. (16 sts)
- Round 3: Alternate 1 sc, 1 inc around. (24 sts)
- Round 4: [1 sc, 1 inc, 1 sc] repeated 8 times. (32 sts)
- Round 5: [3 sc, 1 inc] repeated 8 times. (40 sts)
- Height and Shape (Round 6-22):
- Rounds 6-9: Work 40 sc. (40 sts per round)
- Round 10: Alternate 2 sc, 1 inc, 2 sc around. (48 sts)
- Round 11: Work 48 sc. (48 sts per round)
- Round 12-22: Gradually add stitches based on the transcription to increase circumference (e.g., 56 sts, then 64 sts).
- Decrease Rounds (Round 23-30):
- Gradually reduce the stitch count by alternating sc and dec.
- Final Round: Close the body (8 dec). Use a needle to sew through the last few stitches and pull tight.
- Stuffing:
- Stuff the head and body firmly with fiberfill during the rounds to ensure a stable shape.


Legs
- Magic Circle Base:
- Round 1: 8 sc into the MC. (8 sts)
- Round 2: Make 1 inc in each stitch. (16 sts)
- Rounds 3-6: Work 16 sc in back loops only.
- Decrease Rounds: Gradually decrease to form the tapered end, leaving a long tail for sewing.
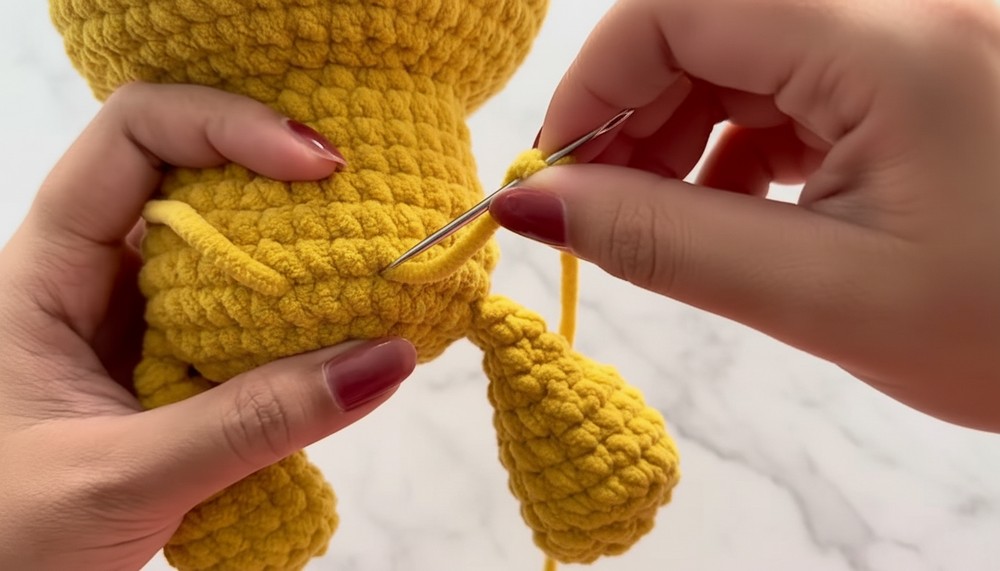
- Stuffing and Assembly:
- Stuff lightly and sew the legs securely to the body at Round 26-27.
Arms
- Magic Circle Base:
- Round 1: 10 sc into the MC. (10 sts)
- Round 2: Work in back loops only for 10 sc. (10 sts)
- Rounds 3-6: Work 10 sc in continuous rounds.
- Stuffing and Assembly:
- Stuff lightly and attach the arms to the body at Round 20-21.
Ears
- Foundation Chain:
- Chain 4.
- Work along both sides of the chain to create a rounded ear shape, increasing at the corners to form the curve.
- Assembly:
- Sew the ears to the head between Round 4-11, leaving 9 stitches apart.
Snout
- Foundation Chain:
- Chain 6 and work along both sides as described in the transcription. Increase at the ends to create an oval shape.
- Finish and Assembly:
- Sew the snout to the head between Round 12-15. Embroider the nose and mouth with black yarn.
Accessories
Ruffle Collar
- Foundation Chains:
- Chain 61.
- Work slip stitches, double crochets, and increases as per the transcription to create a ruffled effect.
- Assembly:
- The ruffle collar is designed to be removable. Adjust the final look by carefully arranging the ruffles.
Scarf
- Foundation Chains:
- Chain 62.
- Work 59 dc starting from the third chain from the hook.
- Add 2 slip stitches on each end for neat finishing.
Customization Ideas and Tips
- Adjusting Size: Use different yarn weights and hook sizes for larger or smaller teddies.
- Color Customization: Experiment with unique colors for a more whimsical teddy bear.
- Facial Expression: Change eye placement or size for a unique personality.
- Accessories: Add a bowtie, hair bow, or tiny crochet flowers for further customization.
Finishing Touches
- Tie off and securely hide any loose yarn ends.
- Shape the bear as you stuff to ensure an even, plush appearance.
- Adjust and shape accessories after attaching them.
- Use pins to position features before sewing to maintain symmetry.
Conclusion
Congratulations! Your adorable teddy bear is now complete with optional accessories like the ruffle collar and scarf. This huggable creation is perfect for gifting or treasuring as a cozy companion. With its soft texture and charming details, it is guaranteed to bring smiles and joy.