
Quick Free Crochet Unicorn Coin Purse Pattern to Try
Bring a playful unicorn coin purse to life with this free crochet guide. Great for beginners, add charm to your accessories or surprise someone with a handmade treasure.
It's easy to feel intimidated by crochet projects that seem overly complicated, but this unicorn coin purse breaks that mold with its simple yet enchanting design. From its playful colors to the whimsical unicorn horn, this coin purse combines charm and practicality in the perfect way. Its compact size makes it ideal for storing coins, small trinkets, or as a thoughtful handmade gift for someone special.
Free Crochet Unicorn Coin Purse Pattern Using Simple Stitches
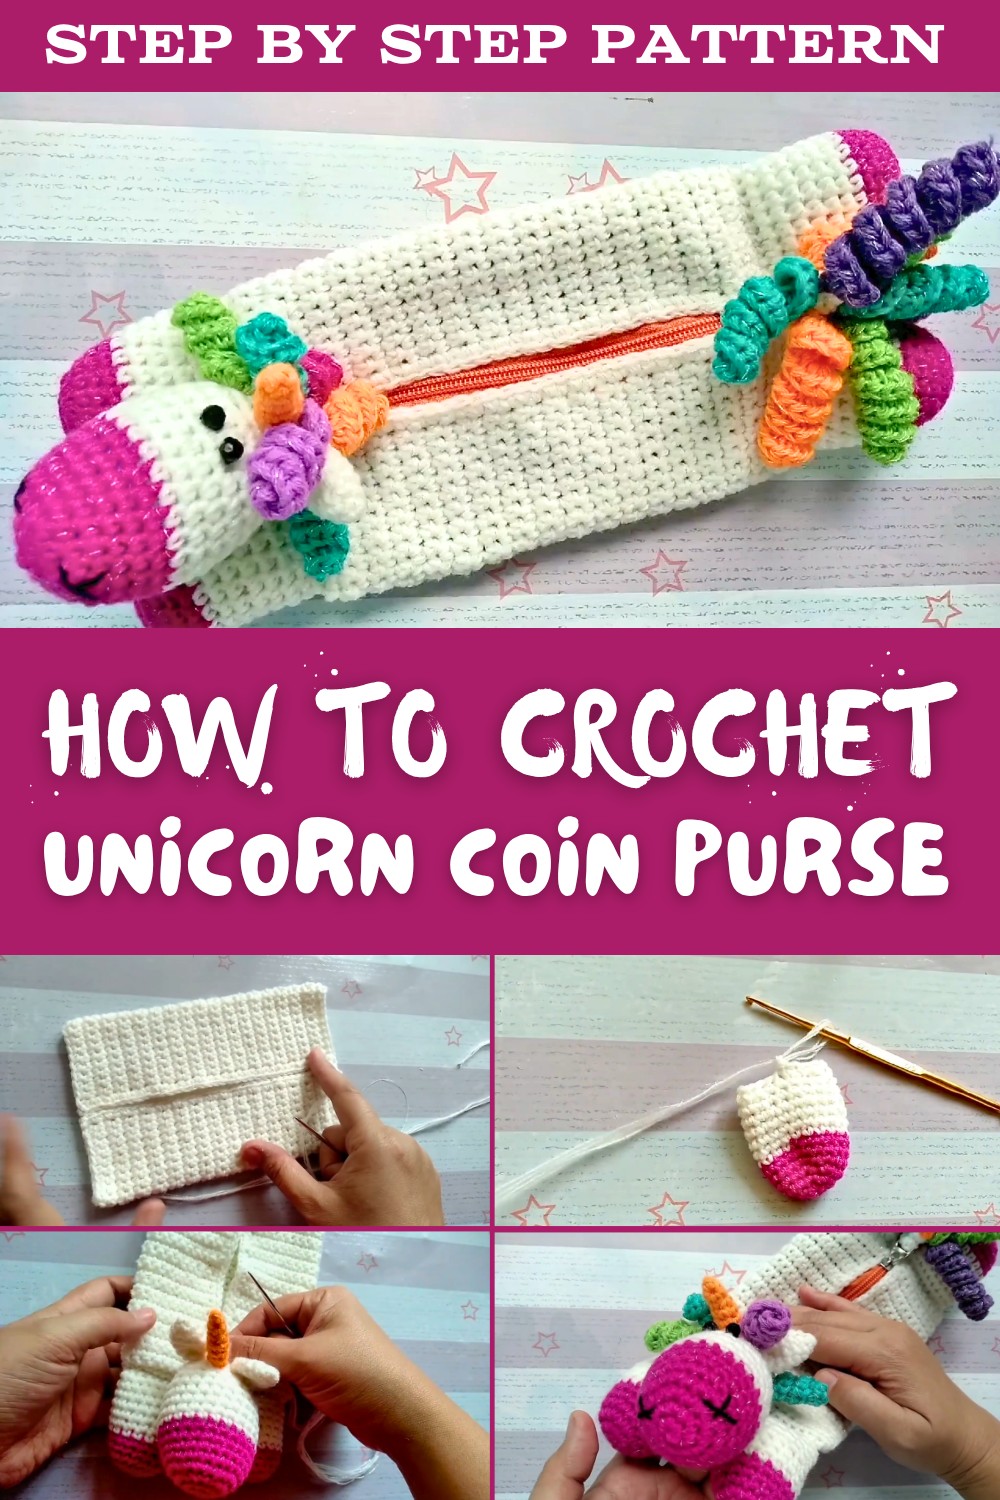
This pattern is designed to be beginner-friendly, using basic crochet techniques like single crochet and double crochet, ensuring anyone can create something beautiful, even if they're new to the crochet. The step-by-step process allows you to build your confidence while enjoying the creative experience. Plus, the smaller scale of the project means you'll have a sense of accomplishment without spending too much time.
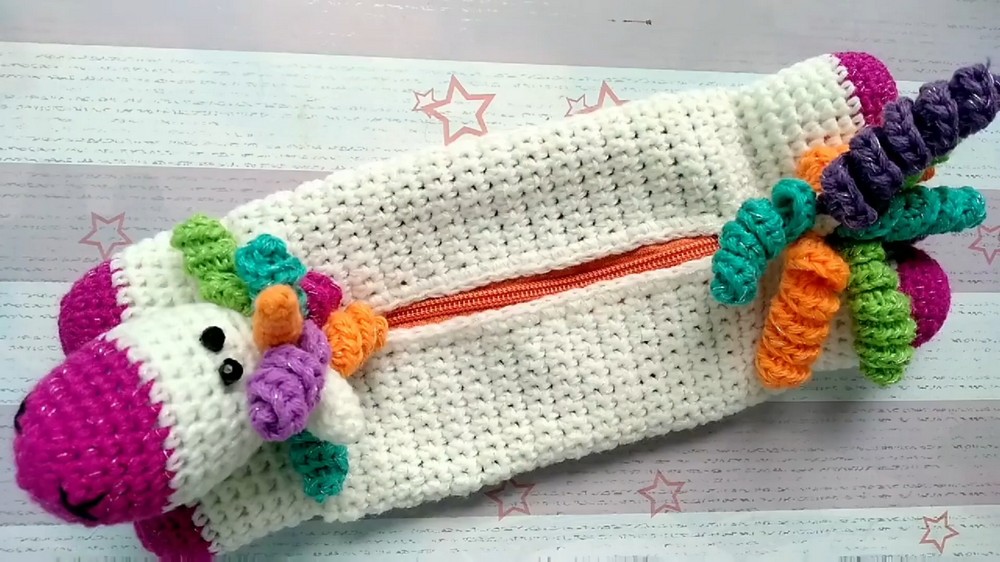
With just a few materials, including soft yarn, a zipper, and your chosen crochet hook, you can easily bring this magical piece to life. Adding features like the mane, ears, and glittering horn is straightforward and enhances the overall charm of the purse. Whether you're making it as a gift, for kids, or just as a cute accessory, this project reminds us that crochet can be simple, creative, and fun all at once.
Unicorn Coin Purse (With Zipper) - Crochet Pattern
Finished Size
Approximately 10 cm high x 16 cm wide (4" x 6.5"), but can be adjusted based on foundation chain and yarn thickness.
Materials Needed
- Yarn: 8-ply (DK/Eight-ply) thick acrylic or cotton yarn, white (main color) and accent colors (magenta, rainbow colors for hair)
- Hook: 3.5-4.0 mm crochet hook (adjust to yarn weight)
- Optional: Metallic embroidery thread/silk (silver or other)
- Stuffing: Polyester fiber fill or scrap yarn
- Sewing needle: For attaching parts and sewing zipper, and for embroidery
- Sewing thread: To match zipper and purse
- Black beads or safety eyes: For eyes
- Small amount of black yarn or thread: For nostril embroidery
- Zipper: 10-12 cm (4-5"), nylon or plastic, color of choice
- Scrap fabric and fabric glue (optional): For lining
- Scissors, pins, stitch marker
Special Techniques
- Magic ring/circle
- Single crochet (sc)
- Half double crochet (hdc)
- Increase and decrease (sc2tog)
- Working in continuous rounds (amigurumi technique)
- Attaching a zipper by hand
- Simple hand embroidery for nostrils
Instructions
PART 1. Body (Main Purse; Make 2 Panels)
- Foundation:
Chain 40 (adjust as needed for desired width; 40 chains ≈ 16 cm).
Add extra if you want a larger purse. - Row 1:
Single crochet (sc) in the second chain from hook and in each chain across (39 sc).
If you chained 40, you will have 39 sc; adaptation for desired purse size is allowed. - Rows 2-35:
Chain 1, turn.
Single crochet in each stitch across. (39 sc)
Continue until you have a rectangle approx. 10 cm tall. Check your measurements as you go. - Optional: Add a fabric lining for durability, leaving a seam allowance.

PART 2. Preparing for Zipper
- Edging:
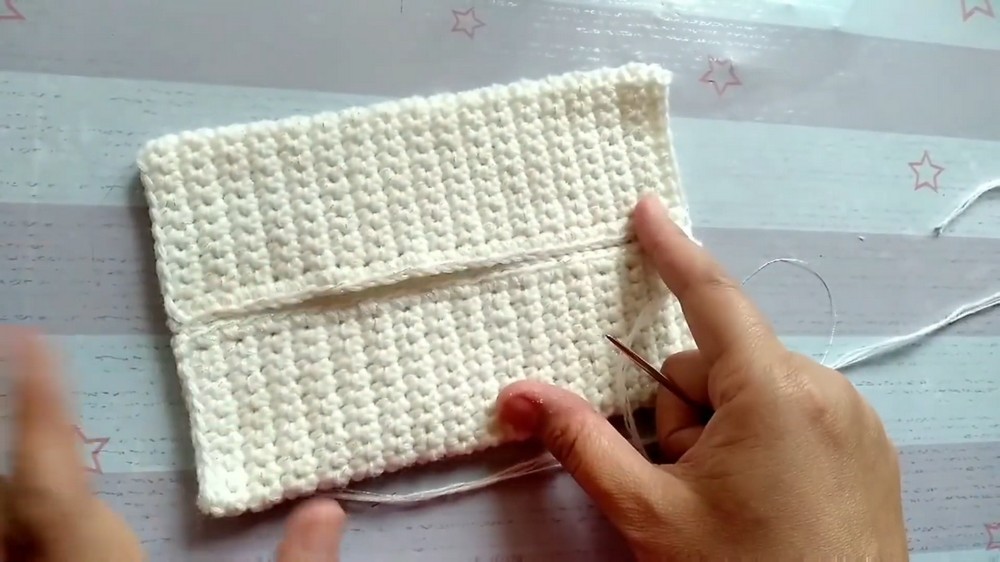
Single crochet along the two short sides (edges where the zipper will be attached), creating a clean edge.- Repeat for both panels.
PART 3. Joining Body
- Attaching Zipper:
- Place your zipper between the two panels, aligning with prepared edges.
- With sewing thread and needle, hand-sew the zipper to both panels neatly.
- Sew the panels together along the base and sides using whip stitch or mattress stitch. Leave the zipper accessible at the top.
- Turn the purse right side out.
PART 4. Unicorn Legs (Make 4)
With magenta yarn (or your chosen hoof color):
- Round 1:
Make a magic ring. Chain 1, work 6 sc into ring. (6 sts) - Round 2:
Work in continuous rounds without joining.
2 sc in each stitch around. (12 sts) - Round 3:
[1 sc in next st, 2 sc in next st] repeat around. (18 sts) - Rounds 4-6:
Sc in each stitch around. (18 sts each round)
Switch to main body color (white):
- Rounds 7-13:
Sc in each stitch around. (18 sts each round) - Fasten off.
Leave a long tail for sewing.
Stuff gently with fiber fill or scrap yarn.
PART 5. Attach Legs
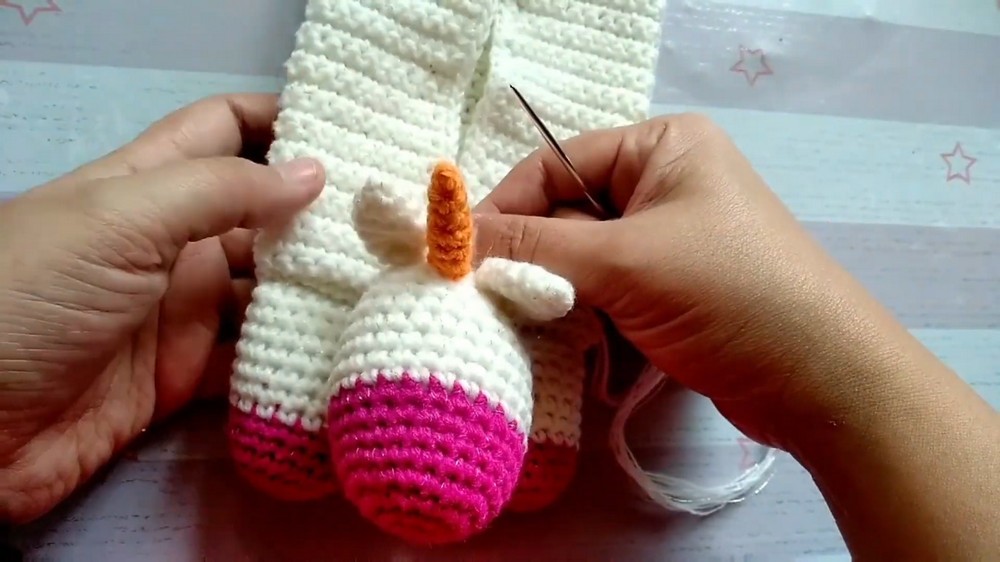
- Sew the open end of each leg to the base/underside of the purse using a yarn needle.
- Distribute evenly for symmetry.
PART 6. Unicorn Head
With white yarn:
- Round 1:
Magic ring, chain 1, 6 sc into ring. (6) - Round 2:
2 sc in each stitch around. (12) - Round 3:
[1 sc, 2 sc in next st] repeat around. (18) - Round 4:
[1 sc in next 2 sts, 2 sc in next st] repeat. (24) - Rounds 5-7:
Sc in each stitch around. (24)
Change to white (if desired):
- Rounds 8-12:
Sc in each stitch around. (24)
Decrease for shaping:
- Round 13:
[Sc in next 2 sts, sc2tog] repeat around. (18) - Round 14:
Sc in each stitch around. (18)Stuff lightly at this point. - Round 15:
[Sc in next st, sc2tog] repeat around. (12) - Round 16:
[Sc2tog] repeat around. (6) - Fasten off and close the opening.
Weave in the end.

PART 7. Ears (Make 2)
With white yarn:
- Round 1:
Magic ring, ch 1, 3 sc into ring. (3) - Round 2:
2 sc in each stitch around. (6) - Round 3:
[1 sc in next st, 2 sc in next st] repeat 3 times. (9) - Rounds 4-5:
Sc in each stitch around. (9) - Fasten off, leave a tail for sewing.
- Sew the open edges together slightly to pinch the ear (for shaping) before attaching to the head.
PART 8. Unicorn Horn
With silver/metallic/contrasting yarn:
- Round 1:
Magic ring, chain 1, 3 sc into ring. (3) - Rounds 2-4:
Sc in each stitch around. (3) - Round 5:
[1 sc, 2 sc in next st] repeat once, sc in last st. (4) - Round 6:
Sc in each stitch around. (4) - Stuff lightly. Fasten off, leaving a tail.
PART 9. Assembly - Head Details
- Sew horn and ears to the top of the head (as shown in images/video).
- Sew eyes (using black beads/safety eyes or embroider with black thread/yarn).
- Embroider nostrils using black thread or yarn.
PART 10. Curly Mane (Hair) and Tail
- For each curl:
Chain 22. - In 3rd chain from hook: Work 2 hdc.
In each chain across, work 3 hdc. - Fasten off, leaving a tail for sewing.
- Make several curls (in rainbow colors for mane and a few for the tail).
- Sew the curls to the side/top-back of the head for a curly mane and at the back of the unicorn for a tail.
PART 11. Attach Head to Purse
- Use a yarn needle and leftover tails to securely fasten the head to the front upper edge of the body (above zipper), ensuring it is well anchored and straight.
Finishing
- Tidy all yarn ends inside the purse.
- Check all pieces are secure, especially the zipper and decorative elements.
- If using, attach the lining now (use fabric glue or whip stitch to secure).

Final Words and Tips
- Blocking: Lightly block pieces to shape before assembly if desired.
- Safety: Always secure small parts well if intended for children.
- Customizing: Vary mane/tail colors, use sparkle yarn for horn/mane, add tiny bows or flowers as decorations.
- Care: Spot clean gently as needed.
- Durability: A sturdy lining helps the purse last longer.
- Personal Touch: Hand-embroider initials or names inside the purse.
Conclusion
This unicorn coin purse, crafted with a vibrant curly mane, sturdy little legs, expressive features, and a fully functional zipper, is both a beautiful accessory and a handy storage item. The project blends basic stitches with engaging three-dimensional elements, and is sure to delight crafters and gift recipients of all ages.