Simple Crochet Dish Towel Holder (Free Pattern with Tutorial)
Introduce a charming touch to your kitchen with this Free Crochet Dish Towel Holder Pattern that's for gifting or enhancing your kitchen decor.
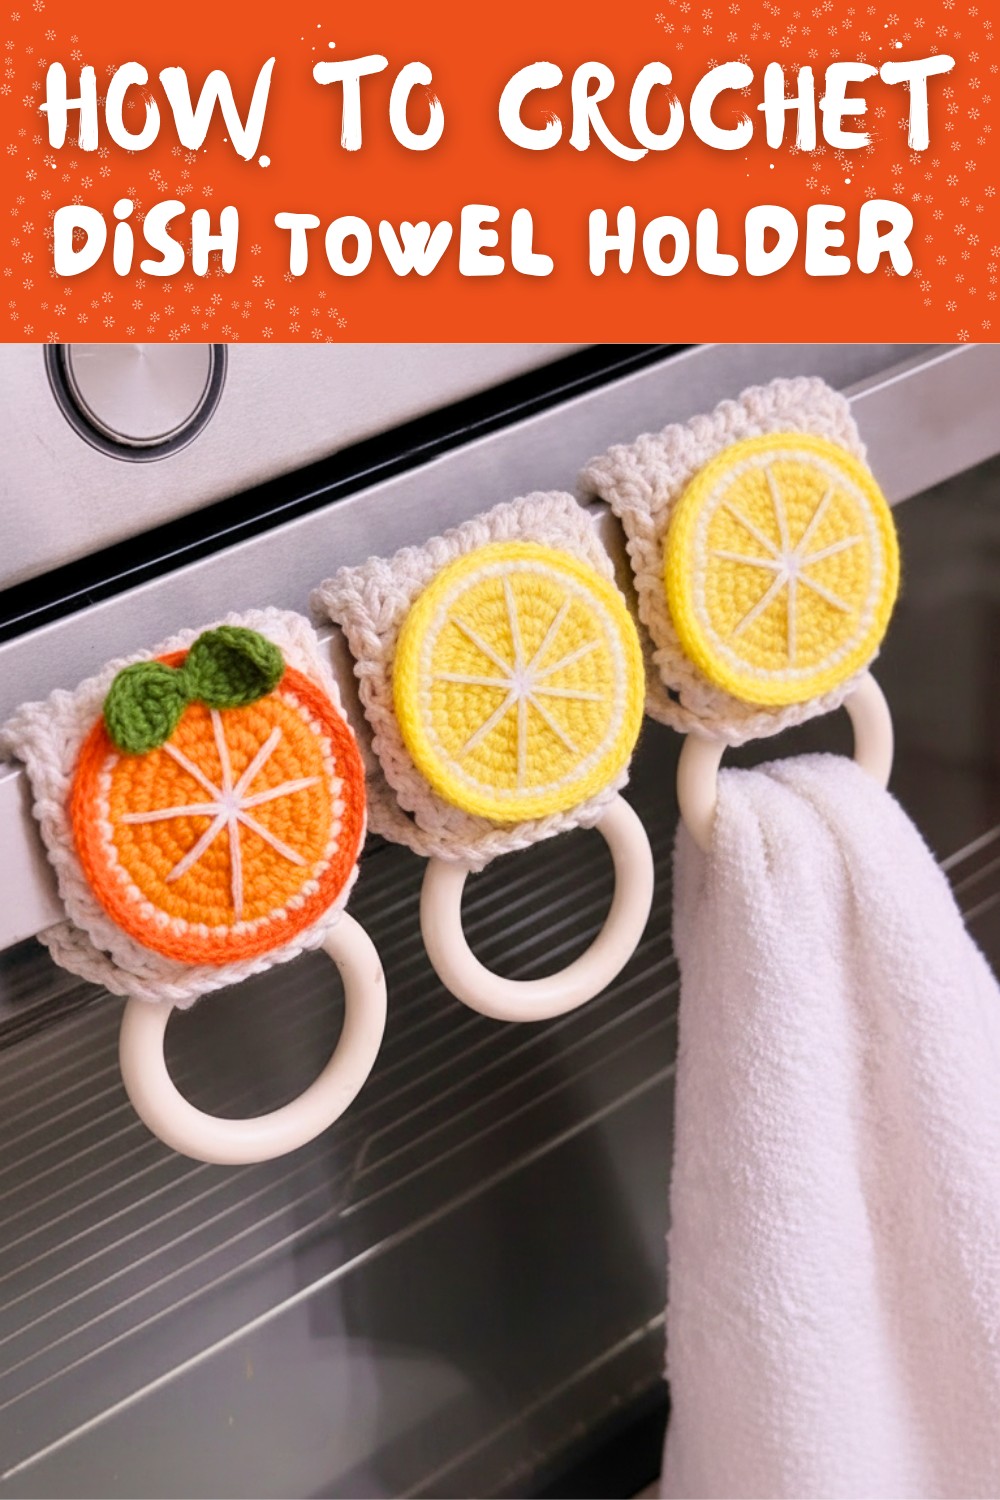
Keeping your kitchen organized and stylish doesn't have to be complicated. With a Free Crochet Dish Towel Holder Pattern, you can create a functional accessory that neatly holds your dish towels in place while adding a handmade touch to your space. Perfect for hanging on cabinet knobs, oven handles, or towel hooks, this project combines practicality with charm.
Free Crochet Dish Towel Holder Pattern Perfect for Beginners

The beauty of crocheting your own towel holder is the flexibility it gives, you can match it to your kitchen's aesthetic by choosing bold, cheerful colors or subtle, earthy tones. Beyond aesthetics, this little creation reduces countertop clutter and keeps towels easily accessible during busy cooking sessions.

Sicilian Lemon Crochet Napkin Holder Pattern
It's also a quick and enjoyable project, ideal for beginner crocheters or anyone looking for a thoughtful, practical gift idea. Small yet mighty, it blends style with everyday convenience seamlessly.
Skill Level
Intermediate
Materials List
- Yarn:
- Yellow yarn: For the Sicilian lemon (two shades: light yellow for the center and vibrant yellow for the outer section).
- White yarn: For the lemon segment boundaries.
- Optional: Light orange for creating an orange variant instead of lemon.
- Crochet Hook: 2.5 mm or 3 mm (adjust according to yarn thickness).
- Stitch Marker: To mark the beginning and end of rounds.
- Tapestry Needle: For sewing and weaving in ends.
- Scissors: For cutting yarn.
- Metal or plastic ring: To form the foundation of the napkin holder (approximately 8-10 cm in diameter).
- Optional: Fabric glue for reinforcing sewn pieces.
- Stuffing (optional): If adding dimension to the lemon design.
Key Abbreviations
- ch: Chain stitch
- sc: Single crochet
- sl st: Slip stitch
- inc: Increase (2 single crochets into the same stitch)
- dec: Decrease (combine two stitches into one)
- st(s): Stitch(es)
Special Notes
- Pattern uses US crochet terminology.
- Work in continuous rounds unless stated otherwise (no slip stitch joins, use a stitch marker).
- Adjust ring and chain sizes to suit your desired measurements.
- You can modify the lemon design to create oranges by switching the shades of yarn.

Step-by-Step Pattern
1. Metal Ring Foundation
Foundation Chains
- Chain a foundation row the length to securely wrap around your chosen ring. Measurement example: ~8.5 cm.
- Once the chain is complete, work 1 sc in each chain across the row.
Back-and-Forth Rows
- Continue working sc rows in continuous back-and-forth rows until the strap measures 15 cm height.
- At the end of each row, ch 2, turn the work, and continue working the next row.
- Ensure your last row ends evenly.


2. Attaching the Foundation Strap to the Ring
- Use a tapestry needle and double the yarn for strength.
- Stitch the strap securely to the ring, making sure each stitch aligns with points around the ring (for even distribution).
- Use back-and-forth sewing and tighten as necessary.
- Once the stitching is complete, finish off and trim excess yarn.

Tip: For extra durability, reinforce the seam using fabric glue if this holder is being sold.
3. Sicilian Lemon Crochet Design
Step 1: Lemon Center (Light Yellow Yarn)
- Magic Ring: Start with a magic ring.
- Round 1: Work 5 sc into the ring. Tighten the ring and sl st to close.
- Total: 5 sts.
- Round 2: Work 2 sc in each stitch (inc) around.
- Total: 10 sts.
- Round 3: Work 1 sc, inc around.
- Total: 15 sts.
- Round 4: Work 2 sc, inc around.
- Total: 20 sts.
- Round 5: Work 3 sc, inc around.
- Total: 25 sts.

Step 2: Lemon Interior Segments (White Yarn)
- Attach white yarn.
- Round 6 (with white yarn): Work 4 sc, inc around.
- Total: 30 sts.
- Round 7: Work 5 sc, inc around.
- Finish off: 36 sts.

Step 3: Lemon Outer Section (Vibrant Yellow Yarn)
- Attach vibrant yellow yarn (or orange if making an orange).
- Round 8: Work 5 sc, inc around. Trim unused yarn.
- Total: 42 sts.
- Round 9: Work 6 sc, inc around.
- Total: 48 sts.
- Round 10 (Final Round): Work sc in each stitch for a neat finish.
- Optional: If making a larger lemon, repeat the increase sequence (adding 6 sc per round) or add more sc rounds for thickness.

Tip: Work these final rounds with very low stitches (sl st) for a smooth edge.
4. Creating Lemon Segments
- Use white yarn to divide the lemon into 6 wedge-like segments.
- Insert the tapestry needle through two sc increases in each section (use the increases as guidelines).
- Pull the yarn tight after stitching the segment and secure at the back.
Tip: For additional customization, you can reduce the number of segments to 4 or add extra sections to the wedge.

5. Attaching the Lemon to the Foundation Strap
- Attach the lemon to the ring foundation using either glue or sew it securely around the middle of the strap.
- Adjust the placement based on whether you want the lemon centered or slightly offset.
Finishing and Conclusion
Corrections & Customizations
- If the strap seems too wide or long, reduce the foundation chains at the start.
- Adjust the lemon's size by adding or reducing increase rows.
- Experiment with contrasting colors for the strap and lemon for unique designs.
Final Tip
For durability, apply a layer of fabric glue before selling or gifting. This ensures the project holds up even after washing.
Conclusion
This Sicilian Lemon Crochet Napkin Holder combines utility and aesthetics in a single design. Whether gifted, sold, or added to your own kitchen decor, the vibrant lemon shape brings a touch of creativity and joy. Crocheters can easily adapt the design to suit different styles, sizes, or purposes.