Trendy Free Crochet Granny Square Top Pattern That’s for Sunny Days
Turn heads with this Free Crochet Granny Square Top Pattern that's for sunny days, effortless layering, and showcasing your unique handmade style.
A warm summer day when all you need is something breezy yet effortlessly stylish. That's where the Free Crochet Granny Square Top pattern comes in-a timeless blend of vintage charm and modern flair. This top is more than just a handmade piece; it's a way to showcase your creativity and style in everyday fashion.
Easy & Free Crochet Granny Square Top Pattern That's for All Levels

Perfect for casual outings, sunny beach days, or even festivals, this design lets you play with bold colors and intricate granny square motifs. Pair it with high-waisted jeans for a retro vibe or layer it over your favorite swimsuit for a chic bohemian look. Beyond its versatility, crocheting this top is pure joy, with endless opportunities to customize the colors and patterns. Whether you're enhancing your wardrobe or gifting someone special, this lightweight and playful top is a crochet staple worth stitching.

Step-by-Step Crochet Granny Square Top Pattern
Materials Needed
- Yarn:
- Worsted weight acrylic yarn (Category 4).
- Choose multiple colors for a dynamic and colorful design or a single color for a minimalist look.
- Hooks:
- 4 mm crochet hook (or adjust to match your gauge and desired tension).
- Notions:
- Tape measure (to confirm size alignment).
- Darning needle for joining and weaving in ends.
- Scissors to trim excess yarn.
- Stitch markers (optional, for joining pieces).
Skill Level
Intermediate.
Finished Measurements
- Each Square: 5 inches wide.
- Each Triangle: Slightly smaller than squares (4 rows).
- Bust Measurement: Measure from one rib cage to the other and divide by 3 to determine a square size.
- Customizable to any size by adjusting the number of rows.

Gauge
Gauge is not critical, but ensure consistency across all pieces. For reference:
- Square (5 inches wide): Approx. 6 rows with worsted weight yarn using a 4 mm hook.
Key Abbreviations (US Terminology)
- ch: chain.
- sl st: slip stitch.
- sc: single crochet.
- dc: double crochet.
- sp: space.
- tog: together.
- rep: repeat.
Special Techniques
- Magic Ring:
- Make a loop with your yarn. Insert your hook into the loop, pull up the working yarn, and work stitches into the ring. Pull the tail tight to close the ring.
- Alternatively, chain 4, join with a slip stitch to form a ring, and work into the ring.
- Working Over Strands:
- For a neat finish, carry and weave leftover yarn strands as you work stitches into the spaces.
- Right and Wrong Side:
- Pay attention to the alignment (right sides face each other when joining).
Pattern Instructions
Step 1: Granny Squares
You need 5 squares for the top. Follow these instructions for each square:
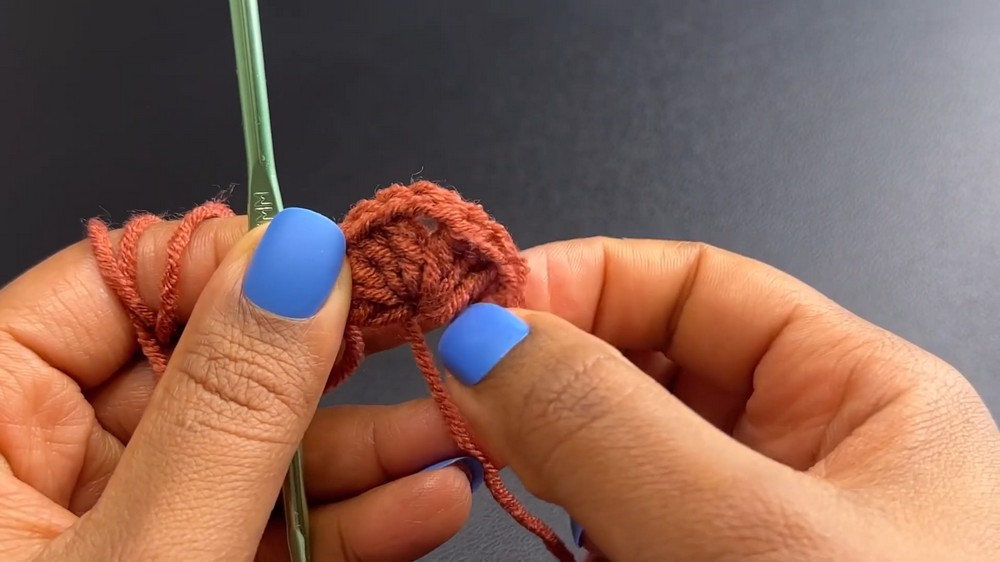
Row 1: Foundation
- Start with a magic ring:
- Insert hook, pull up a loop, and chain 2 (does not count as a stitch).
- Work into the ring as follows:
- (3 dc, ch 2) × 4 (create 4 sets of 3 dc separated by ch 2).
- Pull the strand tight to close the ring.
- Finish the row:
- Ch 2, sl st into the first dc.
- Fasten off the yarn. Leave a long tail for weaving in.
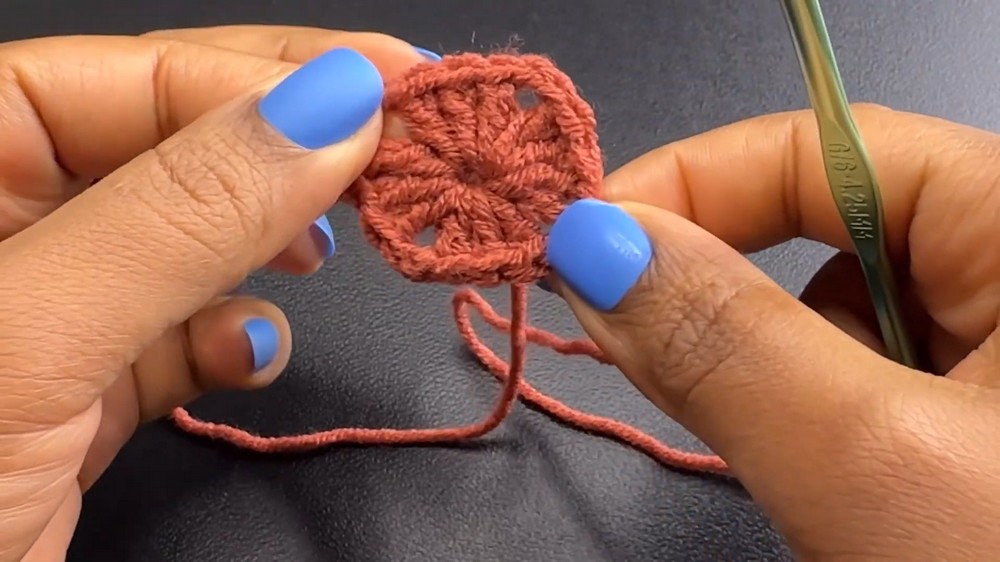
Row 2:
- Attach a new color to any ch-2 corner space.
- Work into each corner as follows:
- (3 dc, ch 2, 3 dc) to form a corner.
- In each ch-1 space, work 3 dc. Always ch 1 between sets of dc clusters.
- Repeat around: Complete 4 corners and 4 sides.
- Finish the row:
- Sl st into the first dc, fasten off.
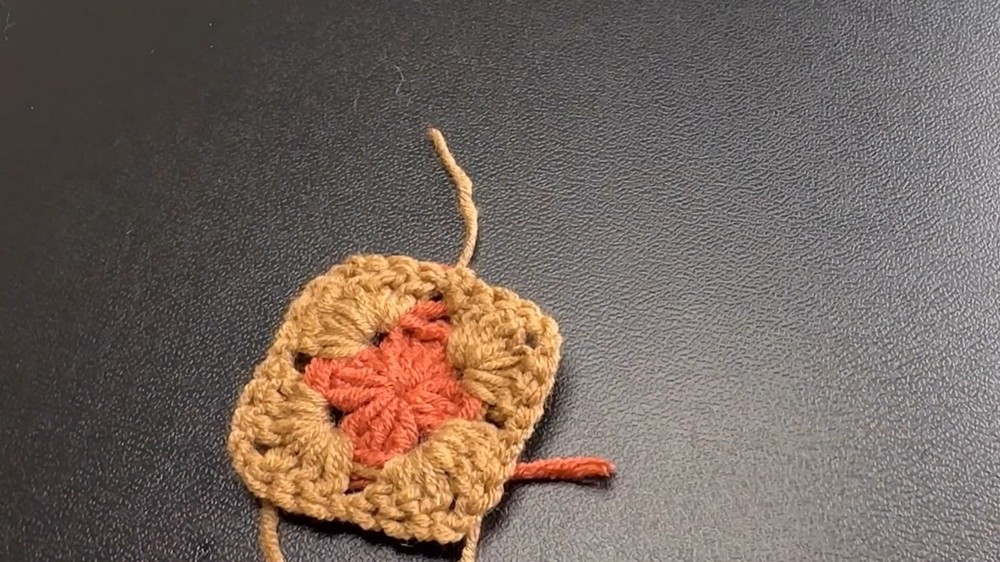
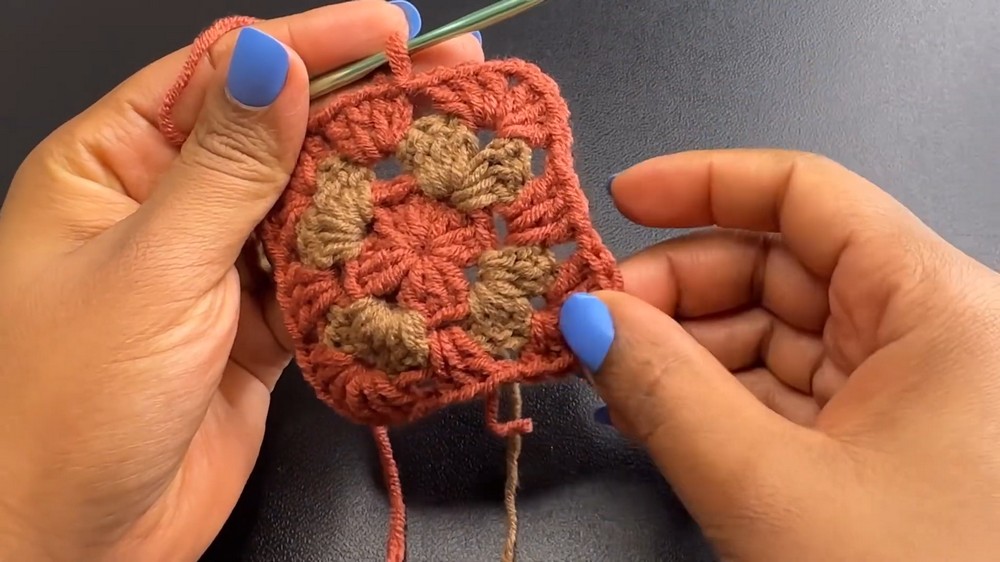
Row 3 (and beyond):
Repeat the instructions for Row 2, increasing the number of ch-1 spaces as the square grows.
- Continue until the square measures 5 inches wide or your desired width.
- For the final row, weave in all loose ends neatly.
Step 2: Triangles
You need 4 triangles to complete the top. Each triangle will have fewer rows than the squares, making them slightly smaller.
Row 1:
- Start with a magic ring:
- Insert hook, pull up a loop, and chain 4 (counts as 1 dc + ch 1).
- Work into the ring as follows:
- (3 dc, ch 2) (first corner), 3 dc, ch 1, dc.
- Pull the strand tight to close the ring.
- Fasten off the yarn.

Row 2:
- Attach a new color to the top of the dc from the previous row.
- Work into each space:
- 3 dc in ch-1 spaces, (3 dc, ch 2, 3 dc) in the center ch-2 corner.
- Finish the row:
- Always ch 1 between clusters. Sl st, fasten off.
Row 3-4:
Repeat the process above, maintaining the triangular shape. Note:
- Triangles end with 4 rows, ensuring they are smaller than the squares.
Step 3: Joining Squares and Triangles
After completing the squares and triangles, assemble them as follows:
Square Assembly:
- Align three squares horizontally. These will form the front of the top.
- Use a darning needle and sew pieces together using whip stitches or single crochet.
- Attach the remaining two squares to each side of the rectangle formed above.

Adding Triangles:
- Place one triangle in each corner of the joined squares.
- Ensure the triangles align neatly to form the top edges.
- Sew triangles into place using the same method.

Step 4: Attach Straps
Straps are adjustable and crisscross in the back.
Strap Instructions:
- Attach yarn to the corner of one square. Create a long chain.
- Strap length depends on your preference (approximately 60-80 chains).
- Repeat the process for the opposite corner, ensuring symmetry.
- Use chain spaces along the back to weave the straps, creating a crisscross pattern.

Finishing
- Weaving in Ends: Neatly weave in all loose strands using a darning needle.
- Blocking: Block the squares if needed to ensure proper shaping.
- Strap Adjustment: Secure the chains with knots or bows.

Customization Ideas
- Colors: Use gradient yarn or experiment with color-changing squares for a vibrant summer aesthetic.
- Sizing: Modify the size by adding or removing rows of granny squares/triangles.
- Strap Placement: Experiment with different strap placements for a unique look.
Final Words
This granny square top is a timeless yet fashionable addition to your wardrobe. Perfect for beginners transitioning toward intermediate skills, the design allows you to experiment with colors, textures, and sizing. Whether worn alone or layered, this crochet masterpiece is sure to impress.