
Trendy Free Crochet Tiny Cat Charms Pattern for Fun Bag Accessories
Pounce on cuteness with this Free Crochet Tiny Cat Charms Pattern and stitch sweet mini kitties that add playful flair to bags, keys, gifts, and tiny keepsakes.
A tiny handmade charm hanging from a bag or keyring can make an ordinary day feel a little more cheerful. The Free Crochet Tiny Cat Charms Pattern shows how to make a small cat figure that looks sweet, playful, and full of personality. This little charm usually has a round face, tiny ears, and a soft body that gives it an adorable appearance. The gentle yarn texture makes it pleasant to touch while also giving it a neat handmade look.
Free Crochet Tiny Cat Charms Pattern to Make Colorful Charms

It can be used to decorate a bag, hang on a keychain, or add a cute touch to a gift. Because of its small size, it is easy to carry and simple to display anywhere. The pattern often follows clear and easy stitches that help beginners complete it step by step. With different yarn colors, the tiny cat can look lively and unique, turning a simple crochet project into a charming decorative piece.

Crochet No Sew Tiny Cat Charms Pattern
Finished Size
- Head: Approximately 1.5 to 2 inches in diameter (depending on yarn and tension).
- Tail: Approximately 1.5 inches in length.
Materials Needed
- Yarn:
- Chanel yarn or lightweight yarn in various colors:
- Main colors:Sky blue,blue, white, black, gray, light brown, and dark brown (for different cats).
- Black or contrasting yarn: For facial details (eyes, nose, and whiskers).
- Optional: Scrap yarn for tail stuffing.
- Chanel yarn or lightweight yarn in various colors:
- Hook Size: 2.5 mm crochet hook.
- Stuffing Material: Fiberfill or scrap yarn for stuffing the head and tail.
- Tapestry Needle: For sewing, embroidery, and hiding yarn tails.
- Stitch Marker: To mark the start of each round.
- Scissors: For cutting yarn neatly.
- Keychain Findings: Chamber rings for assembling the head and tail.
- Measuring Tape: To ensure uniformity in size.

Gauge
- Gauge isn't critical for this project, but maintaining consistent tension will result in a uniform look. As a guide:
- 8 single crochet stitches x 8 rows = 1 inch.
Abbreviations (US Terminology)
- ch: Chain
- sc: Single Crochet
- inc: Increase (2 single crochets in the same stitch)
- dec: Decrease (combine two stitches into one)
- sl st: Slip Stitch
- MC: Magic Circle
- st(s): Stitch(es)
Special Techniques
- Magic Circle (MC):
- Wrap the yarn around two fingers to form a loop.
- Insert the hook into the loop, yarn over, and pull through. Chain 1 (or more as needed) for the foundation. Work the required stitches into the loop, then pull the yarn tail to close the circle.
- Color Changing:
- On the last pull-through of the stitch before a color change, pick up the new color and complete the stitch.
- Carry the unused color along the hook by crocheting over it, or leave it behind and cut it as necessary.
- Invisible Decrease:
- Insert the hook into the front loops of the next two stitches (2 loops on the hook).
- Yarn over and pull through the first two loops, then pull through the final two loops.
Pattern Instructions
Head (Same for Yellow, Tabby, and Black Cats)
- Round 1 (MC): Make 7 sc into the magic circle. (7 sts)
- Round 2: Make 1 inc in every stitch around. (14 sts)
- Round 3: Alternate 1 sc and 1 inc around for a total of 7 times. (21 sts)
- Rounds 4-5: Work 1 sc into each stitch around. (21 sts per round)
- Round 6:
- Make 5 sc.
- 1 inc, 1 sc, 1 inc.
- Make 5 sc.
- 1 inc, 1 sc, 1 inc.
- Make 5 sc. (25 sts)
- Round 7: Work 1 sc into each stitch around. (25 sts)
- Round 8:
- Make 5 sc.
- 1 dec, 1 sc, 1 dec.
- Make 5 sc.
- 1 dec, 1 sc, 1 dec.
- Make 5 sc. (21 sts)
- Round 9: Alternate 1 sc and 1 dec around for 7 times. (14 sts)
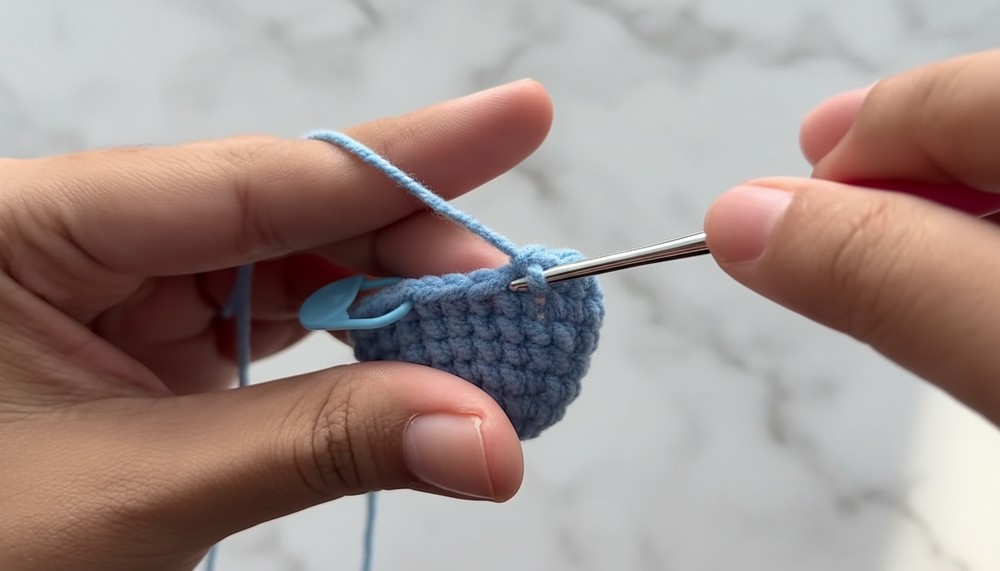
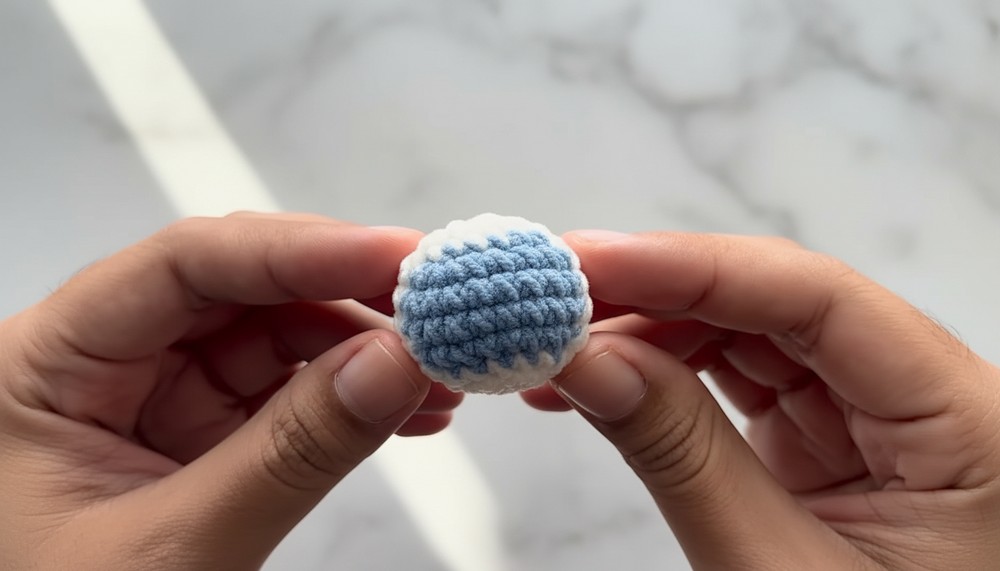
- Stuff the head with fiberfill before fully closing.
- Round 10: Make 1 dec in every stitch around. (7 sts)
- Close the head:
- Use a tapestry needle to weave through the front loops of the remaining 7 stitches.
- Pull the yarn tail gently to close and insert it into the center. Hide the remaining yarn tail.



Tail
- Round 1 (MC): Make 6 sc into the magic circle. (6 sts)
- Round 2: Alternate 2 sc and 1 inc for 2 times. (8 sts)
- Rounds 3-5: Work 1 sc in each stitch around. (8 sts per round)
- Stuff the tail using scrap yarn.
- Round 6: Alternate 2 sc and 1 dec for 2 times. (6 sts)
- Rounds 7-8: Work 1 sc in each stitch around. (6 sts per round)
- Close the tail:
- Weave through the front loops of the remaining 6 stitches and pull gently to close.
- Insert the needle back into the center and hide the remaining yarn tail.
Ears
- Attach yarn to Round 2 heading toward Round 4 of the head.
- Chain 3.
- Starting from the 2nd chain from the hook, make:
- 1 sc in the first chain.
- 1 hdc in the next chain.
- Slip stitch to Round 2 of the head and cut the yarn.
- Weave in and hide the yarn tails.
Repeat for the second ear.
Facial Features
- Eyes:
- Cut a 10 cm piece of black yarn.
- Using the tapestry needle, stitch the eyes at Round 6, spacing them 5 stitches apart.
- Knot gently and hide the yarn tail.
- Nose and Whiskers:
- Use black yarn for the nose and whiskers.
- Make the nose between the eyes.
- Add 3 whiskers below the eyes on both sides for added charm.
- Hide the yarn tails securely.

Customization by Cat
- Yellow and Tabby Cats:
- Add stripes on the forehead and body using contrasting yarn (e.g., orange for the yellow cat, black for tabby).
- Calico and Tuxedo Cats:
- Alternate colors for rounds and stitches as described in the video transcription to achieve patterns.
- Siamese Cats:
- Use beige and dark brown for distinct markings (ears and tail).
Assembly
- Attach a keychain ring to the top of the head and the tip of the tail using a chamber ring.
- Connect the head and tail using another chamber ring positioned at the base of the head and top of the tail.
- Optional: Add embellishments like bells or bows!
Finishing Touches
- Secure all yarn tails by weaving them neatly into the project.
- Shape the charms gently with your hands to adjust the stuffing for a smooth finish.

Final Words
Congratulations! You've crafted a delightful cat head and tail charm that's perfect as a keychain, bag charm, or gift. Play with colors and patterns to create various cat breeds or custom designs for your loved ones. Don't rush the process-practice creating the head, tail, and embroidery details to ensure uniformity.
Tips to Maintain the Pattern
- Choose Suitable Yarn: Thicker yarns may make it difficult to achieve fine details for small projects.
- Tension: Maintain even tension throughout to ensure a professional finish.
- Color Changes: Secure and carry yarn carefully during color changes to avoid loose ends.
- Stuffing: Avoid overstuffing; this can distort the shape.