
Turtleneck Sleeveless Sweater Crochet Pattern With Overlapping
Style a cozy turtleneck sleeveless sweater effortlessly that's for wearing during cool days, casual outings, or pairing with your favorite seasonal looks.
When the seasons begin to shift, and temperatures hover between cool and warm, it's the perfect time to reach for wardrobe staples that balance comfort and style. A Free Crochet Turtleneck Sleeveless Sweater Pattern offers just that - a layering piece that's both functional and versatile. This sweater's chic turtleneck design provides a touch of coziness without feeling overly bulky, making it ideal for cooler evenings or transitional weather.
Free Crochet Turtleneck Sleeveless Sweater Pattern

Wear it over a long-sleeve shirt for extra warmth or style it solo with high-waisted jeans or skirts for a more relaxed, breathable look. The sleeveless design makes it a year-round favorite, working well for layering in winter while being light enough for spring or autumn. Crocheting this pattern is not only rewarding but allows you to create a timeless piece perfect for casual outings, office days, or even coffee dates.
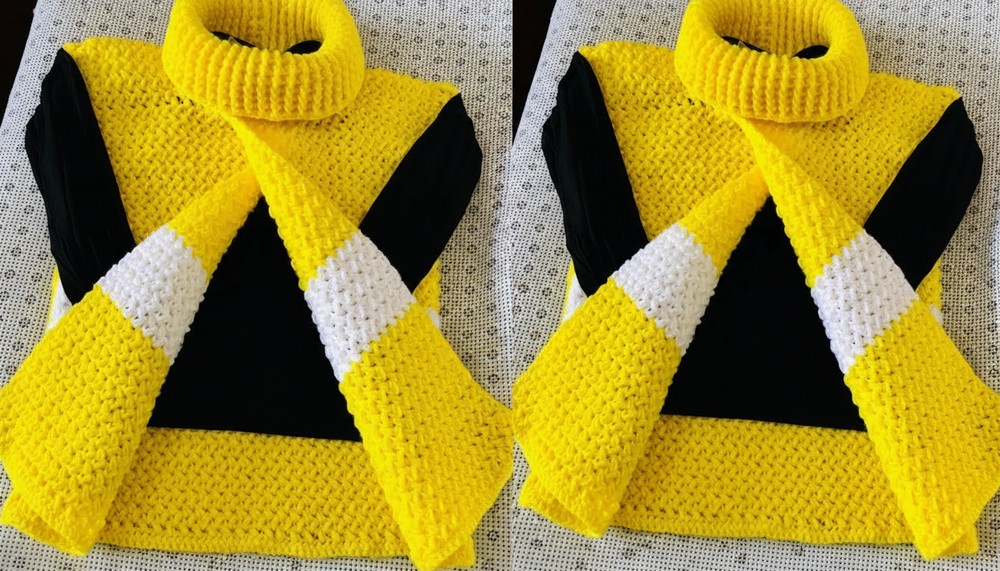
Crochet Sleeveless Sweater Pattern
Skill Level
Intermediate
Materials
- Yarn: Medium worsted-weight yarn (#4); suggested: Acrylic or cotton blend for comfort and drape (sample used ~500g for size XS).
- Hook: 5.0mm crochet hook.
- Notions:
- Scissors
- Stitch markers
- Darning needle (for sewing panels and weaving in ends).
- Optional: Tape measure (to ensure proper measurements).
Key Abbreviations
- Ch: Chain
- SC: Single Crochet
- DC: Double Crochet
- Sl St: Slip Stitch
- YO: Yarn Over
- Mini Bean Stitch (MBS): Insert hook, YO, pull up a loop, YO, insert hook again into same stitch, pull up a loop, YO, pull through all 4 loops on hook, Ch 1 to close.
- FPDC: Front Post Double Crochet
- BPDC: Back Post Double Crochet
Special Notes
- The pattern is worked in three panels (1 back panel and 2 overlapping front panels), which are joined for assembly.
- All measurements provided are for an Extra Small (XS) size. Adjust your starting chain and row counts to customize.
- Maintain even and relaxed tension throughout to achieve the desired drape for the sweater.
Pattern Instructions
1. Back Panel
- Foundation Chain:
- Chain 70, or enough to match your shoulder-to-shoulder measurement (approx. 16 inches for XS). Ensure an even number of chains.
- Row 1:
- SC in 2nd Ch from hook, and across the row. Turn. (69 stitches)
- Row 2:
- Ch 1, SC in the first stitch.
- Skip the next stitch. Work MBS into the next stitch (Insert hook, pull up a loop, YO, pull up another loop, YO, pull through all loops on hook, Ch 1 to close).
- Skip 1 stitch, work MBS into the next stitch. Repeat from * to end of the row. End with 1 SC in the last stitch to finish. Turn.
- Row 3 (and all subsequent rows):
- Ch 1, SC in the first stitch and the open spaces created by the previous row of mini bean stitches.
- Work MBS under the visible "gap" from the previous row. Continue to the end of the row, finishing with 1 SC in the last stitch. Turn.
- Repeat Row 3 for 65 rows total, or until the back panel measures approx. 21 inches long.

2. Front Panels (Make 2)
- Foundation Chain for Each Front Panel:
- Chain 35, or half the width of the back panel (approx. 10 inches for the XS size).
- Work Mini Bean Stitch Pattern:
- Follow Row 1-3 instructions from the Back Panel for 55 rows total.
- Shaping the Shoulder Pad:
- Ch 1, turn. Work Mini Bean Stitch across only the first 8 mini bean stitches in the next row (approx. 5 inches at shoulder).
- Turn and continue working only along these first 8 mini bean stitches for 10 additional rows.
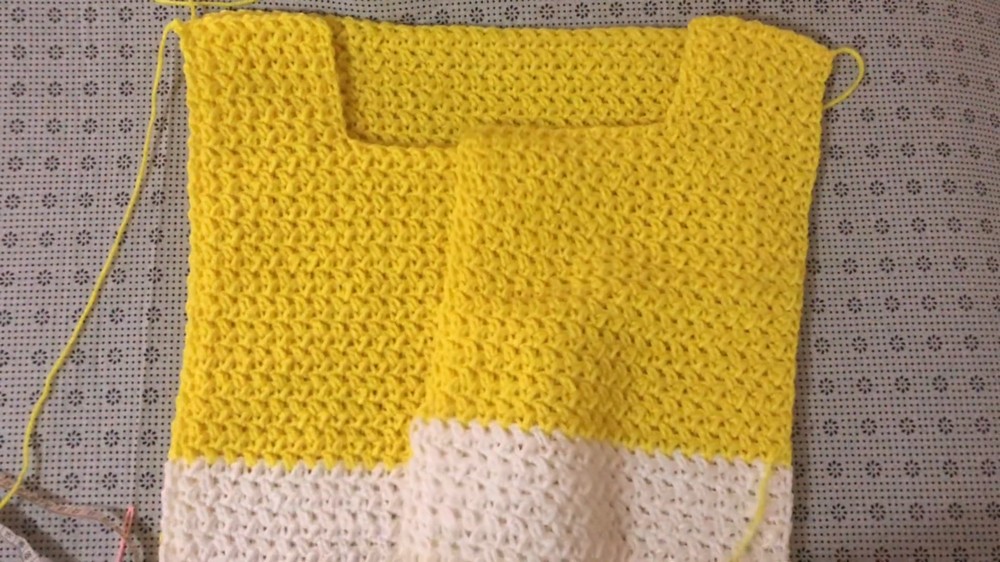
3. Assembly
- Align the Panels:
- Lay the back panel flat. Align the two front panels over it so they overlap at the center-front (as shown in the video transcription).
- Ensure the shoulder pads, sleeves, and sides match up evenly.
- Sew Shoulder Seams:
- Using a darning needle, sew the 8 mini bean stitches of the shoulder pads to the corresponding stitches of the back panel using a zig-zag stitch seam.
- Secure ends by weaving your yarn back and forth.
- Sew the Sides:
- Measure 7.5 inches down from the top of each side for armholes. Use a stitch marker to hold that point.
- Sew the sides from the armhole marker to the bottom edge using the same zig-zag stitch. Repeat on the other side.

4. Sleeves
- Attach Yarn at Armhole:
- Attach yarn with a slip stitch at the underarm seam.
- Ch 1 to secure.
- Round 1 (DC Foundation Round):
- Work 1 DC into each single crochet row around the armhole. Join with a Sl St to the first DC.
- Round 2-3 (Ribbing):
- Ch 3. Alternate FPDC and BPDC stitches around the row to create ribbing. Join with a Sl St to the first DC.
- Round 4 (Single Crochet):
- Ch 1. Work 1 SC in each stitch, joining with a Sl St at the end.
- Fasten off and weave in ends. Repeat for the second sleeve.
5. Neckline and Front Edges
- Attach Yarn at Back Neckline:
- Slip stitch into any back neckline stitch. Ch 3 to begin.
- Round 1 (DC Foundation Round):
- Work 2 DC stitches into each mini bean "gap" around the neckline and front edges. At the overlapping front panels, work through both layers of fabric.
- Round 2-12 (Ribbing):
- Ch 3. Alternate FPDC and BPDC stitches around for ribbing texture. Ensure that front posts stay in front and back posts stay in back for consistency.
- For a final touch, work a single crochet edging if preferred.
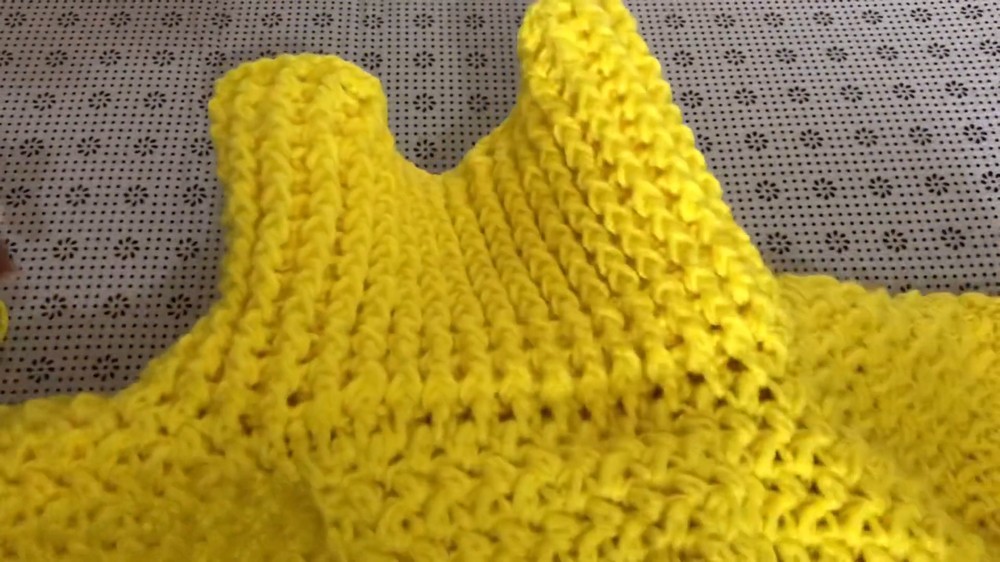

Finishing
- Weave in Ends:
Secure all loose ends by weaving them back and forth into the stitches. - Block the Sweater:
Gently block your project to set the stitches, using a wet blocking method or steam blocking for acrylic.
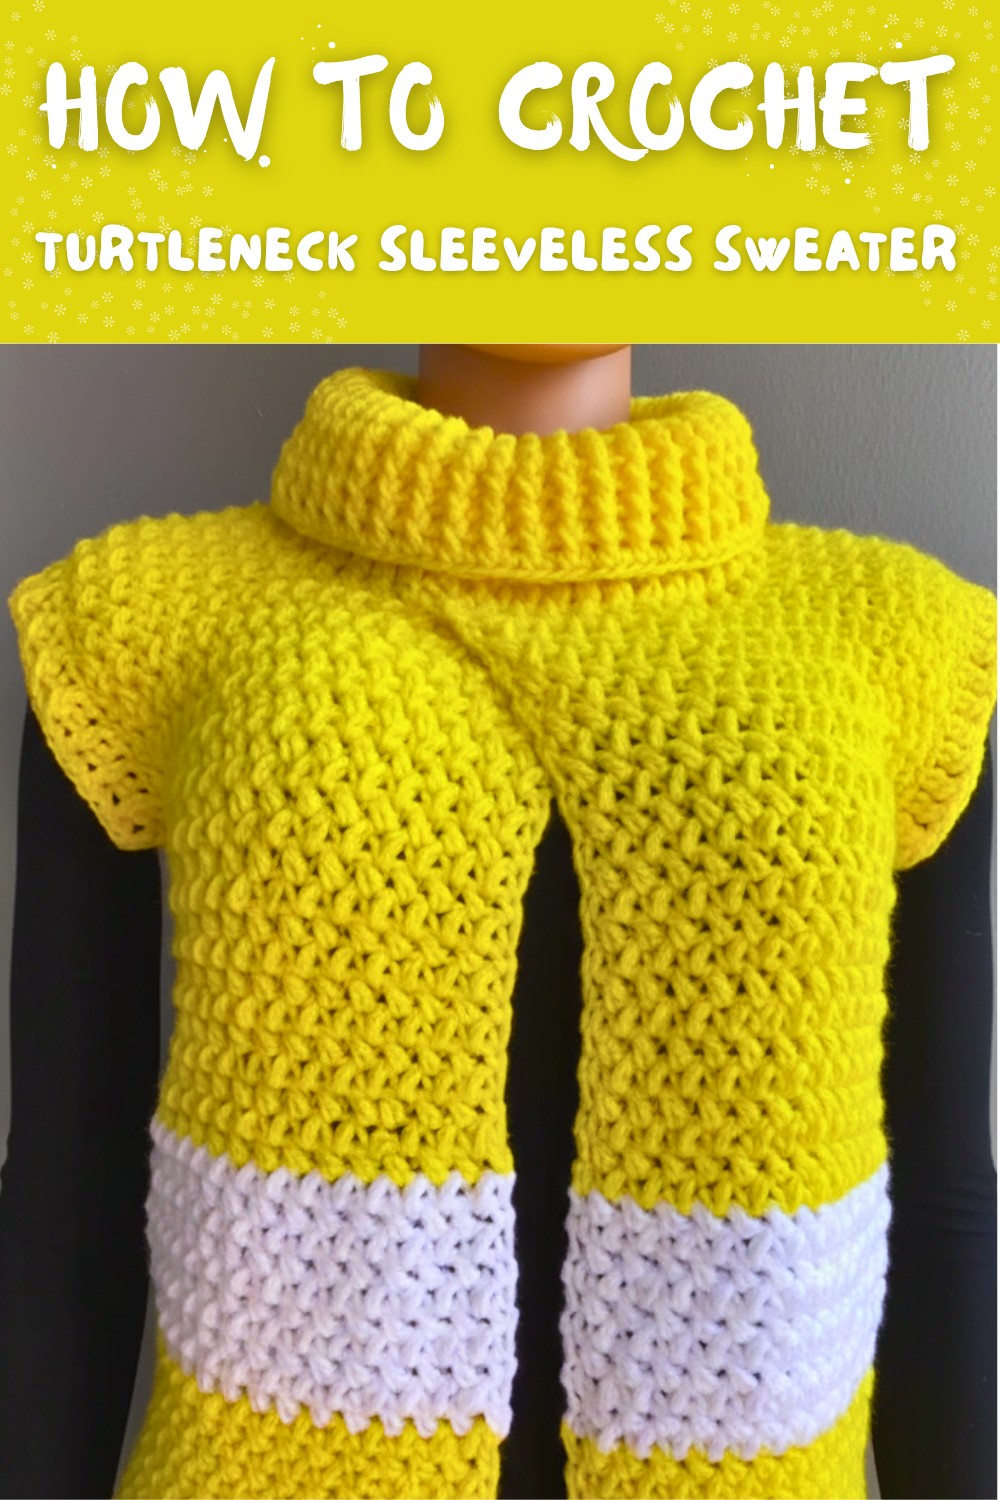
Pattern Correction
In the transcription, there was a minor inconsistency regarding the neck ribbing. Ensure you alternate FPDC/BPDC stitches accurately for a clean and professional ribbed finish.
Conclusion
Congratulations, you're done! This sleeveless sweater is versatile, stylish, and perfect for layering. The overlapping front panels add a unique design element, while the mini bean stitch gives the fabric a textured yet delicate look.
Tips for Advancement
- Custom Sizing: Modify the starting chain to match your shoulder width. Adjust the length by increasing or decreasing the rows.
- Add Pockets: Sew small crochet rectangles onto the front panels for functionality.
- Experiment with Yarn: Try using a variegated yarn for added personality or a lightweight cotton blend for summer-friendly wear.