
Unique Free Crochet Couple Keychain Pattern That Stands Out
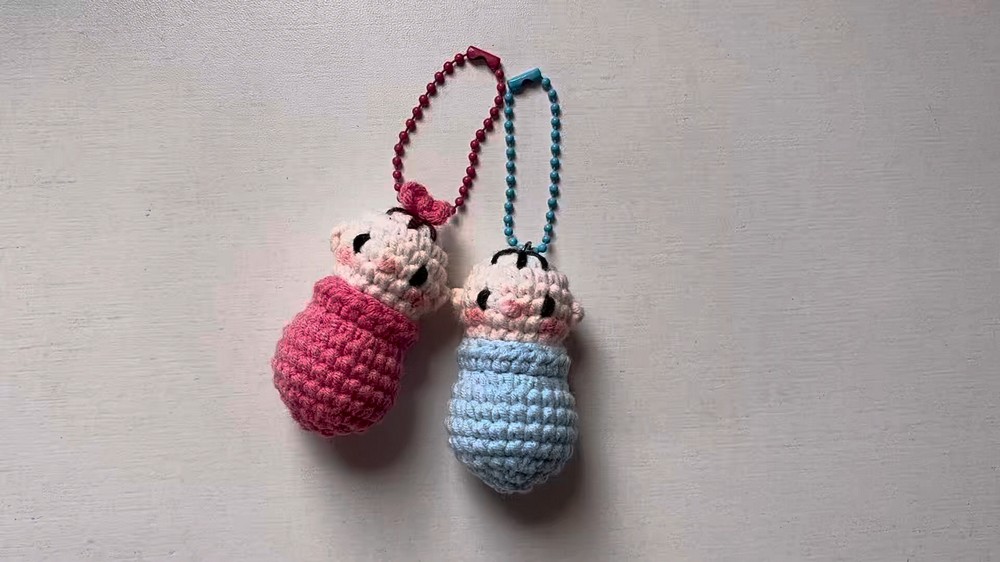
Enjoy this Free Crochet Couple Keychain Pattern featuring adorable details and a heartfelt touch, perfect as a gift or a unique accessory.
Two charming figures, full of personality and warmth, come together to symbolize love and connection in the most adorable way. A crochet couple keychain offers not only a sweet accessory but also a heartfelt keepsake that's small enough to carry everywhere. Featuring tiny outfits, cute details, and cheerful expressions, its delicate design makes it both eye-catching and meaningful.
Free Crochet Couple Keychain Pattern You'll Adore Forever

Whether attached to your keys, a backpack, or gifted to someone special, it's perfect for adding a touch of joy to everyday life. Soft yarn and intricate stitching give it a lovely handmade feel, while customization options allow you to create something truly unique. This tiny treasure is a wonderful way to celebrate relationships, mark special moments, or simply keep a reminder of love close at all times.

Crochet Couple Keychain Pattern
Finished Size
- Baby Keychain Dimension: Approximately 8 cm tall.
- Perfect For: Baby shower gifts, gender reveal favors, or simply as cute ornaments for bags or keys.
Materials Needed
- Yarn: Milk cotton yarn or any light worsted-weight yarn.
- Skin Color: Beige or skin tone of choice.
- Outfit: Pink for girl, blue for boy (or custom colors).
- Hair: Dark brown, black, or any preferred shade.
- Accessories: Pink (for bow).
- Blush: Optional pink color for applying blush.
- Hook Size: 2.5 mm crochet hook.
- Stitch Marker: Essential for marking your rounds.
- Tapestry Needle: For sewing parts and weaving in ends.
- Scissors
- Stuffing Material: Polyester fiberfill or scrap yarn for stuffing.Keychain Hardware:
- 1 Jumper ring.
- 1 Keychain clasp or ring.
Gauge
- Gauge is not critical for this project. Just ensure your stitches are tight enough to prevent stuffing from peeping through.
Stitch Terminology
- US Terminology used throughout.
- sc = single crochet
- sl st = slip stitch
- hdc = half double crochet
- inc = increase (2 single crochets in one stitch)
- dec = decrease (single crochet 2 stitches together)
- ch = chain
- blo = back loop only
Pattern Instructions
Step 1: Head and Body
Head
- Start with the skin color yarn.
- Make a magic ring, and crochet 8 single crochets (sc) into the ring. Pull tight to close the ring. (8 sts).
- Round 2: Inc in each stitch around. (16 sts).
- Round 3: (3 sc, inc) x 4. (20 sts).
- Rounds 4-6: 1 sc in each stitch around. (20 sts).
- Round 7: (3 sc, dec) x 4. (16 sts).
- Round 8: (2 sc, dec) x 4. (12 sts).


Switch to outfit color (pink for girl, blue for boy) on the last decrease stitch of Round 8. Pull through the new yarn to complete the round. Cut the skin-toned yarn and weave in the tail.
Body
- Round 9: With the outfit color yarn, (1 sc, inc) x 6. (18 sts).
- Round 10: Work in back loops only (blo): (2 sc, inc) x 6. (24 sts).
- Stuff the head firmly before proceeding to complete the body.
- Rounds 11-14: 1 sc in each stitch around. (24 sts).
- Round 15: (2 sc, dec) x 6. (18 sts). Stuff the body firmly.
- Round 16: (1 sc, dec) x 6. (12 sts).
- Round 17: 6 dec. (6 sts).


Fasten off, leaving a long tail. Attach the tapestry needle and weave through the front loops of the 6 stitches in the last round. Pull tightly to close the hole. Anchor and hide the yarn tail inside the body.

Step 2: Skirt/Border for Body (Optional for Girl)
- Return to the loop from Round 10 (back loops left unworked).
- Attach the outfit color yarn, ch 2.
- Work 18 half double crochets (hdc) into the loops.
- Join with a slip stitch to the first hdc, ch 1, and fasten off. Weave in the ends.
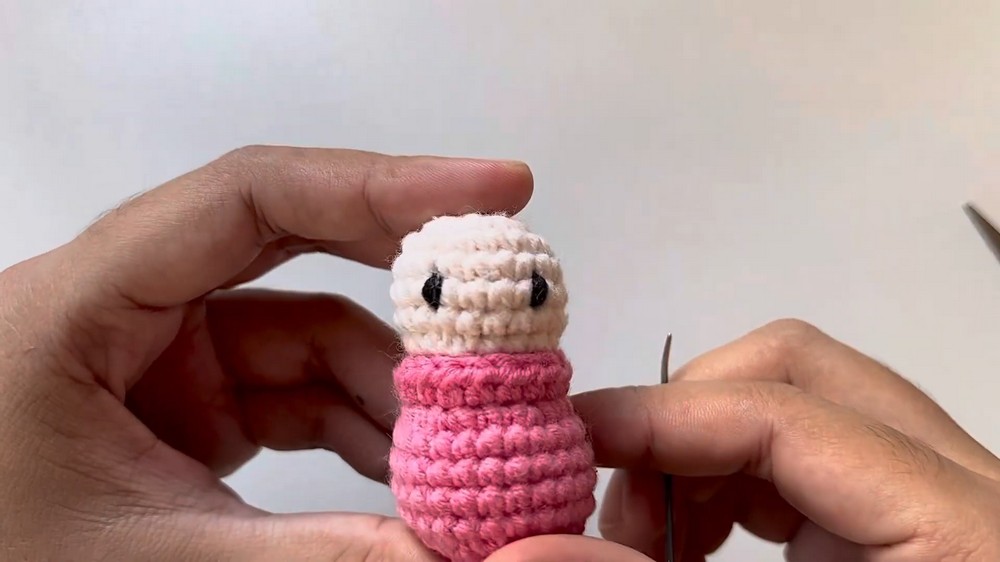
Step 3: Eyes
- Use black yarn, cut approximately 15 cm.
- Place the eyes between Rounds 5-6 of the head, spacing them approximately 4 stitches apart.
- Using a tapestry needle, embroider small straight stitches for the eyes. Double-tie both yarn ends at the back of the head and weave them in or trim them neatly.
Step 4: Ears
- With skin color yarn, make a slip knot.
- Chain 2 and fasten off, leaving a tail for sewing.
- Attach the ears to Round 5 of the head, spacing them 3 stitches away from each eye.
- Tie and sew securely before weaving in the tails.
Step 5: Nose
- Cut approximately 10 cm of the skin color yarn.
- Using a tapestry needle, embroider the nose between the eyes, slightly below their level.
- Double-tie at the back of the head and secure.
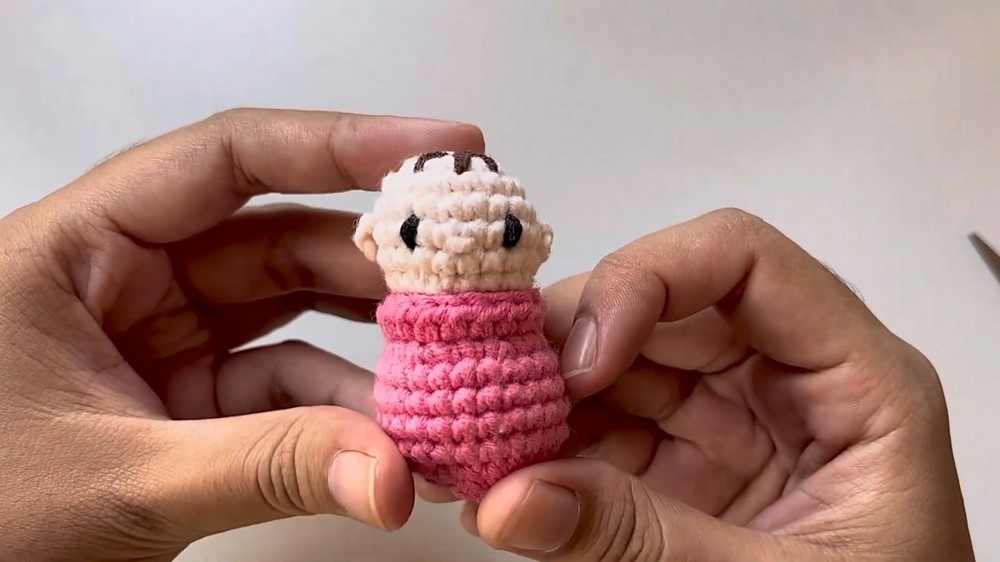
Step 6: Hair
- For the Baby Girl: Use dark brown yarn or preferred color.
- For the Baby Boy: Use black yarn or preferred color.
- Cut pieces of yarn approximately 15 cm long.
- Starting at the back of the head, sew strands to the top center and bring each piece out at the stitches where hair is desired.
- Work carefully to make strands look uniform. Tie and hide tails inside the head.
Step 7: Mini Bow (for Girl)
- Using pink yarn, make a slip knot.
- Chain 3, and sl st into the first chain to create a small loop. Repeat one more time.
- Fasten off and leave a long tail.
- Wrap the tail around the center of the bow to cinch and secure its shape.
- Sew or glue the bow to the girl's head beside one ear.
Step 8: Adding the Blush
- To apply blush, use a soft pink yarn or cosmetic blush.
- Lightly dab onto the cheeks (between Rounds 5-6 of the head) for a lifelike effect.
Step 9: Attach Keychain Hardware
- Use a jumper ring to attach the keychain clasp.
- Secure the ring to the top center of the head.
- Ensure it is tight, so the keychain holds securely.
Suggestions and Customization Ideas
- Accessories: Add small embellishments like mini beads, tiny bows, or embroidery for added personality.
- Baby Cap: Crochet a small hat using the same process as the head but end earlier to create a cap.
- Custom Patterns: Change the outfit's color sections for different themes, such as stripes or polka dots.
Finishing and Final Tips
- Secure Ends: Ensure all yarn tails are securely tied and hidden inside for a clean finish.
- Stuffing: Avoid overstuffing to maintain the keychain's compact size.
- Blocking: Although optional, lightly blocking the bow or yarn features can improve their shape and overall look.

Final Words
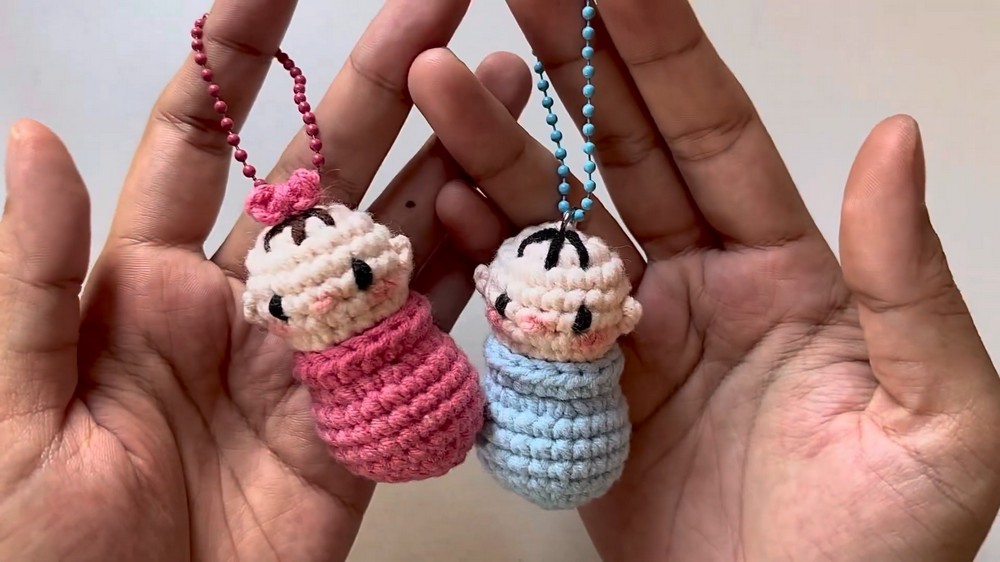
You have now successfully created the cutest baby boy and girl keychains! These handmade items are perfect as gifts for special occasions like baby showers, gender reveals, or even as adorable decorative items. Make sets in various colors to suit different preferences. Thank you for choosing this pattern, and happy crocheting!