
Vibrant Free Crochet Bucket Hat Pattern for Stylish Sun Protection
Spark your personal fashion creativity right now with this free crochet bucket hat pattern to twist bright yarn strands into a spectacular matching outdoor hat.
Add a cool touch of sunny style to your wardrobe with this fun and easy floppy summer hat. This charming and lightweight bucket hat features a deep, round crown with a wide, sloping brim, making it look just like the trendy hats you'd wear on a day at the beach. Perfect for beginner crocheters and new hobbyists, this free crochet bucket hat pattern makes a fantastic project for sunny school outings or relaxed weekend picnics.
Trendy Free Crochet Bucket Hat Pattern for All Seasons

The hat stands out with its neat textured stitch and a floppy, flexible brim that adds a cheerful and stylish vibe. Using bright cotton yarns gives it a vibrant look, making it perfect for any outdoor adventure. What makes it even better is the soft, packable design built into the hat-just fold it up and tuck it into a backpack pocket, and it will spring back into shape when needed. No bulky accessories to carry around, just pure convenience.
Made using basic skeins of cotton yarn and a simple crochet hook, this project is both affordable and practical. Follow the simple directions and crochet your very own cozy, sun friendly hat today.

Radiant Crochet Bucket Hat Pattern
Finished Size
- Diameter of the crown: Approximately 11 inches
- Height of the hat: 7-8 inches (customizable based on preference)
Necessary Materials
- Yarn:
- Main color (beige): Approx. 100-150 grams (Worsted weight yarn)
- Accent color (optional): Approx. 50-70 grams (Worsted weight yarn, contrasting color)
- Crochet Hook: 5 mm (Size H/8)
- Scissors
- Tapestry Needle: For weaving in ends
- Measuring Tape: To ensure accurate sizing
Gauge
- 10 double crochets (dc) = 2 inches
- 5 rows = 2 inches
Ensure your gauge matches to achieve the intended size. Adjust hook size if necessary.
Abbreviations (US Terminology)
- ch: Chain
- dc: Double crochet
- sl st: Slip stitch
- st(s): Stitch(es)
- inc: Increase (2 dc in the same st)
- rnd: Round
Pattern Instructions
Step 1: Create the Crown of the Hat
This part forms the top circular section of the bucket hat. Start with a foundation and gradually increase to expand the diameter.
Round 1:
- Start with a slip knot on your hook.
- Chain 3 (counts as your first dc).
- Slip stitch into the first chain to create a circle.
- Chain 3 (counts as first dc) and place 11 double crochets into the center of the circle (total: 12 stitches).
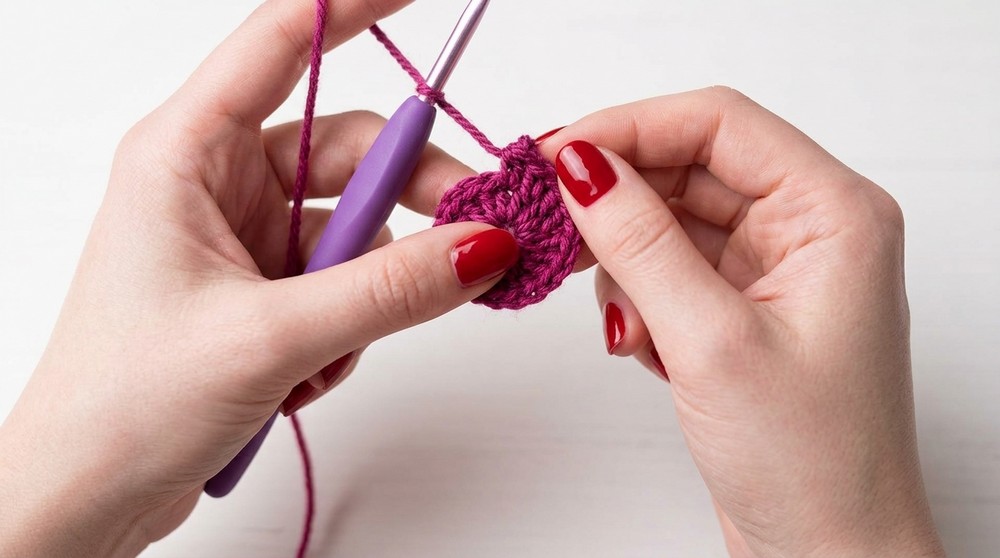
Round 2:
- Chain 3 (counts as your first dc) and add 1 dc into the same stitch (inc).
- Place 2 dc into each stitch from the previous round (total: 24 stitches).
Round 3:
- Chain 3 (counts as the first dc) and add 1 dc into the same stitch (inc).
- 1 dc in the next stitch, inc in the following stitch. Repeat around (total: 36 stitches).
Round 4:
- Chain 3, dc in the same stitch (inc).
- 1 dc in the next 2 sts, inc in the following stitch. Repeat around (total: 48 stitches).

Round 5:
- Chain 3, dc in the same stitch (inc).
- 1 dc in the next 3 sts, inc in the following stitch. Repeat around (total: 60 stitches).
Round 6:
- Chain 3, dc in the same stitch (inc).
- 1 dc in the next 4 sts, inc in the following stitch. Repeat around (total: 72 stitches).
Round 7:
- Chain 3, dc in the same stitch (inc).
- 1 dc in the next 5 sts, inc in the following stitch. Repeat around (total: 84 stitches).
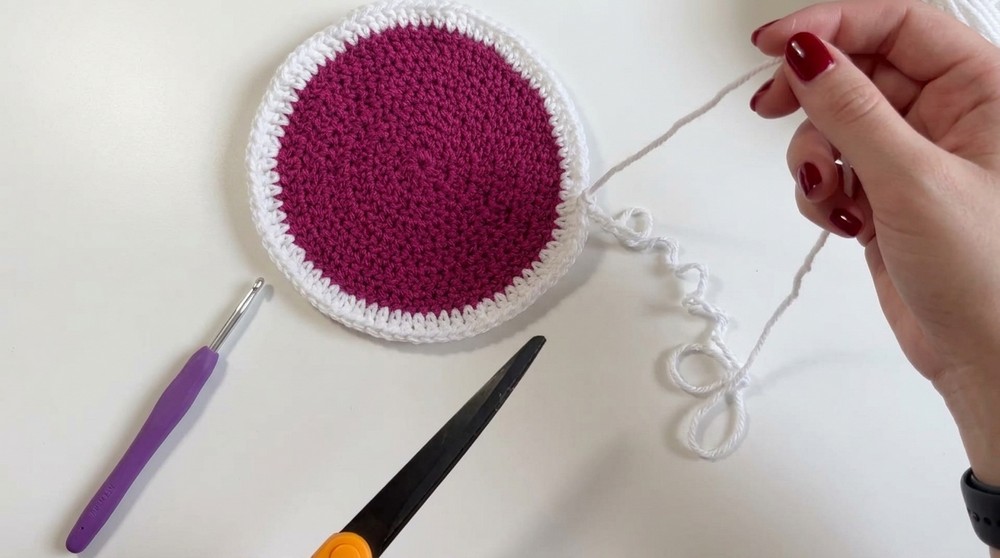
After Round 7, the crown is complete. Adjust the size of the crown if needed by adding or omitting rounds.
Step 2: Build the Height of the Hat (Body Section)
This forms the body of the bucket hat, giving it height.
Rounds 8-15:
- Chain 3.
- Dc in each stitch around (no increases).
- Slip stitch to the top of the starting chain to join the round.
- Repeat for 8 rounds or until you achieve the desired height.

(Optional) Add a stripe or color block by switching to a different yarn color in Round 8 or any of the subsequent rounds. To change colors, introduce the new yarn during the last pull through of the slip stitch to join a round.
Step 3: Create the Brim
The brim flares outward, providing the bucket hat with its signature shape.
Round 16:
- Chain 3, dc in the same stitch (inc).
- 1 dc in the next 6 sts, inc in the following stitch. Repeat around (total: 96 sts).
Round 17:
- Chain 3, dc in the same stitch (inc).
- 1 dc in the next 7 sts, inc in the following stitch. Repeat around (total: 108 stitches).
Round 18:
- Chain 3, dc in the same stitch (inc).
- 1 dc in the next 8 sts, inc in the following stitch. Repeat around (total: 120 stitches).
If you'd like the brim to be floppier or wider, continue increasing across additional rounds. For example:
- Round 19: Chain 3, dc in the same stitch, 1 dc in the next 9 sts, inc. Repeat.
- Round 20: Chain 3, dc in the same stitch, 1 dc in the next 10 sts, inc. Repeat.
Special Techniques
Securing Ends During Color Changes
- After completing a slip stitch to join the new color, knot the previous and new yarn for added security.
- Use a tapestry needle to weave in loose ends along the same color section to achieve a clean finish.
Weaving in Ends
- After completing the hat, use a tapestry needle to weave in all yarn tails, ensuring durability and a polished look.

Customization Ideas
- Size Adjustments
- To achieve a smaller or larger hat, modify the total stitch count or repeat fewer/more increase rounds.
- Color Options
- Experiment with multiple colors, stripes, or alternate every few rows for a unique look.
- Add Decorative Edges
- Finish with a crab stitch or picot edge around the brim for added flair.
Conclusion & Important Remarks
Congratulations on completing your crochet bucket hat! This timeless accessory is ideal for summer outings, casual wear, or as a handmade gift. The structured crown, adjustable body, and customizable brim allow you to make it uniquely yours, regardless of skill level.
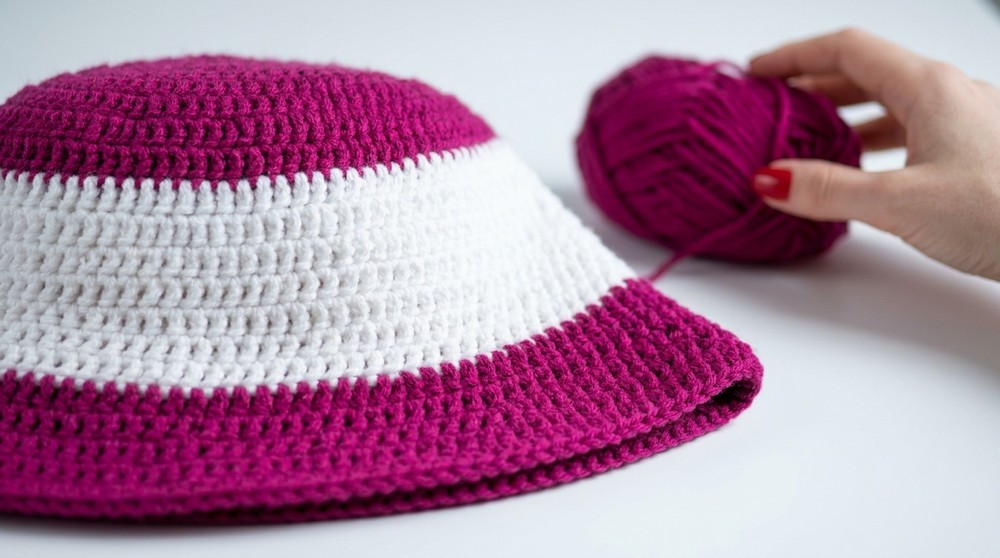
- Final Look: Your finished bucket hat should feature a rounded crown, a snug fitting body, and a flared brim for sun protection.
If at any point the pattern feels confusing, revisit the instructions or seek clarification. Remember that practice makes perfect, and experimenting with variations can ensure your hat suits your personal style.