
How to Crochet Baby Fox Hat Free Pattern
Wrap little ones in warmth with Free Crochet Baby Fox Hat Pattern featuring soft texture playful fox details & cozy comfort for chilly days.
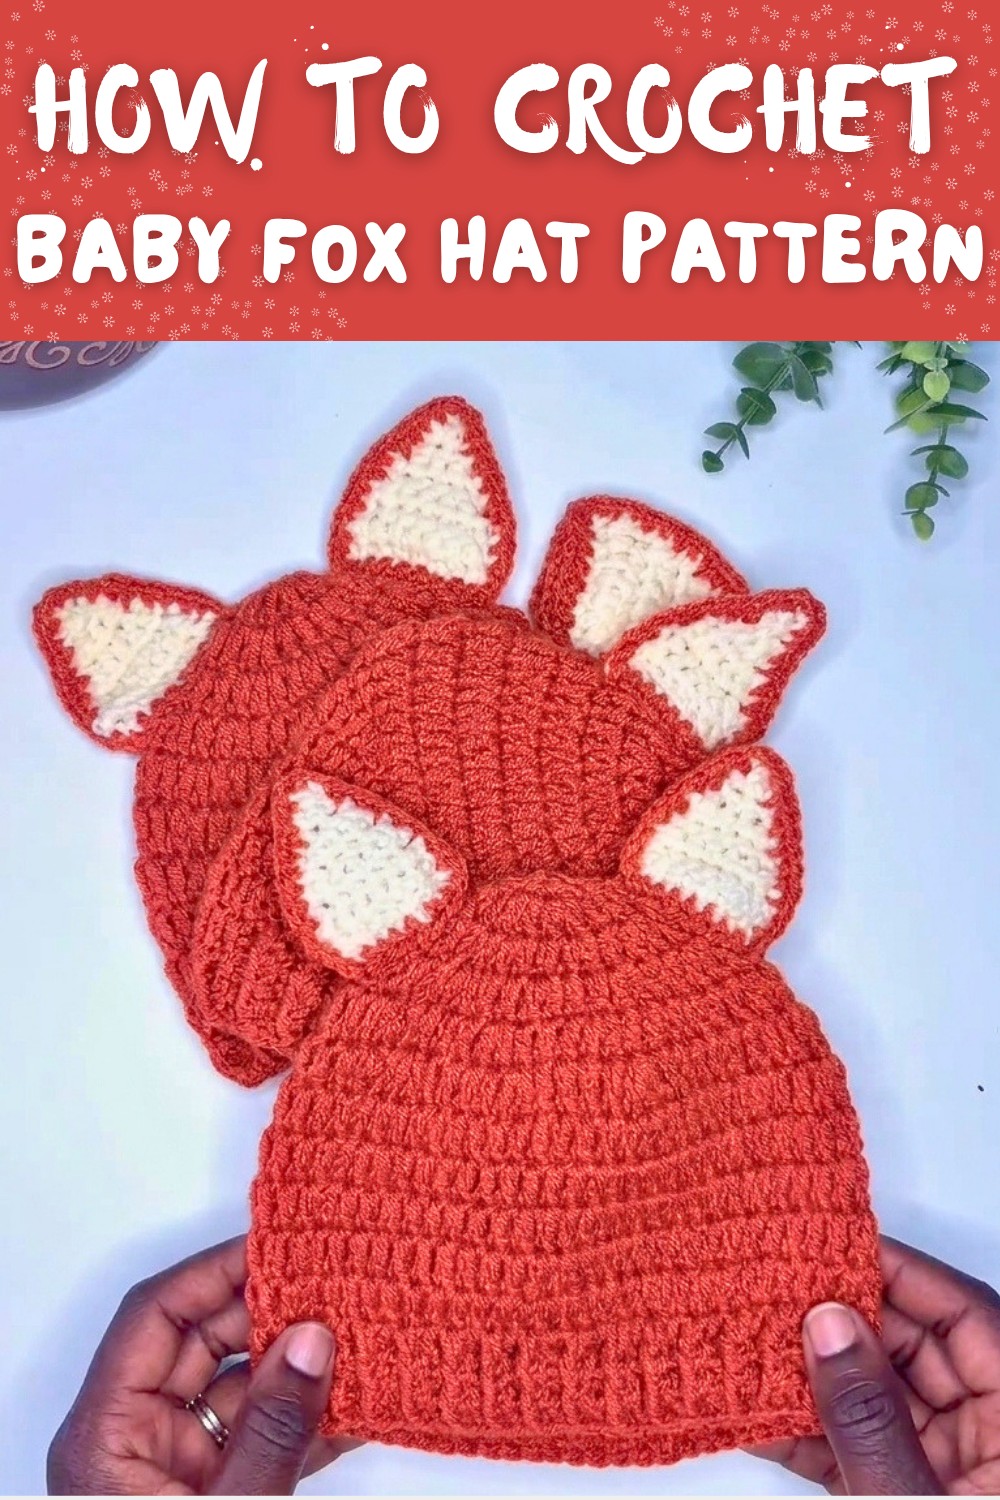
What makes a perfect hat for a baby during cold days? It should be soft warm and comfortable while also adding a touch of fun. The Crochet Baby Fox Hat pattern offers all of these qualities in one charming design. Crocheted to resemble an adorable fox with little ears and a sweet face this hat brings a playful spirit to any baby outfit.
Using soft yarn ensures the hat feels gentle on delicate baby skin. Its stretchy stitches provide a snug fit that keeps warmth close without causing discomfort. This makes the hat ideal for daily wear especially when temperatures drop. Handmade hats like this one are thoughtful gifts full of love and care.

Free Crochet Baby Fox Hat pattern for baby shower gifts
The fox theme adds a special charm that delights both parents and kids. You can choose classic orange yarn for an authentic look or pick soft neutral tones for a subtle style. Pairing the hat with matching accessories like mittens or booties can create a cozy coordinated look.
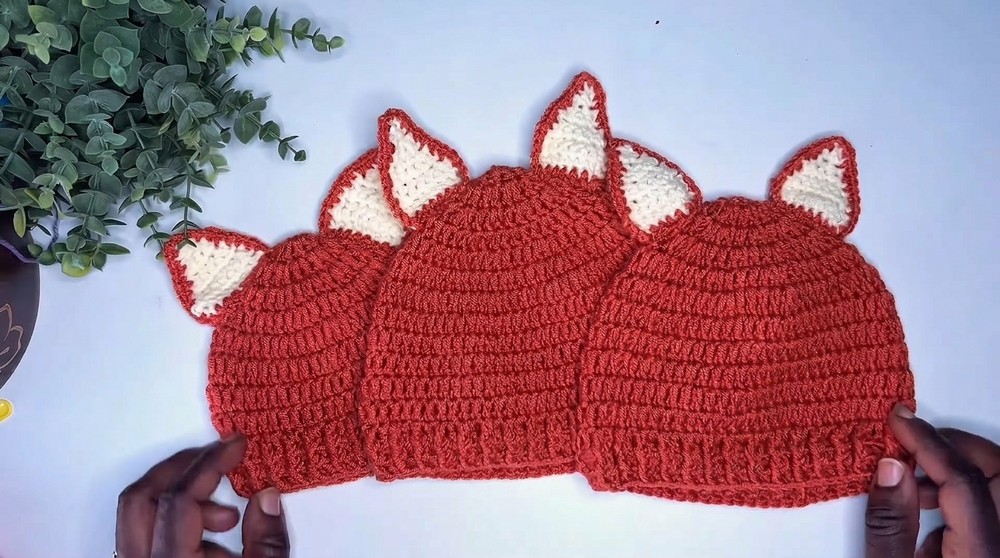
Simple enough for beginners the pattern uses easy crochet techniques making it a fun first project. Crocheting this hat not only results in a cute accessory but also helps build useful skills. Perfect for chilly weather outings photos or just snuggling indoors the Crochet Baby Fox Hat pattern combines style comfort and creativity in a delightful way.
Fox Baby Hat Crochet Pattern (Newborn to 3 Months Size)
Welcome to this charming crochet pattern to create a cozy fox hat perfect for fall! This pattern includes clear, step-by-step instructions for a newborn to 3-month size hat, using soft DK weight yarn and a 3.5 mm crochet hook. With adorable fox ears in contrasting colors, this cozy hat will keep your little one snug and stylish.
Getting Ready to Crochet
- Recommended yarn: DK weight (size 3) acrylic or soft baby-friendly yarn; color choice: warm "brick" color for main body and cream or light shade for ears.
- Crochet hook: 3.5 mm (E/4 US).
- Use a yarn needle for weaving in ends and sewing ears to the hat.
- Beginners: feel free to use a magic circle or slip-knot method for starting the hat.
- Keep stitch markers on hand if you want extra help tracking rounds.
- The pattern includes increases, double crochet, and single crochet stitches-perfect for beginner to intermediate crocheters.
- Be mindful to crochet with a relaxed but consistent tension to achieve accurate sizing.
What to Expect in This Pattern
- Worked in continuous rounds starting from the top crown down.
- Crown is made with double crochet increases forming a flat circular top.
- Smooth, solid stitch rows build the body of the hat.
- Ribbed edging created with front- and back-post double crochet for texture.
- Fox ears crocheted separately in single crochet with shaping decreases.
- Ears sewn securely to the hat's sides for a whimsical finish.
- Pattern accommodates five sizes; this guide focuses on newborn to 3 months size.
How This Fox Hat Comes Together
- Start with a small circle using chains and double crochet stitches for the crown.
- Increase in designated rounds to gently widen the hat's top.
- Crochet evenly around with no increases to form the body length.
- Work textured ribbing around the edge with alternating front and back post double crochets.
- Crochet two fox ears separately with shaping by single crochet and decreases.
- Attach ears to the sides of the completed hat to create the signature fox look.
Appropriate Skill Level
This pattern is suitable for beginner to intermediate crocheters who know or are learning:
- Magic ring or slip knot foundation
- Basic crochet stitches: single crochet (sc), double crochet (dc), increases, decreases
- Working in rounds and joining with slip stitches
- Front post and back post double crochet techniques (ripple ribbing)
Size of the Finished Hat
- Approximate head circumference: newborn to 3 months, around 14 inches (35 cm).
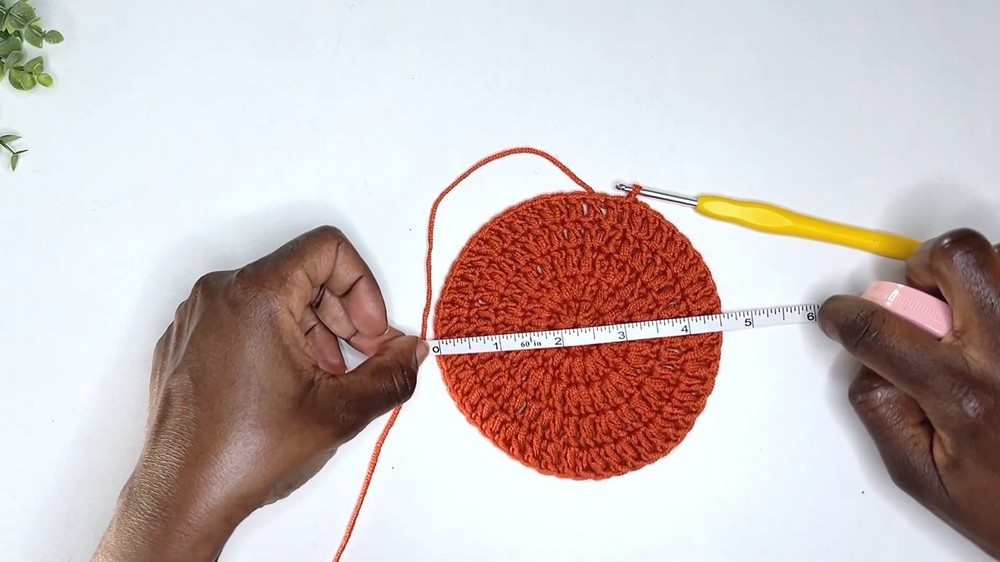
- Crown diameter after increasing rounds: about 4.5 inches (11.5 cm).
- Total height: approximately 5 inches (13 cm) including ribbed edging.
Materials You Will Need
- DK weight acrylic or soft baby yarn in two colors (main and accent).
- Crochet hook size 3.5 mm (E/4 US).
- Tapestry needle for finishing and sewing ears.
- Scissors.
- Optional stitch markers for round counting.
Sizing Reference
- The newborn size here measures approximately 14 inches (35 cm) around the head.
- For other sizes, adjustments in rounds and stitch counts are needed (see the linked full-size pattern in the video description).
Recommended Tension Gauge
- Not crucial for fit but approximate gauge:
- 14 double crochet stitches and 8 rows = 4 inches (10 cm) in pattern with 3.5 mm hook and DK yarn.
- Adjust hook size if needed for looseness or tightness.
Stitch Glossary
- ch - chain
- sl st - slip stitch
- sc - single crochet
- dc - double crochet
- fpdc - front post double crochet
- bpdc - back post double crochet
- inc - increase (two stitches in one stitch)
- dec - single crochet two together (decrease)
Special Techniques Explained
- Magic Ring or Slip Stitch Ring: creates a tight adjustable center circle for starting rounds.
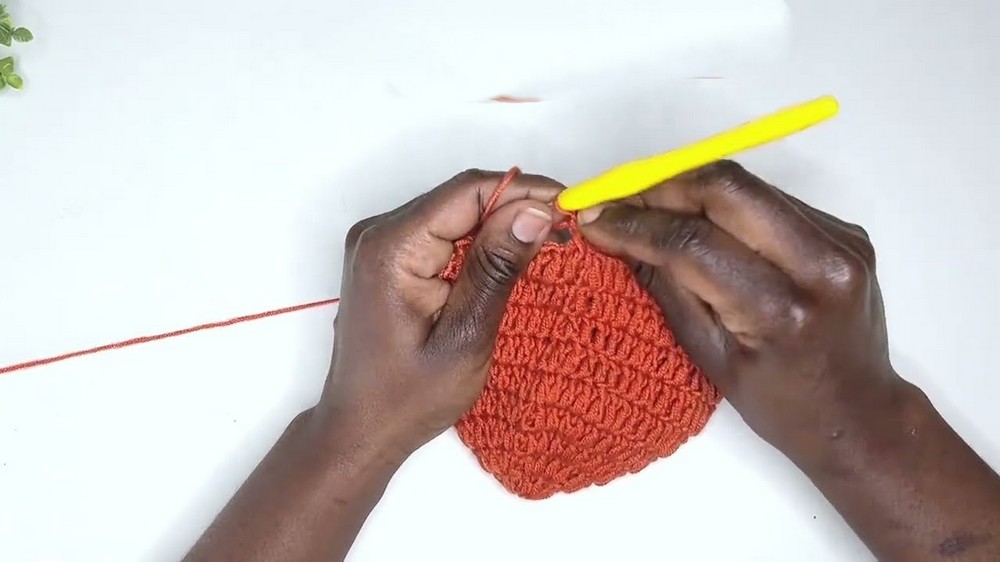
- Front Post Double Crochet (fpdc): yarn over, insert hook from front to back around post of stitch, yarn over and complete double crochet as usual. This creates raised ribbing.
- Back Post Double Crochet (bpdc): yarn over, insert hook from back to front around post of stitch, complete as double crochet for ribbing contrast.
- Single Crochet Decrease (sc2tog): insert hook into next stitch, yarn over, pull through, insert into following stitch, yarn over, pull through, yarn over and pull through remaining loops on hook.
Detailed Crochet Directions
Crown Creation
Round 1:
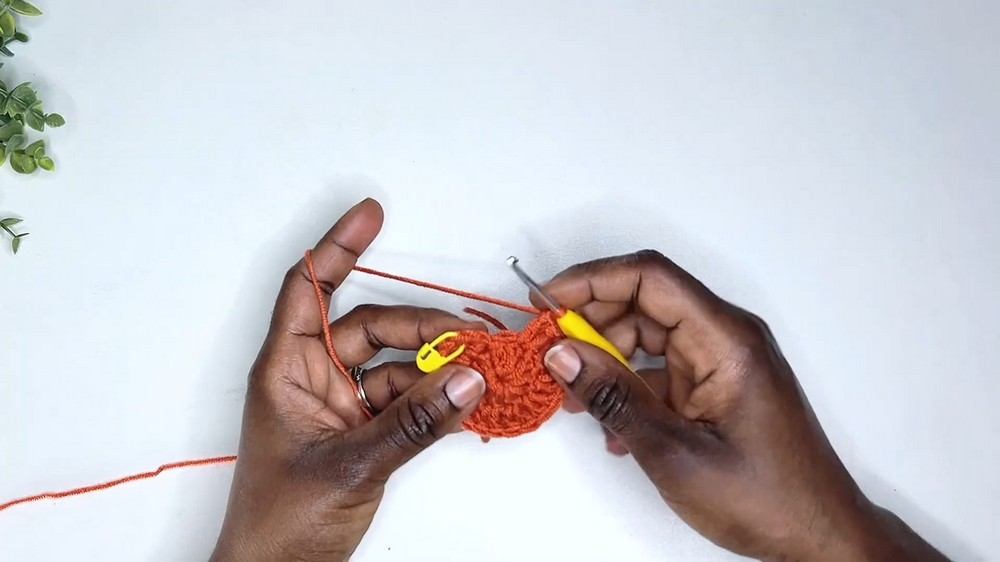
- Make slip knot. Chain 3 and join with sl st to first chain to form a ring (or use magic ring).
- Chain 2 (does not count as stitch), dc 10 times into ring.
- Join with sl st to top of first dc.
Tip: The chain 2 is an overhead chain, not a stitch.
Round 2:
- Chain 2.
- Make 2 dc in each stitch around (total 20 dc).
- Join with sl st.
You are doubling your stitches to increase the circle size.
Round 3:
- Chain 2.
- 1 dc in first stitch, 2 dc in next stitch, repeat around (total 30 dc).
- Join with sl st.
Round 4:
- Chain 2.
- 2 dc in first stitch, 1 dc in next 2 stitches, repeat around (total 40 dc).
- Join with sl st.
Round 5:
- Chain 2.
- 1 dc in each of next 3 stitches, 2 dc in next stitch, repeat around (total 50 dc).
- Join with sl st.
At this point, crown should measure approximately 4.5 inches across.
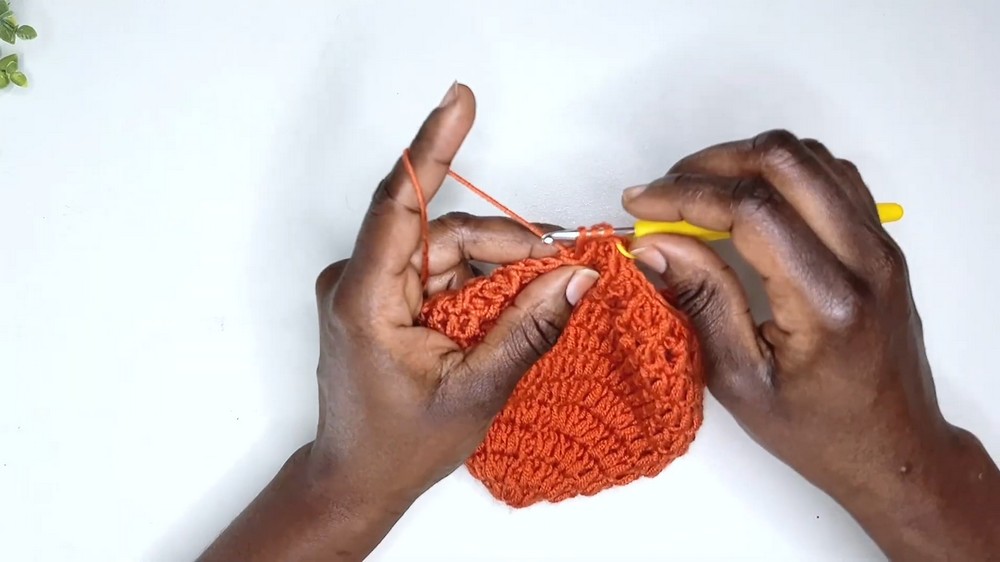
Rounds 6 to 9:
- Chain 2.
- Dc in each stitch around (50 dc).
- Join with sl st each round.
These rounds add height without increasing width.
Ribbed Edging
Round 10:
- Chain 2.
- fpdc around next stitch, bpdc around next stitch, repeat to end.
- Join with sl st to first fpdc.
Round 11:
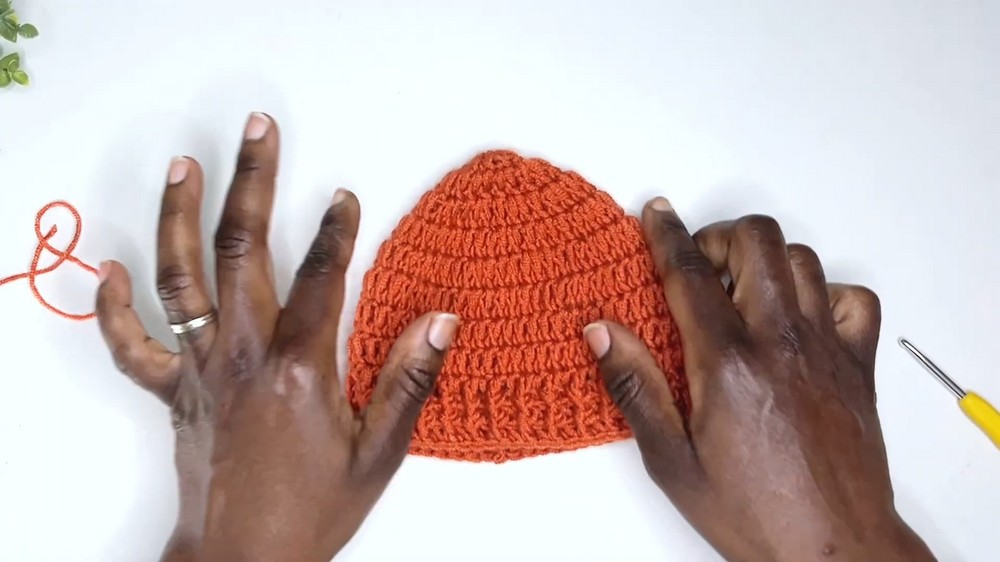
- Repeat Round 10 (fpdc, bpdc alternating).
- Join with sl st.
- Fasten off and weave in ends.
This edging gives a stretchy textured finish.
Fox Ears (Make Two)
Ear Base (Cream Color Yarn):
Row 1:
- Make slip knot, chain 9.
- Skip first chain, sc 8 stitches across.
- Chain 1, turn.
Row 2:
- Sc in each stitch (8 sts).
- Chain 1, turn.
Row 3:
- Sc decrease over first 2 stitches (sc2tog).
- Sc 4 stitches.
- Sc decrease over last 2 stitches. (6 sts)
- Chain 1, turn.
Row 4:
- Sc across (6 sts).
- Chain 1, turn.
Row 5:
- Sc decrease first 2 stitches.
- Sc 2 stitches.
- Sc decrease last 2 stitches. (4 sts)
- Chain 1, turn.
Row 6:
- Sc across (4 sts).
- Chain 1, turn.
Row 7:
- Sc decrease first 2 stitches.
- Sc decrease last 2 stitches. (2 sts)
- Chain 1, turn.
Row 8:
- Sc across (2 sts).
- Chain 1, turn.
Row 9:
- Sc decrease 2 stitches, do not finish decrease.
- Join main hat color yarn and pull through to complete the stitch.
- Chain 1 and sc evenly around entire triangle edge to create a neat border.
- Slip stitch to beginning sc, fasten off.
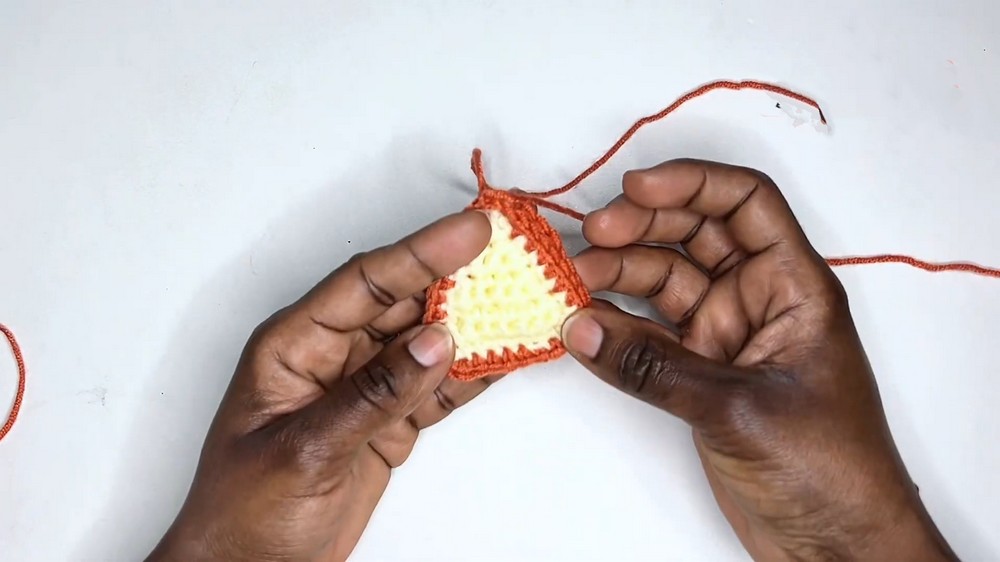
Repeat for second ear.
Simple Explanation for Beginners
- The hat starts with a small circle that increases in size with more stitches per round.
- Adding rounds without increases builds the side walls of the hat.
- The ribbing on the edge stretches gently for a cozy fit.
- Ears are made by shaping small triangles using decreases and are sewn on afterward.
Final Assembly and Finishing Steps
- Weave in all loose yarn ends securely with a yarn needle.
- Attach ears to the top sides of the hat securely, using sewing pins to hold placement while stitching.
- Sew ears evenly on both sides of the hat for symmetry.
- Block hat gently, if desired, by shaping moist fabric to desired form and allowing it to dry flat.

Troubleshooting Common Issues
- Hat too small or tight: Try a larger hook or crochet loosely to increase size.
- Uneven ear shapes: Carefully count decreases and stitches each row; use stitch markers if needed.
- Edges curling: Ensure consistent tension and complete all edging stitches. Blocking can help smooth edges.
Fun Add-Ons and Variations
- Use different color combinations to create other animal hats, like bear or bunny.
- Add a pom-pom to the top as a playful accent.
- Crochet matching mittens or booties with the same yarn.
- Embroider eyes or noses onto ears for a complete fox face.
- Customize size using the full five-size pattern linked in the video description and comment section.