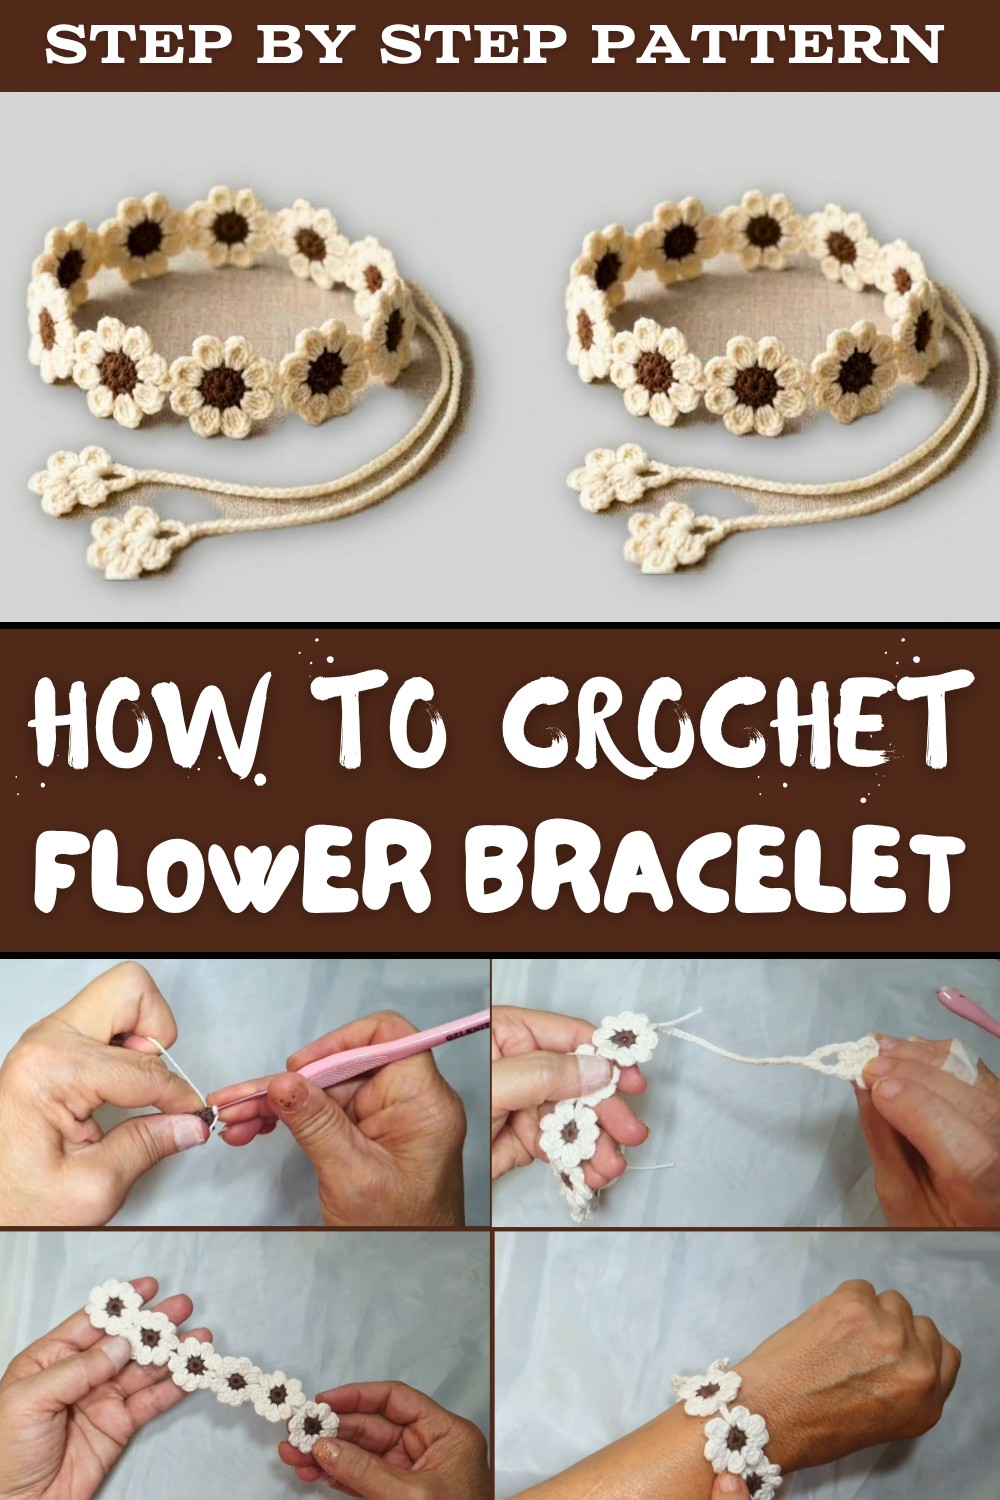
Quick handmade jewelry Free Crochet Flower Bracelet pattern
Adorn wrist style with Free Crochet Flower Bracelet Pattern, featuring delicate floral details and soft charm for everyday fashion beauty.
Making your own jewelry can be fun and rewarding. A handmade bracelet adds a special touch to your outfit. It feels nice to wear something you created yourself. Crochet offers many creative possibilities. One popular idea is a crochet flower bracelet pattern. This pattern is simple and perfect for a beginner. It teaches you how to make a delicate flower shape that looks lovely wrapped around your wrist. The soft yarn used in this bracelet is gentle on the skin. It feels comfortable to wear all day long.
Free Crochet Flower Bracelet pattern for aesthetic crochet lovers
Unlike metal or plastic jewelry, this bracelet does not pinch or cause allergies. You can wear a crochet flower bracelet for many occasions. It brightens casual clothes and adds charm to a dressier look. Try making the bracelet in different colors for a fresh style each time. Small details like beads or buttons can make your bracelet even more special. This accessory also makes a great gift for a friend or family member. The pattern is easy to follow step by step.

It helps you learn new stitches while creating something useful. With just a little practice, your fingers will move quickly and smoothly. Wearing your finished bracelet gives a sense of pride and joy. Overall a crochet flower bracelet pattern is a wonderful way to explore crocheting, improve your skills, and create beautiful jewelry that looks and feels great every day. You get comfort, charm, and creativity all in one tiny piece made by your own hands.
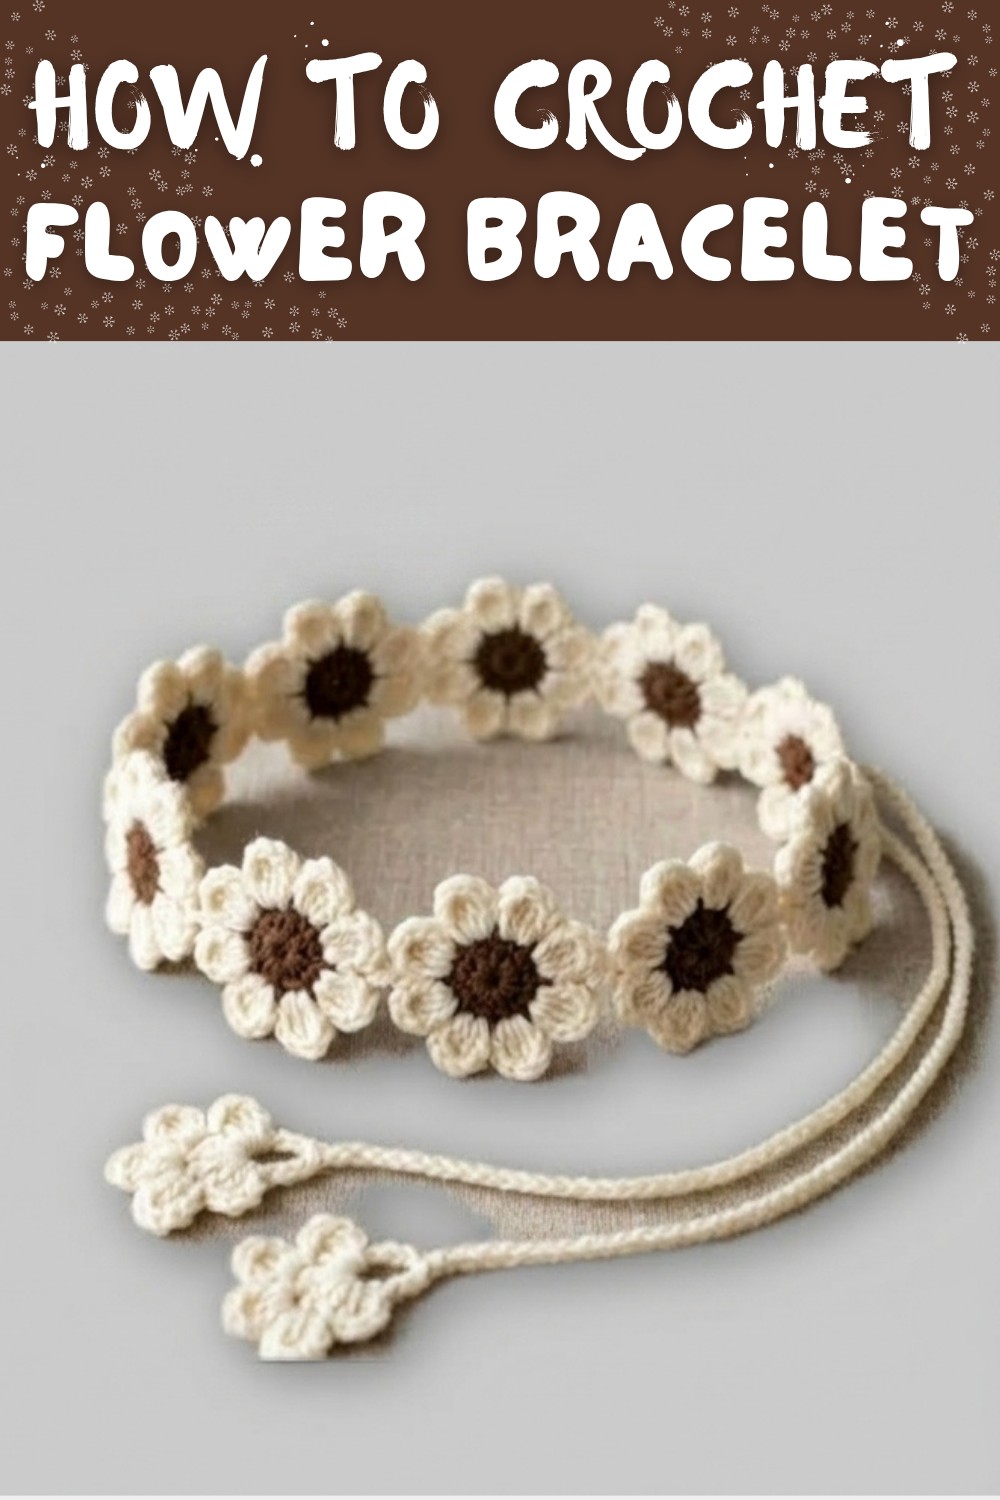
Delicate Crochet Floral Bracelet Pattern
Create a charming and adjustable crochet floral bracelet featuring delicate handmade flowers joined together with a soft cotton yarn. This pretty accessory showcases textured petals made with tight stitches and finished with a simple tie chain for elegant wearability. The pattern uses fine crochet thread and a small hook to produce a lightweight and comfortable bracelet perfect for gifting or personal adornment.
Preparation Essentials Before You Begin
- Yarn: Use fine cotton crochet thread or 3-ply cotton yarn suitable for detailed work, with a recommended crochet hook size of 1.75 mm to maintain delicacy and tight stitch definition.
- Hook Size: 1.75 mm steel or fine crochet hook for best yarn control and neatness.
- Additional Tools:
- Tapestry or embroidery needle for weaving in ends and joining motifs.
- Scissors for trimming yarn tails.
- Stitch markers (optional) to track rounds or petals.
- Tension Advice: Keep stitches tight for defined petals and stable construction; loose stitches may affect shape and durability.
- Workspace Setup: Clean, flat workspace with good lighting helps with fine detail work.
- Customization Tip: Measure your wrist before joining flowers to ensure the bracelet fits comfortably; you can add or reduce flower count accordingly.
Important Pattern Information
- The bracelet is constructed from multiple identical crochet flowers joined side by side at the petals' edges.
- Each flower starts with a tightly closed magic ring base worked in low stitches forming the flower's center.
- Petals are created using double chain spaces and double crochet clusters worked tightly for firm shape.
- Flowers are joined using slip stitches through the spaces between petal groups, maintaining alignment.
- The tying chain is long, allowing adjustable wear and finished with a small flower motif dangling as a decorative end.
- Secure ends carefully with weaving and optional tying to prevent unraveling.
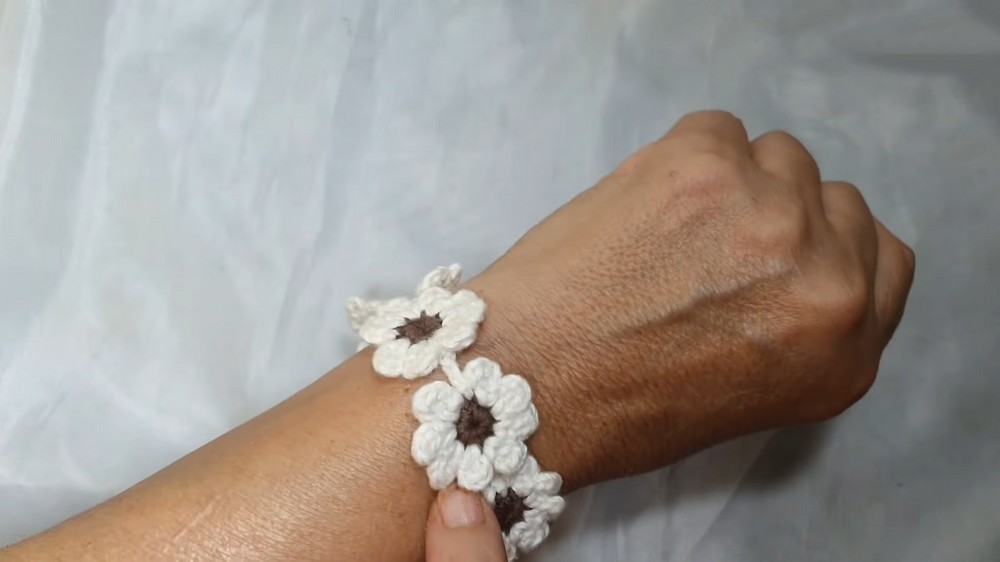
- The finished bracelet is delicate and lightweight, suitable for casual or formal wear.
Construction Overview
- Begin with crochet magic ring centers forming compact flower bases.
- Work each flower's petals in off-white or chosen color with precise slip stitches and chains.
- Join flowers consecutively via slip stitches placed at midpoints between petals to ensure neat connection.
- Complete the bracelet by crocheting a long adjustable chain tie with a small decorative flower on the end.
- Weave all ends securely and adjust length according to wrist measurement.
Skill Level
Intermediate - requires knowledge of magic ring, chains, slip stitches, double crochet clusters, and joining motifs. Some experience with tight stitches is recommended.
Finished Dimensions
- Flower diameter: approximately 3-3.5 cm (1.2-1.4 inches) each.
- Bracelet length: variable, e.g., 15-18 cm (6-7 inches) without tie; tie length adjustable according to wrist size with 30+ chain stitches.
Materials Needed
| Item | Description |
|---|---|
| Cotton Crochet Thread | Fine 3-ply cotton, off-white (or desired colors) |
| Crochet Hook | 1.75 mm steel or suitable fine hook |
| Tapestry Needle | For weaving and joining motifs |
| Scissors | For cutting yarn |
| Stitch Markers | Optional – to mark rounds or petals |
Recommended Gauge
- Gauge is flexible though tight stitches are necessary for petal definition.
- Sample gauge: about 3.5 cm diameter per finished flower.
Abbreviations and Terms (US terminology)
- ch = chain
- sl st = slip stitch
- sc = single crochet (low point)
- dc = double crochet (high point)
- tr = treble crochet (if applicable, not used here)
- st(s) = stitch(es)
- rep = repeat
Description of Special Stitches and Techniques
- Magic Ring: Form an adjustable loop to work stitches into, creating a tightly closed circle.
- Slip Stitch Join: Used to neatly join flowers at petal midpoints and to finish rounds.
- Tight Stitching: Essential to build sturdy petals and preserve bracelet shape. Loose tension may result in floppy flower petals.
- Joining Flowers: Slip stitches sewn through spaces between petals of adjacent flowers for aligned concatenation.
Crochet Pattern Steps
Part 1: Creating the Flower Center
- Begin with a magic ring using cotton thread.
- Chain 1, then make 8 single crochet (sc) evenly into the ring.
- Close the ring tightly by pulling yarn tail; join with a slip stitch in first sc.
- Chain 1 and fasten off, leaving a long tail for sewing and weaving behind.
- Weave the tail securely into the back of the stitch work.
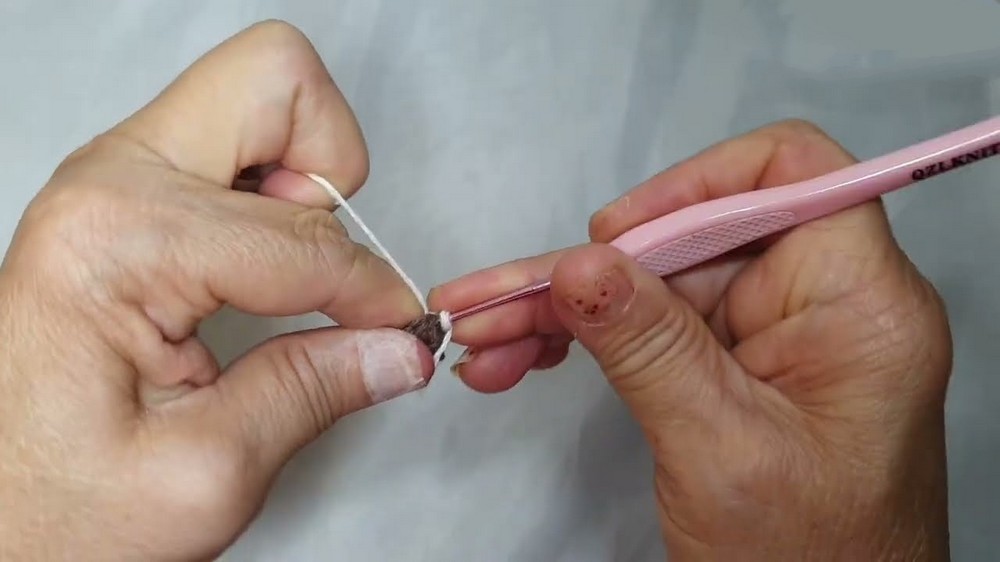
Beginner Note: The magic ring lets you create a tight flower center with no holes.
Part 2: Forming the Flower Petals
- Join your yarn (off-white or chosen color) by slip stitching into any sc of the flower center.
- Chain 2 (counts as first dc).
- In the same stitch, work 2 more double crochet (dc) - total 3 dc in the same stitch; petal base.
- Chain 2 to create spacing.
- Slip stitch into the next sc from the flower center (tightly).
- Repeat this sequence 8 times around to make 8 petals:
(3 dc in one sc, ch 2, sl st in next sc). - After the last petal, chain 2 and finish with slip stitch to join to starting point.
Helpful Hint: Keep petals tight for a defined shape.
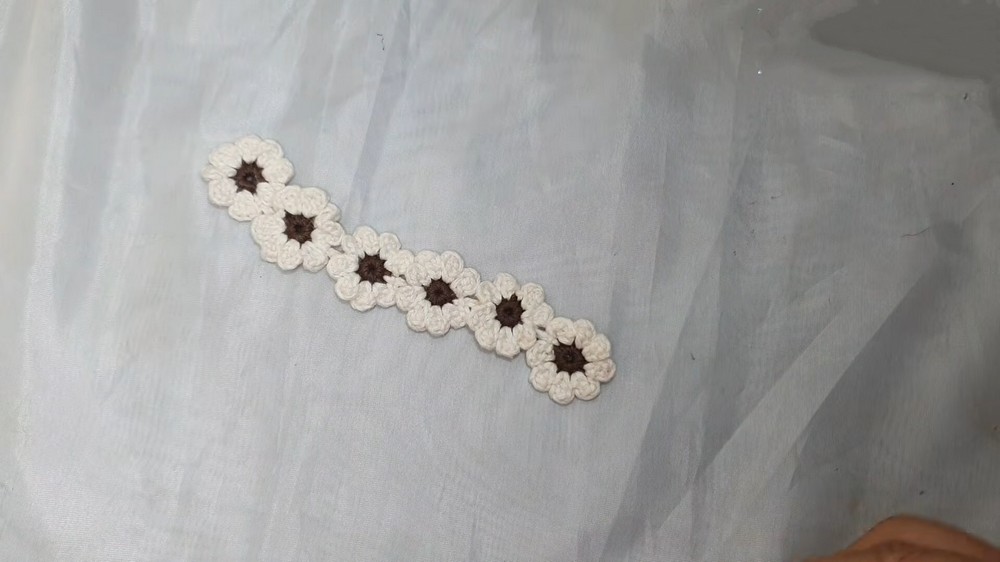
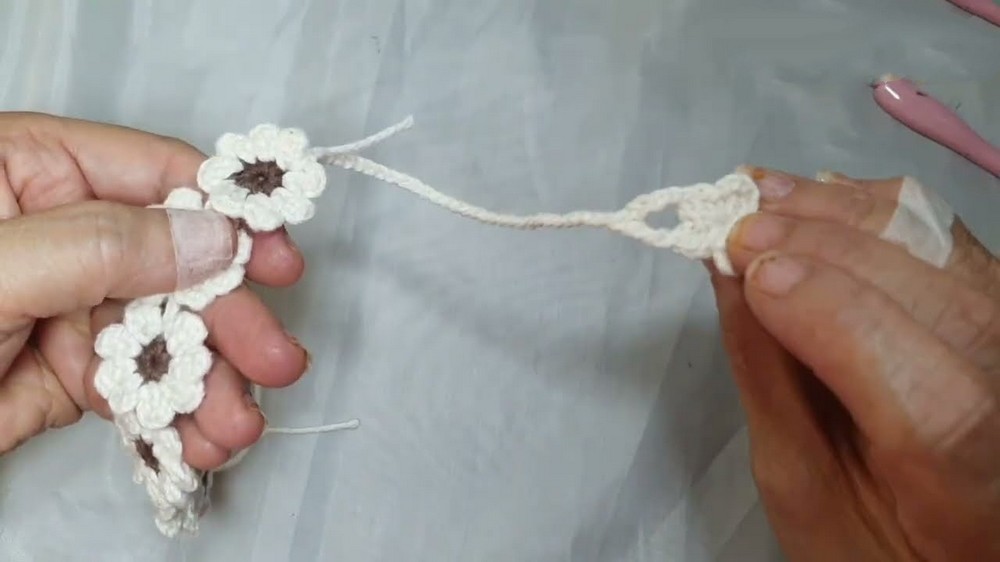
Part 3: Joining Flowers Together
- After creating multiple flowers to desired bracelet length (e.g., 6 flowers for average wrist), join them by:
- Placing flowers side-by-side.
- Inserting your hook into the midpoint space between two petals on two separate flowers.
- Make a slip stitch through both loops to connect flowers.
- Repeat along all adjoining petals until flowers are linked linearly.
- Measure wrist circumference to determine number of flowers needed for comfortable fit.
Part 4: Making the Tie Ribbon with Flower End
- At one end of the connected flowers, create the long tie as follows:
- Chain approximately 30 chains or desired tie length for adjustable closure.
- Attach a small flower at the end using same flower pattern but with 5 petals:
- Magic ring start; chain 2; make 1 high point (dc), ch 2, sl st five times creating 5 petals.
- Fasten off and weave ends neatly.
Customization Tip: Extend chains for longer ties for hanging styles or shorter for tight bracelets.
Part 5: Final Finishing Touches
- Weave all loose yarn tails securely on the wrong side among stitches using a tapestry needle.
- Adjust bracelet length by adding/removing flowers or chain length.
- Optionally, lightly block flowers to help maintain shape.
- Tie around wrist using chain tie and adjust for comfort.
Easy Explanation for Beginners
You create small round flowers by crocheting a tiny circle and detailed petals made from clusters of double crochets separated by chains. Each flower makes a neat little bloom. String many flowers together using slip stitches at the petal edges to form a bracelet. Then add a long chain with a mini flower at the end for tying. Keep your stitches firm and consistent to make the flowers hold shape.
Assembly & Finalizing Notes
- Use long yarn tails for securely attaching flowers during joining.
- Weave in ends neatly to avoid loose threads.
- Tie off yarn securely when finishing each element.
- Block finished bracelet by gently shaping flowers and letting dry flat.
- Store in a small pouch or box to keep flower petals undistorted.
Troubleshooting Tips
- Loose petals or floppy flowers? Use tighter tension and appropriate hook size (1.75 mm recommended).
- Difficult flower joining? Use stitch markers to guide consistent joining points.
- Bracelet too long or short? Adjust number of flowers and length of chain ties before finishing ends.
- Yarn ends visibly loose? Securely weave in with tapestry needle; use fabric glue sparingly for added hold.
Creative Project Ideas Using This Technique
- Floral crochet necklaces or anklets with similar flower chaining
- Decorative edging for scarves or shawls made of joined flowers
- Flower appliques for hats, bags, or garment embellishments
- Bridal or festive wrist corsages and hair accessories
- Small floral brooches or charms by adding backing or pins