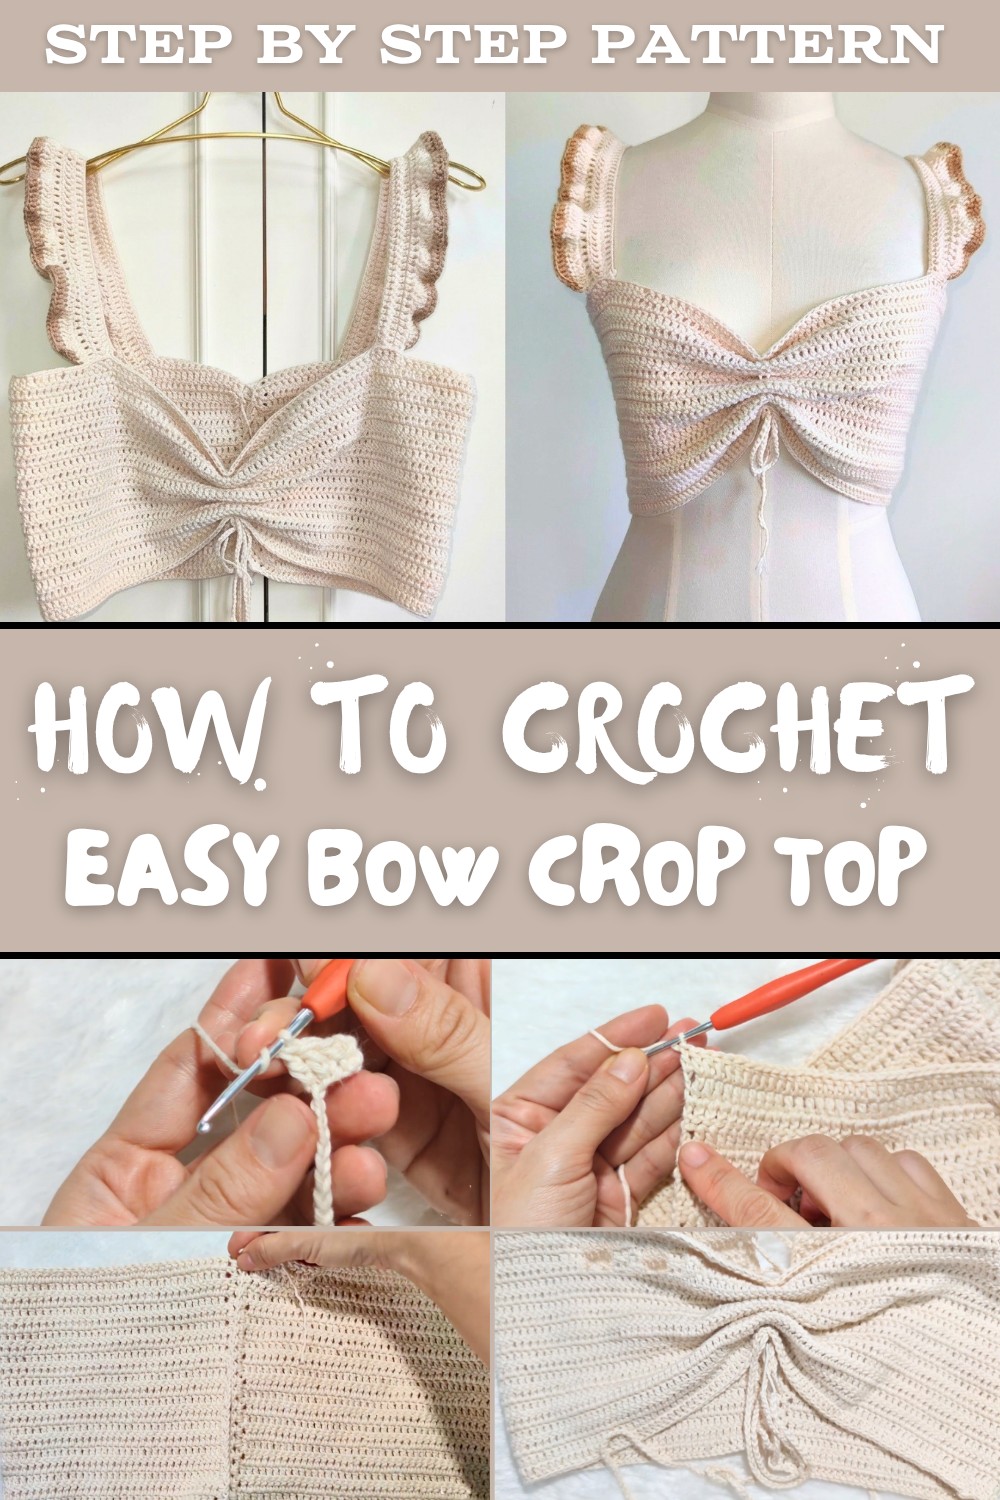
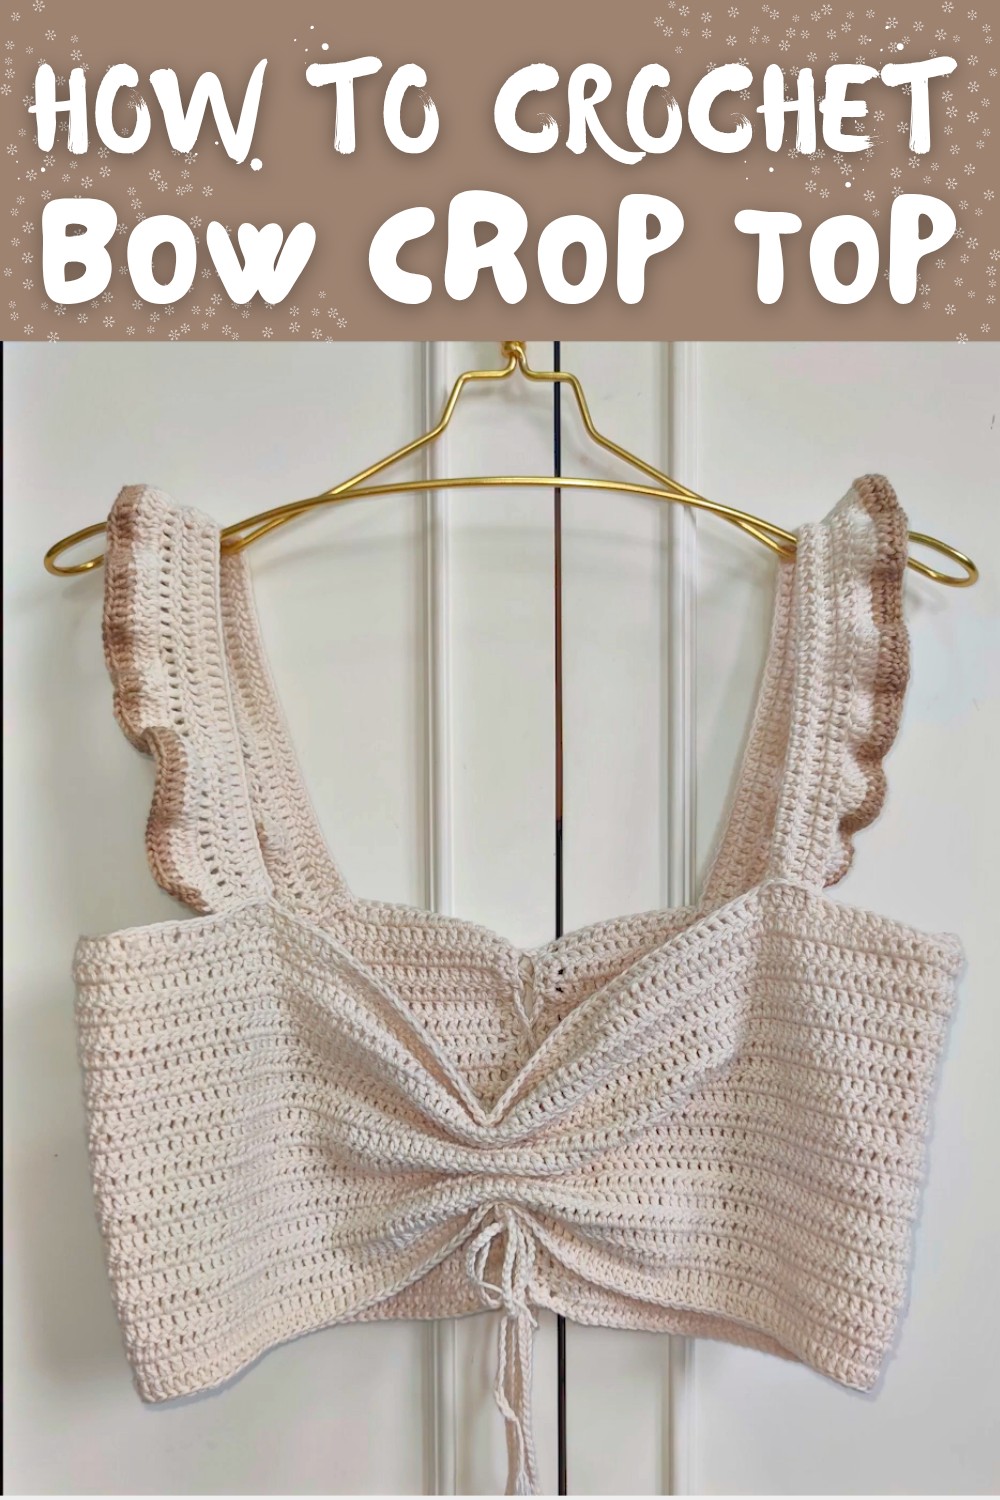
Free Crochet Bow Crop Top pattern for beach-ready outfits
Enhance summer outfits with Free Crochet Bow Crop Top Pattern, featuring cute bow detail soft texture and stylish casual charm for warm days.
Have you ever wanted a summer top that is both cute and comfortable? A crochet bow crop top pattern offers just that-a lovely blend of style and ease that anyone can enjoy. This top features a sweet bow accent that adds charm and personality without being too fussy. Made from soft, breathable yarn, it feels gentle on your skin and keeps you cool during warm days. Thanks to the adjustable bow, the fit can easily be customized to suit your shape perfectly.
Free Crochet Bow Crop Top pattern for trendy looks
This versatile piece pairs well with many outfits. You can team it with shorts or jeans for a relaxed look, or tuck it into a skirt for something a bit dressier. Layer it under an open button-up shirt or light jacket to add texture and flair. The simple crochet stitches used make this pattern great for beginners, allowing you to create a fashionable item without complicated steps.

What makes the crochet bow crop top pattern especially fun is the freedom to choose your favorite colors and experiment with the bow size. It's a wonderful project for expressing your creativity and crafting something special. Whether you want to freshen up your own wardrobe or make a heartfelt gift, this top is a practical and stylish choice.
Comfortable, easy to wear, and full of personality, this crop top brings a handmade touch to your everyday style. Give it a try-you might just fall in love with the charm and versatility of your new favorite piece.
Stylish Beachy Crochet Crop Top Pattern
Welcome to this clear and beginner-friendly crochet pattern for a sexy yet comfortable crop top with a charming beachy vibe. This garment features a lace-up back for adjustable fit and flattering shaping. Follow the instructions carefully to create your very own trendy summer top!
Preparation Tips & Yarn Choices (Before You Begin)
- Use 100% authentic cotton yarn in natural or raw colors for a soft and breathable feel against skin, especially around the neckline.
- Recommended yarn color example: brown or beige, but you can select any shade you prefer.
- Crochet hook: 2.5 mm (Size 4/0 recommended) to work with fine cotton yarn.
- Tools needed: yarn needle for finishing edges, scissors, and stitch markers.
- Take your bust measurement before starting; the pattern adjusts easily to your size thanks to the lace-up back.
- Prepare your workspace with good lighting and have a comfortable chair to support your posture.
- Learn or review basic crochet stitches like chain (ch), double crochet (dc), and working into back loops for texture variation.
- Keep yarn tension consistent to achieve uniform stitches.
Important Pattern Details & Terminology (Pattern Notes)
- Worked in rows from bottom edge to top neckline.
- The foundation chain length is your bust measurement minus 4 inches; adjust as necessary.
- Lace-up back allows size flexibility.
- Stitches worked mostly on the back loop of chains and posts to create a neat, textured surface.
- The pattern uses standard US crochet terms.
- Turning chains vary between 1 or 3 chains depending on row.
- Side holes are created by leaving chain spaces for threading the lace-up cord.
- Pay close attention to stitch placement behind the chains for neat edges.
Construction Overview
- Begin with foundation chain matching adjusted bust size minus 4 inches.
- Work rows of double crochet stitches in the back loops.
- Create side holes as you approach desired body length for threading cord.
- Work decorative edging with alternating dc and chain stitches.
- Crochet two shoulder straps separately and attach to body.
- Make long lace-up cord chains (~150 cm) for back adjustment.
- Finish with cord threading, bow tying, and tidying ends.
Skill Level
Beginner to Intermediate
(Comfortable with basic stitches and reading simple patterns; adjustable lace-up style makes fit forgiving.)
Finished Size
- Bust circumference approx. 27 inches based on an example 31-inch bust measurement minus 4 inches.
- Body length approx. 7 inches from bottom edge to neckline.
- Adjustable fit with lace-up back.
Materials Required
- Cotton yarn, approximately fingering to sport weight, about 150 grams.
- 2.5 mm crochet hook (US size 4/0).
- Yarn needle for weaving in ends and sewing straps.
- Scissors.
- Stitch markers (optional but helpful).
Sizing and Measurements
| Measurement | Example Size |
|---|---|
| Bust circumference | 31 inches |
| Foundation chain | 27 inches |
| Body length | 7 inches |
| Shoulder straps | 13 inches |
| Cord length | 150 cm |
Adjust foundation chain length to your bust minus 4 inches (or more if preferred). Body length and strap length can be customized.
Gauge and Stitch Pattern
- Gauge not rigid; tension affects size, so measure foundation chain accordingly.
- Stitch pattern is rows of double crochet (dc) stitches, mostly worked in the back loops, alternating with chains for edging.
- Side openings created by chain spaces.
Crochet Abbreviations
| Abbreviation | Term | Description |
|---|---|---|
| ch | chain | Yarn over, pull through loop |
| dc | double crochet | Yarn over, insert hook, yarn over, pull through, yarn over, pull through two loops twice |
| sl st | slip stitch | Insert hook, yarn over, pull through stitch and loop on hook |
| st | stitch | Individual crochet stitch |
| rep | repeat | Repeat instructions |
| RS | right side | Front side of fabric |
| WS | wrong side | Back side of fabric |
Special Techniques Explained
Working in Back Loops
- Instead of inserting the hook under both loops of a stitch, insert only under the back vertical loop to create a ribbed texture.
Creating Side Holes for Lace-Up
- Leave chain spaces along sides where you skip double crochet stitches to create openings for threading cord.
Apple Crochet Stitch (or P1 Stitch)
- A variation resembling a double crochet worked carefully into chain posts behind the stitches for neatness and texture.
Step-by-Step Crochet Instructions
Body of the Crop Top
Foundation Chain:
- Tie a slip knot, then chain to bust circumference minus 4 inches (e.g., 27 inches for a 31-inch bust).
- Example stitch count for 27 inches foundation chain while maintaining gauge.
Row 1 (RS):
- Ch 3 (counts as first dc), turn.
- Dc into the 4th chain from hook and each chain across, working into the back loops only.
- End with a total stitch count matching the foundation chain length minus 3 chains.
Row 2 to Row 10 (or until 7 inches length achieved):
- Ch 3, turn.
- Dc into back loops of each stitch across.
- Repeat until fabric measures approximately 7 inches in length.
Tip: For neat edges, always crochet into the back loop behind the chain posts, where you can see small bumps.
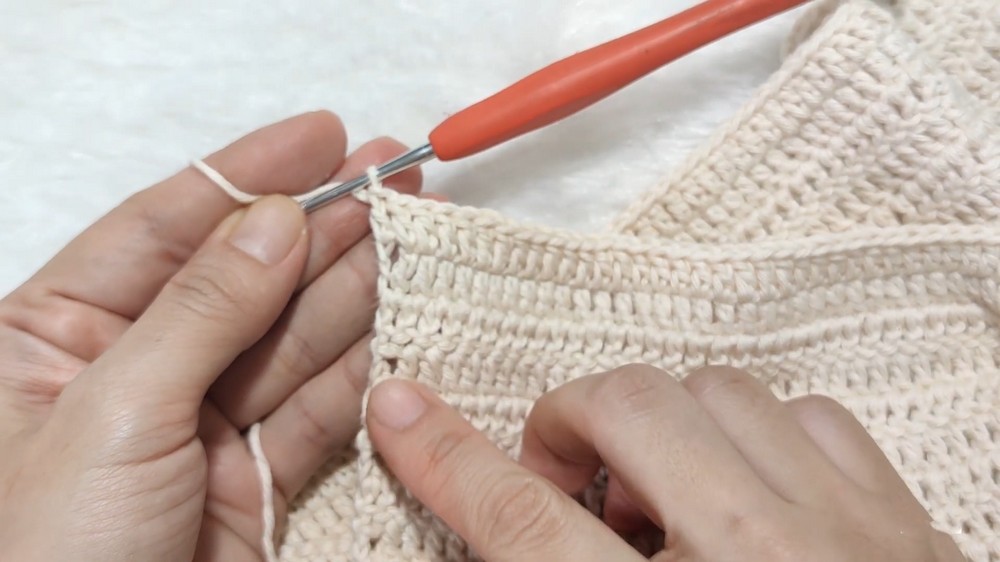
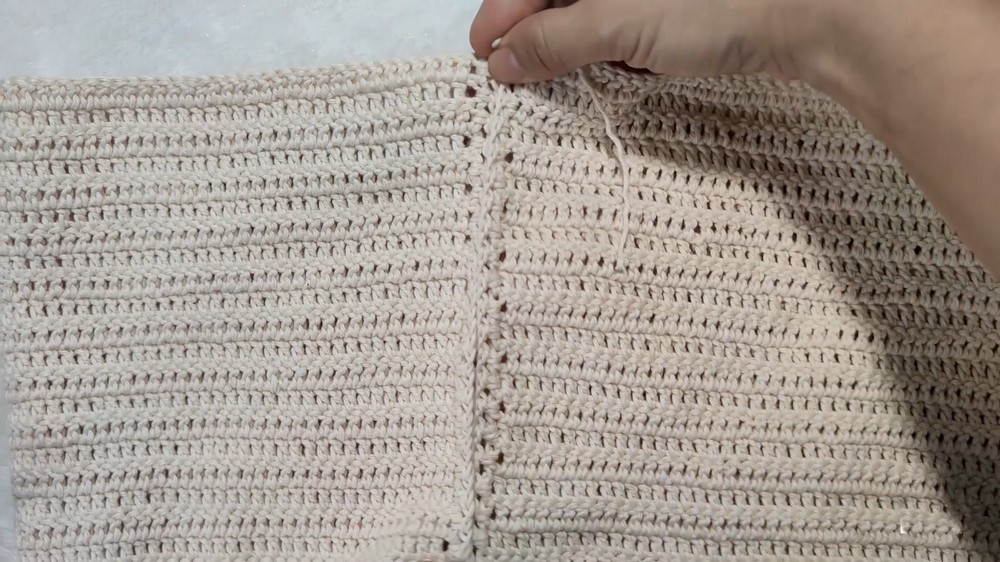
Side Holes for Lace-Up:
- At desired points on the side edges, create holes by replacing every 4th dc with a chain 1 space.
- Continue double crocheting in the preceding stitches.
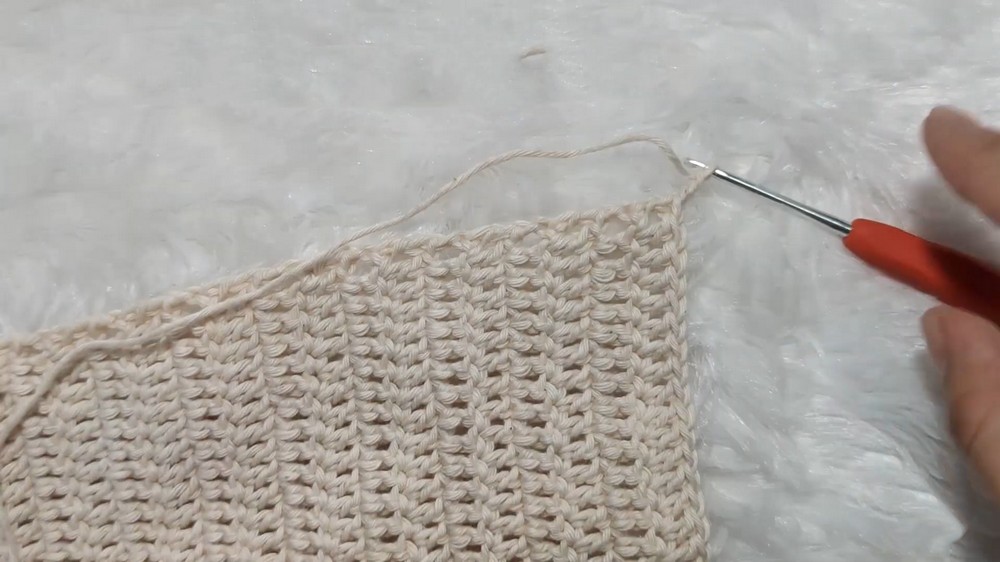
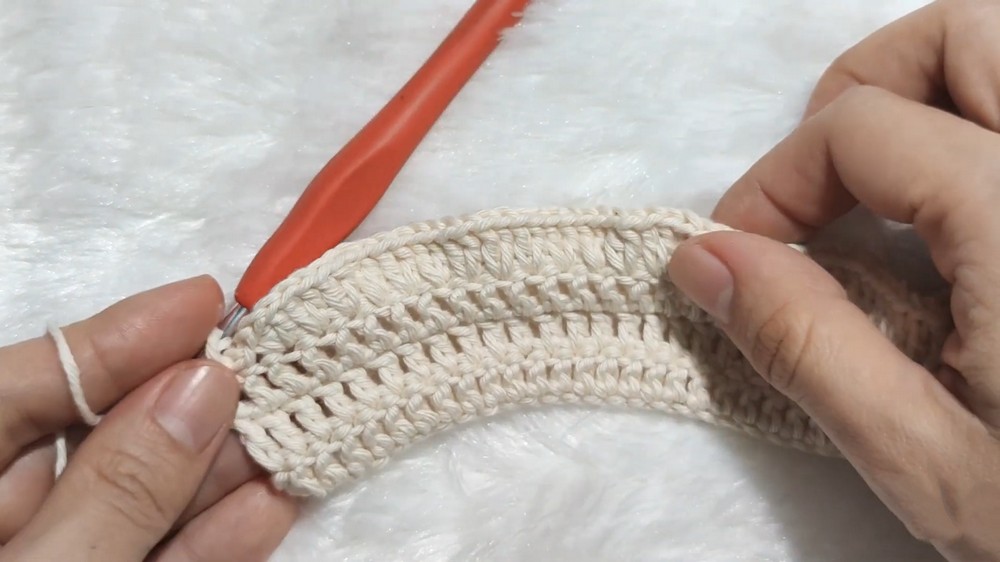
Decorative Edge
Edge Rows:
- Work a triple chain at turning start.
- Crochet alternating dc, ch 1, dc along edges to create delicate openwork border until you reach the other side.
- When turning the piece after each row, switch between chain 1 and chain 3 turning chains for variation.
Shoulder Straps
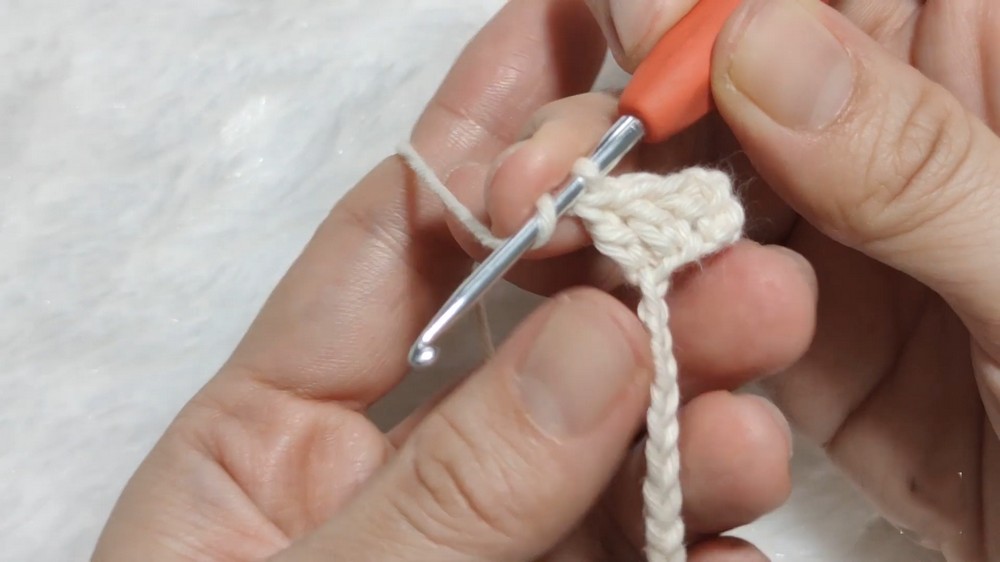
Strap Chains:
- Chain 13 inches (or your desired strap length).
Strap Rows:
- Work rows of double crochet stitches across the chain width.
- Continue for 3 rows or until desired thickness achieved.
Attach Straps:
- Sew shoulder straps securely to front and back of body using yarn needle and remaining yarn tails.
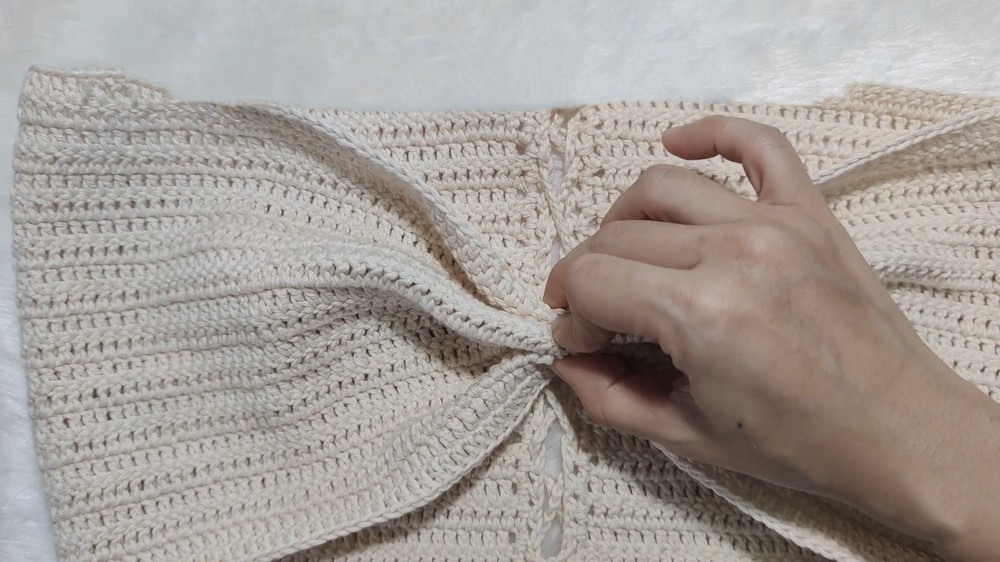
Lace-Up Cord
- Chain approximately 150 cm for lace-up cord length.
- If longer is preferred, chain extra length.
- Thread cord through side holes along back edges.
- Tie into a bow to secure fit.
Explaining Basic Steps for Beginners
- Foundation Chain: Think of this as the base on which the whole top is built. The number of chains you make sets the size of the chest area.
- Double Crochet (dc): A taller stitch that builds the body when repeated row after row. Working in back loops gives a textured effect and keeps the edges neat.
- Side Holes: Instead of a full stitch, you leave space intentionally so you can thread a cord for adjustment later.
- Straps: Simple chains with double crochet rows to make comfortable shoulder supports.
- Cord: A long chain that acts like a shoelace, threading through side holes to let you tie the top snugly.
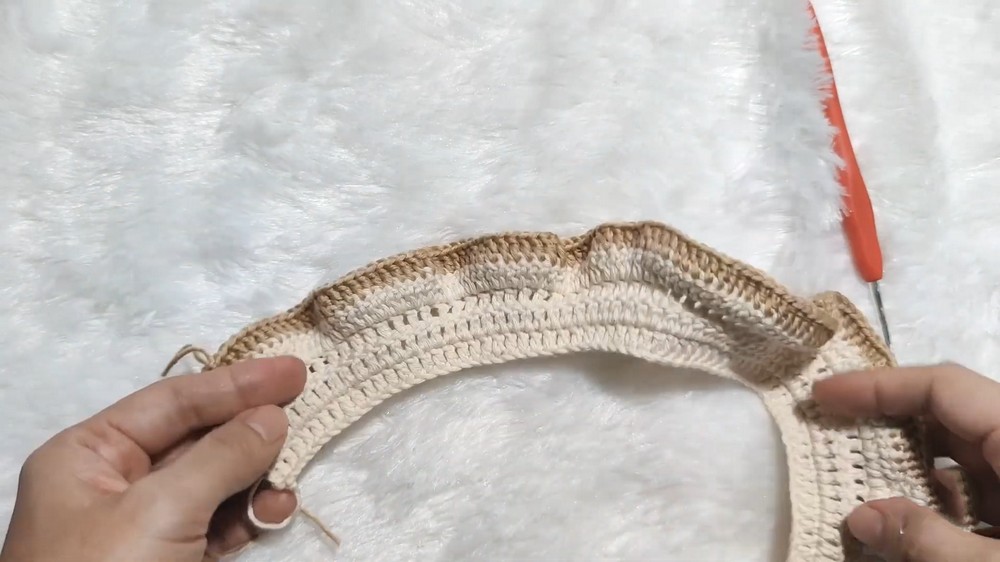
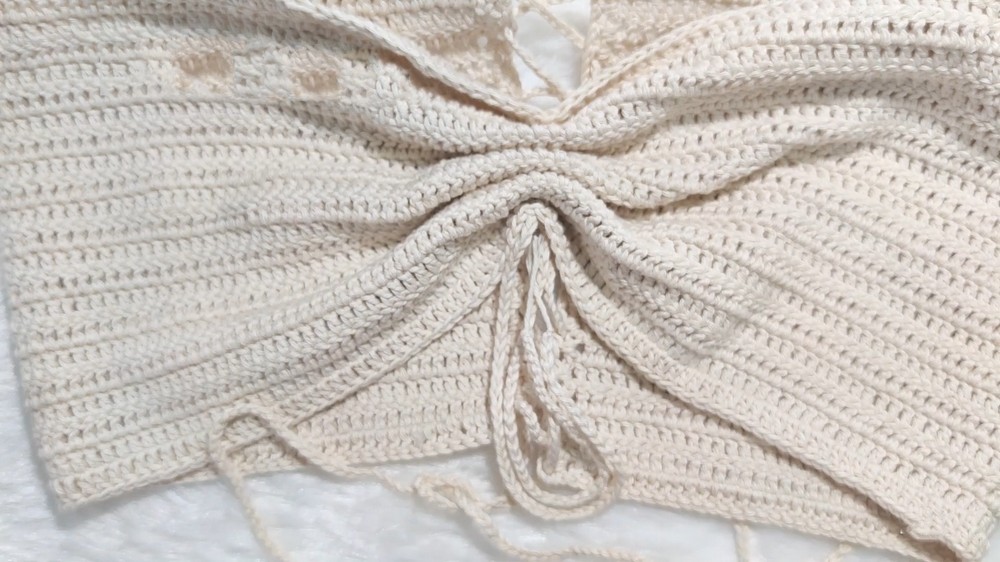
Joining and Finishing Touches (Assembly and Finishing)
- Use yarn needle to sew shoulder straps securely.
- Weave in all loose yarn ends neatly on the inside.
- Thread lace-up cord through the side holes on the back side.
- Tie final bows to adjust fit and prevent slippage.
- Light blocking (wet shaping and drying flat) optional for even edges.
Common Issues & Solutions (Troubleshooting)
- Problem: Foundation chain too tight causes a small top.
Solution: Crochet chain loosely or try a bigger hook for the foundation chain only. - Problem: Side holes too big or small.
Solution: Adjust chain spaces during side hole rows to size that fits your cord snugly but comfortably. - Problem: Straps feel loose or too tight.
Solution: Measure strap length carefully and adjust accordingly; sew firmly to prevent movement. - Problem: Edges curling or uneven.
Solution: Maintain consistent tension; block piece gently after finishing.
Additional Ideas for Using This Technique (Creative Applications)
- Make matching crochet shorts or skirt using the same textured back loop double crochet stitch.
- Create a lace-up crochet bathing suit top in lighter yarn for summer.
- Crochet headbands or neck scarves using the alternating dc and chain edging.
- Use the method to craft crochet crop tops in various colors for layering or gifting.
- Adapt side hole lacing to make adjustable crochet bags or purses.