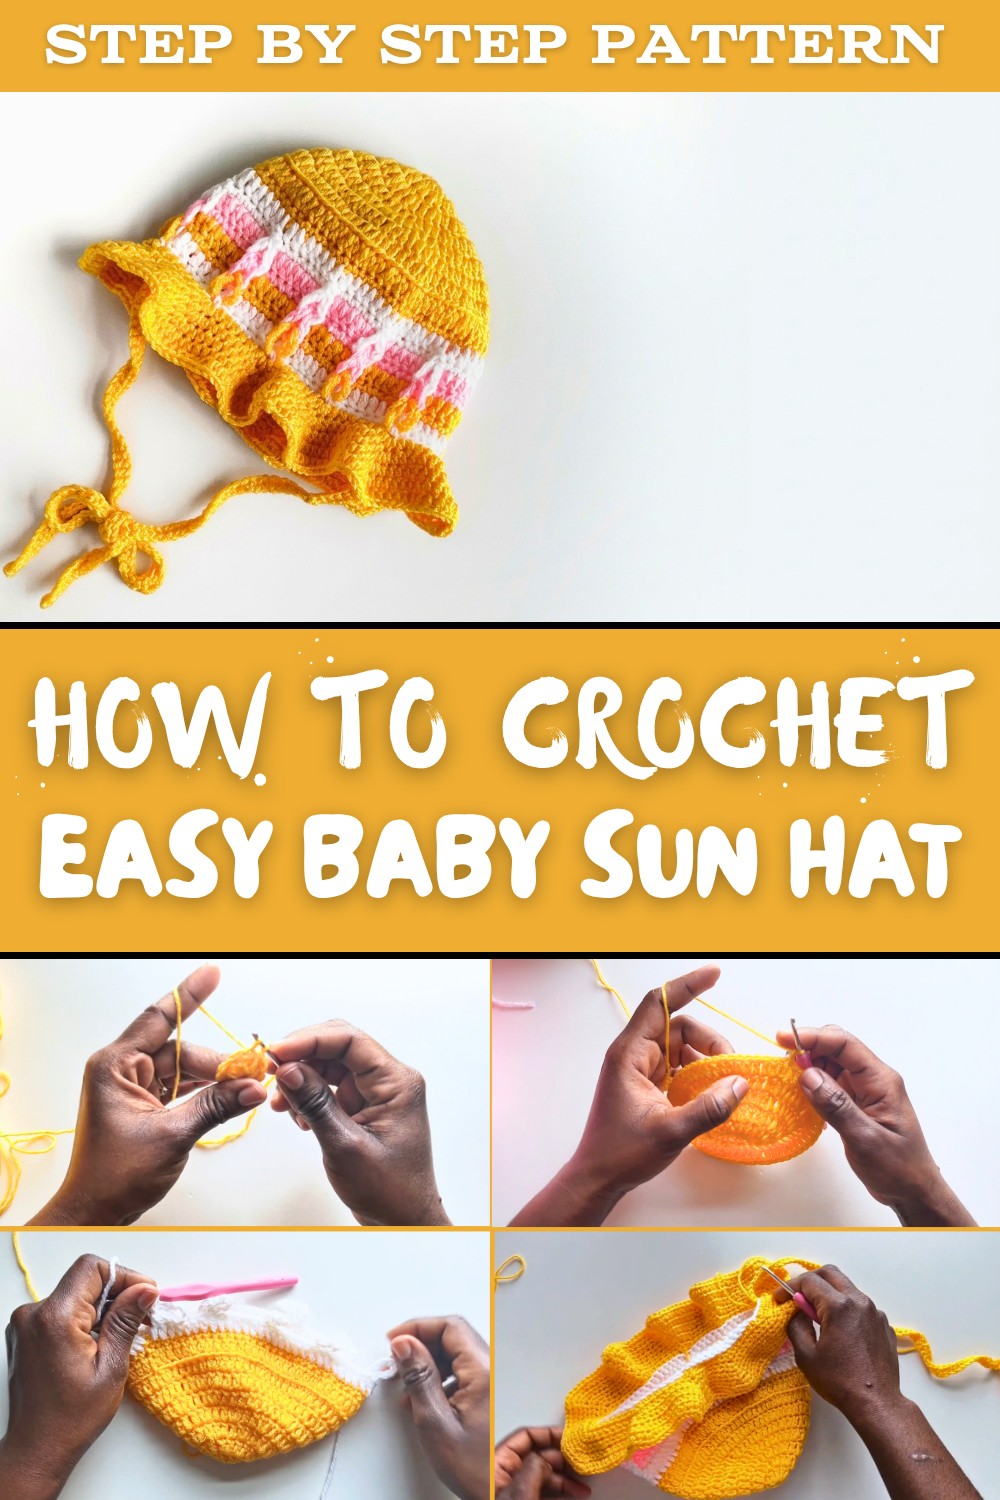
Free Crochet Baby Sun Hat pattern for beach-ready babies
Protect little ones with this Free Crochet Baby Sun Hat Pattern featuring soft texture and gentle style for sunny outdoor comfort and charm.
Sun hats for babies don't always feel just right. Sometimes they can be too tight, scratchy, or make a baby feel too warm. That is where a crochet baby sun hat pattern can be really helpful. This kind of hat is soft and light, giving shade without trapping heat. The holes in the crochet design make sure air can flow freely, helping keep a baby's head cool on sunny days. It is gentle on delicate skin, so babies won't feel itchy or uncomfortable.
Cute summer baby hat made with crochet pattern
The hat also stretches a bit to grow along with your baby. This means it stays useful for longer and fits just right. You can pick any color to make it special or add a little decoration like a flower or bow. These fun additions make the hat a cute match for different clothes and occasions.
Crocheting this hat is a great project for beginners because it is simple but rewarding. In just a few hours, you can have a lovely, handmade sun hat ready to wear. It's a perfect blend of protecting your baby's skin from the sun and adding a stylish touch to their outfit. Plus, it makes a thoughtful gift that shows you care.
With each stitch of the crochet baby sun hat pattern, you are not only keeping your baby safe but also bringing a bit of happiness and color to their day. It's an easy way to create something beautiful and practical all at once.
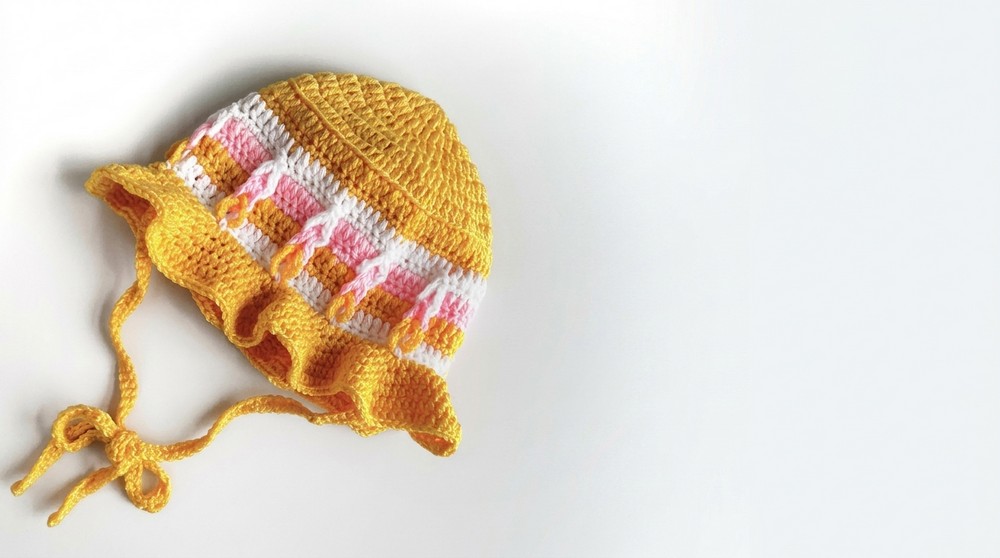
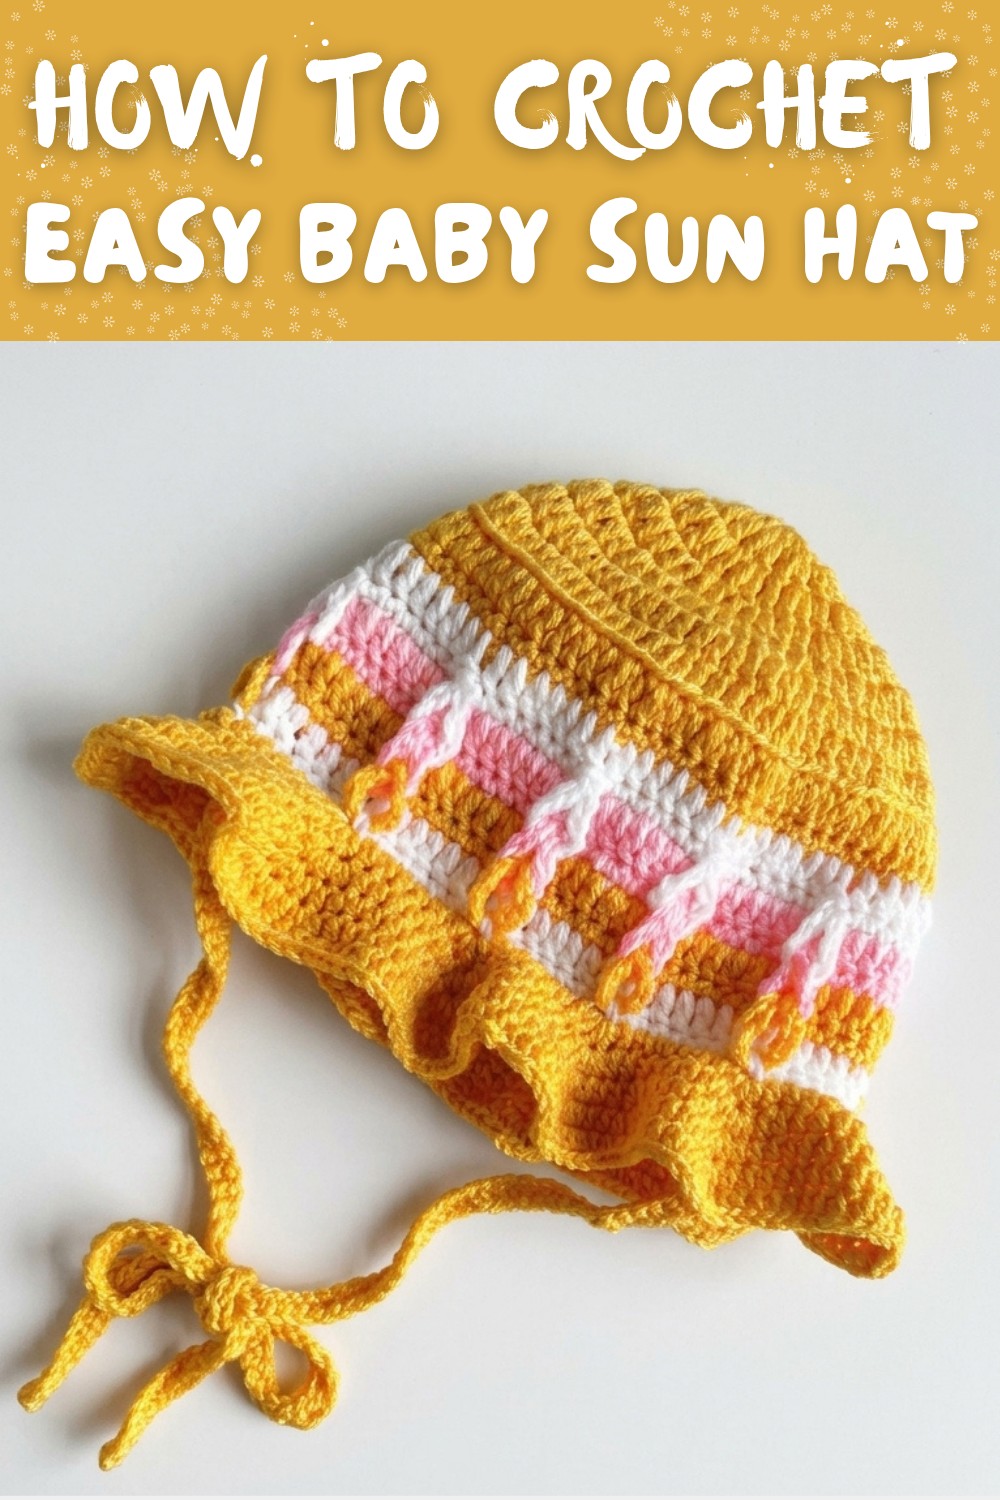
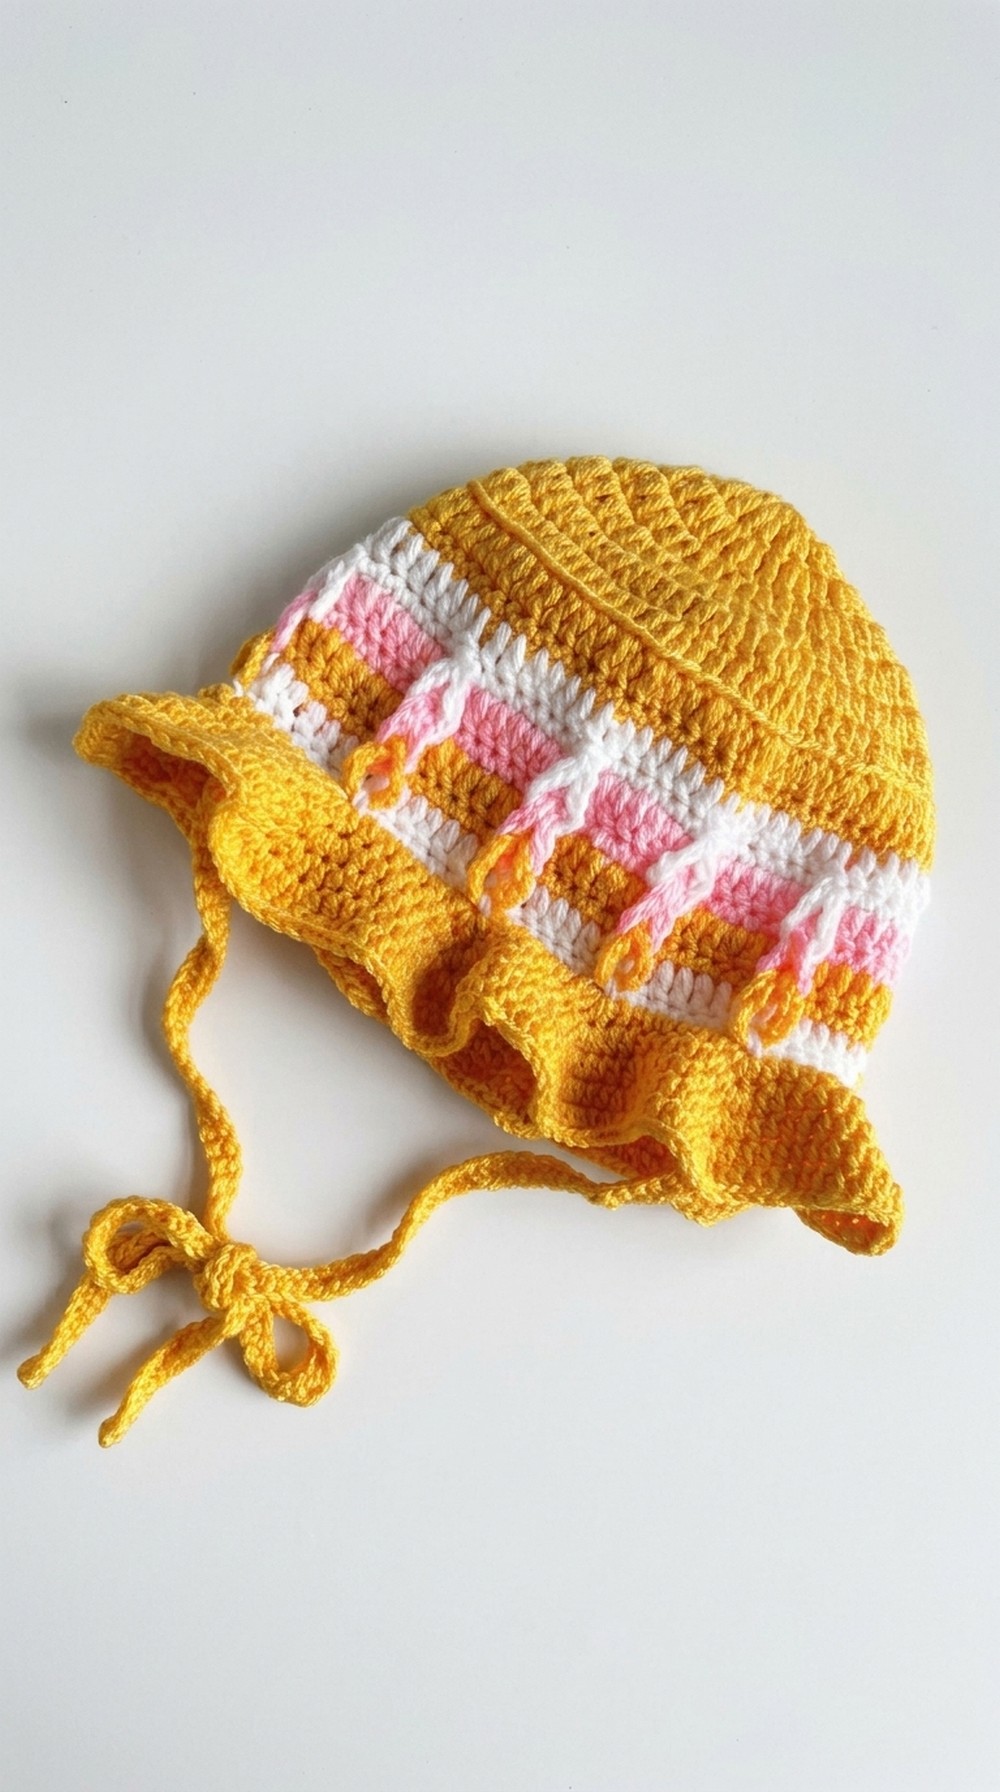
Baby Sun Hat Crochet Pattern (6-12 Months)
Welcome to the complete tutorial for this adorable and practical baby sun hat, sized perfectly for 6 to 12 months old. Featuring bright, cheerful stripes and a wavy brim for charming sun protection, this hat is crocheted with medium-weight yarns and a 3 mm hook. Whether for your little one or as a gift, this lightweight hat is both stylish and functional.
Before You Start
- Recommended yarn: Medium-weight 100% cotton or cotton blend yarn suitable for baby garments, in three colors (yellow, white, pink). Check your yarn's label for care instructions.
- Crochet hook: 3 mm hook ensures a firm but flexible fabric ideal for babies.
- Stitch markers can be useful for marking rounds or increases.
- Scissors and yarn needle for weaving in ends.
- Comfortable workspace with good lighting.
- Measuring tape to verify sizing to your baby's head circumference.
- Familiarity with working in the round, changing colors, and evolving stitch counts will help.
- Maintain consistent tension; neither too tight nor too loose for shape and fit.
- Pattern is sized for 6-month-old; easily adjustable for other sizes by adding or removing rounds in the crown.
Essential Pattern Notes
- This hat is worked exclusively in rounds, starting from the crown using a magic ring style closure.
- Increase rounds are carefully spaced to maintain a flat crown and achieve a smooth dome shape.
- Switch yarn colors to create alternating stripes in yellow, white, and pink.
- The brim uses half double crochet clusters worked in the front loops only to create its wavy texture.
- Brim is constructed with repeated increases for pleasant scalloping and structure.
- The hat includes straps crocheted on each side for securing the hat on the baby's head.
- Ends of yarn are woven in seamlessly as you go for a neat finish.
- For best fit, measure baby's head and modify rounds or strap length accordingly.
Overview of Construction Method
- Begin crown with a closed ring of double crochets (dc), increasing every round to shape the top.
- Alternate between rounds of structured stitch increases and rounds without increases to create the dome's curvature.
- Change yarn colors seamlessly to add striping.
- Work rows of half double crochet (hdc) in the front loops to fashion the wavy brim, building texture and stability.
- Finish with two long single crochet (sc) straps on opposite sides for tying.
- Weave in all loose ends and perform light blocking if desired.
Skill Level
Intermediate beginner - suitable for crocheters comfortable with working in circles, increasing stitch counts, changing colors, working in back loops only, and basic cluster stitches.
Approximate Finished Dimensions
- Crown diameter: about 14 cm (5.5 inches)
- Circumference at brim: approximately 47 cm (18.5 inches)
- Height (including brim): about 13 cm (5 inches)
- Strap length: approx. 38 cm (15 inches) each (adjustable)
Materials List
| Item | Specification |
|---|---|
| Yarn | Medium-weight cotton or cotton blend; yellow, white, pink |
| Crochet Hook | 3 mm (US size D/3) |
| Tapestry Needle | For weaving in ends |
| Stitch Markers | Optional |
| Scissors | To cut yarn |
Gauge Information
- Gauge is approximate and flexible.
- Sample gauge: 20 dc stitches and 10 rounds = 10 cm (4 inches).
- Tension affects size-test on a swatch to ensure fit.
Crochet Abbreviations (US Terminology)
- ch = chain
- sl st = slip stitch
- sc = single crochet
- hdc = half double crochet
- dc = double crochet
- st(s) = stitch(es)
- rep = repeat
Explanation of Special Techniques
- Working in the Round: Continuous rounds forming circle without turning.
- Increasing Rounds: Doubling double crochets in same stitch or spacing increases evenly to expand crown.
- Front Loop Only (FLO) Stitching: Working stitches only into front loops creates textured patterns used for waves along brim.
- Color Changing in Rounds: Switch yarn color at round ends before slip stitch join for clean color transitions.
- Half Double Crochet Clusters: Grouping hdc stitches creates contrasting texture on brim.
Step-by-Step Pattern Instructions
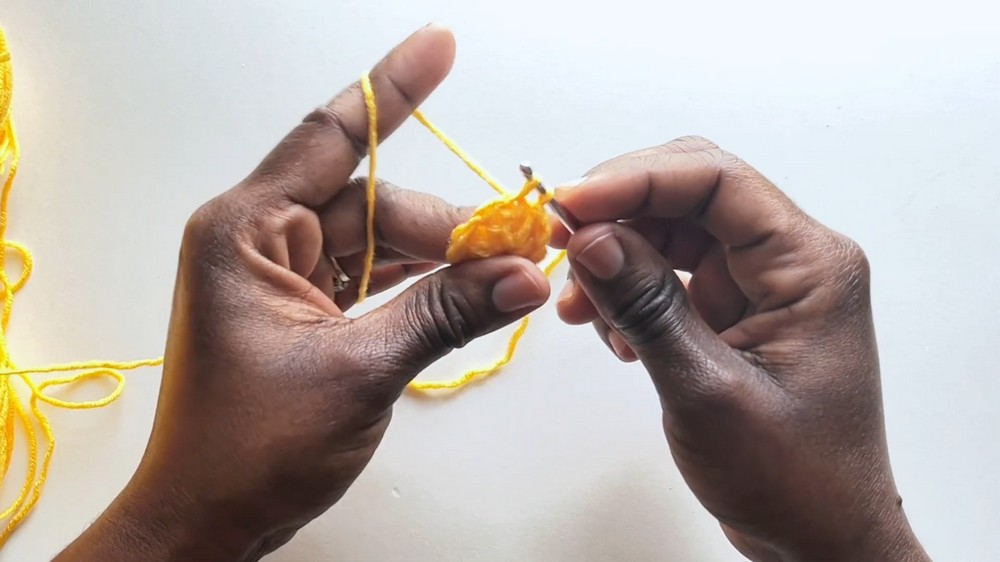
Part 1: Crown Foundation
- Make a slip knot, chain 3 (counts as first dc).
- Work 10 double crochets (dc) into ring formed by chaining 3 and slip stitching into first ch (magic ring style), closing ring tightly.
- Join with slip stitch in top of first dc. (Count: 10 dc)
Part 2: Round 2 (Increase Round)
- Chain 2 (does not count as stitch).
- Work 2 dc into each stitch around. (Count: 20 dc)
- Join with slip stitch to top of first dc.
Part 3: Round 3 (Increase Round)
- Chain 2.
- 1 dc in first stitch, 2 dc in next stitch.
- Repeat from * around. (Count: 30 dc)
- Join with slip stitch.
Part 4: Round 4 (Increase Round)
- Chain 2.
- 2 dc in first stitch, 1 dc in next 2 stitches.
- Repeat from * around. (Count: 40 dc)
- Join with slip stitch.
Part 5: Round 5 (Increase Round)
- Chain 2.
- 1 dc in each of next 3 stitches, 2 dc in next stitch.
- Repeat from * around. (Count: 50 dc)
- Join slip stitch.
Part 6: Round 6 (Increase Round)
- Chain 2.
- 2 dc in first stitch, 1 dc in next 4 stitches.
- Repeat from * around. (Count: 60 dc)
- Join with slip stitch.
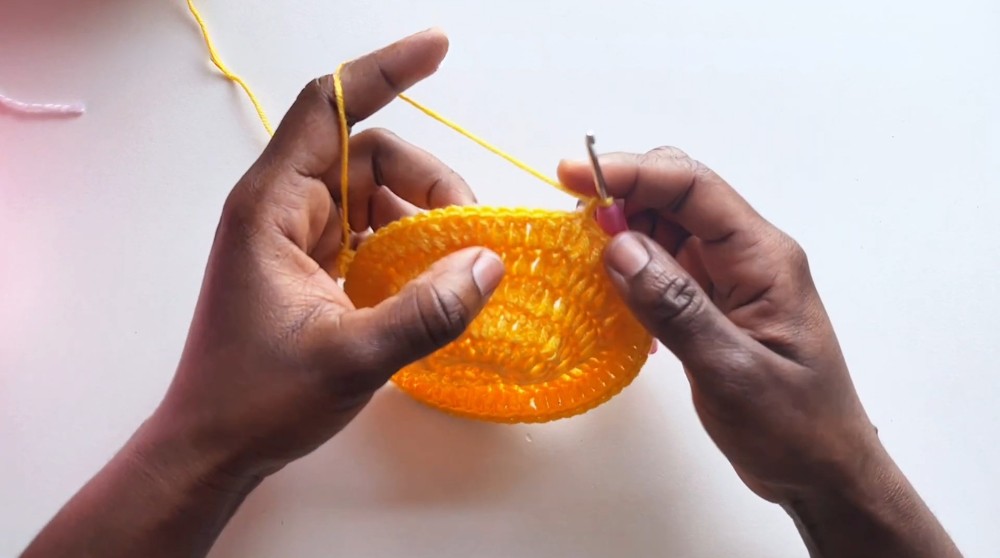
Part 7: Round 7 (Final Increase Round)
- Chain 2.
- 1 dc in next 5 stitches, 2 dc in next stitch.
- Repeat from * around. (Count: 70 dc)
- Join with slip stitch.
The crown diameter should measure about 5.5 inches (14 cm).
Part 8: Round 8 (Back Loop Double Crochet)
- Chain 2, turn.
- Work 1 dc in back loop only of each stitch around to create subtle ridge texture.
- Join with slip stitch.
Part 9: Round 9 (Single Crochet Round)
- Chain 1, turn.
- Sc in each st around for a firm foundation.
- Join and prepare to change yarn color.
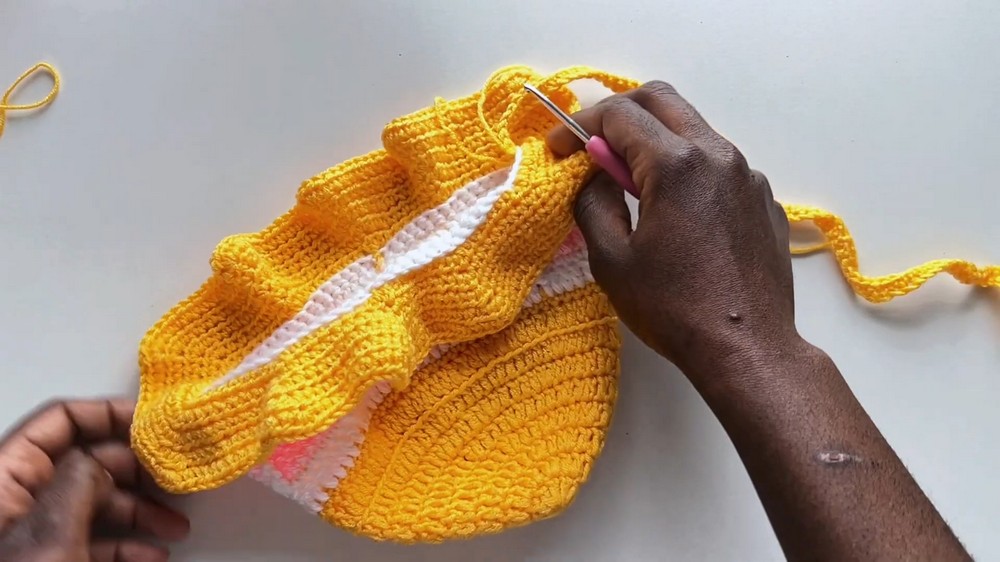
Part 10: Round 10 (Striped Pattern Round One)
- Attach white yarn, securing without cutting yellow yarn.
- Chain 2, dc in next 7 stitches.
- Chain 10, skip 10 stitches, slip stitch into next stitch.
- Repeat (7 dc, chain 10, slip stitch) around for stripes and small open spaces.
- Join round.
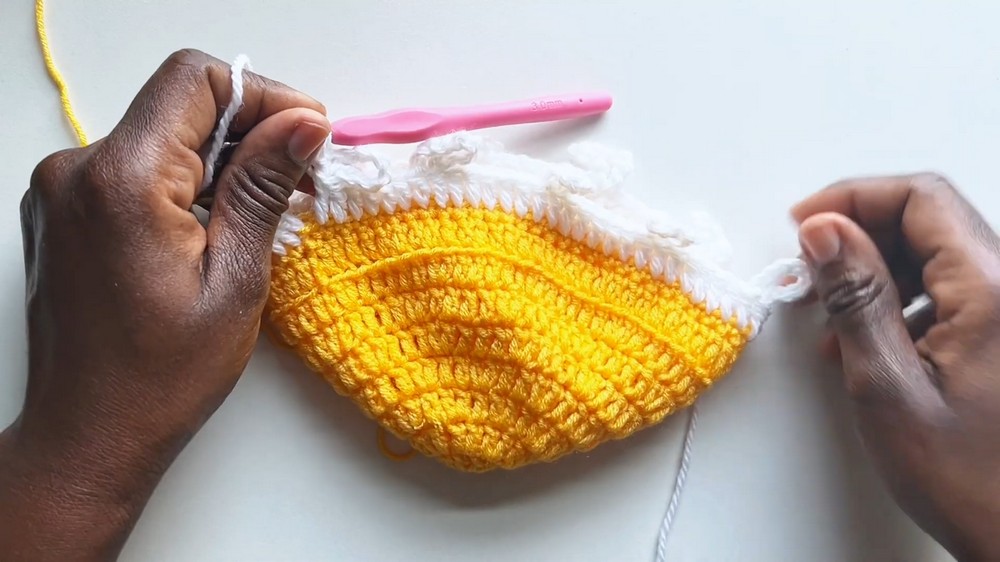
Part 11: Round 11
- Chain 1, turn.
- Sc in every stitch and chain space all around.
- Join. Prepare to change yarn again.
Part 12: Round 12 (Repeat Round 10 with New Color)
- Chain 2, dc in next 7 stitches, chain 10, slip stitch in next stitch.
- Repeat around.
- Join.
Part 13: Round 13
- Chain 1, sc in every stitch all around.
- Join. Hide tails between stitches.
Part 14: Round 14 (Repeat Round 10 with Yellow Yarn)
- Chain 2, dc 7 stitches, chain 10, slip stitch, repeat.
- Build on existing color pattern by crocheting over previous strands for neatness.
Part 15: Rounds 15-17 (Repetition and Closure)
- Continue repeating striped rounds and sc rounds as preferred to desired hat height.
- On round 17, chain 1, sc 6 stitches, then in 7th stitch, insert hook into chain loop, sc to secure.
- Continue this pattern around the brim base.
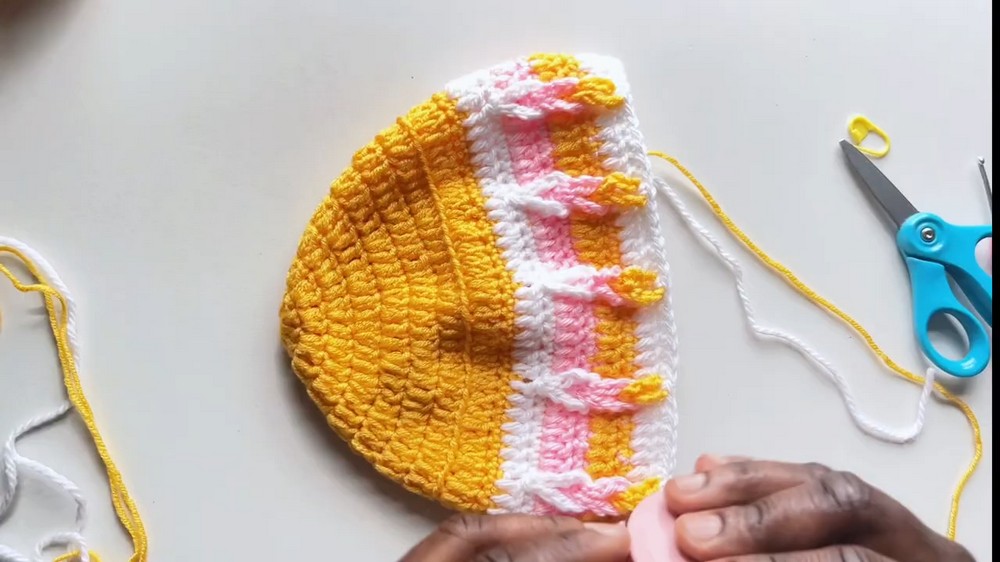
Part 16: Brim Round 1
- Chain 2.
- Work 3 half double crochets (hdc) in first stitch taking front loop only (FLO).
- Then 1 hdc in each of next 6 stitches.
- Repeat 3 hdc in 7th stitch around for a scalloped wavy brim.
- Join.
Part 17: Brim Round 2
- Chain 2.
- Work hdc in each stitch.
- When reaching center stitch of FLO 3-hdc cluster from previous round, work 3 hdc cluster.
- Use stitch marker at center stitch each round for easy reference.
- Join.
Part 18: Brim Rounds 3-5
- Repeat Round 2 pattern three more times for a stable, wavy brim.
- Join at end of each round.
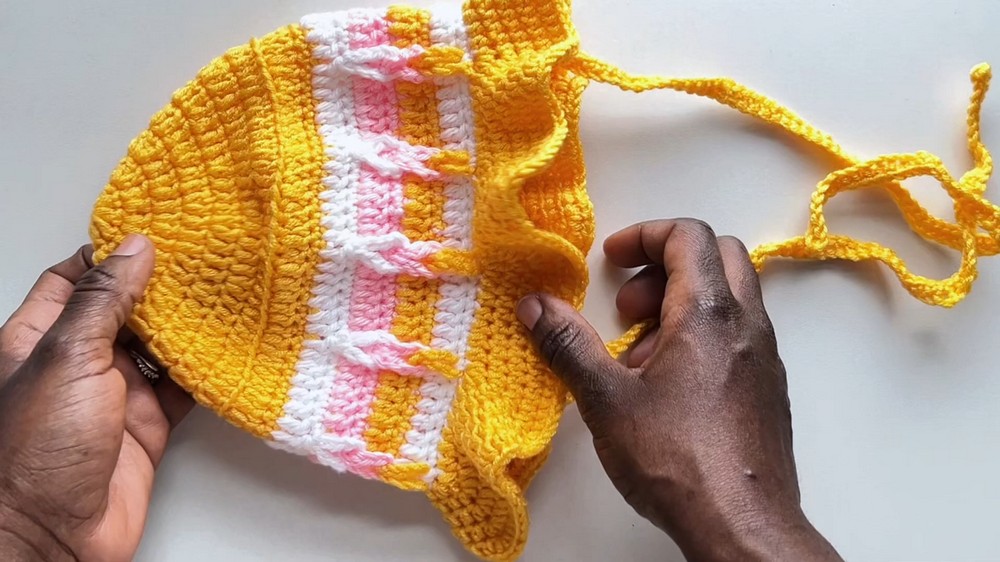
Beginner-Friendly Explanation
You start by making a small circle and then expand it carefully while alternating stitches to create a dome-shaped crown. Then you switch colors to make pretty stripes and chaining open spaces around the hat body. The brim is built by working clusters of half double crochets just into the front loops creating soft waves that give your hat style and sun protection. Straps are crocheted on either side for tying.
Assembly and Finishing
- Weave in all loose ends as you continue to avoid bulk.
- Crochet two straps approximately 15 inches long each, starting from either side of the brim using single crochet stitches over chains.
- Attach straps securely with slip stitches to the brim bases.
- Trim excess yarn ends carefully.
- Optionally block the hat to smooth and shape.
Troubleshooting Assistance
- Hat crown ruffles or warps? Adjust increase rounds; ensure increases are evenly spaced and tension consistent.
- Brim curls or is stiff? Check that brim clusters are worked into front loops only for flexibility.
- Color changes show gaps? Change yarns at ends of rounds, pulling last loops snugly to close holes.
- Straps too short or tight? Extend chains or recreate longer straps before final finish.
Creative Inspirations Using This Pattern
- Make matching baby booties or mittens using same yarn colors and stitches.
- Create bigger size hats adding extra increase rounds for toddlers or adults.
- Use cluster stitch brim technique for sun visors and summer hats.
- Add decorative appliques or flowers for holiday-themed hats.
- Turn striped body texture into a lightweight summer top or dress using a similar stitch pattern.