
Crochet Ruffled Bath Sponge Free Pattern for Spa Like Showers
Turn your shower into a more enjoyable experience with this Free Crochet Ruffled Bath Sponge Pattern that is soft useful and fun to make
If you love simple and creative projects, this Free Pattern is a perfect idea to try. It is easy to make and looks absolutely beautiful. This crochet bath sponge is soft, fluffy, and designed with lovely ruffles that make it stand out. With just a few materials like yarn and a crochet hook, you can create something special that is both useful and attractive. The appearance of this ruffled sponge is unique. The layers of ruffles give it a rich and luxurious texture, making it look like a beautiful flower. You can use bright or pastel yarns to make it colorful, or stick to soft tones for a simple but elegant look.
Free Crochet Ruffled Bath Sponge Pattern for Self Care
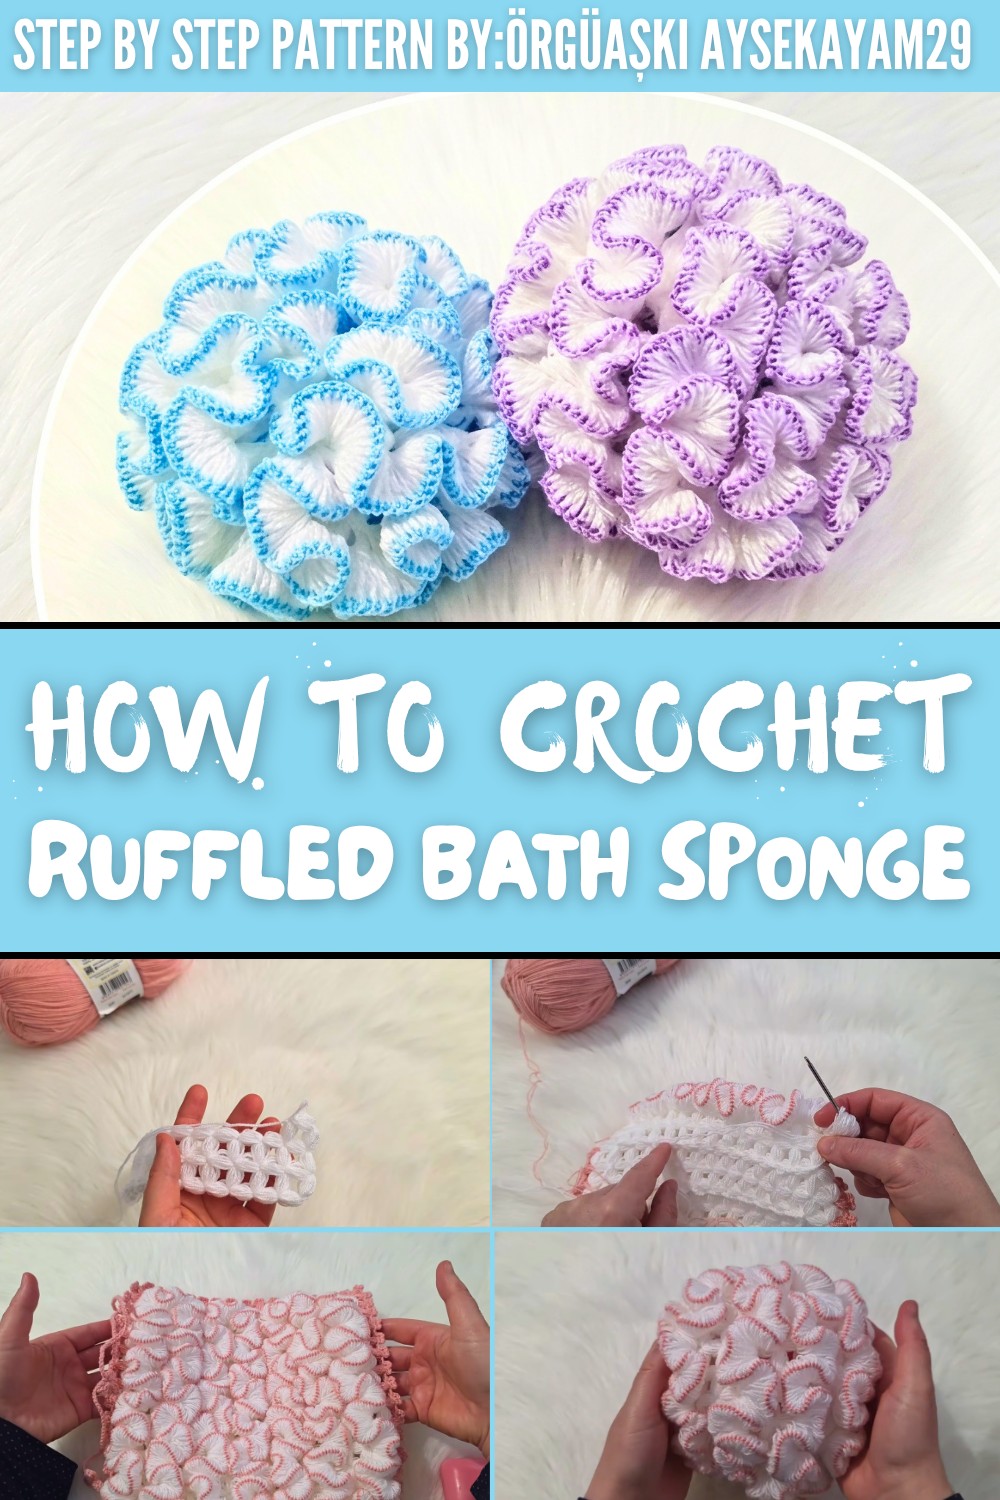
This bath sponge is not only pretty but also very practical. It helps create a nice lather and is reusable, making it an eco friendly alternative to store bought sponges. The soft material is kind to the skin, suitable for both adults and kids. You can use it for yourself or gift it to someone, as it works well as a thoughtful handmade present.
One of its best features is that it is fun and easy to make, even for beginners. You just need basic crochet skills and some patience to learn how to create the ruffled texture. Crocheting this sponge is a relaxing and enjoyable activity, and the result is both useful and beautiful. Overall, the Free Crochet Ruffled Bath Sponge Pattern is a great way to combine creativity with practicality. It is a simple and rewarding project that leaves you with an elegant handmade sponge everyone will love.

Finished Size
- Approx. 24 cm x 24 cm in a square shape (14 puff stitches across horizontally and vertically).
- When finished with the ruffles, the washcloth blooms into a soft, fuller round look.
Materials Needed
- Lif Yarn (Puff Yarn)
Any lightweight #0 or #1 yarn, usually available in the same thickness for lif patterns.- Colors: White for the base and pink for decoration.
- Crochet Hook
Size 5 (1.5mm) steel crochet hook for lif yarns. - Optional Items:
- Small Yarn Needle for sewing ends and threading the cord.
- Stitch Marker to mark corners or beginning stitches if needed.
- Other Supplies:
- A small pair of scissors for cutting yarn.
- Thin soap or filler if using the project as a soap holder.
Gauge
- Puff Stitch: Each completed puff stitch will measure approximately 1.5 cm x 1 cm after being worked.
Note: Exact gauge isn't critical for this pattern, but consistency in stitch tension is important for overall size and uniformity.

Pattern Instructions
Step 1: Crochet the Square Base
- Set Up and Chain Foundation
Use white yarn. Form a slip knot and chain 2 loose foundation chains.
Begin the first puff stitch base by chaining 1 more and working into the last chain. - Create Puff Stitches
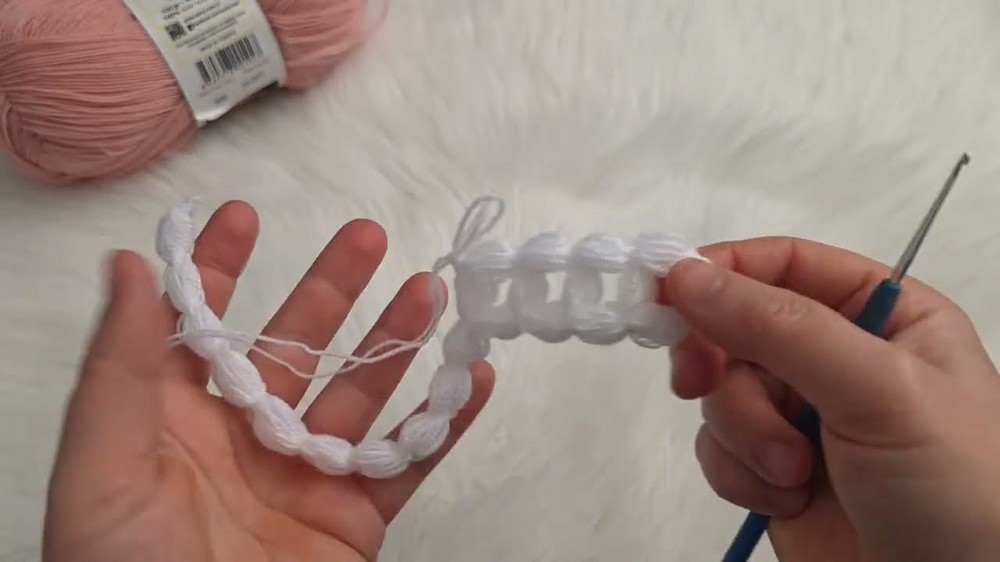
- Yarn over, insert the hook into the foundation loop, pull up a loop, and repeat this 3 times (total of 3 loops on the hook).
- Once your puff stitch is made, chain 1 to secure.
- Work Horizontally Across
Work a total of 16 puff stitches for the first row. Ensure the stitches are evenly spaced. - Begin Subsequent Rows
Chain 1 and turn. Begin the next row in the first puff and complete a total of 14 puff stitches horizontally. This will leave room for ruffle edging later. - Complete the Square
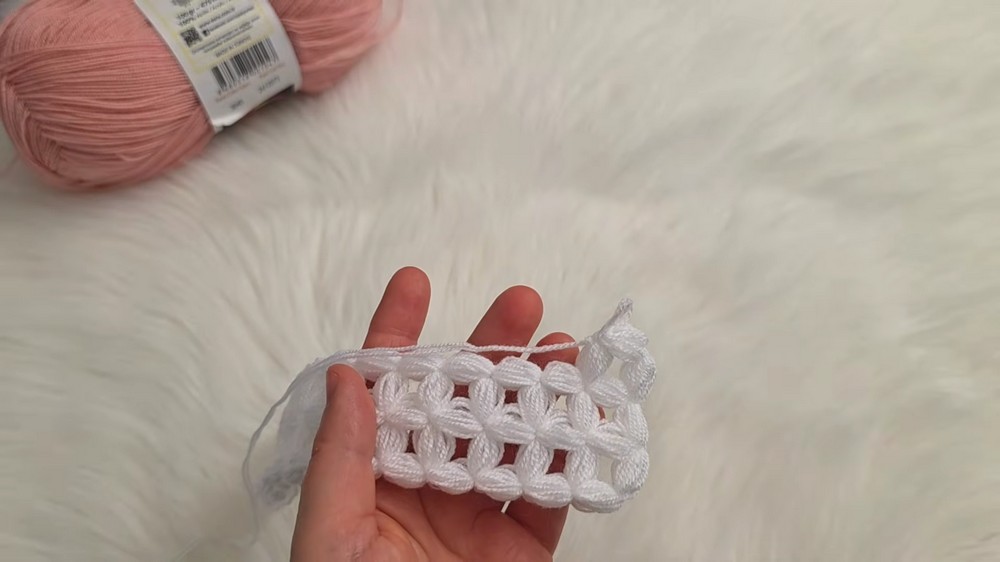
Continue to work in rows until the base measures 14 puff rows vertically (14 rows x 14 stitches). The result is a clean, even square base.Tip: Use uniform tension and puff lengths to achieve consistency.

Step 2: Add the Border
Now that the base is complete, use pink yarn to add a decorative border with puff stitches and picots.
- Attach Pink Yarn
Attach yarn to any corner puff stitch with a slip knot. Work 1 puff stitch in each side space (around 16 spaces on each side), ensuring you go directly into the gaps between puff stitches, not individual loops. - Work the Corners
For each corner, place 3 puff stitches in the same gap. Between each puff stitch, chain 3 to create picots. Ensure the puff stitches are evenly spaced for a rounded corner effect. - Complete the Border
Continue around the entire square base, working puff stitches and picots. Once you've reached the starting point, slip stitch to fasten off and weave in the ends.


Step 3: Create Ruffle Loop Rows
With white yarn, begin preparing loops for the ruffle feature.
- Work Foundation Loops
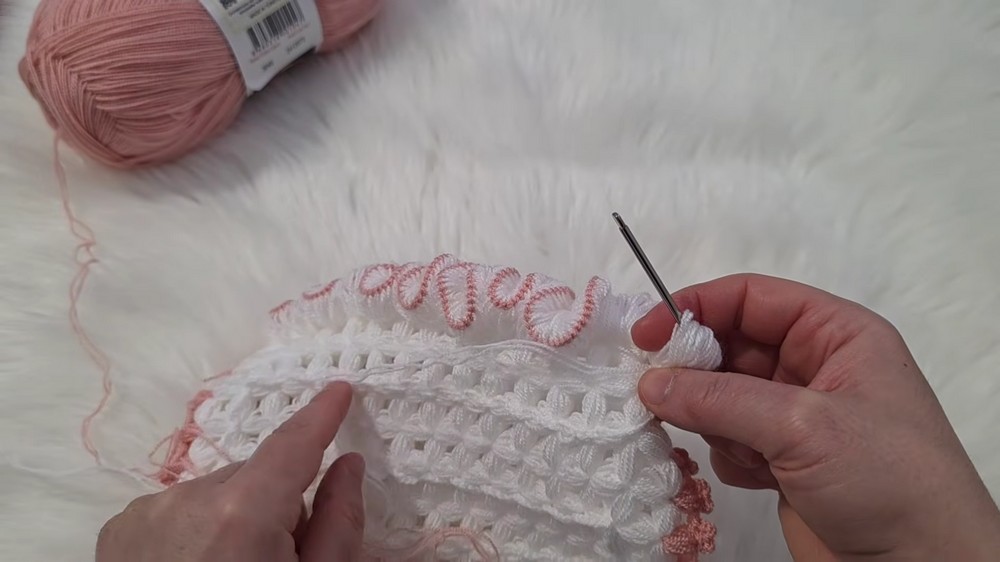
Starting at the second puff row (both horizontally and vertically) inside the base, chain 5. Attach the chain with a single crochet directly into the next space between puffs. Continue this pattern across the row.
Repeat for remaining rows, but skip one puff row after each completed line to create evenly spaced loop rows. - Rows and Rounds
Continue working chain 5 loop rows horizontally and vertically until the base is covered. Each skipped row will help stagger the ruffle pattern.Tip: Ensure all loops are secure to avoid any gaps in the ruffles.
Step 4: Add Fırfırlar (Ruffles)
Here's where the magic happens: creating those fluffy, beautiful ruffles.
- Use Silkon Saplı (Handle Free) Hook or Detachable Handle Hook
Attach the yarn used for ruffles and begin creating chain loops through the pre made foundation loops. - Making Ruffles
- Insert the hook into any loop and pull a long piece of yarn (approx. 3 4 cm).
- Yarn over and continue pulling loops (approx. 13 loops per space).
- Carefully pull all loops together to complete one ruffle.
- Connect the Ruffles
With the hook still in place, work into the next foundation loop and repeat the process. The goal is to create two complete ruffles every 2 connected foundation loops. - Repeat Around the Base
Work in an alternating back and forth motion for a fluffy, layered effect. Make sure ruffles aren't too tight to allow them to expand naturally.

Step 5: Add the Cord
- Chain the Cord
Using pink yarn for contrast, create a chain long enough to wrap around the entire square base with some extra tail length for tying (~30 cm longer than needed). - Thread the Cord
Using a yarn needle, weave the cord in and out of the last row of puff stitches (close to the ruffle base). Skip 2 puff stitches, then thread through the next. Ensure the cord moves smoothly. - Finishing Touch
Attach small decorative flowers or tassels to both ends of the cord for an elegant finish. Your cord doubles as both decoration and a functional closer.


Special Techniques
- Puff Stitch: The foundation of this pattern. For extra puffiness, use loose tension and long yarn loops when forming the stitch.
- Picots: Use chain 3 picots along borders for a playful, textured finish.
- Loop Control: When creating ruffles, hold the loops gently until you're ready to gather them for better uniformity.
Customization Tips
- Color Variations: Experiment with pastel or bright combinations to suit your home decor or gifting needs.
- Size Adjustments: Increase or decrease the puff stitch count in the foundation row to make larger or smaller washcloths. Always work with even numbered rows.
- Textures: Try using metallic or textured yarns for a sparkling, unique effect.

Conclusion and Remarks
This Puff Stitch Ruffled Washcloth is a visually stunning and practical project, perfect for gifting, home use, or special occasions like baby showers and bridal trousseaus. Its soft, fluffy texture makes it perfect as both a decorative lif or functional scrubber.
The ruffles add a dynamic 3D effect, while the puff stitches create a sturdy yet delicate base. With its customizable size and colors, the pattern is versatile for many uses. Simply ensure you follow the gauge, keep loops consistent, and enjoy every step of the process.
Enjoy your crochet journey and the satisfaction of completing this elegant puff-stitch masterpiece.