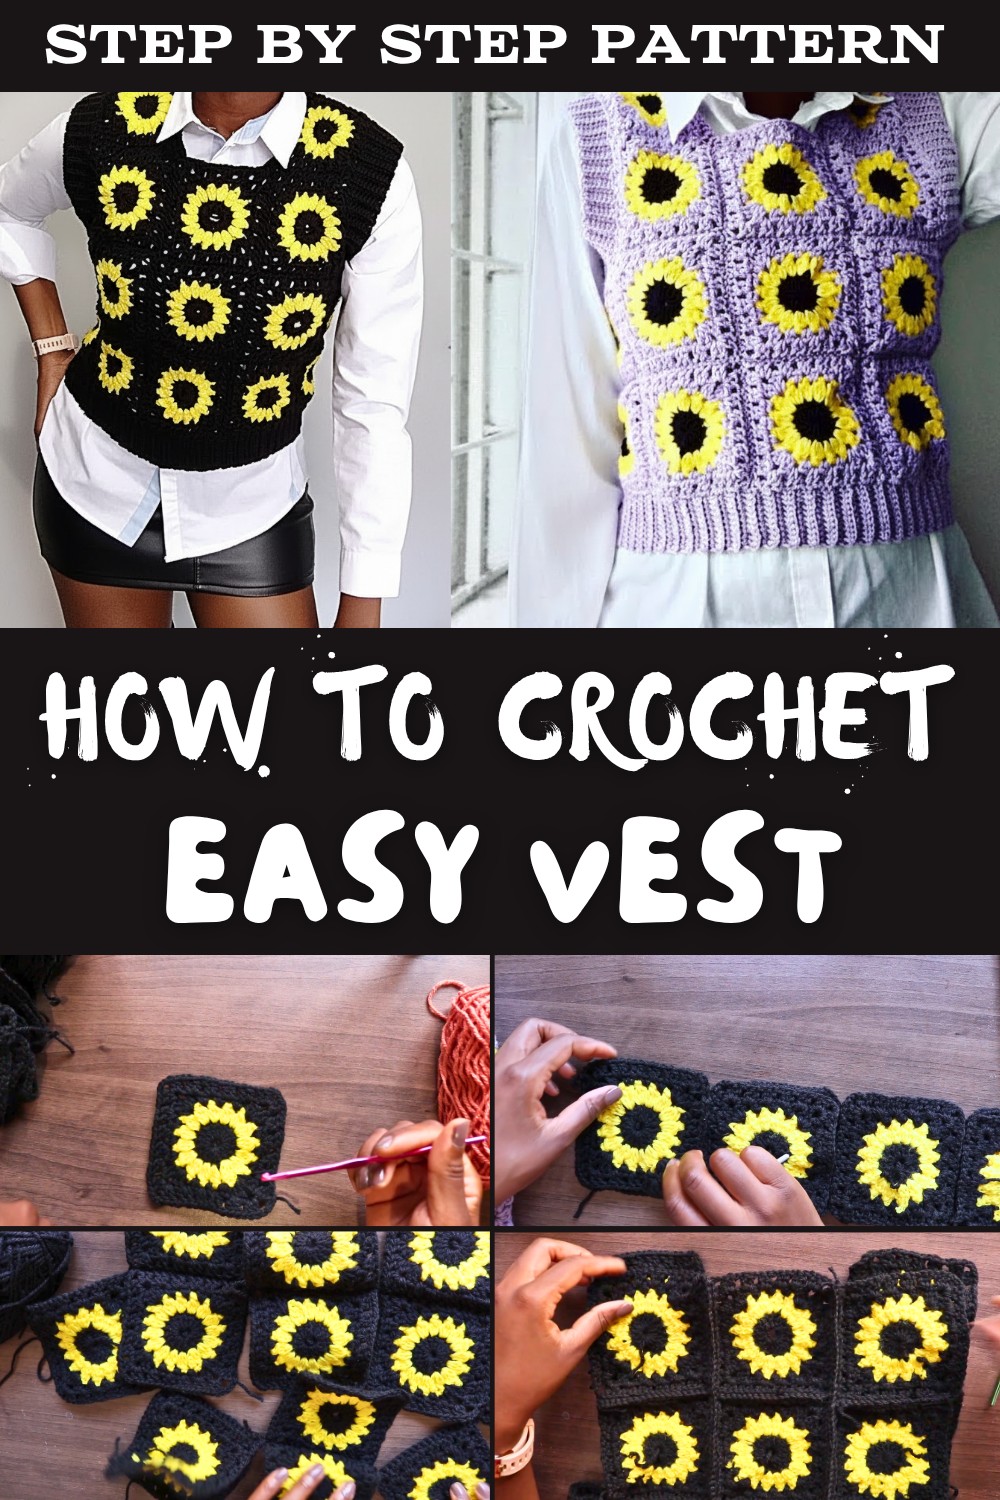
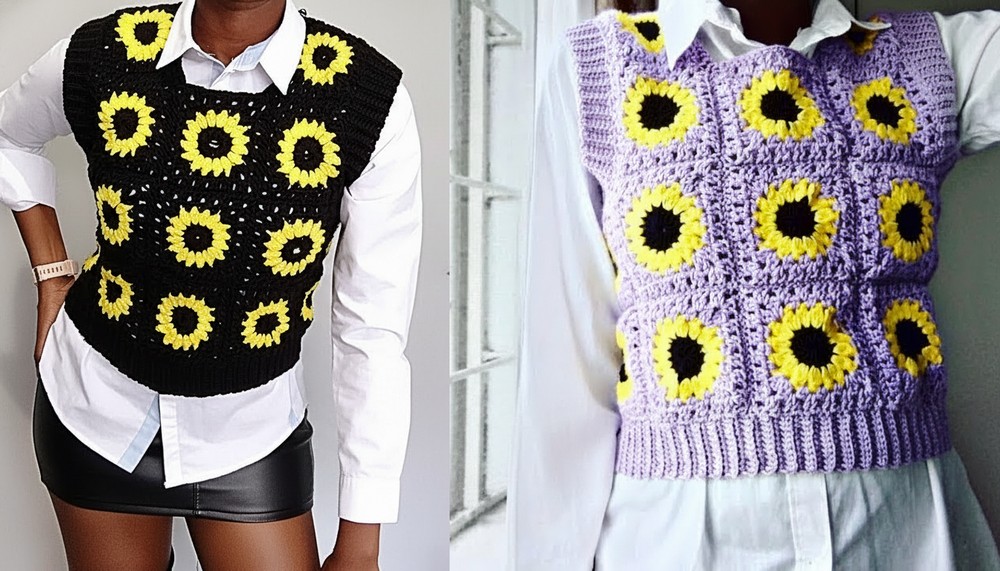
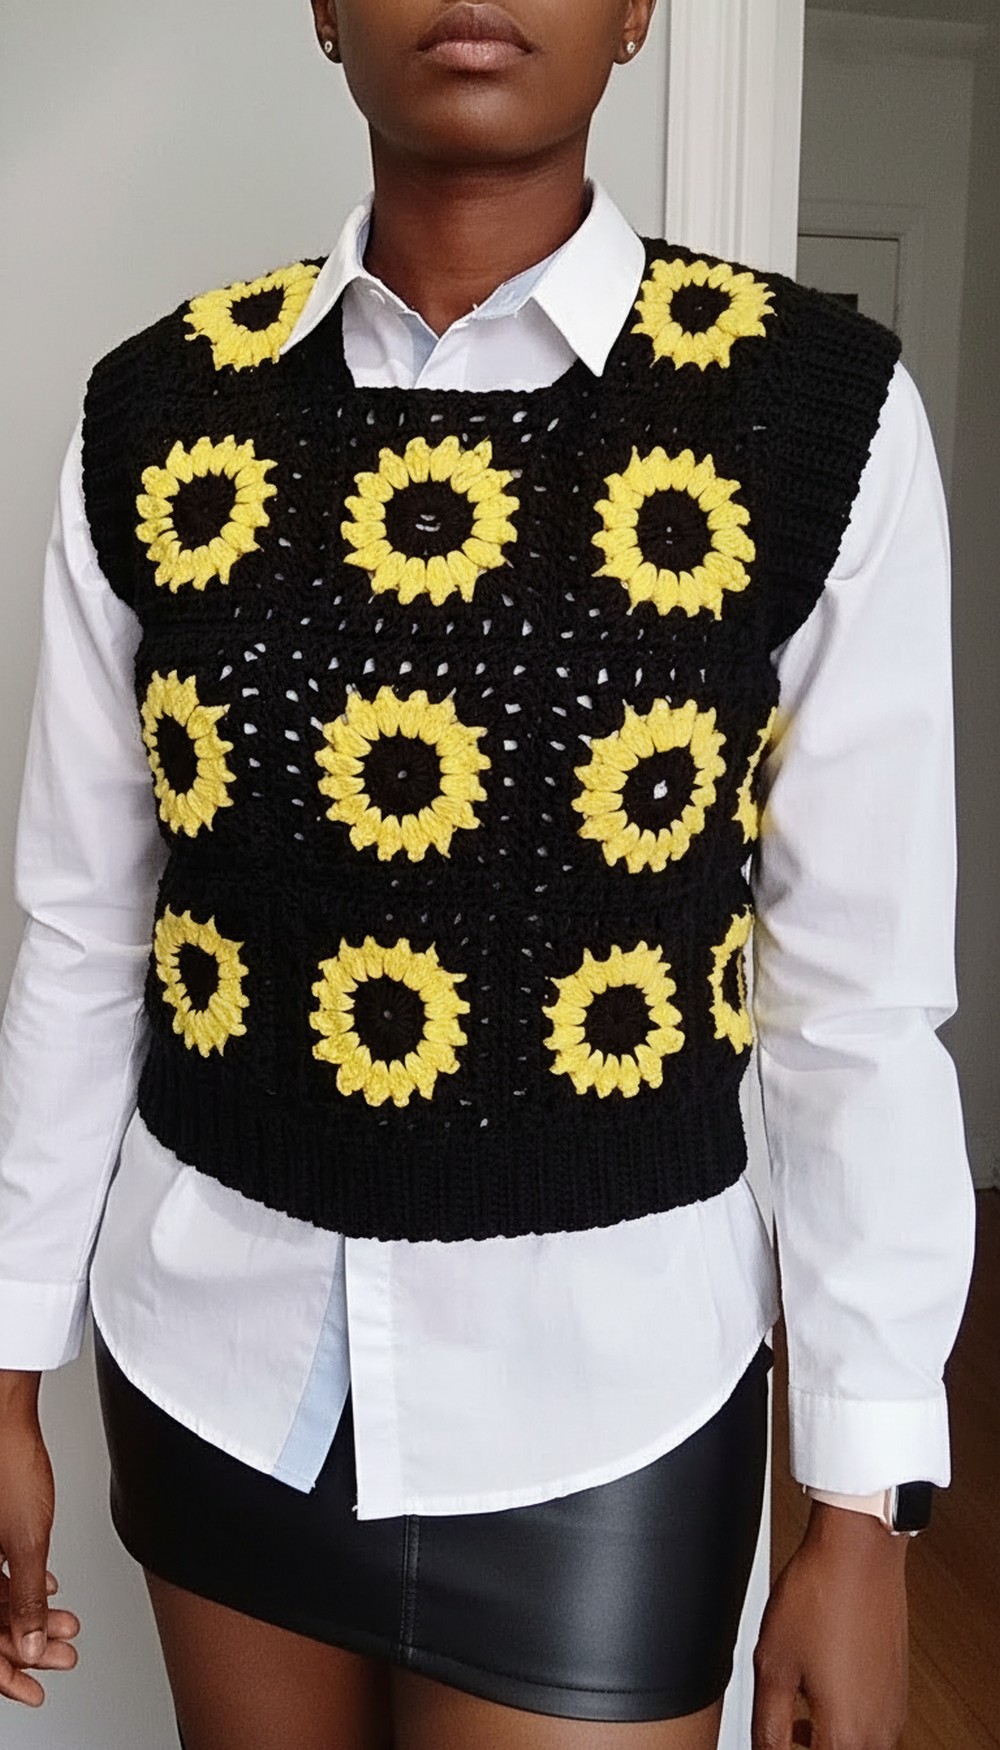
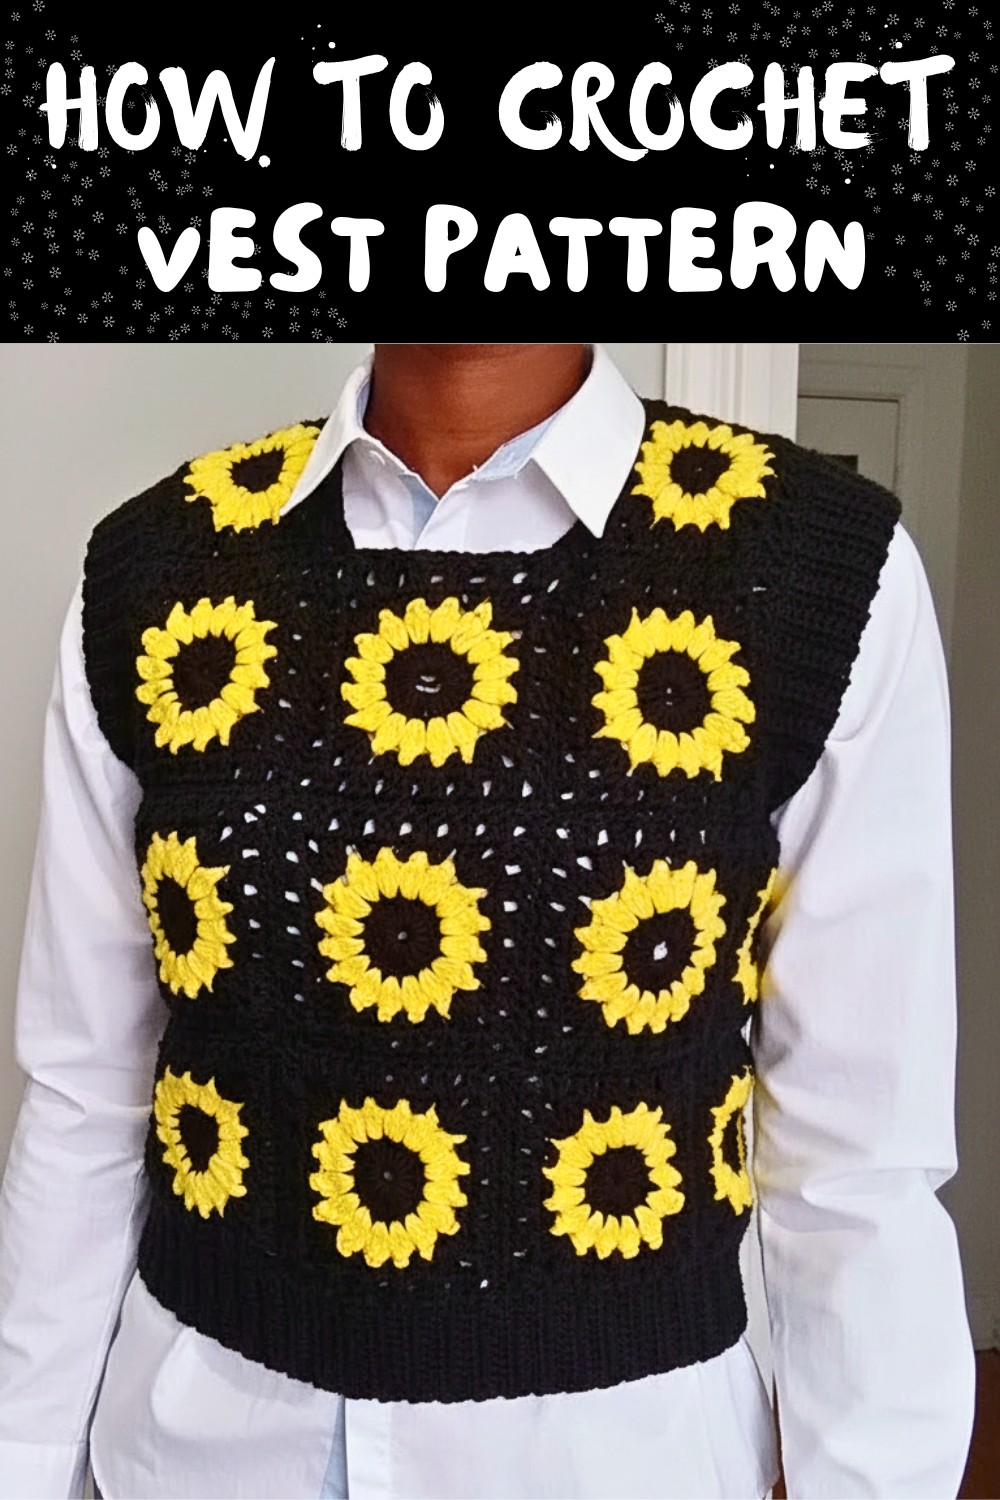
Free Crochet Vest Pattern for Warm Weather That's Soft & Airy
Spark your creativity with a Free Crochet Vest Pattern that’s simple, stylish, and fun to make, perfect for adding a cozy handmade touch to any outfit today.
Many people think making clothes by hand is too hard or takes too much time, but that idea is not true. A Free Crochet Vest pattern shows simple steps that are easy to follow and understand. It helps turn plain yarn into a useful and pretty vest without confusion. The vest looks neat and soft, with small holes in the design that keep it light and airy.
Handmade Free Crochet Vest Pattern for a Cozy Everyday Outfit
Its beauty comes from the careful stitches that give it a clean and calm appearance. It can be worn over shirts or dresses to add a nice touch without feeling heavy. This vest is useful for daily wear, light weather, and simple outings. It feels comfortable on the body and does not restrict movement. Its appearance stays simple yet attractive, making it easy for anyone to enjoy wearing it again and again.
Materials Needed
- Yarn:
- Double-knit yarn (Mid-weight) in two contrasting colors.
- Choose colors for the flowers and the background/base squares.
- Black or dark yarn is used for seam stitching.
- Hooks:
- 4.5mm crochet hook (for making squares).
- 3.5mm crochet hook (for assembling squares and adding ribbing).
- Other Tools:
- Sharp scissors.
- Stitch markers (optional for corners).
- Yarn needle (for weaving in tails at the end).
- Gauge:
- Each finished square should measure about 5" x 5" (depending on the hook size and yarn weight). Adjust hook size for larger or smaller squares.
Finished Size
This pattern is designed for a Small-Medium size. To adjust for larger sizes, increase the number of squares or add more rows to each square during the corner section.
- Vest Size: Fits 30-inch bust (Small-Medium).
- Finished Length: Approximately 24 inches.
- Width: Adjust depending on squares arrangement.
Pattern Overview
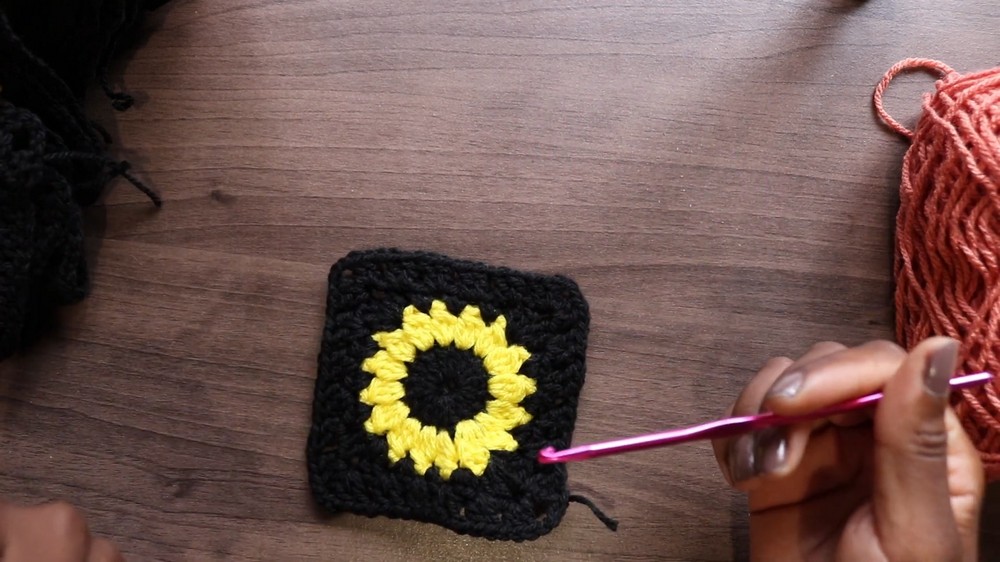
The project centers around creating floral granny squares which are later assembled to make a sweater vest. Each square includes:
- Magic Ring,
- Center Flower Petals,
- Square Base, and finally
- Joining Squares for assembling into a wearable vest.
Customization ideas are added throughout the instructions.
Instructions
Step 1: Starting the Central Flower
- Create a magic ring (use your preferred method; refer to popular crochet tutorials if needed).
- Wrap the yarn around your fingers, insert the hook, and pull through to form a circle.
- Chain 4 to form the first double crochet. This counts as your first double crochet stitch.
- Crochet 16 double crochets into the magic ring:
- Yarn over, insert into the ring, yarn over to pull through, yarn over, pull through 2 loops, yarn over, pull through the final 2 loops.
- Repeat this stitch around until you have 16 stitches in total.
- Pull the tail to close the ring securely. Use a slip stitch to join the round and cut the yarn. Ensure the center circle looks balanced and tight.
Step 2: Adding Flower Petals
- Attach your second color yarn to the first round.
- Insert the hook into any stitch along the outer part of the circle, yarn over, and secure with a slip stitch.
- Begin forming petals:
- Chain 3, then crochet 3 double crochets into the same stitch.
- Chain 2 and move to the next stitch.
- Repeat the process, creating 16 petals around the initial circle (each consisting of 3 double crochets with chain 2 between them).
- Close off the round with a slip stitch into the top of the first chain stitch and cut the yarn.
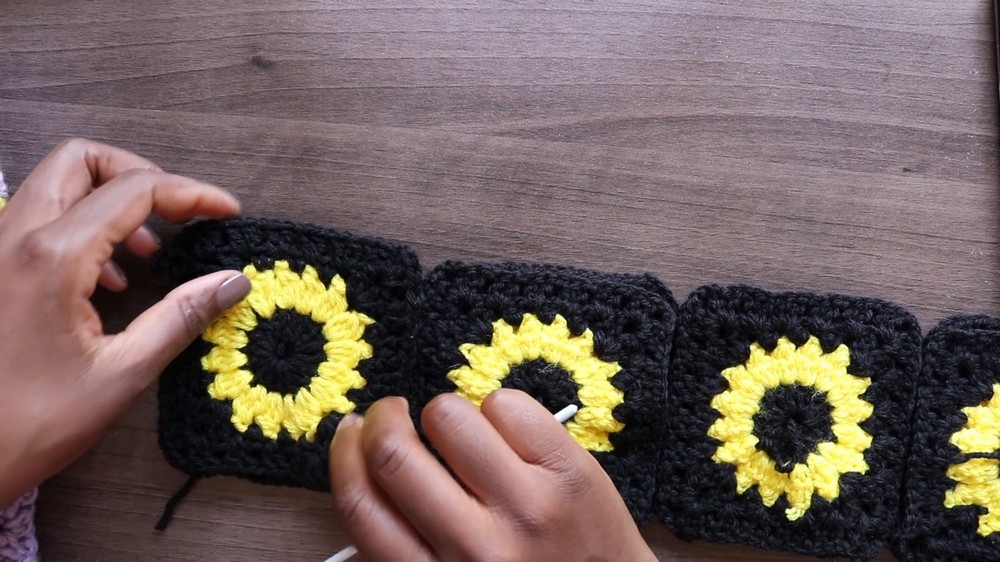
Step 3: Creating the Square Base
- For the square’s outer edge, switch to the base color yarn.
- Insert your hook into any petal chain space and secure.
- Chain 3 (counts as first half double crochet), and add 3 double crochets into the same chain space.
- Form the first corner: Chain 3 and crochet 2 more double crochets into the same space.
- Continue along with:
- Chain 1, crochet two double crochets into each petal chain space for the sides, then form corners (two double crochets, chain 3, two double crochets).
- Repeat this pattern to complete four sides of the square.
- At the end of the final corner, use a slip stitch to join and cut yarn.
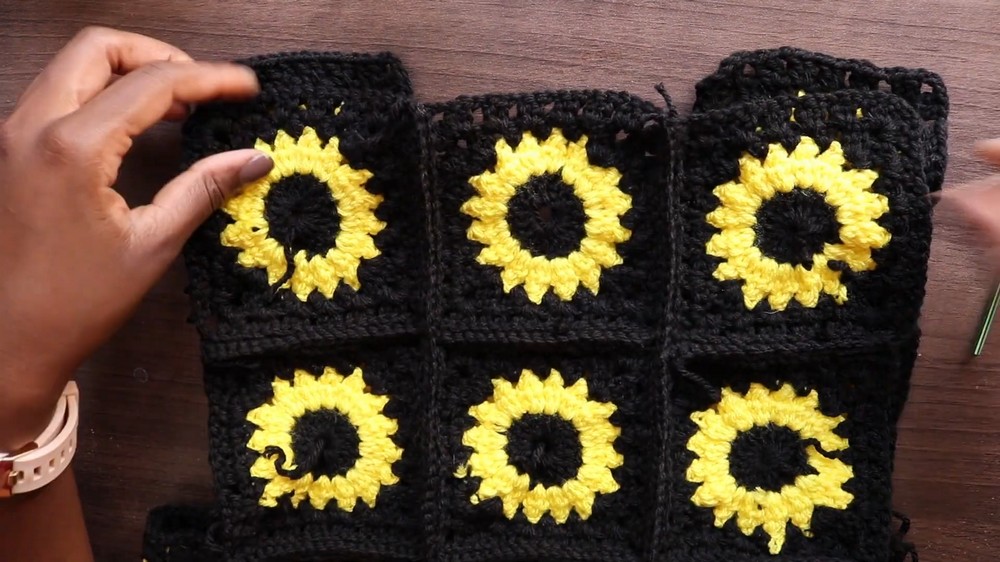
Step 4: Assembling the Squares
- Crochet 27 squares as explained above.
- Plan your layout:
- Front: 3 rows of 3 squares (9 squares total).
- Back: 3 rows of 3 squares (9 squares total).
- Sides: Use 3 squares for each arm width.
- Plan your layout:
- Use black or dark yarn and a 3.5mm hook to connect squares:
- Place two squares together (right sides facing each other).
- Slip stitch along the edges, ensuring holes, corners, and sides match perfectly.
- Repeat this for all squares until entire vest shape is assembled.
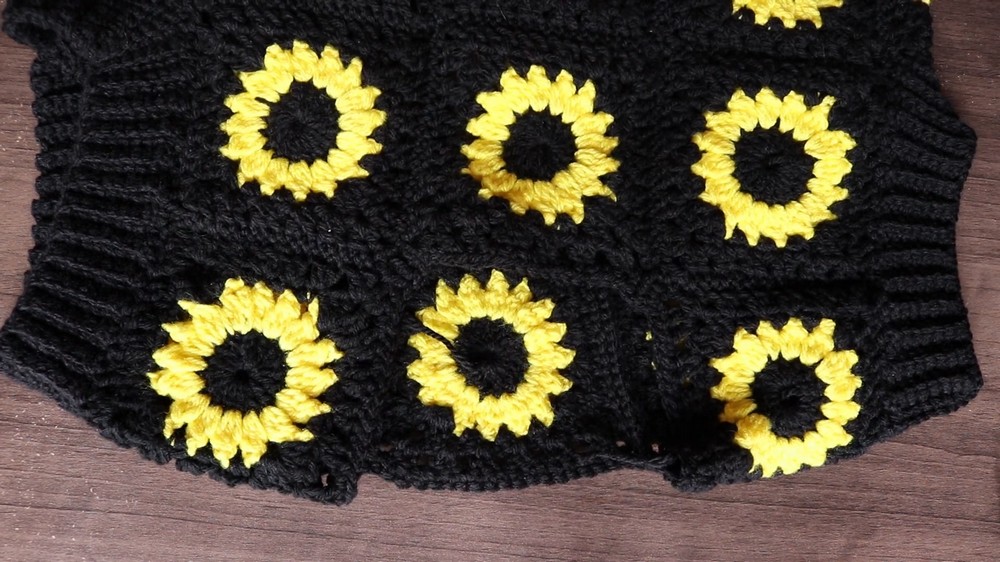
Step 5: Adding Ribbing
- Armholes:
- Attach the yarn to the armhole edge and chain 8 stitches.
- Crochet single crochets spaced evenly along the edge.
- At each end, slip stitch to the next available stitch to secure.
- Bottom Edge:
- Use the same method as the armhole ribbing but chain 10 stitches for the bottom edge.
- Neckline:
- For a smooth finish, use single crochet stitches around the neckline.
- At corners, add double crochet or treble crochet for a rounded look.
Customization Ideas
- Colors: Experiment with vibrant yarn colors for flowers and bases to make it more eye-catching.
- Sizes: Adjust the number of squares or add rows for larger sweaters. Adding a border along edges also makes the fit versatile.
- Yarn Texture: Use chunky yarn for a cozier look or lightweight yarn for a breezier sweater vest.
Special Techniques
- Magic Ring: Create a tight and secure ring to ensure durability.
- Slip Stitch Joining: Keep tension loose to prevent puckering while joining squares.
- Ribbing: Measure evenly for consistent edges so the vest feels polished and professional.
Conclusion
Your crochet flower granny square vest will be a beautiful handmade piece filled with charm. The floral squares add character, while the ribbing creates a neat, fitted edge. With custom color options and sizing, this sweater vest is the perfect project to show your creativity.
Important Remarks
- Weave in all loose tails securely to avoid unraveling.
- Block your finished squares before assembling for cleaner edges.
- Pair your vest with a simple blouse or jeans for a casual winter look.
- Share your finished projects online to inspire others—feel free to tag photos with the creator for feedback!