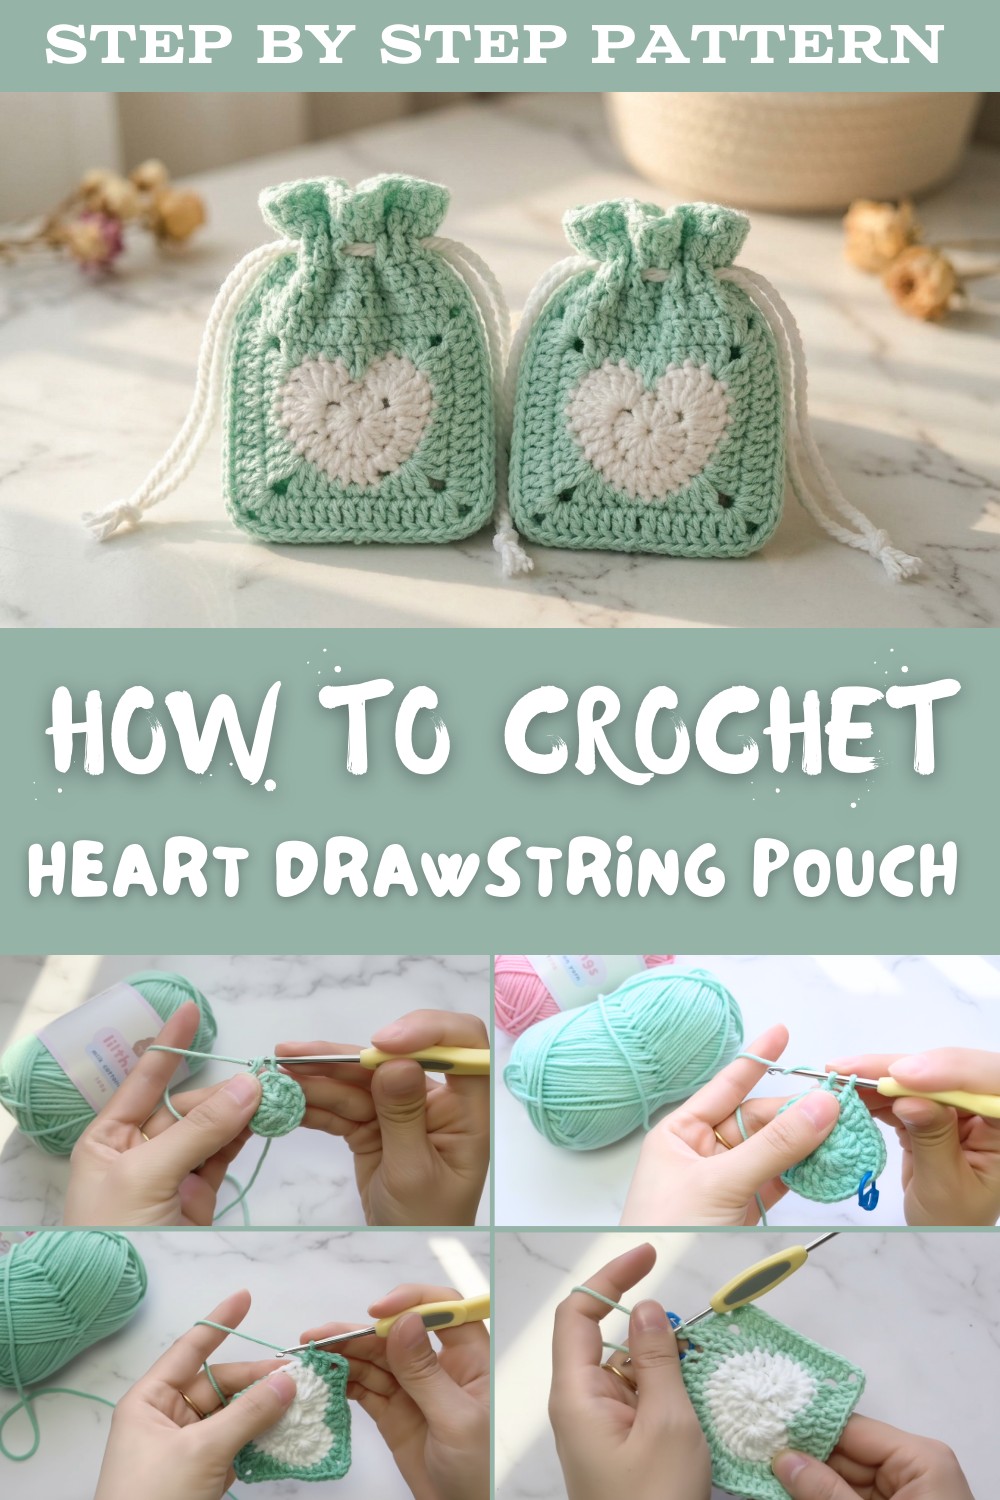
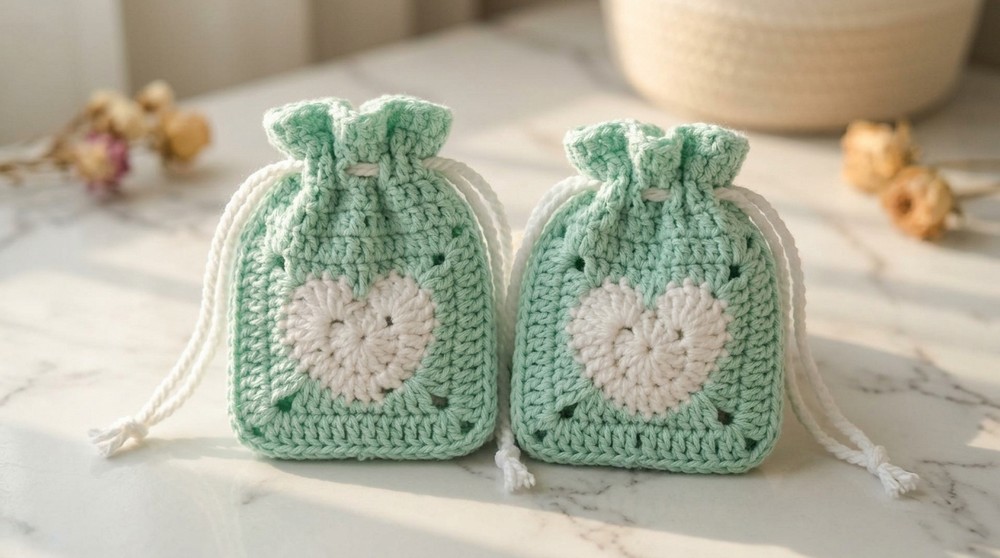
Cute Free Crochet Heart Drawstring Pouch Pattern to Steal the Show
Carry the charm of handmade warmth with a Crochet Heart Drawstring Pouch featuring textured stitches and a playful design for gifting or storing treasures.
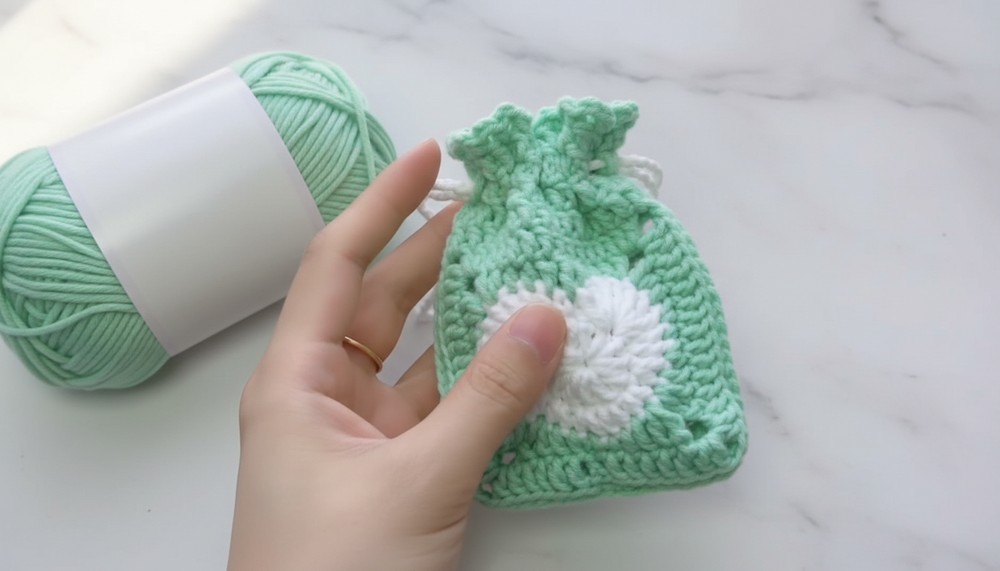
Shaped like a little love letter in yarn, this adorable pouch is a masterpiece of both design and function. With its heart-shaped granny square base and charming drawstring closure, it's the perfect crochet project to express creativity and make something truly one-of-a-kind. Whether used to hold tiny treasures, keep loose change handy, or as a thoughtful handmade gift, this pouch proves that small projects can have a big impact.
Perfect Free Crochet Heart Drawstring Pouch for Special Moments
Its playful yet practical design invites endless customization, mix vibrant colors, embellish with tassels, or pair it with matching accessories. Plus, the fun assembly process lets you experiment with textures and stitches while crocheting something that's as beautiful as it is versatile.
Crochet Heart Granny Square Pouch Pattern
Skill Level
Intermediate to Advanced
Materials Needed
- Yarn:
- Lightweight (Category #3 yarn, or similar).
- Colors: White (heart base), yellow (assembly slip stitches), and any additional colors for strings.
- Hook Size:
- 3mm crochet hook.
- Optional Tools:
- Stitch markers (highly recommended for beginners).
- Darning needle for sewing and weaving ends.
- Scissors.
Abbreviations (US Terminology)
- ch: Chain
- sc: Single Crochet
- dc: Double Crochet
- tr: Triple Crochet (or Treble Crochet)
- hdc: Half Double Crochet
- inc: Increase (two stitches in the same stitch).
- sl st: Slip Stitch
- st(s): Stitch(es)
- magic ring: Circular foundation technique to create closed centers.
Special Notes
- Use stitch markers to track your rounds, corners, or specific stitches.
- Adjust tension evenly throughout the project. If your pouch is too loose or tight, slightly change hook size.
- Ensure yarn tails are hidden securely during finishing to give your pouch a clean, professional look.
Part 1: Heart Granny Square
Step 1: Magic Ring
- Wrap the yarn around your fingers and create a magic ring.
- Using your hook, slide under the loop, yarn over, pull through, and tighten to form the ring.
Ch 3 (counts as the first stitch, but not a double crochet).
Round 1: Foundation
- Work 12 double crochets (dc) into the magic ring.
- Start each double crochet by yarning over, inserting the hook into the ring, pulling up a loop, and pulling through loops as per regular double crochet technique.
- Pull the tail to close the magic ring tightly.
- Insert your hook into the V of the first stitch (not the chain) and join with a sl st.
Round 2: Creating the Top of the Heart
- Ch 1, then begin working 8 triple crochets (tr) into the first st.
- Yarn over twice before inserting the hook into the stitch. Pull through two loops at a time until you have completed the triple crochet.
- Repeat this step 8 times into the same stitch to form the curved top part of the heart.
- Next Stitch:
- 1 double crochet (dc).
- Upcoming Stitch:
- Work 1 dc and 1 hdc into the same stitch.
- Follow this with 2 hdc into the next stitch.
- Next Stitch Sequence:
- Work 1 hdc + 1 dc into the same stitch (for the heart's midpoint).
- Place a stitch marker here to mark the midpoint of the heart.
- Complete the opposite side symmetrically:
- Start with 1 dc + 1 hdc in the next stitch.
- 2 hdc in the next stitch.
- 1 hdc + 1 dc in the next stitch.
- Last Stitch:
- Work 8 triple crochets into the same stitch to form the top curve on the other side.
- Connect the round:
- Sl st into the first st and cut the yarn.
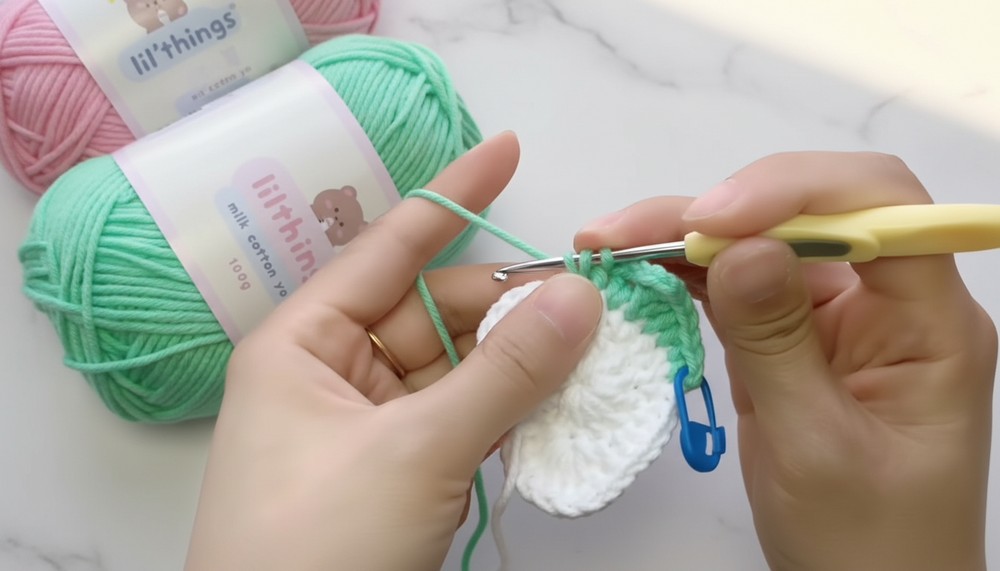
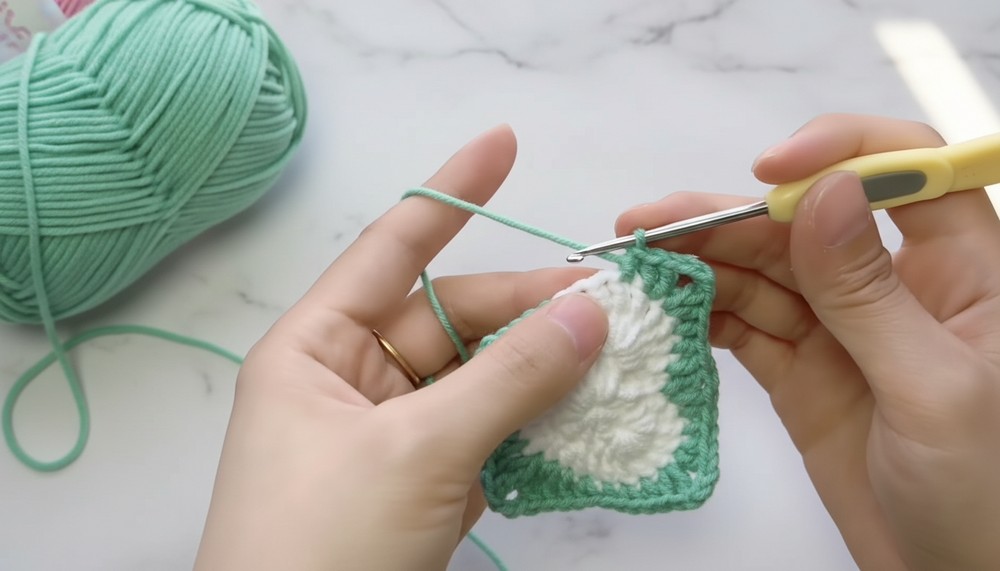
Part 2: Border and Assembly
Step 1: Border
- Use yellow yarn or choose any contrasting color.
- Attach yarn into the midpoint stitch (where the stitch marker remains).
- Work sc all around the border:
- Ensure to place 1 sc in each st around the heart's curved edges.
- At corners, chain 3 to emphasize the boundaries.
- Finish with sl st where you began, cut yarn, and weave in the ends.
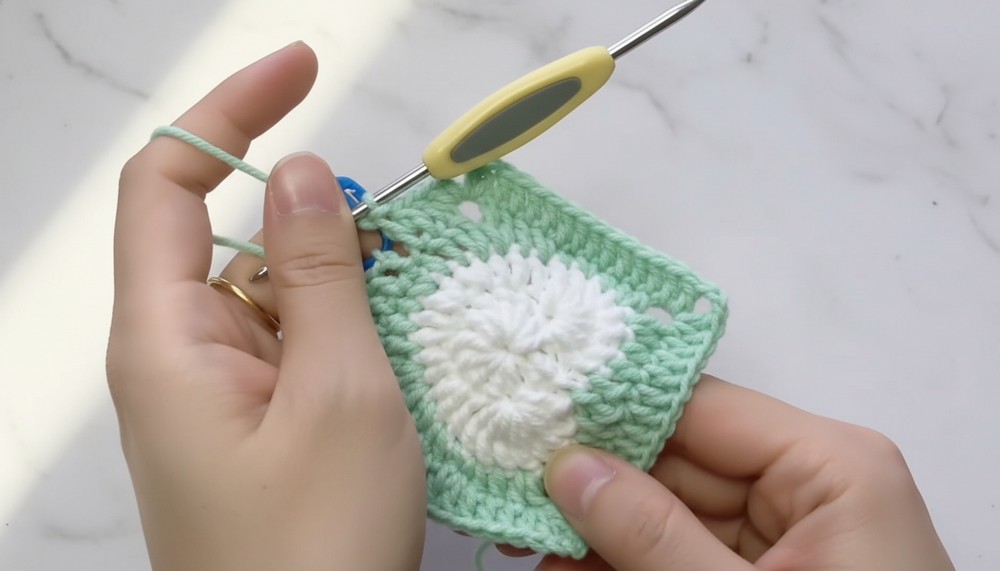
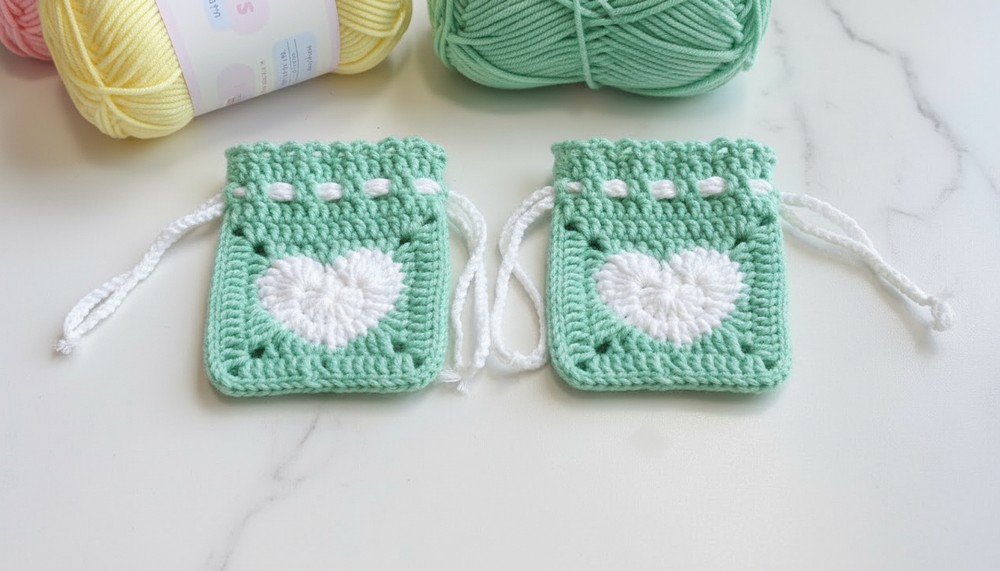
Part 3: Pouch Assembly
Step 1: Joining Two Squares
- Align two heart squares with the wrong sides facing outward.
- Using yellow yarn (or assembly color), join the edges with sl st:
- Pick up the back loops from both squares for a clean finish.
- Insert the hook and sl st along 3 sides of the square, leaving one side open for the pouch opening.
- Before finishing, flip the pouch inside out for a clean look.
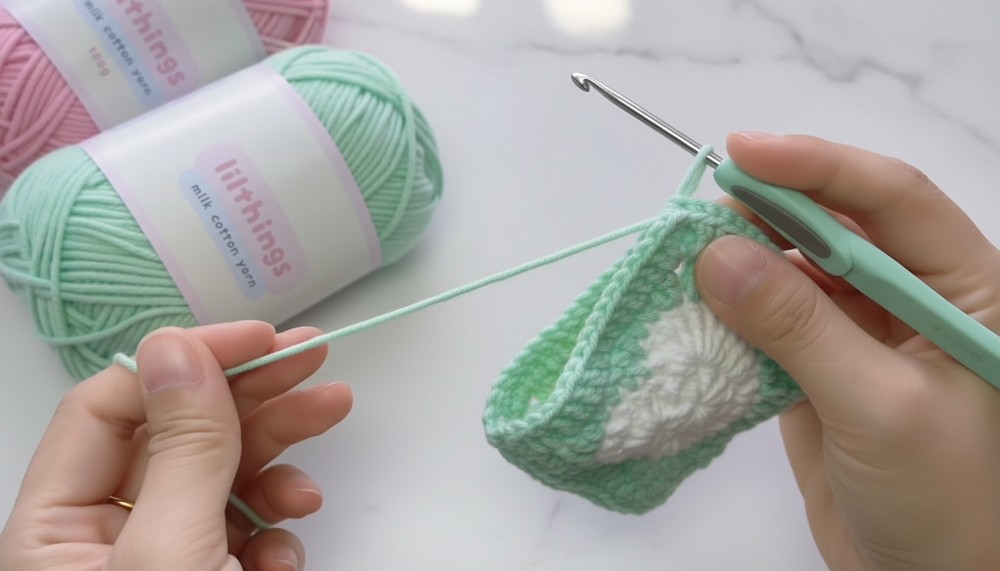
Step 2: Adding Depth and Border
- Work rounds of double crochet:
- Starting from the pouch opening edge, work 1 dc into each st along the top.
- When you reach corners, chain 3 to maintain the opening's shape.
- Repeat for 2-3 rounds depending on the desired pouch depth.
- Complete with a decorative border:
- Work chain-3 loops with sc by skipping every other stitch.
- Finish with sl st, cut yarn, and weave in ends.
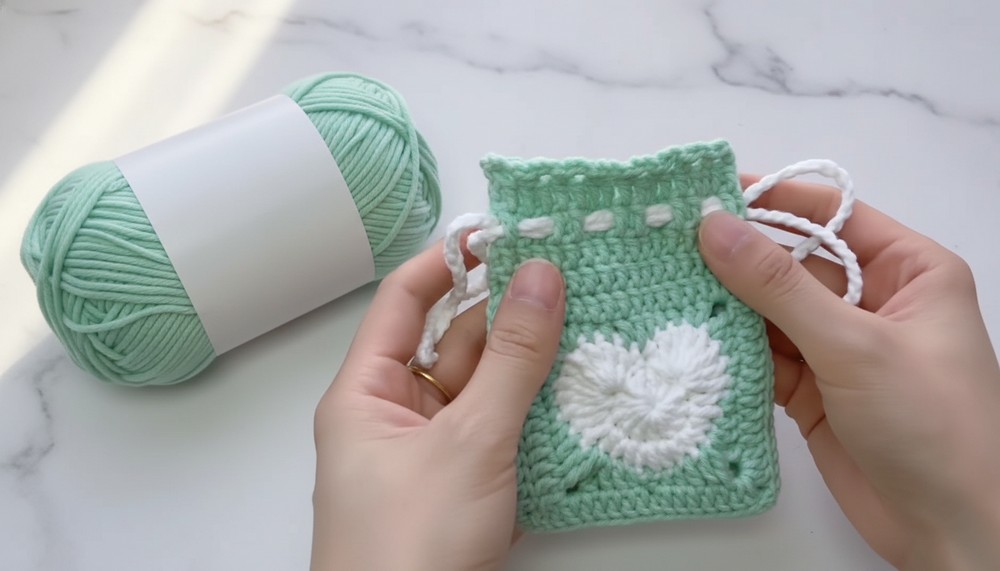
Part 4: The String Closure
- Use the same yarn color as the hearts or any preferred color.
- Create two long chains (70-80 ch minimum for each string length).
- Thread the chains through the last round of double crochet stitches along the opening:
- Follow an under-two, over-two pattern.
- Tie the strings securely in the corners; trim excess ends neatly.
Conclusion
Congratulations! You've successfully created a unique Heart Granny Square Pouch. The charming heart motif, combined with its functional drawstring closure, makes this project both beautiful and practical. It's perfect for storing small items, gifting, or simply showcasing your crochet skills.

Pattern Correction
- Round 2 Heart Curve: The top part requires 8 triple crochets, not 7 as mistakenly mentioned in the transcription.
- Triple crochets should be completed evenly to ensure symmetry.
Tips for Success
- Blocking: Block your finished heart squares to straighten edges.
- Customization: Experiment with colors for the heart, border, and strings to match your taste.
- Finishing: Use a tapestry needle carefully to hide your yarn ends within stitches for a neat finish.