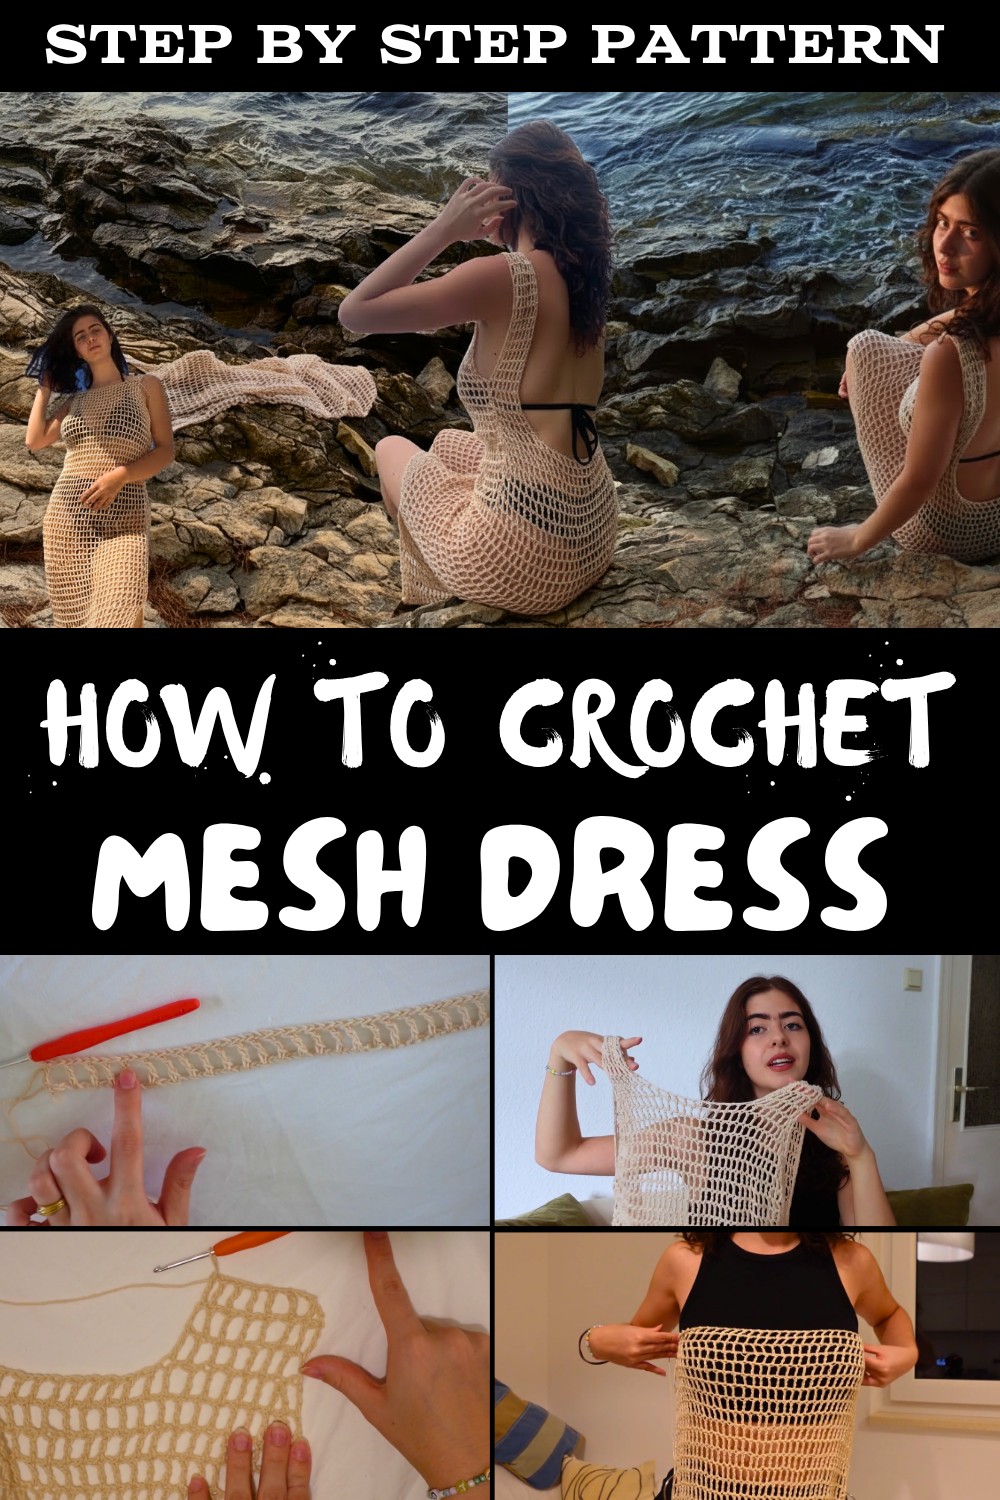
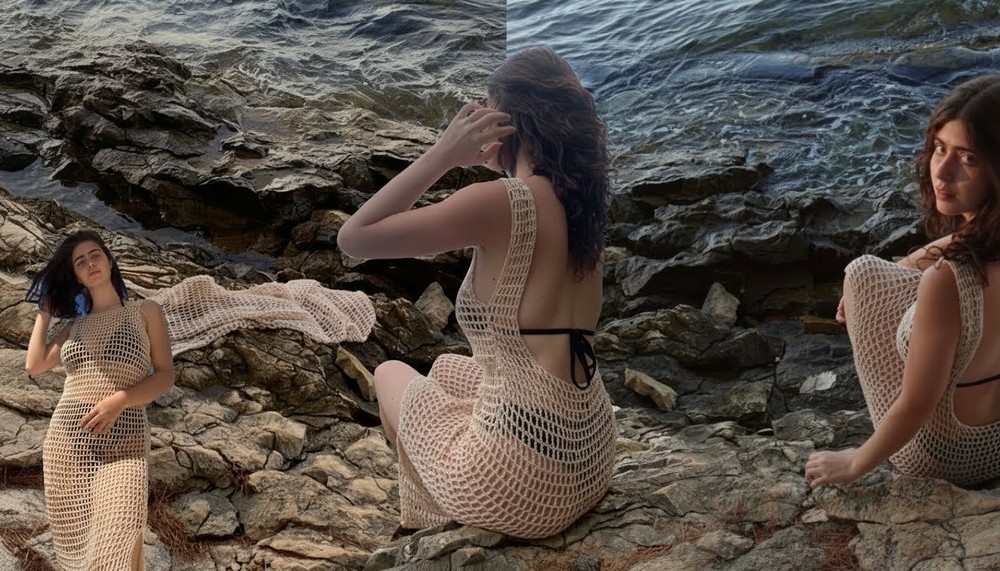
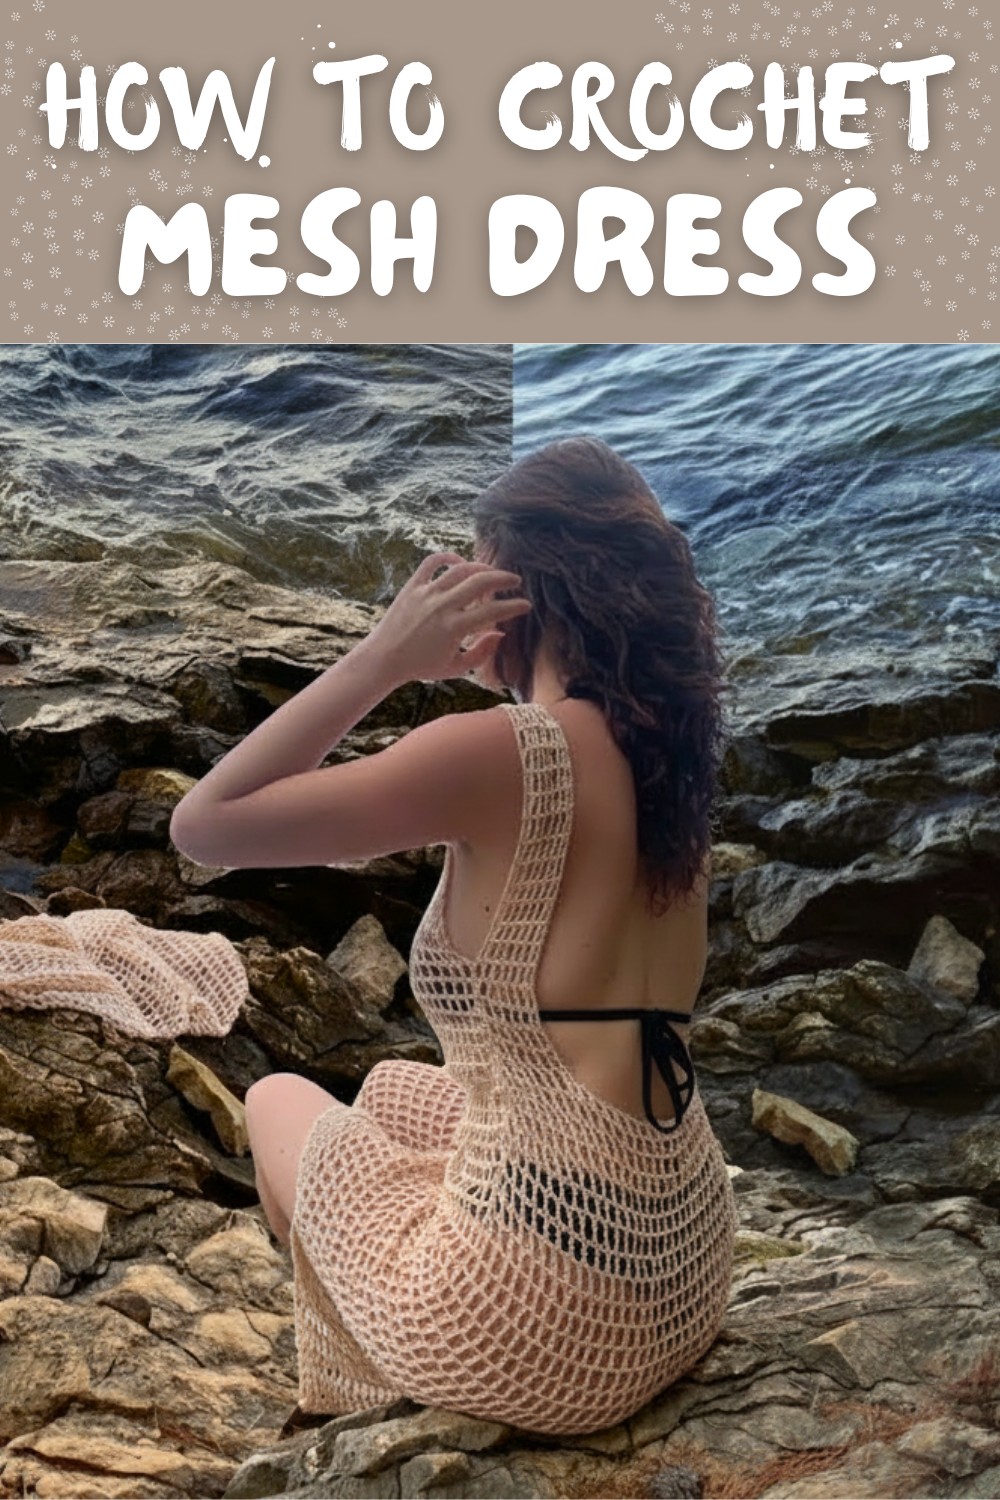
Easy Free Crochet Mesh Dress Pattern for Summer Look
Learn to make a simple and beautiful crochet mesh dress that is light, comfortable, and perfect for sunny days or layering for any occasion.
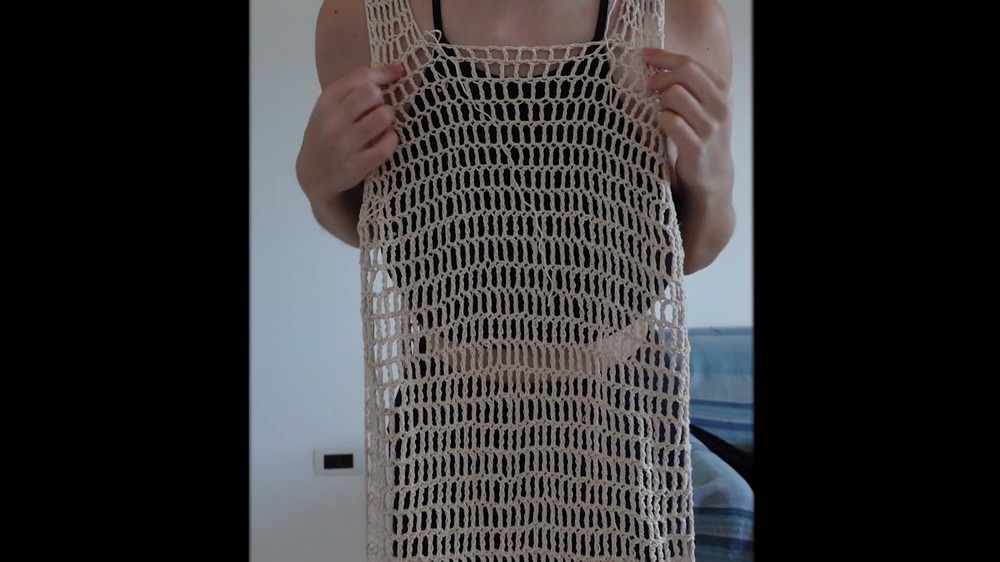
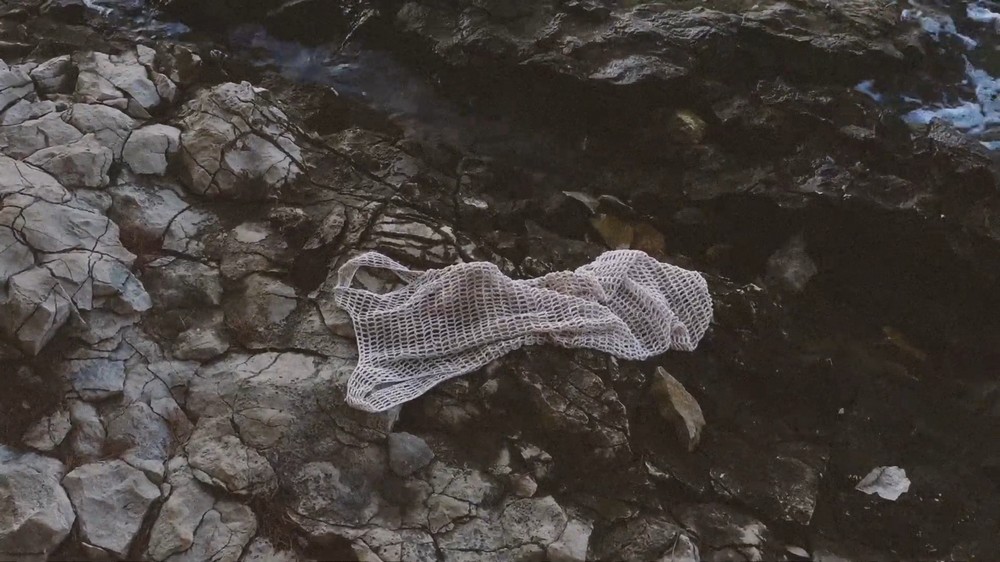
Light and airy, this outfit is perfect for warm days or layering over other clothes. Its open, crisscross design gives it a stylish yet breathable look that feels comfortable to wear. The softness and flowing structure make it a great choice for casual outings, beach trips, or simply relaxing at home.
Stylish Crochet Mesh Dress Pattern Free for All Skill Levels
It carries a charming simplicity while offering endless ways to personalize with different yarn colors, letting each piece feel unique. This mesh dress suits various occasions, blending practicality with elegance, and is a great addition to any wardrobe.
Its lightweight feel and graceful appearance make it stand out, offering both comfort and beauty in one piece. Even those new to crocheting can enjoy putting it together with ease, making it both fun to create and rewarding to wear.
Crochet Mesh Dress Pattern with Low Back
Skill Level
Beginner to Intermediate: Familiarity with basic crochet stitches, chains, increases, decreases, and working in rows is required.
Materials List
Yarn:
- Lightweight cotton yarn, size 2 (fine):
- Approximately 200g (680 meters).
- Yarn used: Beige cotton yarn (German brand).
- Recommended hook size for yarn: 2.5 mm-3.5 mm.
Crochet Hook:
- 3 mm crochet hook (used in tutorial).
- Adjust hook size for different effects:
- Smaller hooks create tighter, denser stitches.
- Larger hooks result in looser, airier stitches.
- Adjust hook size for different effects:
Additional Supplies:
- Scissors: For cutting yarn ends.
- Tapestry needle: For weaving in loose ends.
- Stitch markers (optional): Use earrings or pieces of yarn as substitutes for marking rows and placement during sewing.
Key Abbreviations (US Crochet Terminology)
- Ch: Chain
- Sl st: Slip stitch
- TC: Triple Crochet
- St: Stitch(es)
- Rep: Repeat
Special Notes
- Gauge: Not critical, but ensure consistent stitch width and tension across panels.
- Customization:
- Adjust the neckline depth, back cut, and width as desired.
- Add or reduce the number of rows for shorter or longer lengths.
- Back Panel Adjustment: If you prefer more waist definition, reduce row width on the back panel by decreasing evenly.
Pattern Instructions
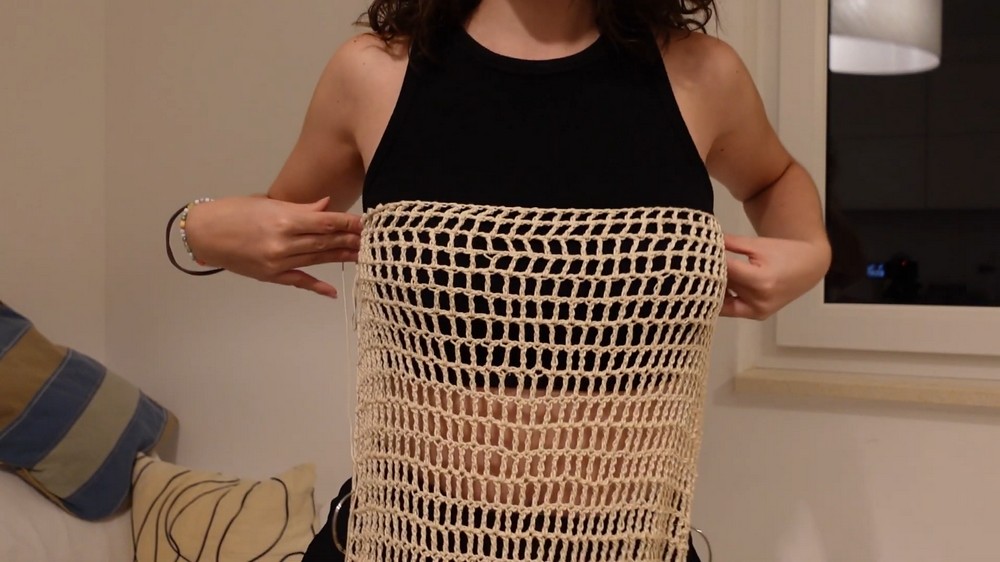
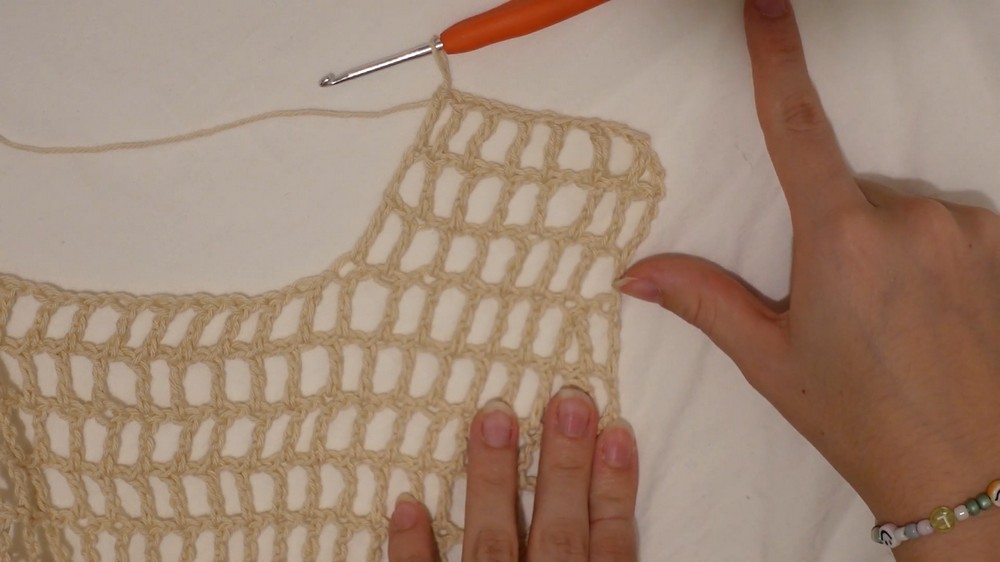
Step 1: Creating the Front Panel
Basic Setup:
- Start with a slip knot.
- Create a foundation chain long enough to cover the width of your chest (from one side to the other, including the width between both busts).
- Example: 81 chains was used in the tutorial.
Row 1 - Triple Crochet Foundation:
- Chain 4 more (add 4 extra chains to your foundation chain):
- This serves as the height for the first TC and skipping the next stitch.
- Triple crochet (TC) in the 7th chain from the hook:
- Yarn over twice, insert hook into the 7th chain, yarn over and pull through.
- You will have 4 loops on the hook.
- Yarn over, pull through 2 loops (repeat twice).
- Chain 1, then skip the next chain on the foundation row.
- TC into the next chain, continuing the sequence:
- TC → Ch 1 → Skip 1.
- At the end of your row, you should have 41 TC stitches and 40 spaces (for 81 chains).
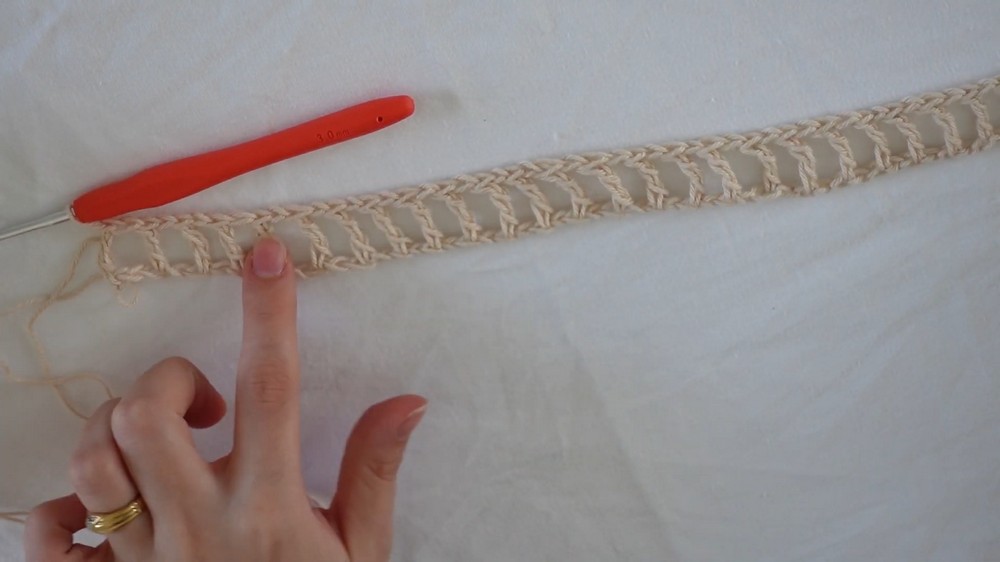
Row 2+: Adding Length
- Once you complete a row, chain 4:
- The first 3 chains serve as the height for the first TC.
- The 4th chain accounts for skipping one space.
- Turn your work.
- Always TC into the top of the previous row's TC, chaining 1 between each TC stitch.
- Continue working this airy TC pattern until the desired length of the front panel is achieved.
- Example: Create a long rectangle that covers from the neckline to your desired hem length.
Step 2: Adding Decreases for Shoulder Adjustment
Optional Step: Top Panel Decreases
For body shapes where the chest width exceeds shoulder width, triangular sections must be added to the top of the front panel.
- Start with a regular TC in the first stitch of the row.
- Decrease the next two TC stitches into one:
- Yarn over twice, insert into the TC, pull through and leave the final loop unworked.
- Yarn over twice, insert hook into the next TC, pull through.
- Once 3 loops remain on the hook, yarn over and pull through all 3 loops to close the decrease.
- Work the row pattern as usual (TC → Ch 1).
- At the end of the row, decrease the last two TC stitches.
- Rep decreases at the beginning and end of each row, forming triangular straps at the shoulders.
Step 3: Creating the Back Panel
- The back panel follows the same TC pattern used for the front panel:
- Start with a foundation chain equal to the chest width.
- Work TC with spaces for rows until reaching the desired length.
- For additional waist shaping, decrease evenly across rows:
- Reduce width slightly at the waist area by decreasing rows, then return to normal width further down.
Step 4: Adding Front and Back Straps
- Straps use the same TC pattern as the dress:
- Work rows of TC stitches for a width of 8 TC stitches (or adjust width for preference).
- Attach yarn to specific rows and work strap rows upward until reaching the length needed to meet shoulders.
- Ensure front and back strap rows match for symmetry.
Step 5: Assembly
- Armhole Placement:
- Try the front and back panels on to measure armhole height.
- Use stitch markers (or earrings) to mark the sections for sewing and openings for the arms.
- Joining Panels:
- Use slip stitches or sewing to connect the sides of the front and back panels.
- If desired, leave slits at the hem for added movement.
Optional: Adding Mini-Straps to Adjust Neckline
For better balance or if the neckline feels too tight:
- Add mini-straps to the front panel using the same TC pattern.
- Ensure width matches the straps.
- Likewise, extend the length of the back panel straps to balance the front and back height.
Conclusion
Congratulations! You've completed the airy crochet dress with a high neckline and a low back. This flowing design is breathable, elegant, and perfect for sunny days. The beauty of this dress lies in its ease of customization, allowing you to perfectly tailor it to your shape and preferred style.
Pattern Correction
- Uneven Edge Alert: Always count your stitches carefully at the end of each row. The number of TC stitches should remain consistent across all rows.
- Armhole Symmetry: Double-check that armhole placement matches on both sides to avoid uneven assembly.
Tips
- Block Your Panels: To achieve a well-shaped final garment, lightly block both the front and back panels before sewing.
- Dark Colors for Contrast: Consider using black or darker tones for added elegance.
- Lightweight Layering: Pair this dress over swimwear or a slip for more coverage.