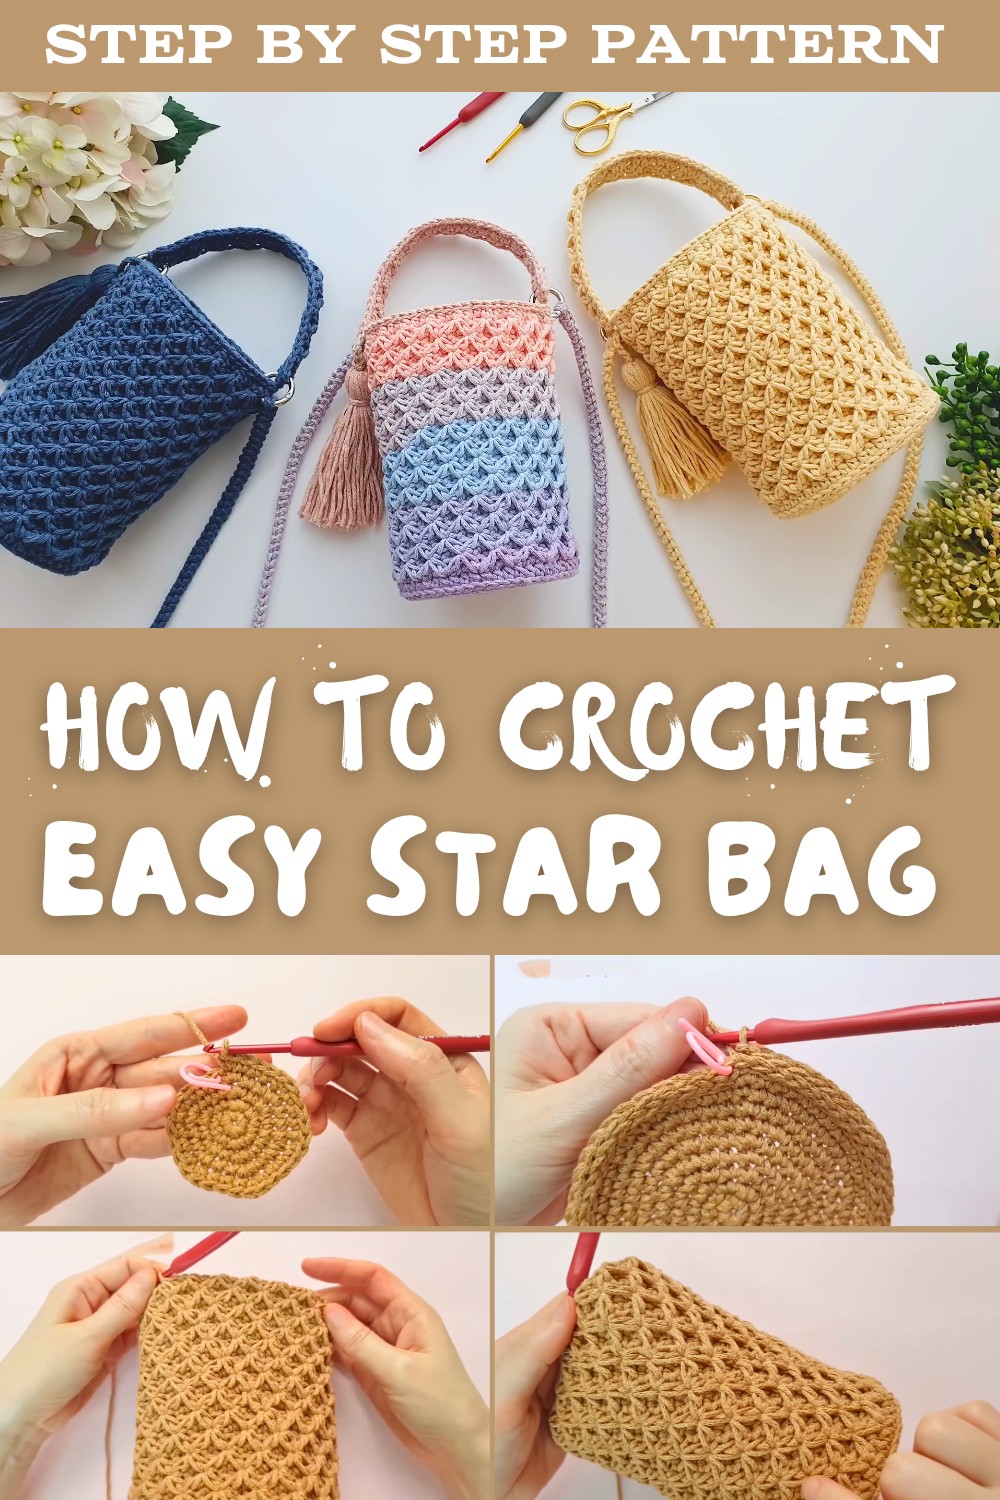
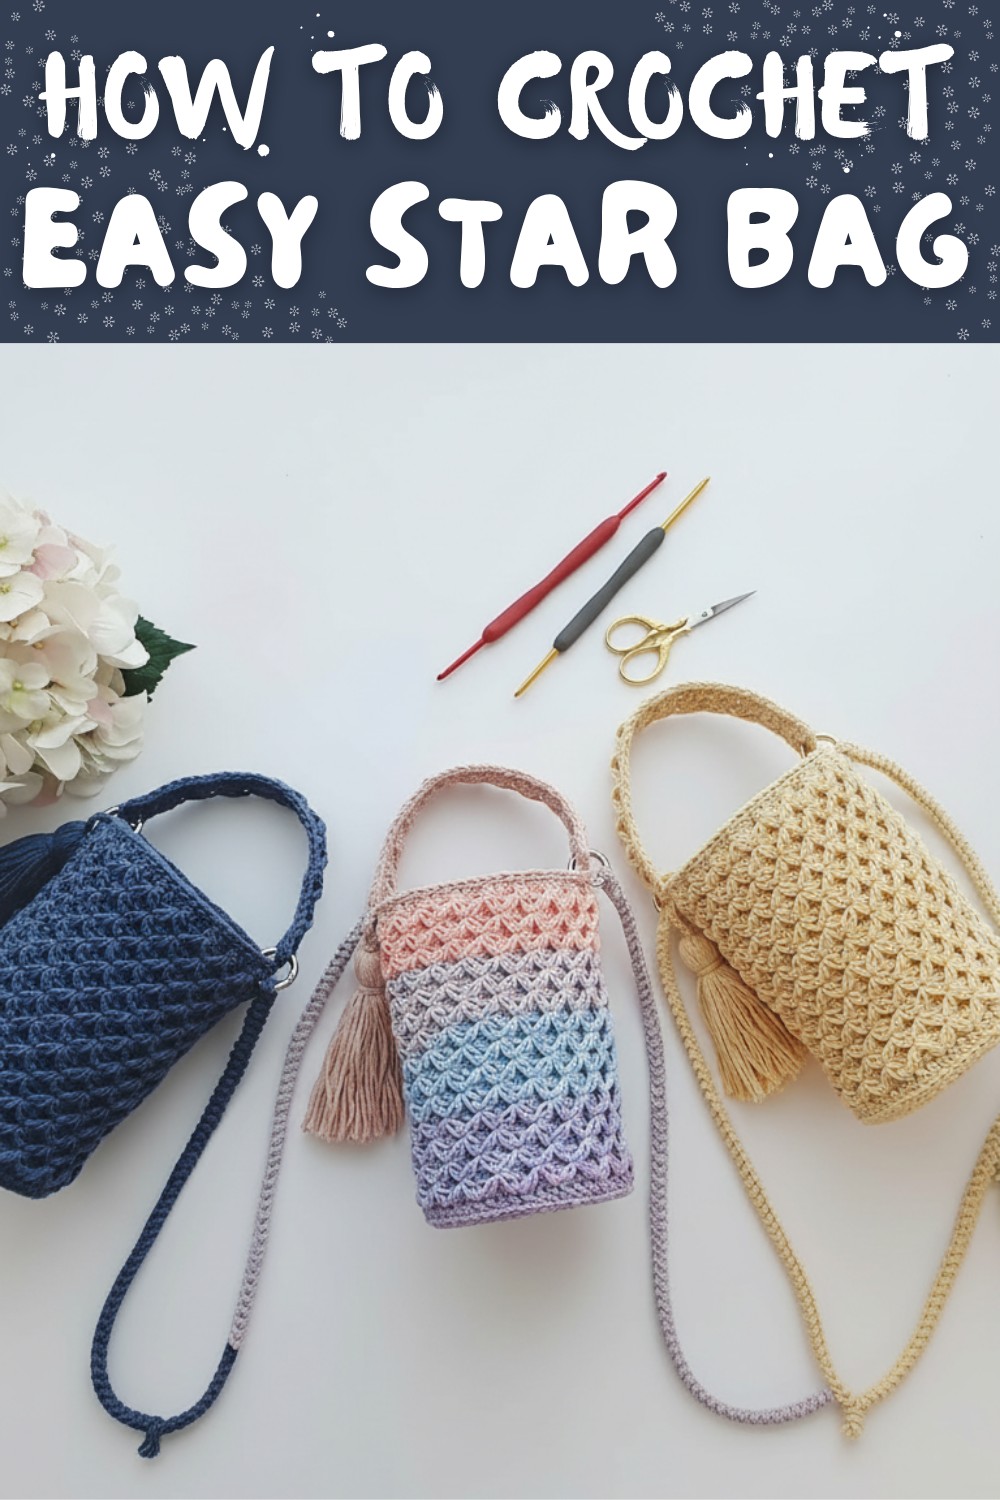
Crochet Star Bag Free Pattern for 3D Texture
Design your personal Star Bag with this free crochet pattern, using simple stitches and sturdy yarn to create a functional and beautiful handmade accessory.
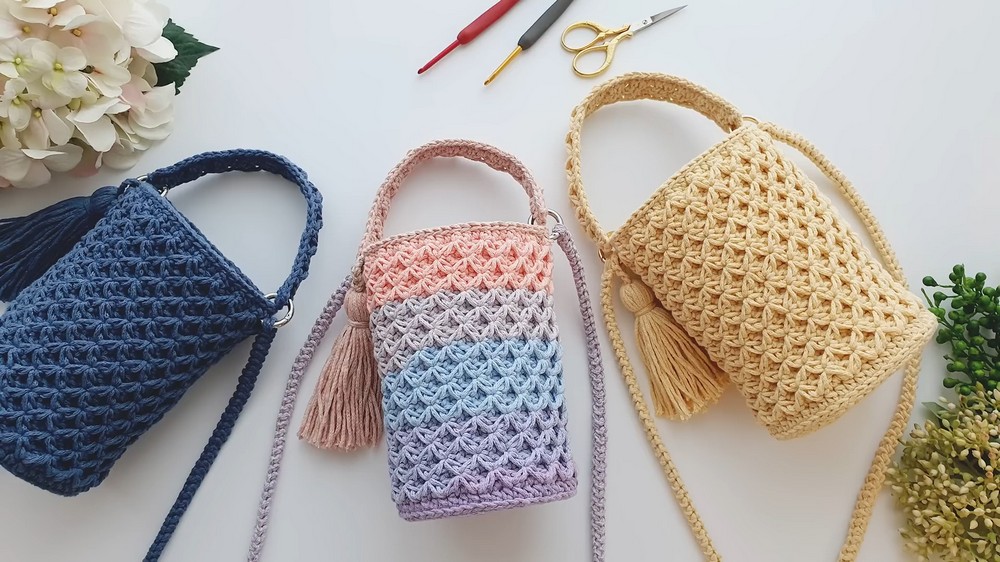
Stand out with a unique and enchanting handbag that's as practical as it is beautiful. The Free Crochet Star Bag Pattern combines creativity and functionality with its stunning star-shaped design, making it perfect for casual outings, special occasions, or everyday use. This bag isn't just a handy accessory-it's a statement piece that showcases your love for crochet and style. The pattern is beginner-friendly, with easy-to-follow steps that even new crocheters can master, while still being engaging enough for seasoned crafters.
Free Crochet Star Bag Pattern for Bold Looks
Soft yet sturdy yarn holds the structure of the bag, allowing it to carry essentials like your wallet, phone, or keys effortlessly. You can personalize it with custom colors, playful straps, or even decorative tassels, making it a flexible and versatile project. Whether you prefer neutral tones for a chic look or vibrant hues for a bold statement, this pattern is perfect for expressing your creativity.
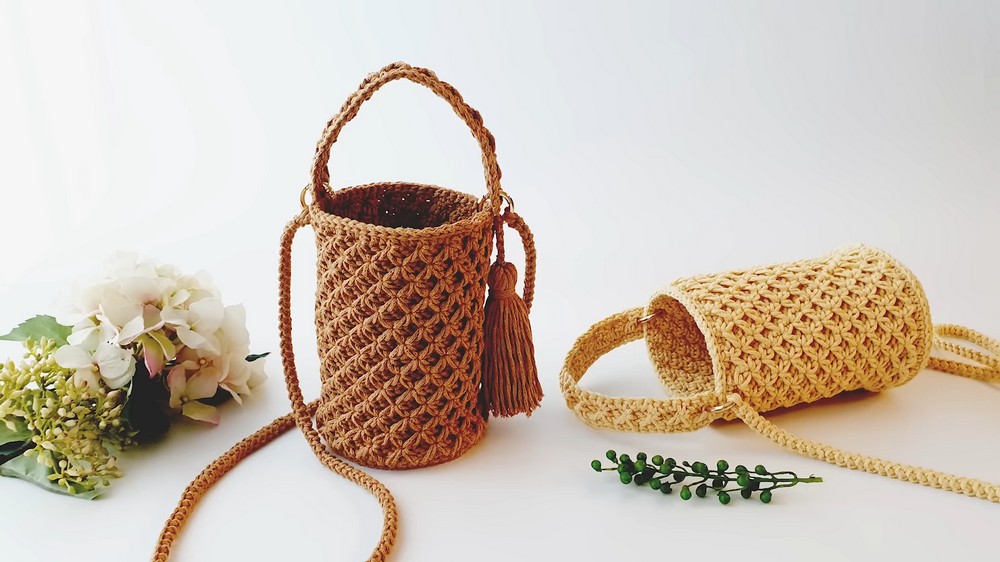
Adding to its charm, this crochet star bag makes an excellent gift idea for friends and family. Bring fun, style, and functionality together with this incredible free pattern that inspires everyone to create something extraordinary with their own two hands.
Crochet 3D Star Circular Cross Bag Pattern
Finished Size
- Diameter (bottom): Approximately 20 cm (8 inches)
- Height: Approximately 15 cm (6 inches)
Note: Size depends on your tension and chosen yarn.
Materials
- Macrame Yarn: Gradient or solid color (200g recommended). Cotton yarn is ideal for durability.
- 6 mm Crochet Hook
- Two Small Metal or Plastic Rings: For attaching the strap.
- Bag Bottom Insert: Optional but recommended for stability. Cut a stiff base in circular form.
- Scissors
- Stitch Markers or Rings: Important for marking starting stitches.
- Tapestry Needle: For weaving in ends.
- Measuring Tape/Ruler: To confirm size.
Gauge
Gauge isn't critical for this project, but you can aim for 14 stitches in 10 cm using single crochet if you want a specific outcome. It's always a good idea to make a small swatch to confirm your expected size.
Special Techniques
- Working in Rounds: The project starts in circular rows.
- Increase: Adding stitches symmetrically to ensure an even round shape.
- Ridge Stitch: Working into back loops to create texture.
- 3D Star Stitch: Combining elongated stitches and skipped stitches to form a beautiful star/diamond structure.
- Tightening the Ring: Pulling the starting tail tightly to close the circle.
Step-by-Step Pattern
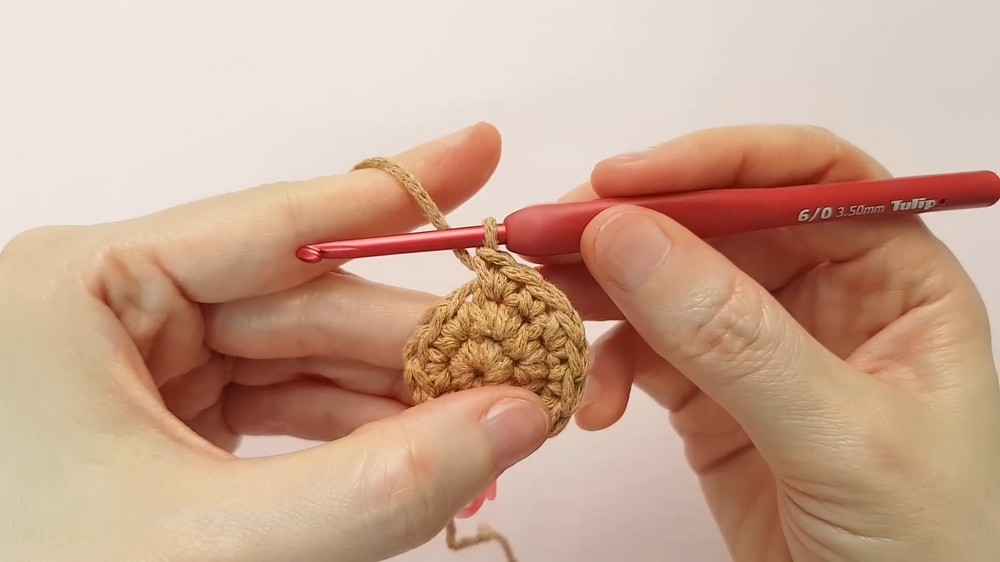
Base Circle: Rounds 1-9
- Round 1:
- Create a magic ring.
- Crochet 6 single crochets (sc) into the ring.
- Pull the tail to tighten the ring completely.
- Place a stitch marker in the first stitch to mark the beginning of the round.
- Round 2:
- Perform 2 single crochets in each stitch around (increase).
- Total: 12 stitches.
- Round 3:
- Alternate 1 single crochet in the first stitch, and an increase (2 sc in the next stitch). Repeat.
- Total: 18 stitches.
- Round 4:
- Alternate 1 single crochet in each of the next 2 stitches, increase in the following stitch. Repeat.
- Total: 24 stitches.
- Rounds 5-9:
- Continue the same pattern, adding 1 more single crochet between increases for each successive row (e.g., Round 5: 3 sc, 2 sc in the next stitch; Round 6: 4 sc, inc).
- For even-numbered rounds, split the increases to prevent harsh angles (e.g., 2 sc, inc, 2 sc).
- After Round 9, you should have a smooth, flat circular base.
- Verify: Lay the base flat - do not allow rippling or cupping.
- If necessary, lightly flatten it under a book overnight or steam block it.
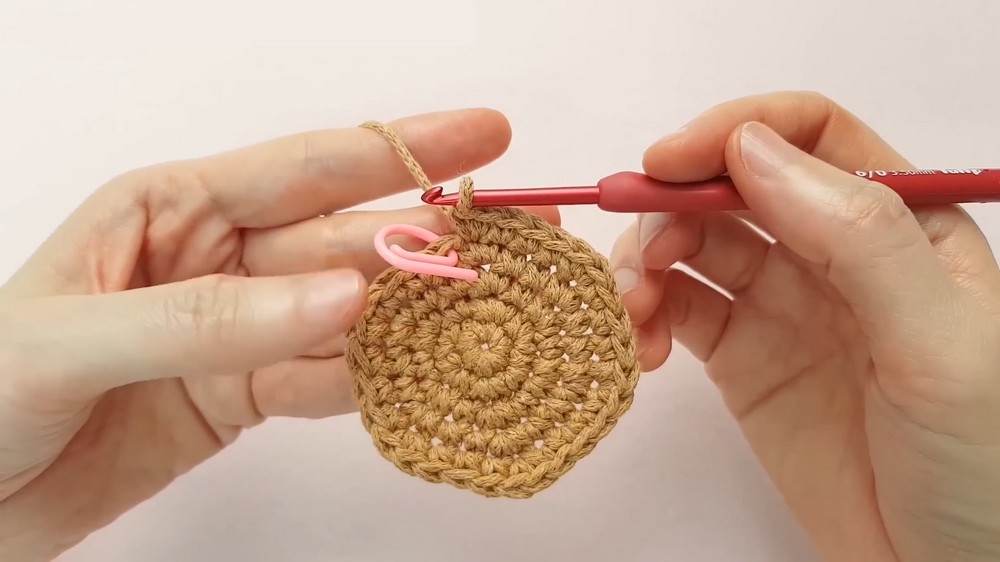
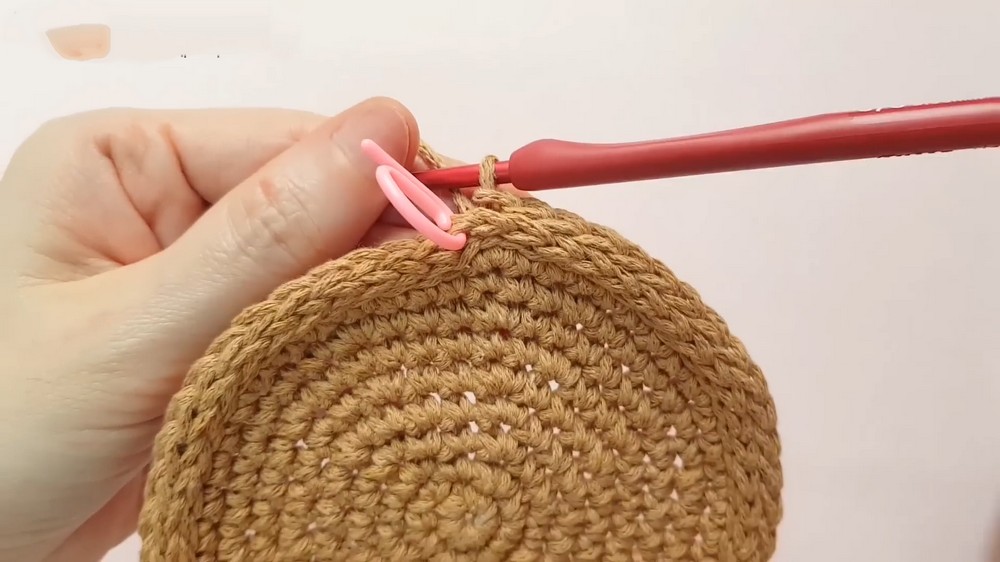
Transition: Ridge Stitch (Round 10)
- Work into the back loop only (BLO) of each stitch to create a ridge that separates the bottom from the sides.
- Crochet 1 single crochet per stitch around (use a loose tension to avoid tightness).
- Total: Stitch count remains the same as the last row.
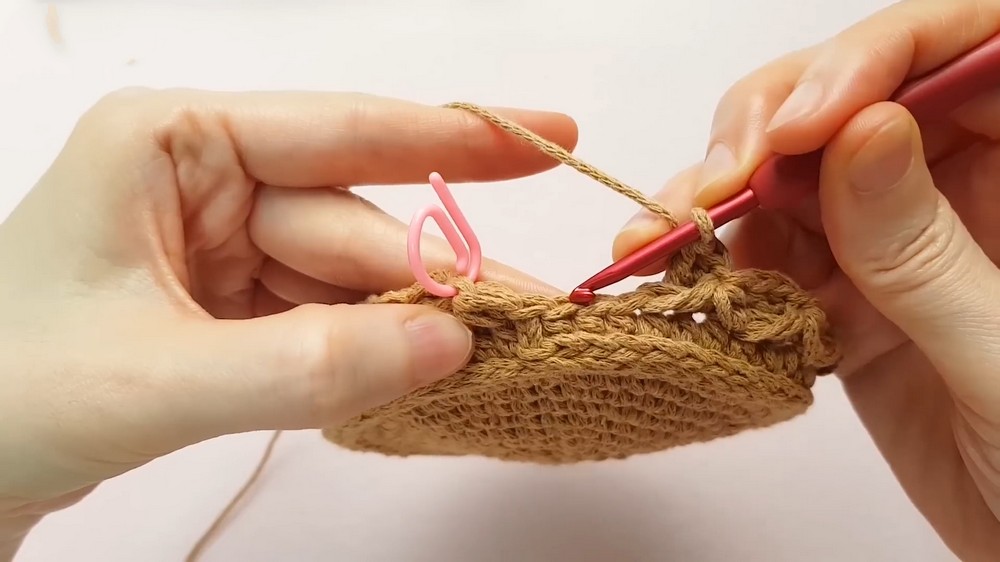
Sides: 3D Star Stitch Pattern
- The 3D star-stitch pattern forms the walls of the bag. Follow this 2-row repeat for Rounds 11-24.
- Round 11 - Star Formation
- Stretch the yarn slightly to the length of a double crochet (dc).
- Wrap yarn, insert the hook into a stitch, and pull through (elongated loop).
- Skip 2 stitches, then repeat the process on the 3rd stitch.
- When 5 loops are on the hook, yarn over and pull through all loops.
- Chain 1 to lock the "star."
- Crochet a dc into the skipped stitches beneath the star.
- Repeat the pattern all around.
- Round 12 - Long Crochet Filling
- To stabilize the design, make 1 long crochet into each of the skipped spaces.
- Insert into the elongated stitches behind each star.
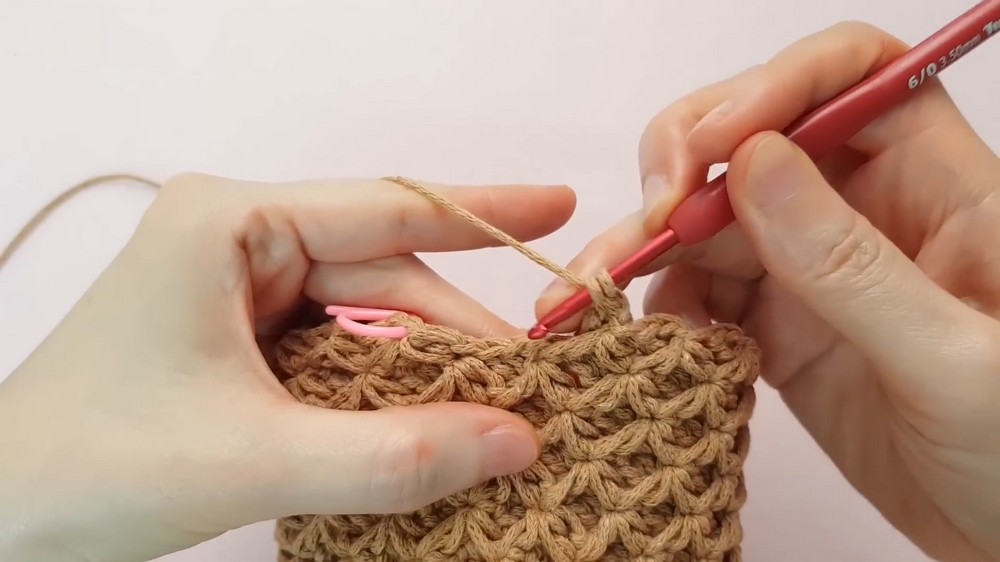
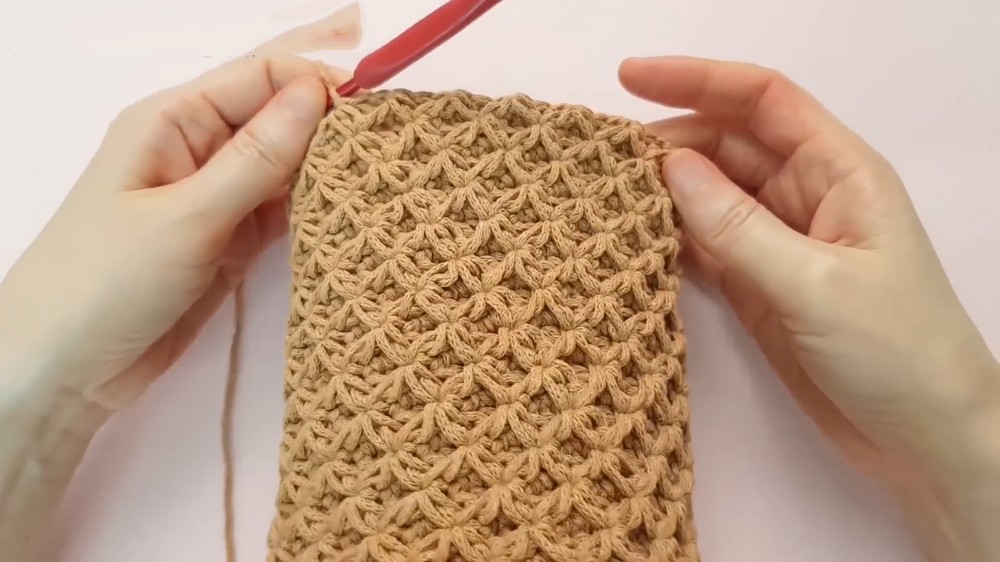
Repeat Star Pattern
- Alternate between star rows and filler rows in a 2-pattern repeat.
- Continue until you reach your desired height (14 rows recommended from the ridge).
Finishing Rows (Last 2 Rounds)
- Work 1 round of single crochet into each stitch to stabilize the edge.
- Add a slip stitch round for a clean, polished edge.
Tips & Customizations
- Colors:
- Gradient yarn adds vibrant flair.
- Use solid colors for an elegant or understated look.
- Strap Length:
- Adjust based on personal preference (crossbody or handbag style).
- Use a chain strap, leather handle, or crochet a matching strap.
- Custom Shape:
- Experiment with a longer body or smaller diameter for alternate styles.
Important Remarks
- Blocking: It's crucial to lightly block the bag (especially the base) for a professional look.
- Tension: Loose tension is key during the ridge stitch and star stitch rows.
Conclusion
The 3D Star Circular Cross Bag combines artistry and function, creating a stunning accessory for daily use. With its rich texture and customizable options, this bag is a project that showcases your creativity. Whether you use it for holding essentials or as a statement piece, the final result is sure to turn heads.