
Crochet Striped Headband Free Pattern : A Stylish Way to Stay Warm
Style your look with a crochet striped headband using endless color combinations for a unique accessory perfect for casual outings or cozy mornings.
Adding a touch of style and personality to your accessories collection is easy with a striped crochet headband pattern. Featuring simple yet eye-catching rows of alternating colors, this headband combines functionality with flair. It's more than just a fun project-it's a way to explore your creativity by mixing and matching colors to suit your favorite outfits, seasonal themes, or even team spirit. The pattern is versatile, making it suitable for everyday wear, workouts, or keeping your ears warm on chilly days.
Easy Crochet Striped Headband That's Great for All Ages
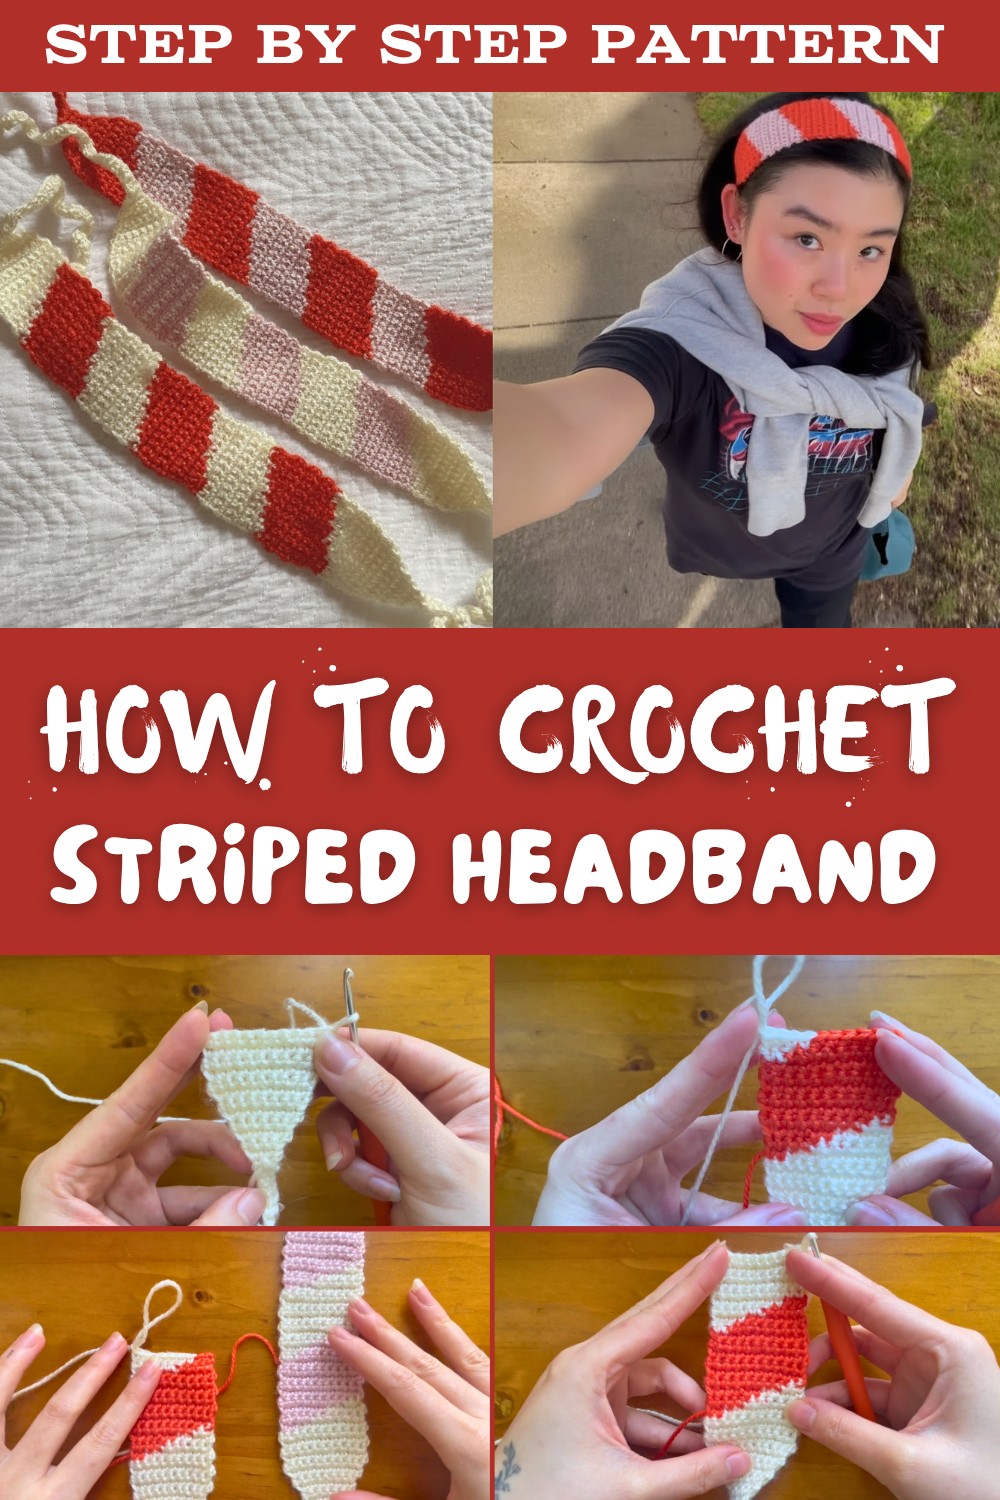
What makes this design particularly rewarding is how beginner-friendly it is while offering endless customization for advanced crocheters. Whether you're mastering basic stitches or experimenting with bold color combinations, it's a project that keeps you inspired.
Striped headbands are also a brilliant way to use leftover yarn, minimizing waste while crafting something beautiful. For a unique twist, try adding textured stitches, embellishments like small buttons, or even a crochet flower for extra charm. Lightweight and practical, these headbands make thoughtful handmade gifts or quick additions to your craft market inventory.
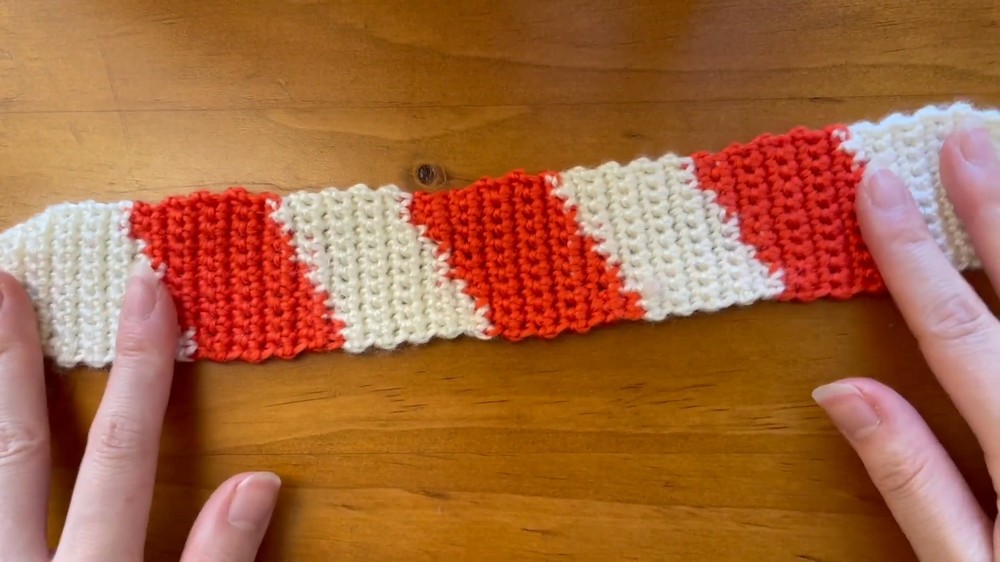
Stripy Headband with Diagonal Lines - Crochet Pattern
Skill Level
Confident Beginner to Intermediate: The pattern involves working in single crochet, increasing, decreasing, and managing color changes.
Materials
Yarn
- 4-ply yarn (sport weight)
- Color A (e.g., white): primary color.
- Color B (e.g., orange-red): secondary color.
- Recommended Material: Cotton yarn for its durability and soft feel, though you may use acrylic or other fibers as preferred.
Hook
- 3 mm crochet hook: Recommended for sport weight yarn. Adjust hook size for different yarn weights.
Tools
- Scissors: For snipping off yarn tails.
- Darning needle: To weave in ends neatly.
- Optional Tools:
- Stitch markers: To track color changes and rows.
- Measuring tape: For ensuring consistent dimensions.
Key Abbreviations (US Terminology)
- ch: Chain
- sc: Single Crochet
- sl st: Slip Stitch
- st(s): Stitch(es)
Special Notes
- Color Changes: Always change colors on the last yarn over of the previous stitch to create a smooth transition. Carry the non-working color across and weave it to maintain neatness.
- Edging: Working into back bumps for the foundation chain ensures a clean and neat edge. However, this is optional.
- Tension and Curl Fix: Slight curling of the ties during crocheting is normal; blocking or washing the finished piece will resolve this.
Pattern Instructions
Step 1: Starting the First Tie
- Foundation Chain:
- With Color A, make a slip knot.
- Chain 41. The last chain is a turning chain.
- Row 1 (First Tie):
- Work 1 sc into the 2nd ch from your hook.
- Work 1 sc into each ch across (40 sc in total).
- Optionally, work into the back bumps of the chain for a neater edge.
- Do Not Chain at the End: Leave the tie uncurled and move directly to increasing into the headband's body.
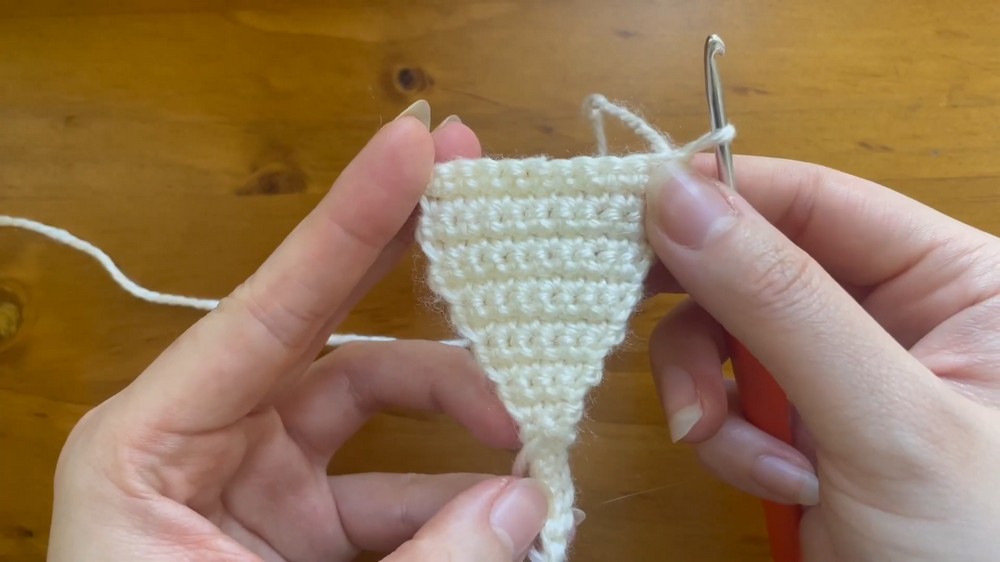
Step 2: Increasing into the Headband Body
- Row 1 (Increase Start):
- Work 2 sc into the last st of the tie (2 sc in this row).
- Rows 2-9 (Increase Rows):
- Ch 1, turn.
- Work 1 sc into the first st and 2 sc into the second st of the row (increase in the last st).
- Repeat this pattern in each row, increasing by 1 st per row.
- At the end of Row 9, you should have 10 sc in the row.
- Rows 10-13 (Stitch Maintenance):
- Ch 1, turn, and work 1 sc into each st across (10 sc each row).
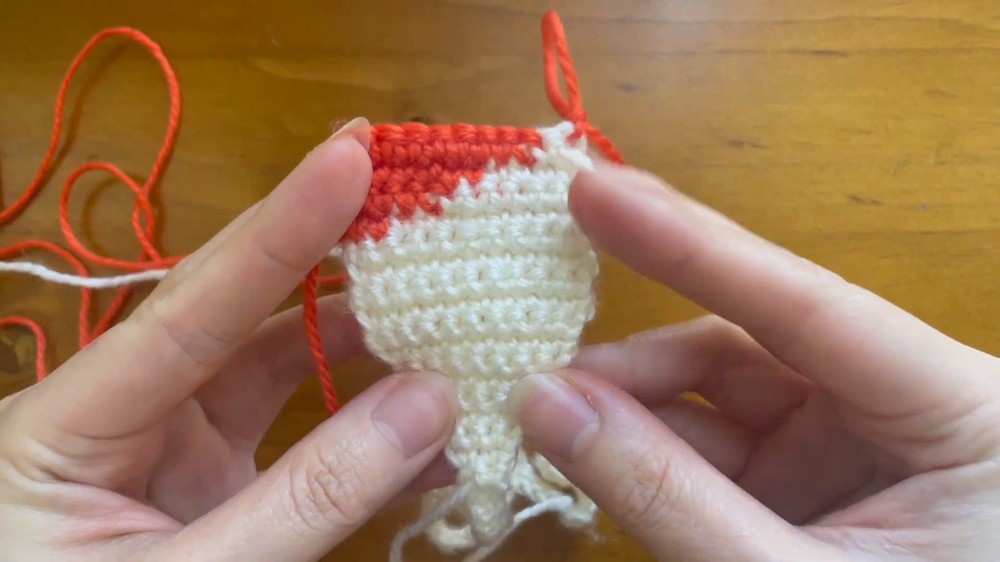

Step 3: Introducing the Stripe Pattern
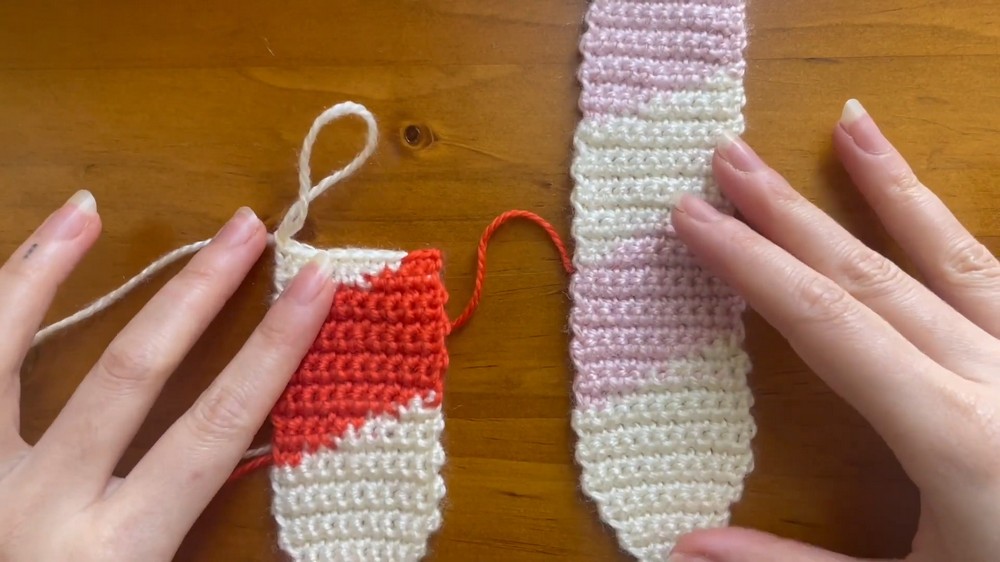
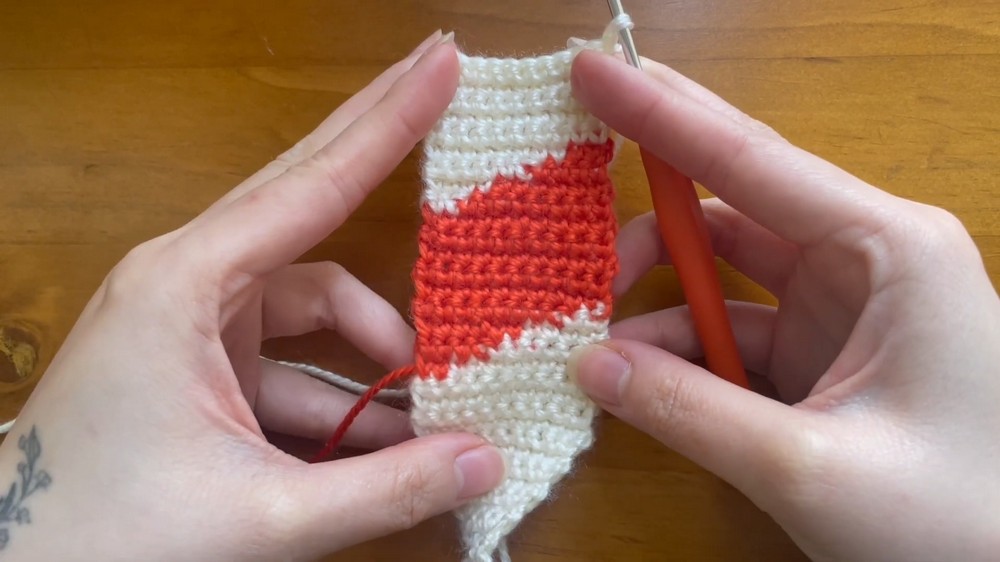
- Row 14:
- Work 8 sc in Color A, then switch to Color B.
- Work 2 sc in Color B.
- Color Change Tip: Complete the last yarn over of the 8th stitch in Color A using Color B, ensuring a smooth transition.
- Row 15 (Wrong Side):
- Work 4 sc in Color B and 6 sc in Color A.
- Carry Color B for an additional 2-3 stitches under Color A to make the next color change easier.
- Work 4 sc in Color B and 6 sc in Color A.
- Row 16 (Right Side):
- Work 4 sc in Color A, then 6 sc in Color B.
- Carry Color A for 2-3 stitches behind Color B.
- Work 4 sc in Color A, then 6 sc in Color B.
- Row 17:
- Work 8 sc in Color B, then work 2 sc in Color A.
- Rows 18-22:
- Work 5 rows in Color B only.
- Cut off Color A, leaving about a 10 cm tail for weaving later.
- Repeating the Stripe:
- Rows 23-26: Transition back to Color A in the same incrementing and decrementing pattern:
- Row 23: 2 sc in Color A, 8 sc in Color B.
- Row 24: 6 sc in Color B, 4 sc in Color A.
- Row 25: 6 sc in Color A, 4 sc in Color B.
- Row 26: 2 sc in Color B, 8 sc in Color A.
- Rows 23-26: Transition back to Color A in the same incrementing and decrementing pattern:
- Rows 27-32:
- Work 5 rows in Color A only.
- These rows form the alternating base for all Color A stripes.
- Stripe Repeats:
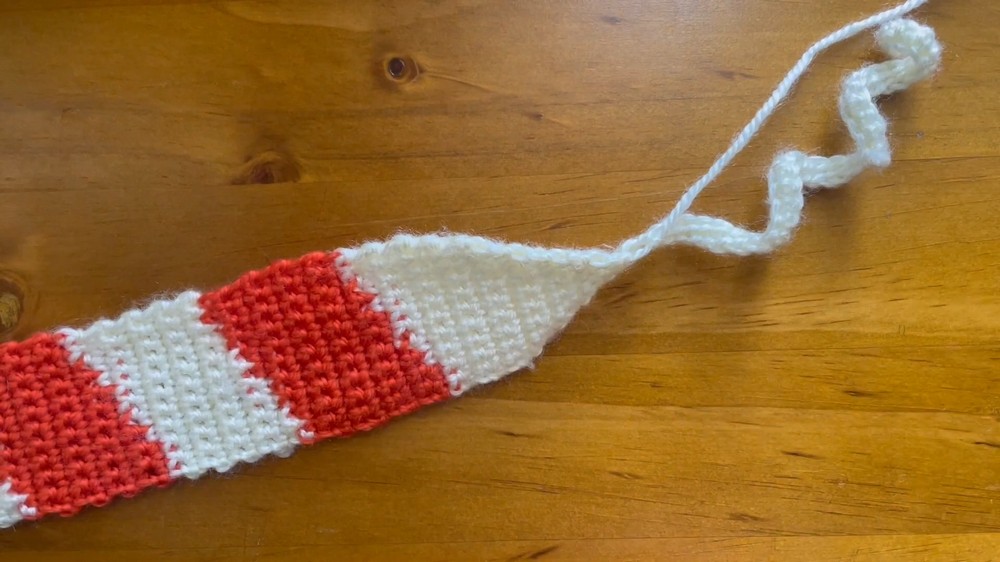
- Repeat Rows 14-32 two more times to create 3 diagonal stripes.
Step 4: Decreasing into the Second Tie
- Row 69 (Start Decreasing):
- Sc across the first 8 sts, then work an sc2tog (single crochet two together) in the last 2 sts (decrease).
- Total stitches: 9 sc.
- Rows 70-75:
- Repeat the decrease pattern at the end of every row until you decrease to 2 sc in Row 76.
Step 5: Creating the Second Tie
- Row 77 (Start Tie):
- Work 1 sc into the first st of Row 76.
- Chain 40 to form the tie.
- Row 78:
- Work 1 sc into each ch of the foundation chain.
- Slip stitch into the last stitch of Row 76 to secure.
Step 6: Finishing Touches
- Weave Ends:
- Securely weave in all tail ends. Change weaving directions 2-3 times for durability.
- Wash and Shape:
- Wash in warm soapy water and flat dry. This step softens the headband and corrects any curling of the ties.

Conclusion
Congratulations! You've completed your stripy headband with diagonal lines. With an elegant design and sturdy ties, this headband is perfect for everyday wear, workouts, or gifts. Experiment with colors to create unique patterns.

Pattern Correction
- Ensure consistent tension in stitches when carrying yarn between color changes to avoid puckering.
- Check stitch counts frequently as uneven increases or decreases may disrupt the diagonal stripe pattern.
Pro Tips
- Color Changes: Always change colors in the last yarn over of the previous stitch for a clean and seamless transition.
- Curling Correction: Blocking or washing the headband ensures ties and body edges lie flat.
- Customization: Adjust the number of rows or stitch counts for a wider headband or alternate striping patterns to suit your aesthetic.