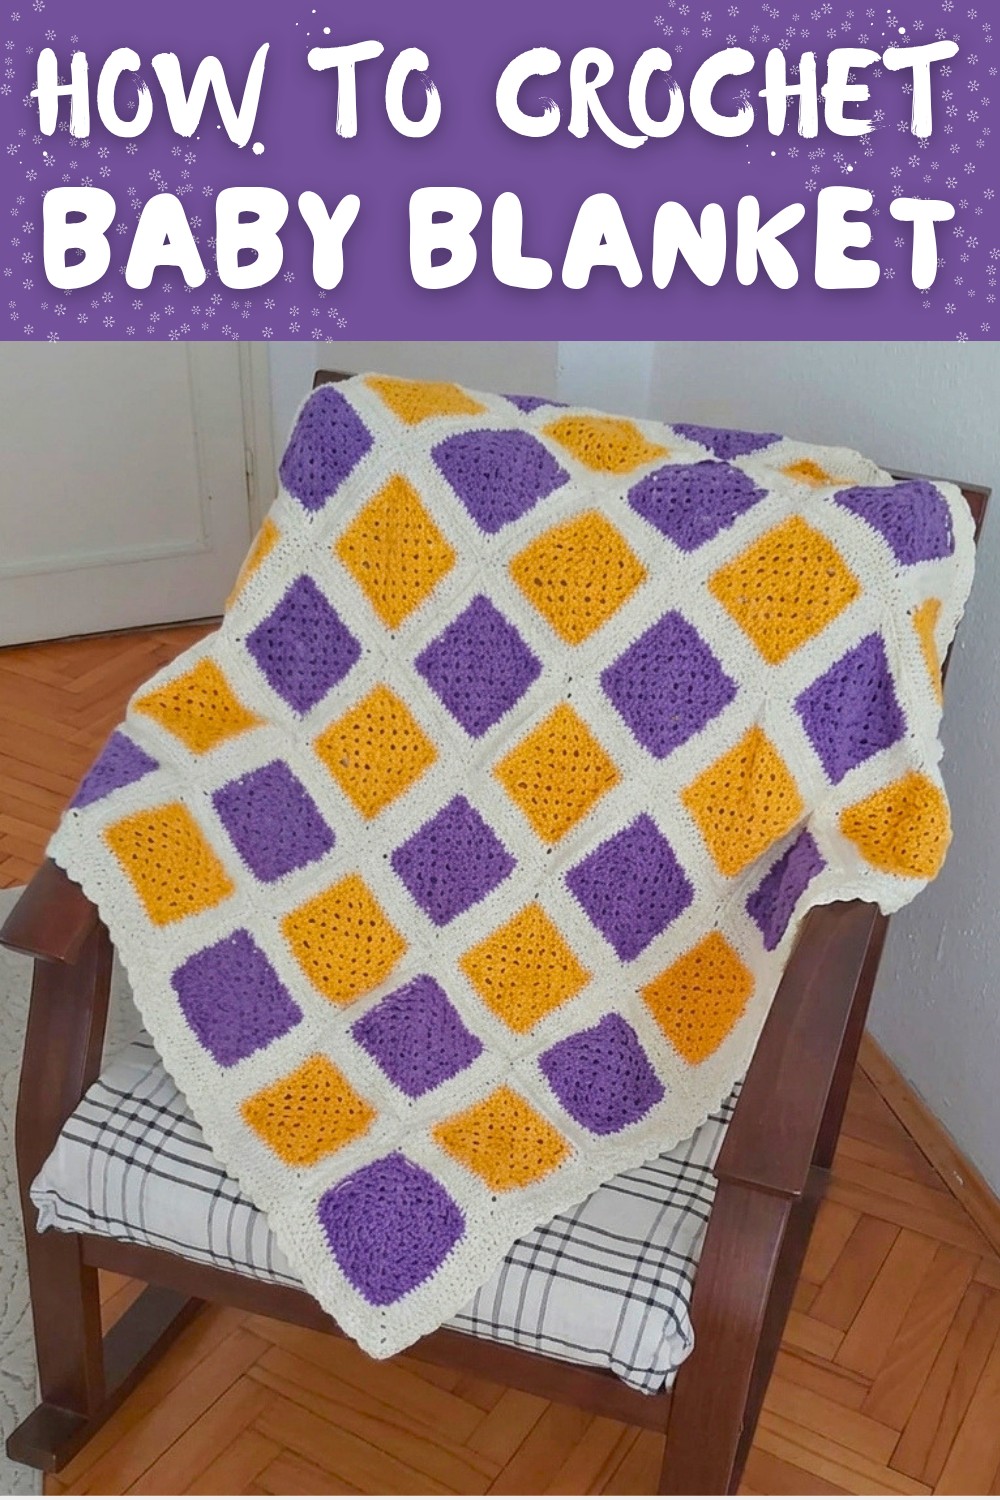
Free Crochet Baby Blanket Pattern for Warm Snuggles
Float through this free crochet baby blanket pattern and create a soft, cozy, and lightweight blanket that's perfect for keeping your baby warm and happy.
A baby blanket made with love is one of the most thoughtful and comforting gifts you can give. Using a free crochet baby blanket pattern, it's easy to make something warm, snuggly, and perfectly suited for a little one. Soft textures, gentle pastel hues, and simple yet beautiful stitches come together in these blankets to provide both comfort and charm. Plush, lightweight yarns like cotton or baby friendly blends work beautifully for this kind of project, ensuring that the finished piece feels gentle against delicate skin. Many crocheters enjoy adding interest to the blanket through playful stitch techniques such as bobbles, ripples, or puff stitches, which give the blanket a visually appealing depth without compromising on softness.
Free Crochet Baby Blanket Pattern That Add Love to Gifting
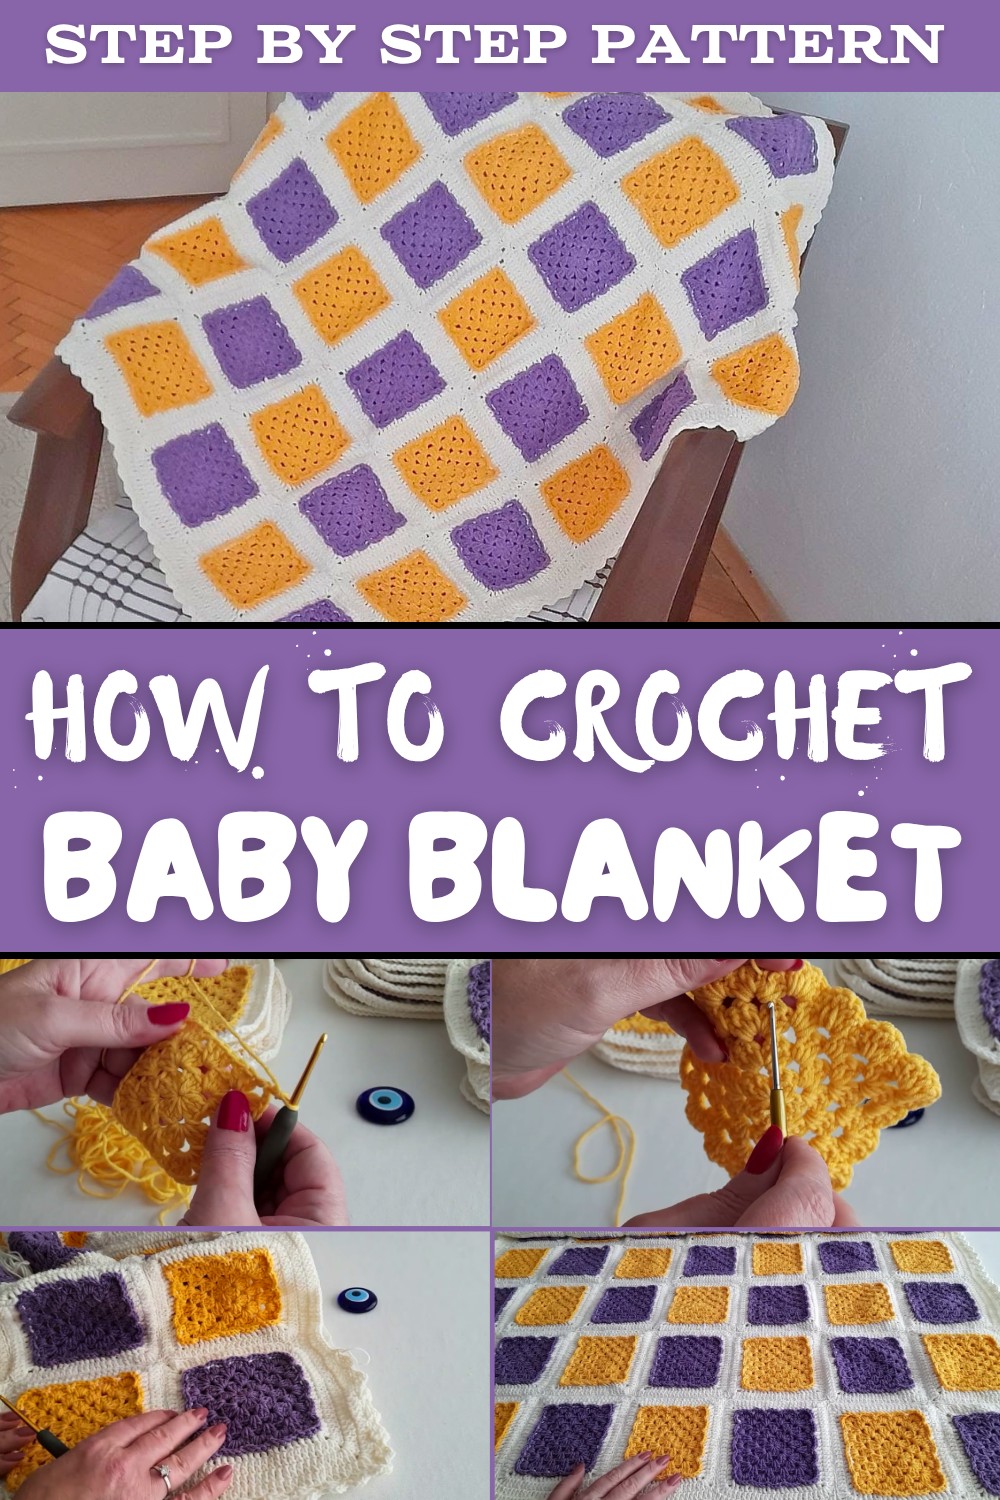
Baby blankets also offer flexibility in terms of colors and styles. Whether you choose neutral tones for a classic look or bright hues to add a cheerful vibe, the result will always be something special. Simple geometric shapes, or even connected squares are popular approaches, giving the blanket a timeless appearance that parents will cherish.
Sized perfectly for cribs, strollers, or as an extra layer of warmth, baby blankets provide both practicality and sentimentality. They are lightweight enough to carry on outings yet warm enough to keep the baby cozy during nap time. With every stitch, you're adding comfort and care to a thoughtful keepsake, designed to be used, loved, and remembered for years to come.
Crochet Baby Blanket Pattern
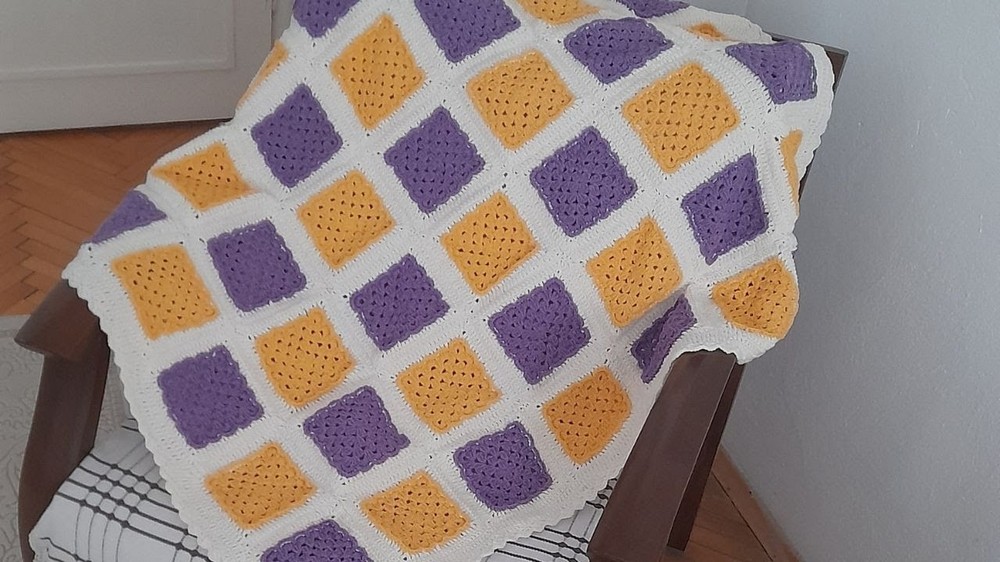
This guide follows the steps described in the given pattern to create a charming, lightweight blanket that's perfect for warm weather.
Quick Overview of Pattern
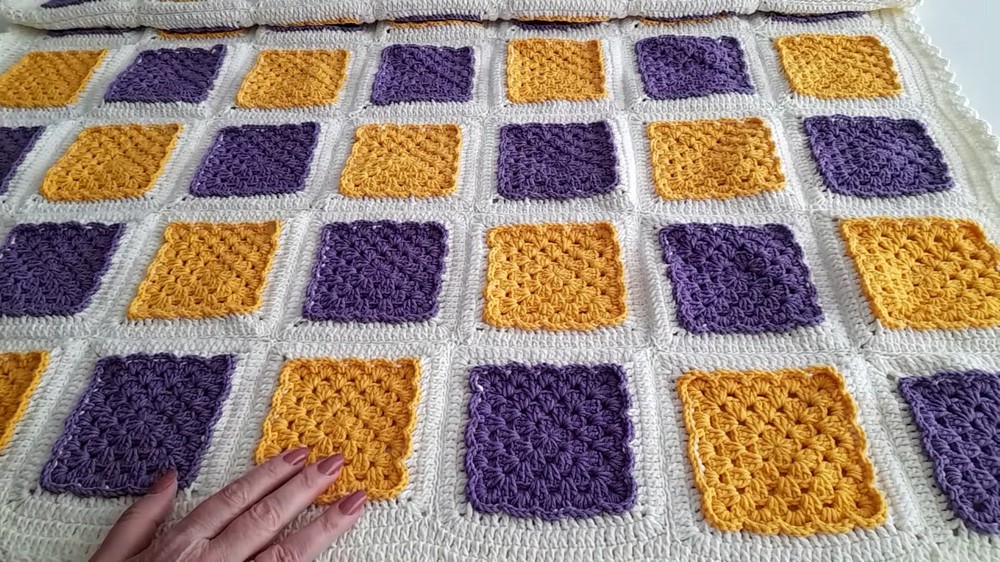
- Pattern Name: Biscuit Motif Summer Blanket
- Project: Crochet blanket ideal for summer
- Yarn Type: Cotton yarn
- Motif Type: Biscuit motif pattern
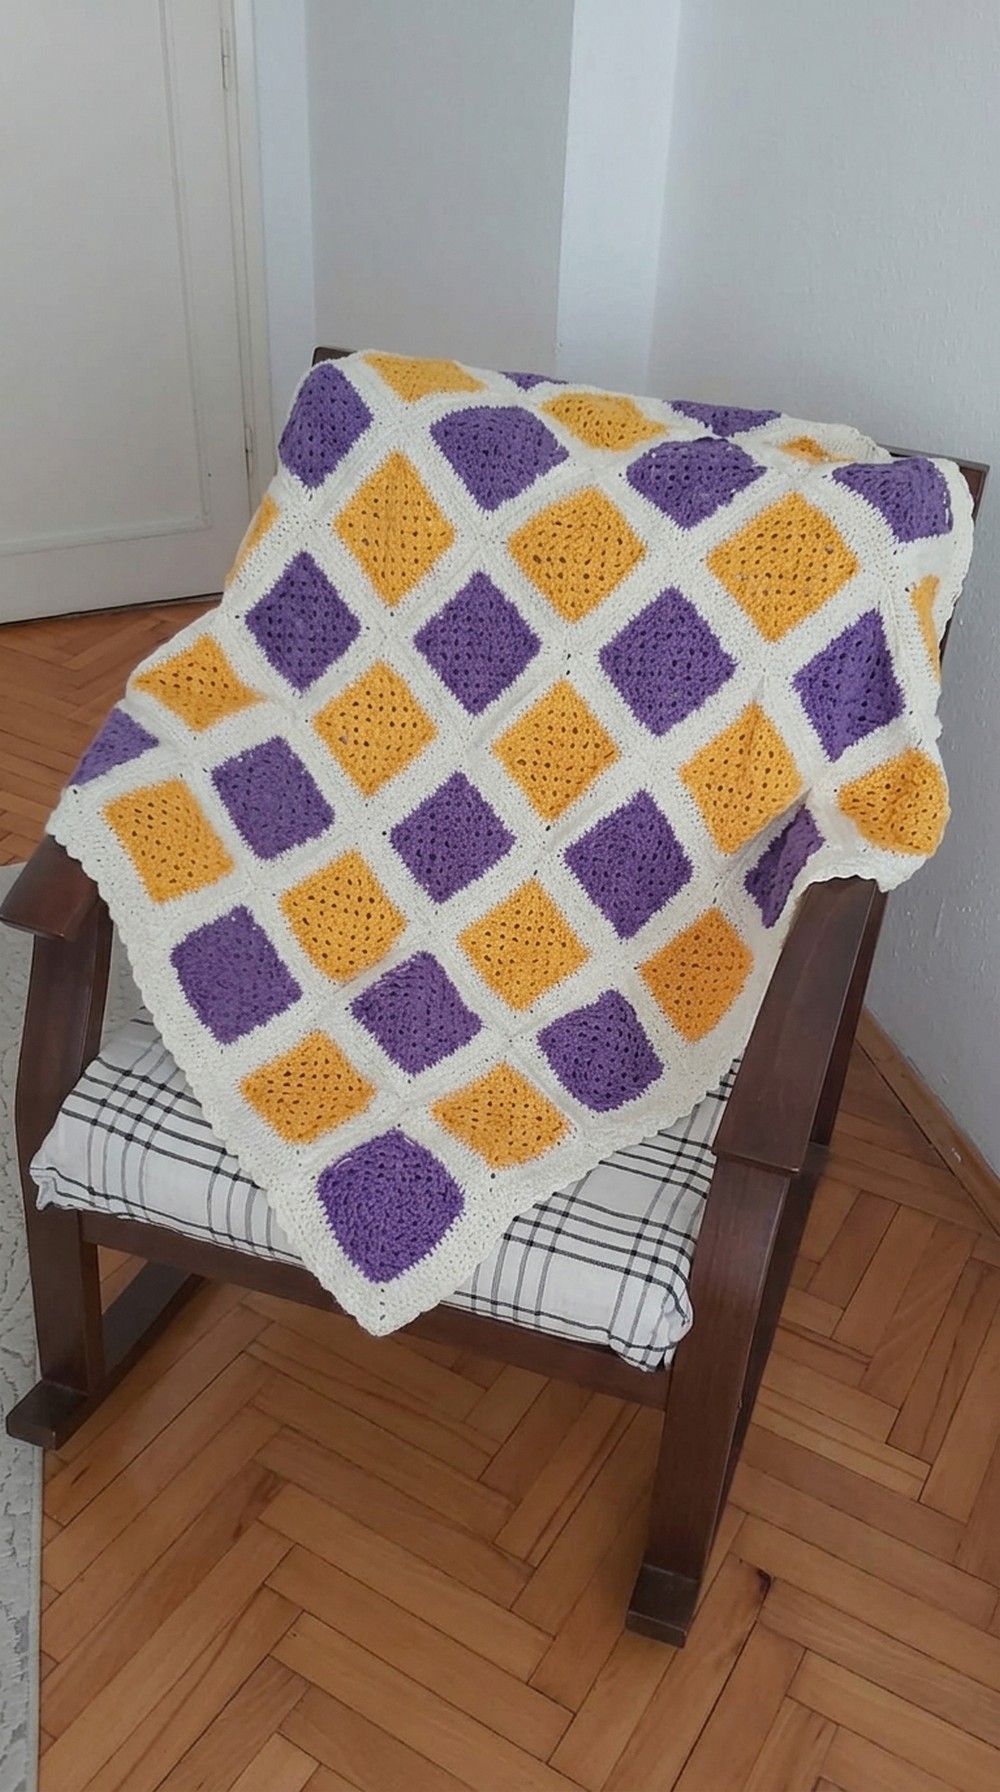
- Construction: Made of 49 motifs joined together
- Final Size: 100 cm x 100 cm (1m x 1m)
Notes
- Each motif measures approximately 14 cm x 14 cm.
- The blanket consists of 7 motifs in width and 7 motifs in length. For a smaller blanket (approximately 90 cm x 90 cm), 6 motifs can be used in both dimensions.
- Yarn usage may vary depending on personal tension or changes to the blanket size.
Skill Level
Intermediate - This pattern includes techniques such as working with magic rings, V stitches, and back post double crochet.
Materials
- Yarn: YarnArt Cotton Yarn (50 grams, approximately 160 to 170 meters)
- Color 1: Yellow (#35) - 3 skeins (24 motifs)
- Color 2: Purple (#72) - 4 skeins (25 motifs)
- Color 3: Cream (#03) - 7 skeins for edging and borders
- Crochet Hook: 3mm
- Scissors
- Tapestry/Darning Needle (for weaving in ends and joining motifs)
- Optional: Stitch markers (to help count and keep track of corners)
Measurements / Sizing
- Final Blanket Dimensions: 100 cm x 100 cm (1m x 1m)
- Motif Size: Approximately 14 cm x 14 cm
- Optional Smaller Blanket: 90 cm x 90 cm (6 motifs x 6 motifs)
Gauge
Gauge is not critical for this pattern, as the blanket is constructed of individual motifs. Ensure each motif measures approximately 14 cm x 14 cm after completing all rounds. Adjust hook size if necessary to achieve the desired dimensions.
Stitch Abbreviations
- Ch - Chain
- Sc - Single Crochet
- Dc - Double Crochet
- Sl st - Slip Stitch
- Ch sp - Chain Space
- Rep - Repeat
Special Stitches
- Magic Circle:
- Create a loop with the yarn around your fingers. Insert hook into the center, pull up a loop, and work the first crochet stitches directly into this circular loop. Pull the tail to close the circle tightly.
- Back Post Double Crochet (BPDC):
- Yarn over, insert hook from back to front around the post of the stitch (instead of through the top loops), yarn over and pull up a loop, yarn over, pull through two loops, yarn over, pull through final two loops.
The Crochet Pattern
Step 1: Create Individual Biscuit Motifs
Round 1:
- Make a magic circle.
- Ch 3 (counts as 1 dc).
- Make 3 dc into the magic circle, and ch 2 (this forms the first corner).
- Repeat [3 dc into the magic circle, ch 2] three more times to create a total of 4 groups of 3 dc stitches (each group separated by 2 ch).
- Draw the magic circle tightly closed.
- Ch 1 and sl st into the top of the starting ch 3.
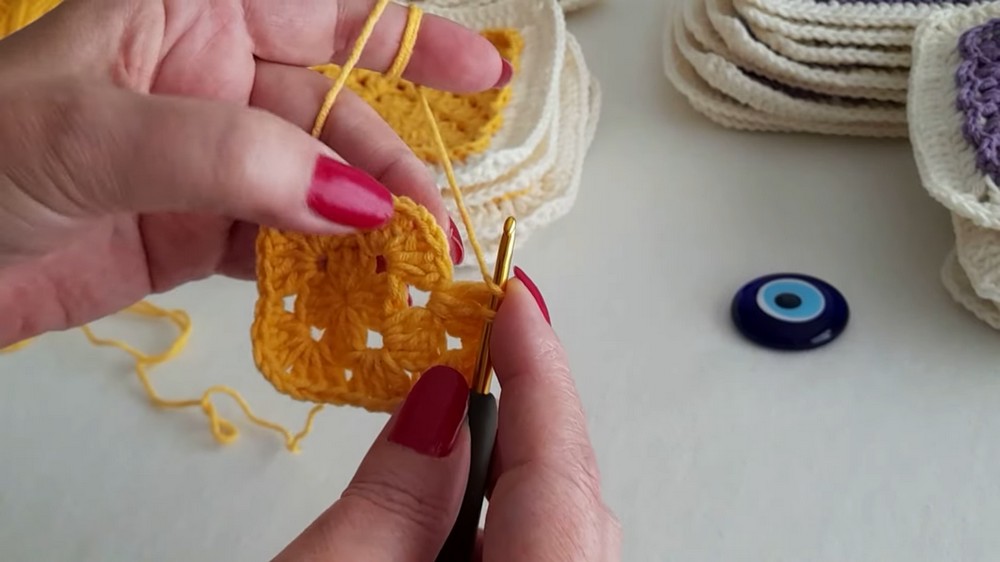
Round 2:
- Ch 3 (counts as 1 dc). This is your starting stitch for the first corner.
- In the same ch sp of the previous round:
- Make 2 dc after the initial ch 3 (half a corner formed).
- Do not chain; proceed directly to the next corner space.
- In the next corner ch sp:
- Make [3 dc, ch 2, 3 dc].
- Repeat the above step for each remaining corner.
- Finish the round with 3 dc in the starting corner space.
- Sl st into the top of the starting ch 3 to close the round.
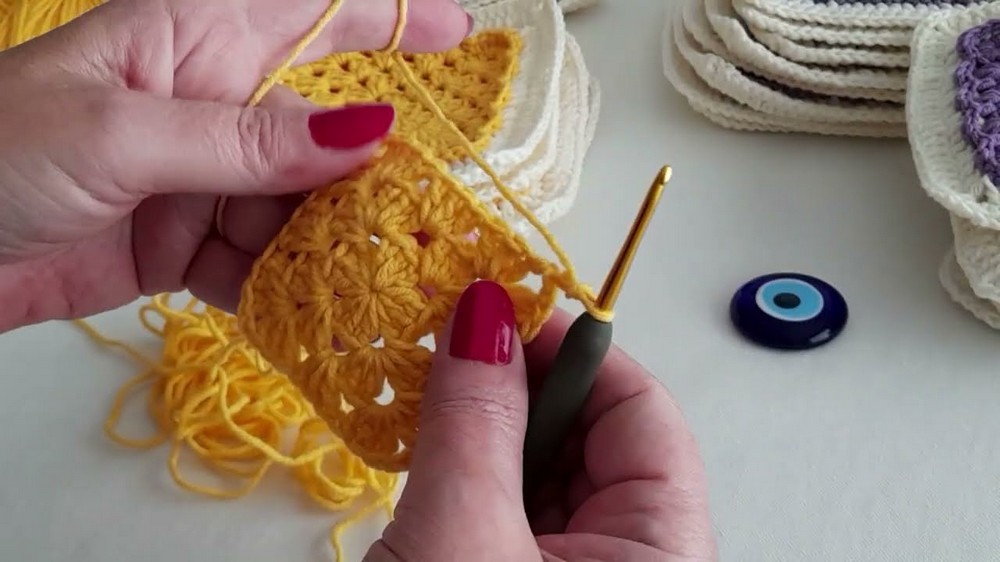
Round 3:
- Ch 3 (counts as 1 dc).
- In the same corner ch sp:
- Make [3 dc]. This is half a corner.
- Do not chain; proceed to the next spaces.
- For each side, work 3 dc into each side space (no chaining between groups).
- For each corner, work [3 dc, ch 2, 3 dc].
- Finish the round with 3 dc in the starting corner space.
- Sl st into the top of the starting ch 3 to close the round.
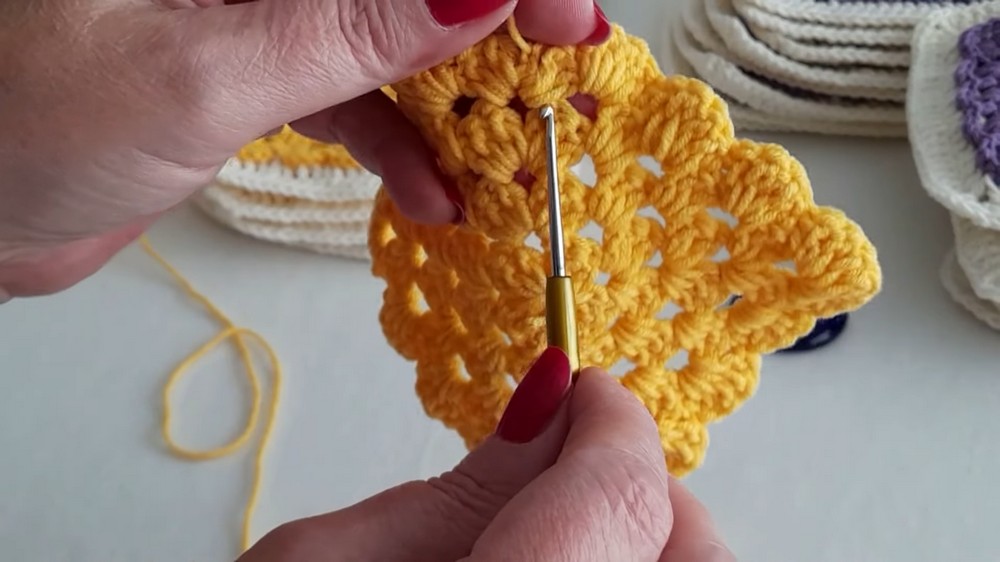
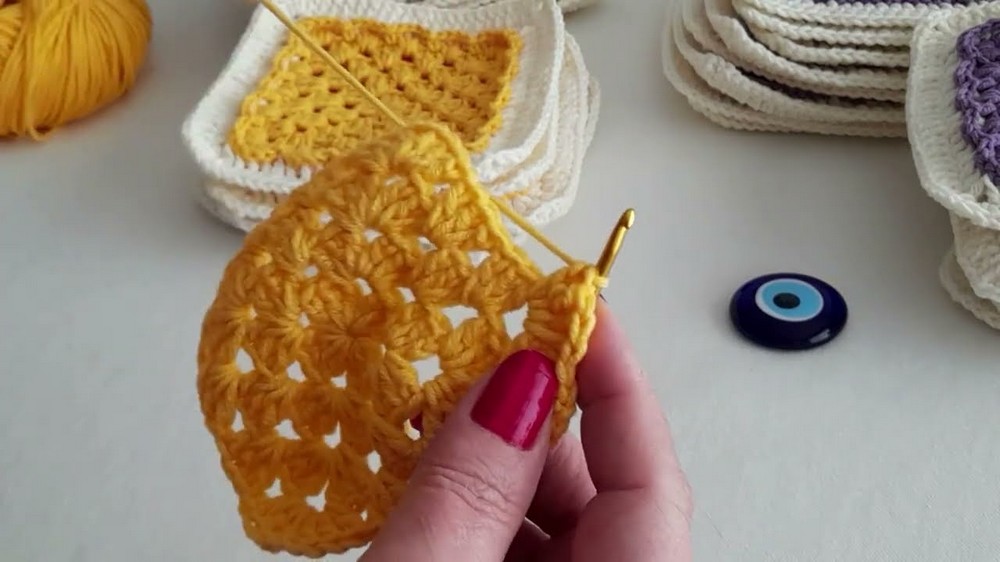
Step 2: Adding Final Detailing to Motif Edges
Round 4:
- Start from a corner space. Ch 1 and make 3 sc.
- Work 4 dc into each side space, then sl st into the 2nd dc of groupings made in the previous round.
- For corners, make [7 dc].
- Continue all around the motif, sl st to close the round at the end.
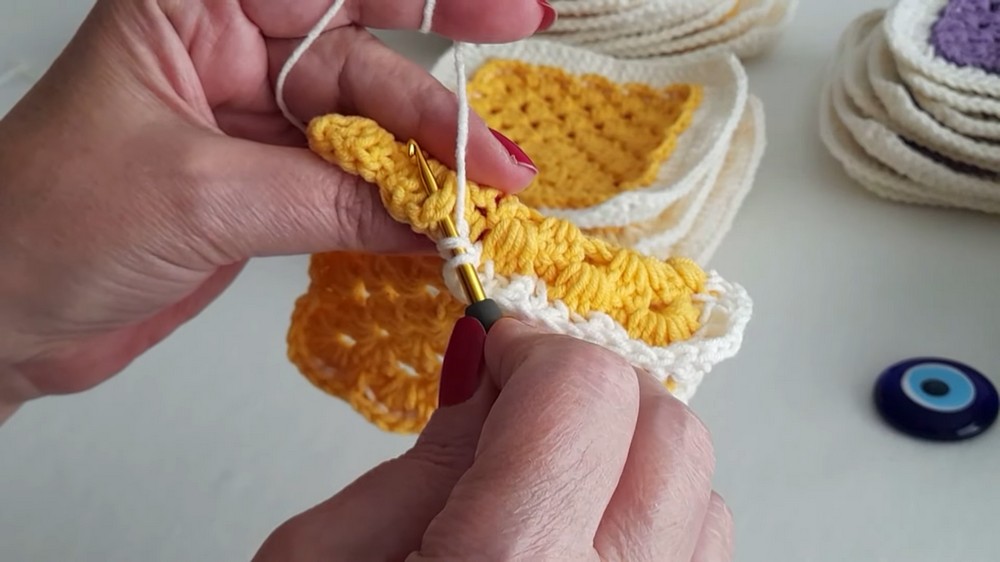
Clean Up Ends:
- Weave in ends carefully using a tapestry needle and work stitches to secure leftover yarn into the motifs.
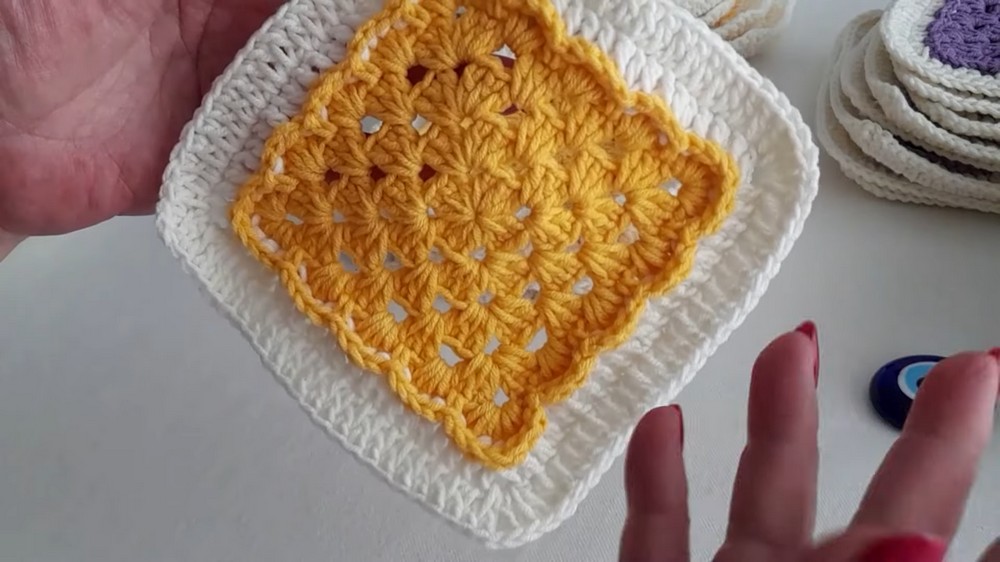
Assembly & Finished Size
Joining Motifs:
- Lay out motifs in a 7x7 grid (or chosen sizing if adjusting). Alternate colors for a balanced design.
- Align V shaped stitches at the corners of motifs and stitch pairs together using matching yarn. Ensure seam stays firm but flexible.
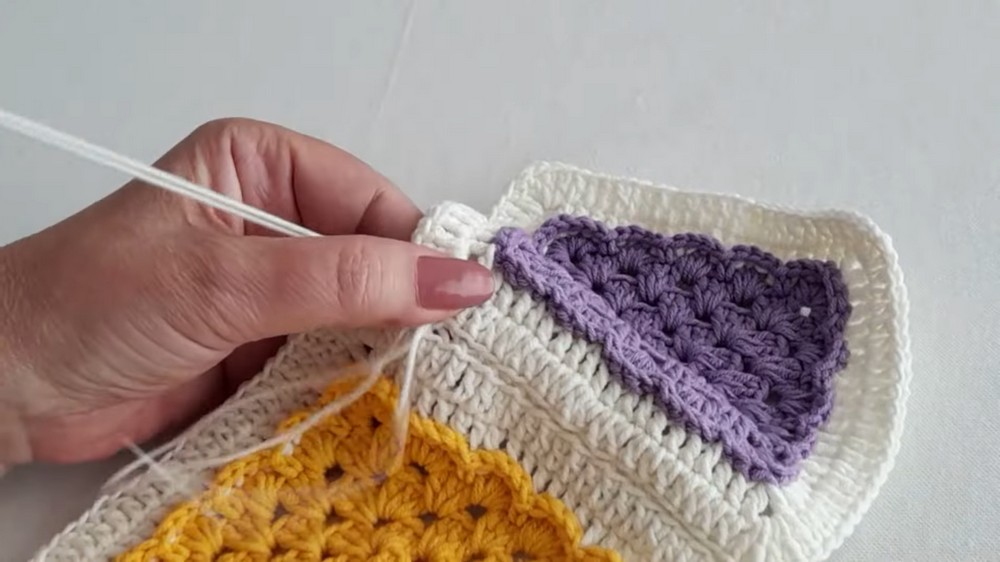
Border:
- First Border Round:
- Work one round of bpdc (back post double crochet) stitches along all edges of the blanket.
- In corners, work [3 dc into the corner, ch 2, 3 dc into the same space].
- Second Border Round:
- Make one additional round of bpdc stitches along the edges.
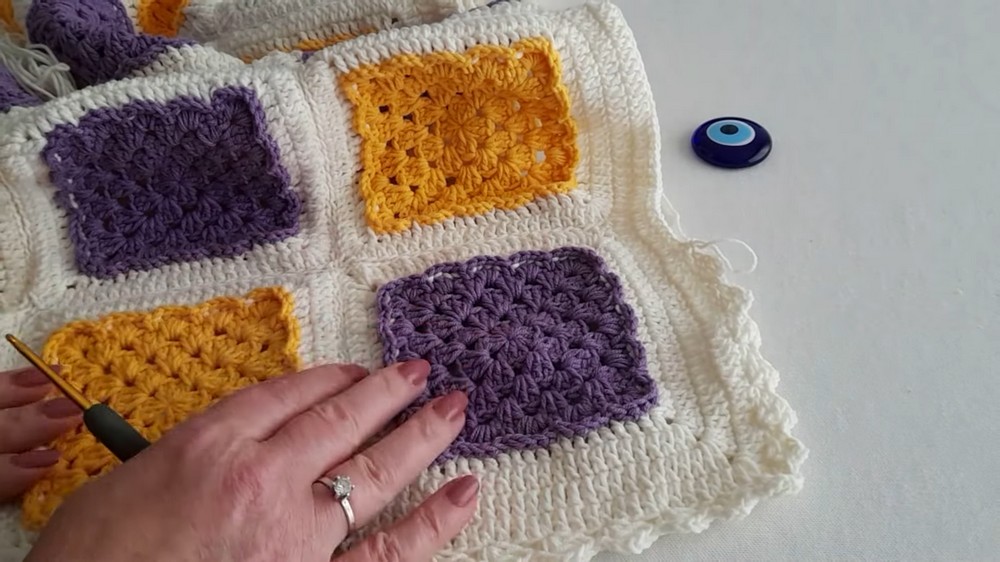
Tips for a Perfect Crochet Baby Blanket Pattern
- Choose the Right Yarn: For a summer-friendly blanket, choose cotton or lightweight yarn. This will keep the blanket breathable and ideal for warm weather use.
- Maintain Consistent Tension: Ensure your stitches are even for all motifs; this helps the blanket lie flat and look uniform. Blocking finished motifs can also help smooth things out.
- Use a Smaller Hook for Seaming: When sewing or joining motifs, consider using a smaller hook for a more seamless look. This helps create tighter joins, which will provide a neater finish.
- Plan Your Color Pattern: Before sewing motifs together, lay them out in the desired design. This will help ensure that you get the checkerboard effect or any other color combination you have in mind.
- Keep Edges Clean: When transitioning between different motifs, carefully hide all loose ends between stitches for a polished finish.
- Adapt the Size: Change the blanket's size easily by adding or removing motifs. Stick to the basic pattern, but calculate how much yarn you'd need before starting.
- Relax and Have Fun: The biscuit motif is beginner-friendly and repetitive, so enjoy the process. Crochet is as much about the journey as it is the result!
Conclusion and Finishing Up
Congratulations, Your Crochet Baby Blanket Pattern is now complete. This charming piece will surely bring warmth and style to your home without compromising on a lightweight feel for summer use. Whether as a gift or a personal project, it's perfect for crocheters who love working with motifs. Enjoy your beautiful creation and feel free to experiment with different color schemes or sizes to make it uniquely yours.