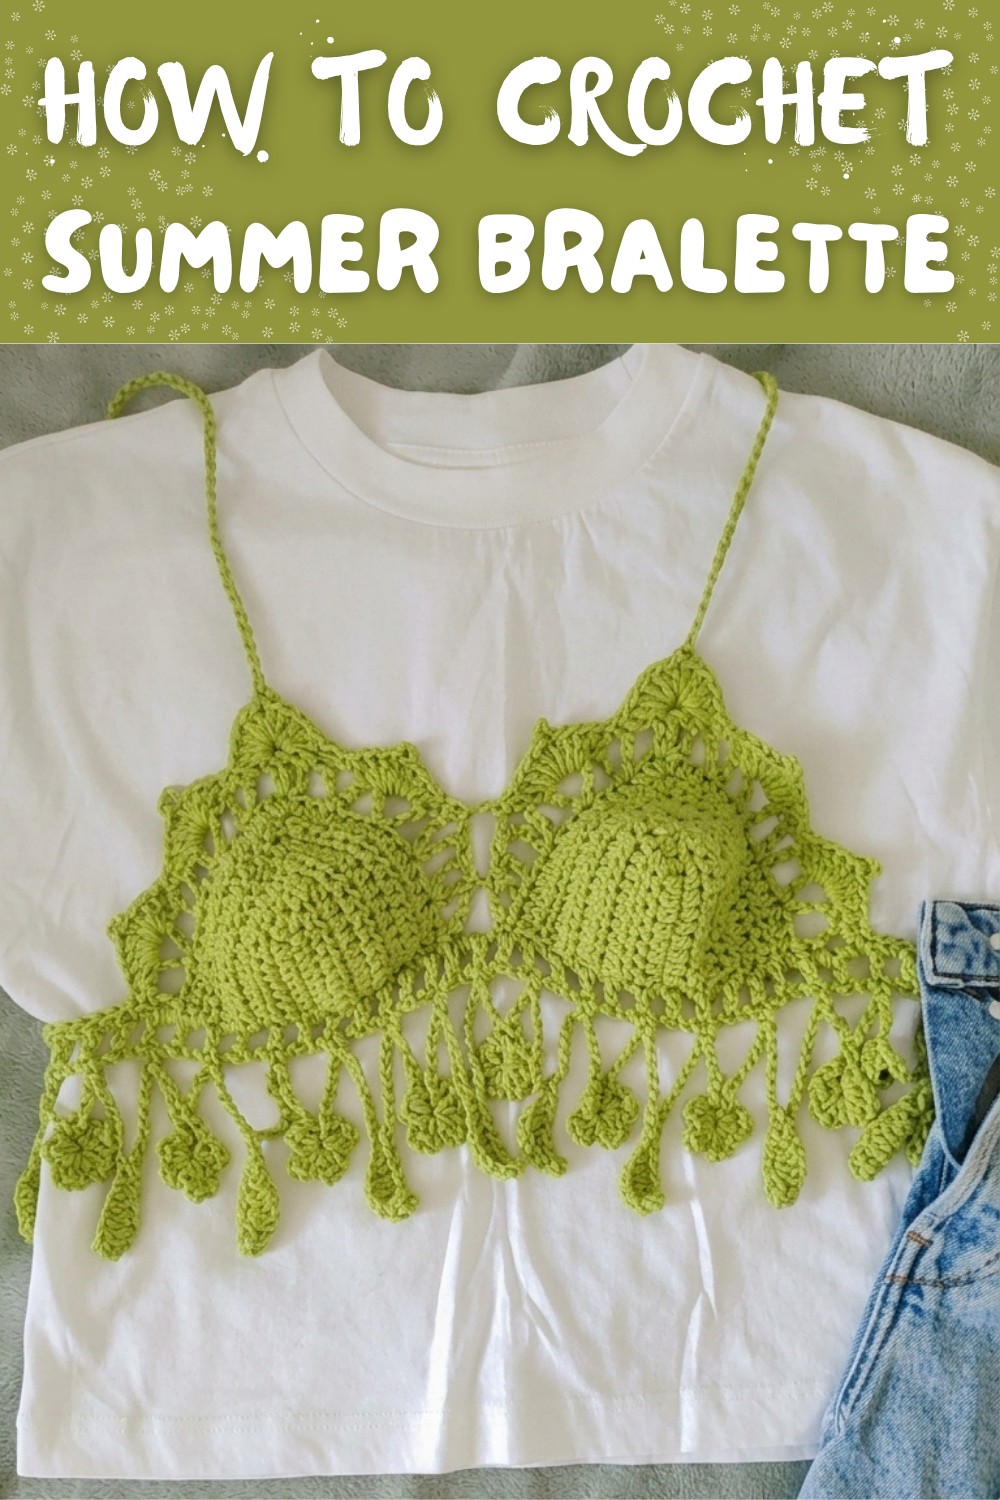
Free Crochet Bralette Summer Pattern With Elegant Stitches
Complete your summer outfits with this Free Crochet Summer Bralette Pattern, showcasing breathable stitches, unique flower detailing, and adjustable sizing options.
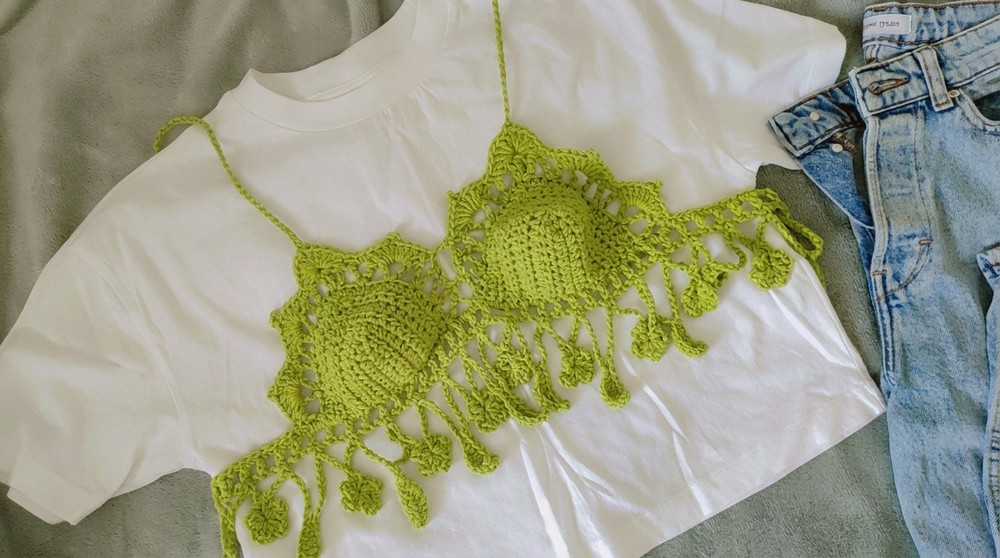
Looking for the perfect summer top that combines comfort and elegance? This beautiful design features classic cups with a delicate lace pattern underneath, creating a lightweight and breathable bralette ideal for warm days. Using the Free Crochet Summer Bralette Pattern, you'll create a versatile piece that's both stylish and functional. The design is adjustable for different sizes, as the cup size can be customized with simple increases. The lace detailing adds a romantic touch, and the inclusion of charming leaves and flowers around the underbust elevates its look, making it stand out as a must-have summer accessory.
Adjustable Free Crochet Summer Bralette Pattern You'll Love Wearing
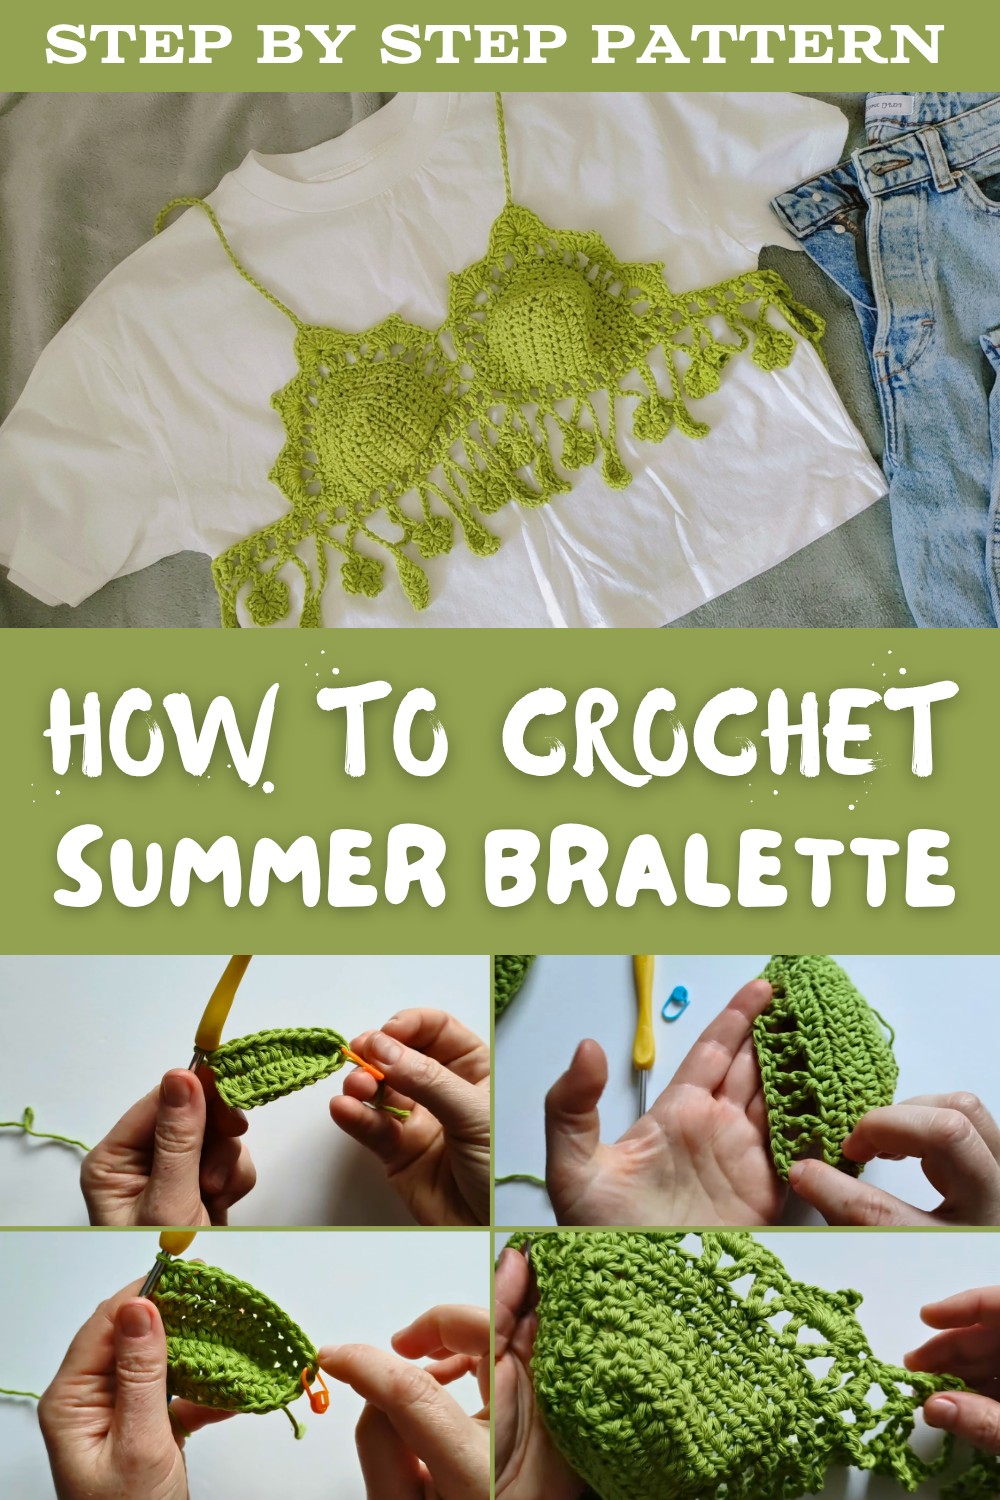
The project uses basic stitches like half double crochet, trebles, and chains, making it beginner-friendly while still offering intricate details like picots on the edges for a polished finish. The bralette is tied at the back with a long chain, providing a secure but flexible fit.
Whether you want to wear it for a beach day, as festival wear, or even layered under tops, this project offers a customizable and stylish wardrobe staple. With step-by-step instructions, it's an easy way to craft something unique, beautiful, and perfect for summer fun.
Step-by-Step Crochet Pattern - Summer Top
Required Materials
- Yarn: Any medium-weight (Category 4) cotton yarn is recommended for comfort and durability in warm weather.
- Amount: Approximately 150-200g (depending on size).
- Suggested colors: Light pastel shades, neutral tones, or bright summer colors based on your preference.
- Crochet Hook: 4 mm or the hook size needed to match your gauge.
- Stitch Markers: To mark the center of the cups and ensure correct placement during the increases.
- Scissors
- Tapestry Needle: For weaving in ends securely.
- Measuring Tape: To customize the size of the cups and lace portion.
Special Techniques
- Half Double Crochet (hdc): Yarn over, insert the hook into the stitch, pull up a loop, yarn over again, and pull through all three loops on the hook.
- Treble Crochet (tr): Yarn over twice, insert the hook into the stitch, pull up a loop, [yarn over, pull through two loops] three times.
- Picot: Chain 3, insert the hook into the base of the chain, yarn over, and pull through in a slip stitch.
- Making Leaves and Flowers:
- Leaf: Combines single crochet (sc), half-double crochet (hdc), and double crochet (dc) stitches with a slip stitch to create a leaf shape.
- Flower Petals: Created with chains, slip stitches, hdc, and dc stitches.
Gauge
- Gauge for Cups: 4 rows of hdc = 1.5 inches in height.
- Gauge for Lace Under-Bust Pattern: 6 trebles = 4 inches in width.
- Adjust hook size if necessary to meet these measurements for an accurate fit.
Pattern Steps
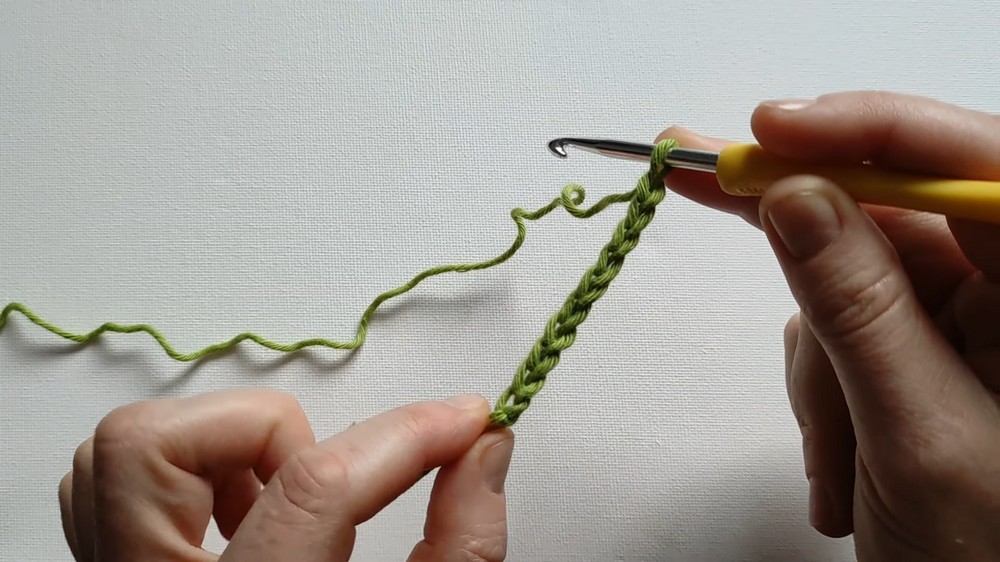
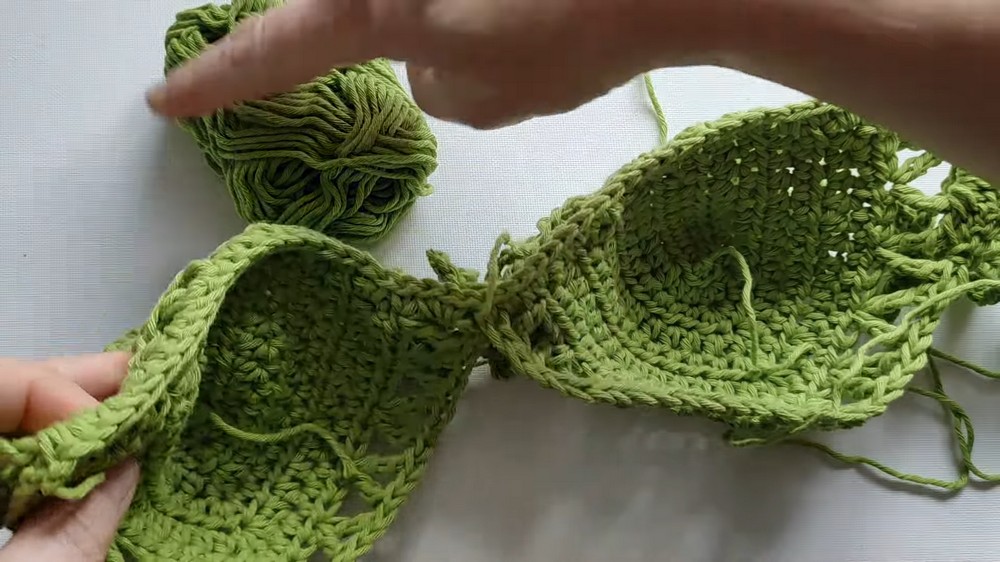
Step 1: Create the Cups
Foundation:
- Chain 10 (for size S). If creating a larger size:
- For size M: Chain 12-14.
- For size L: Chain 16 or more.
- This chain should correspond to the vertical distance from the nipple to the bottom of your bust. Adjust accordingly.
Row 1:
- Hdc in the second chain from the hook, and continue making 8 hdc across the chain.
- In the last chain stitch, place 3 hdc. This forms the top center point of the cup.
- Mark the second hdc of the 3 hdc. This will be your increase point for subsequent rows.
- Work 8 hdc back down the other side of the chain.
- Chain 1, turn your work. (The turning chain does not count as a stitch.)
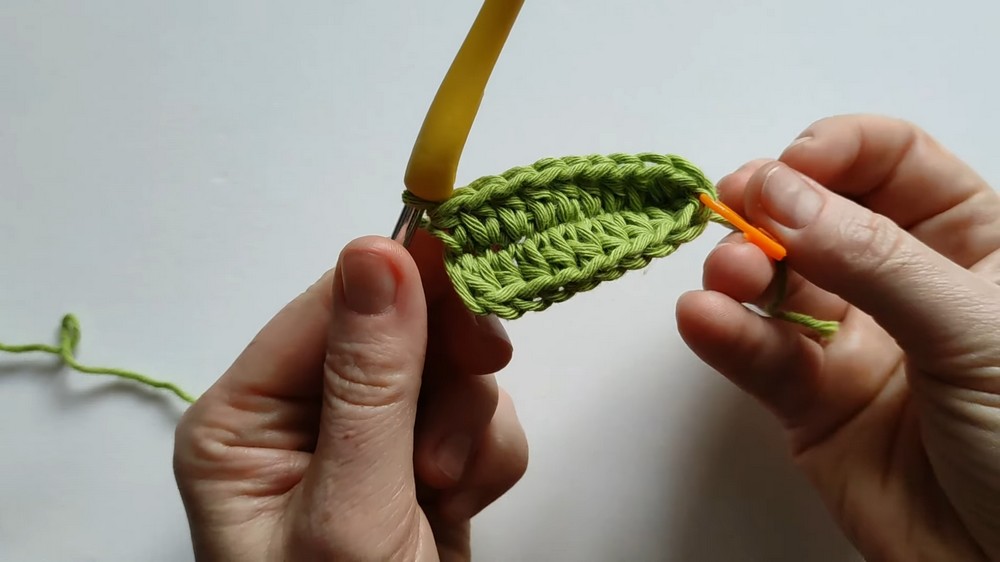
Rows 2-7:
- Work 1 hdc into each stitch along the first side.
- At the marked stitch (top-center point):
- Place 3 hdc, and reinsert the stitch marker into the middle hdc to maintain your increase point.
- Continue with 1 hdc in each stitch along the other side.
- Chain 1, turn.
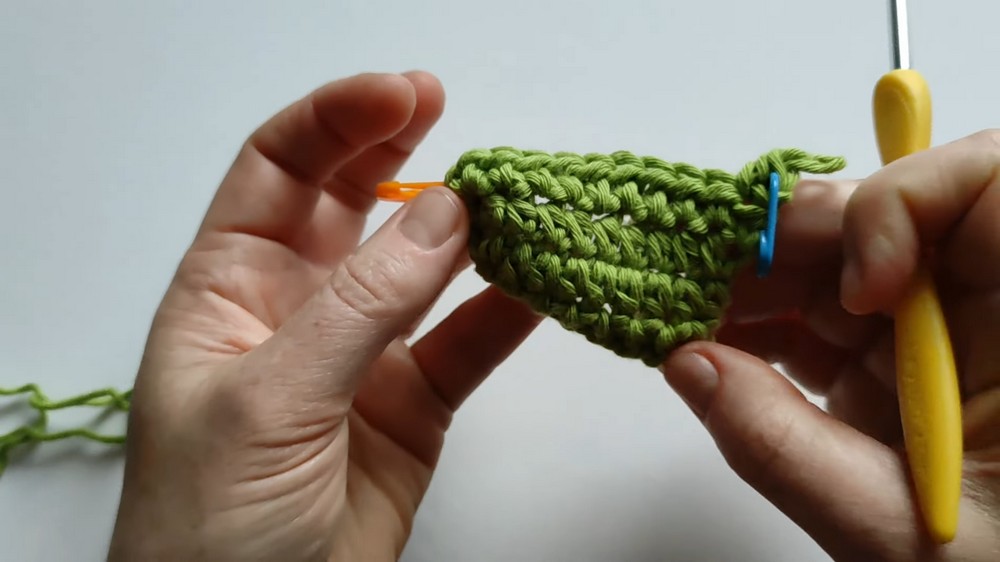
Continue working this pattern until the cups reach the desired size (typically 6-7 rows for size S/M). Increase the number of rows for larger sizes as needed.
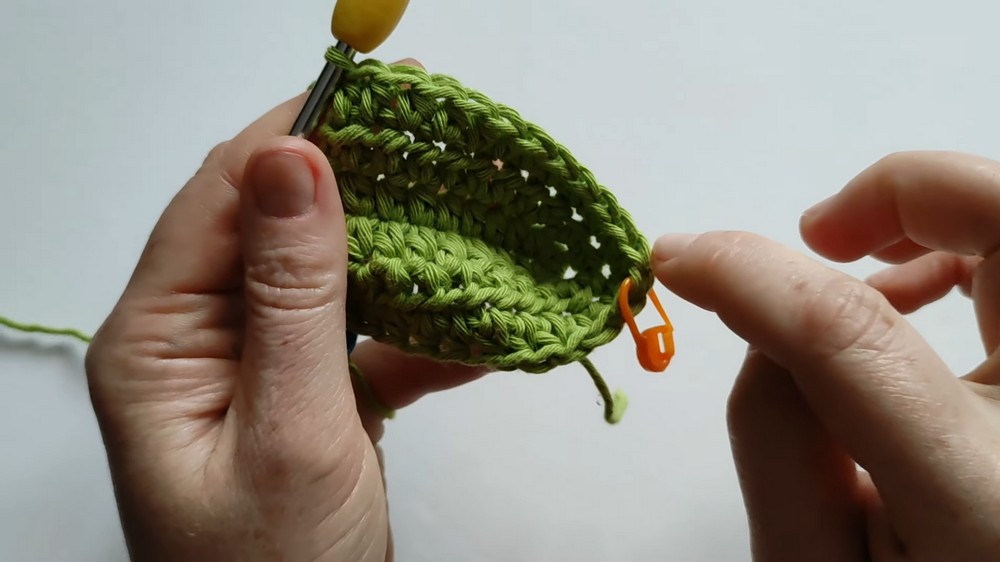
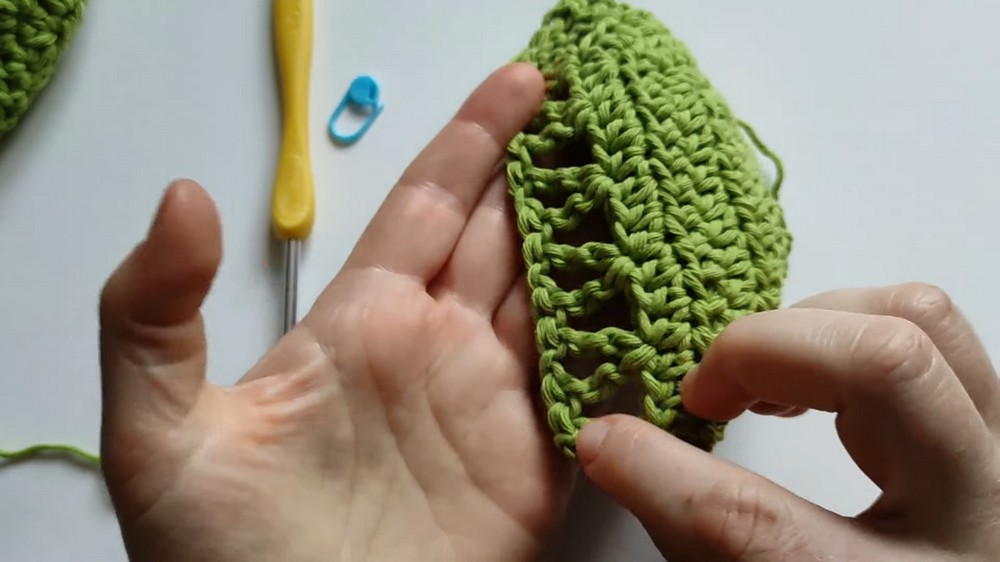
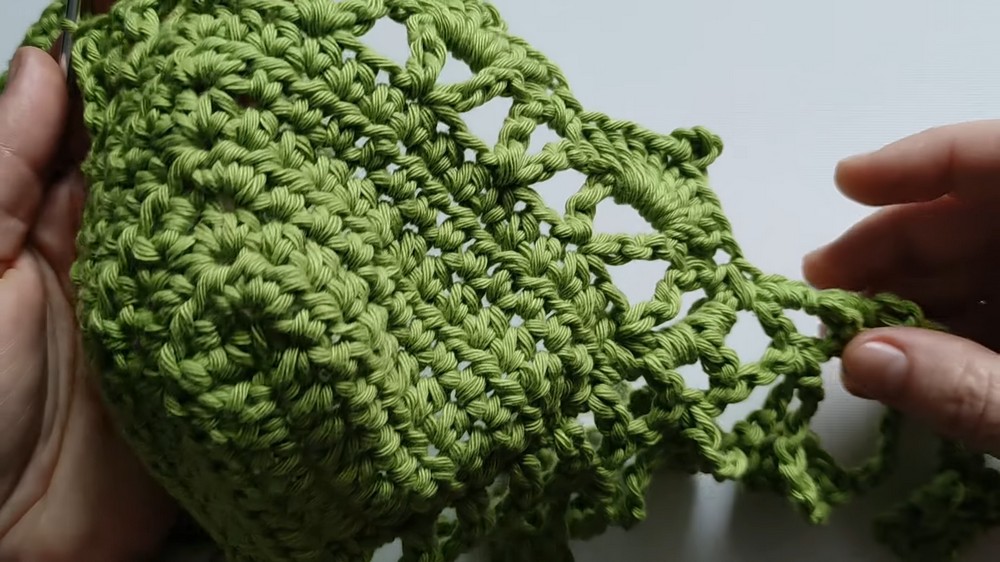
Step 2: Add the Lace Design on the Cups
- Chain 4 after completing the last hdc row of the cup. This acts as the turning chain for treble stitches.
- Work the following lace pattern:
- Treble crochet (tr) in the same stitch, skip two stitches, work:
- *[1 tr, chain 1, 1 tr] in the third stitch.
- Repeat this pattern across the row until you reach the center.
- Treble crochet (tr) in the same stitch, skip two stitches, work:
- At the marked top-center stitch:
- Place 3 trebles. This maintains the cusp of the cup's shape.
- Continue the lace pattern down the other side:
- [1 tr, chain 1, 1 tr] in every third stitch.
- If the pattern doesn't fit perfectly at the bottom edge, modify by skipping 1 stitch instead of 2.
- Fasten off, leaving a long tail to weave in.
Repeat the steps for the second cup.
Step 3: Design the Under-Bust Lace Pattern
- Foundation Row:
- Create a chain that fits snugly around your under-bust circumference.
- Work [1 dc, chain 1, 1 dc] into every third chain.
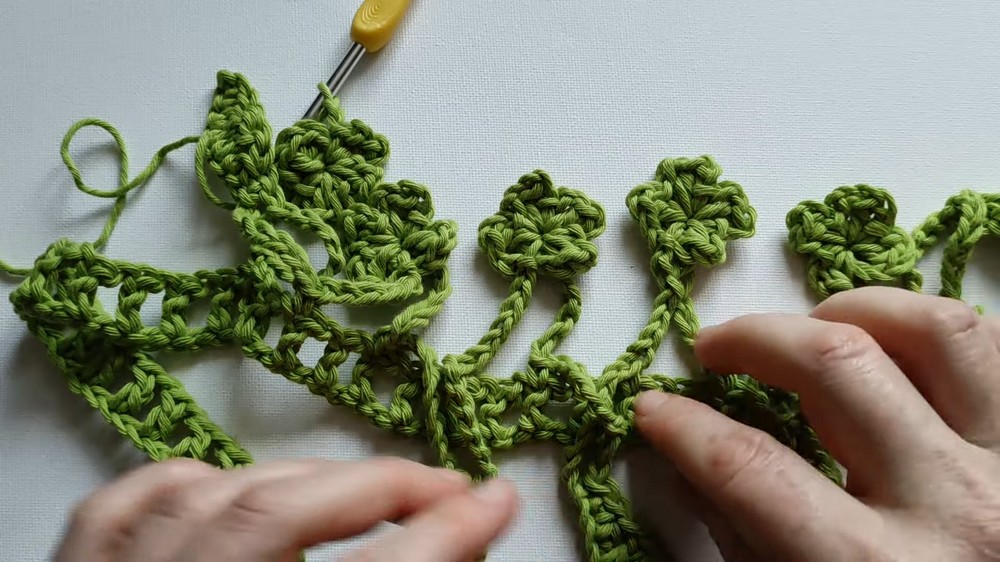
- Leaves and Flowers:
- Leaf:
- Chain 16, turn and skip the first chain.
- Work in sequence: 1 sc, 1 hdc, 2 dc together, 1 dc, 1 hdc, 1 sc, slip stitch.
- Flower:
- Chain 6, slip stitch into the third chain to form a circle.
- Into the circle: [Chain 2, 1 hdc, chain 2, slip stitch] to create 4 petals.
- Leaf:
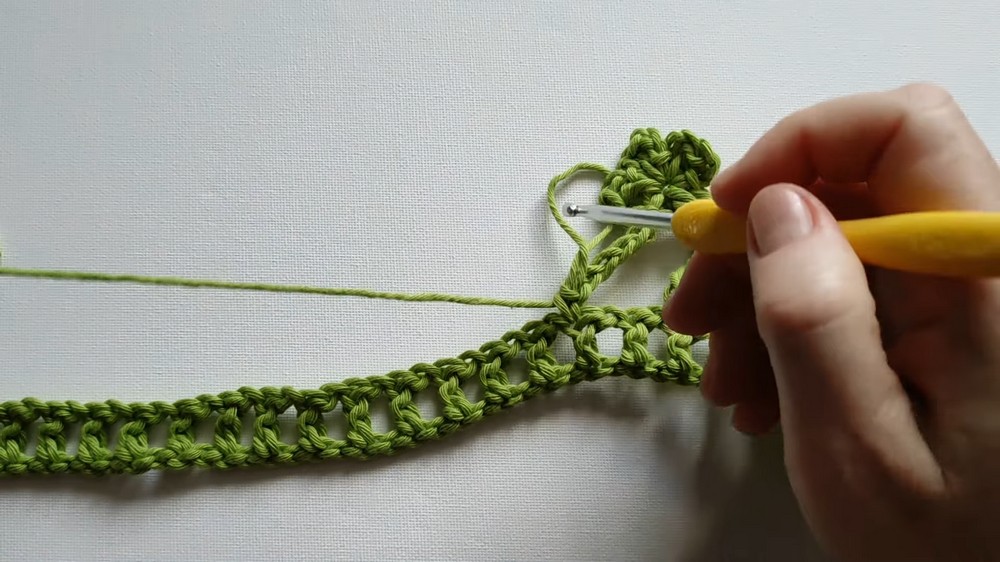
Alternate between leaves and flowers as desired for your preferred look.
- Straps:
- Attach yarn to the top points of the cups. Create one long chain that ties at the back or goes over the shoulders, meeting the under-bust lace for a halter design.
Step 4: Add Scallop Edging
- Work the scallops along the edges of the cups:
- [4 dc, picot, 4 dc] into the chain spaces or stitches between clusters.
- Work 5 dc, picot, 5 dc at the top-center point.
- The scalloped detail creates a polished and decorative finish.
Finishing the Lace Portion
- Attach the cups to the lace under-bust panel:
- Use single crochet or whip-stitch with a tapestry needle to join.
- Ensure the cups are evenly spaced and aligned.
- Weave in all loose ends securely.
Final Words & Tips
- Stretch While Measuring: Crochet fabric is stretchable, so slightly stretch your fabric when fitting the cups or lace portion.
- Blocking: Lightly block your top to ensure your stitches settle and the lace pattern lays flat.
- Secure Decorations: If your lace flowers and leaves dangle too loosely, consider sewing them in place to make them more stable.
- Customizations:
- Experiment with color changes for stripes or use variegated yarn for added texture.
- Add beads or sequins to the flowers for a decorative touch.
Conclusion
Congratulations on completing your summer top bralette with lace design! This lightweight and comfortable piece is a wonderful project that combines practicality with elegance. Wear it as a stand-alone piece or layer it over your favorite outfit for a fashionable summer look.