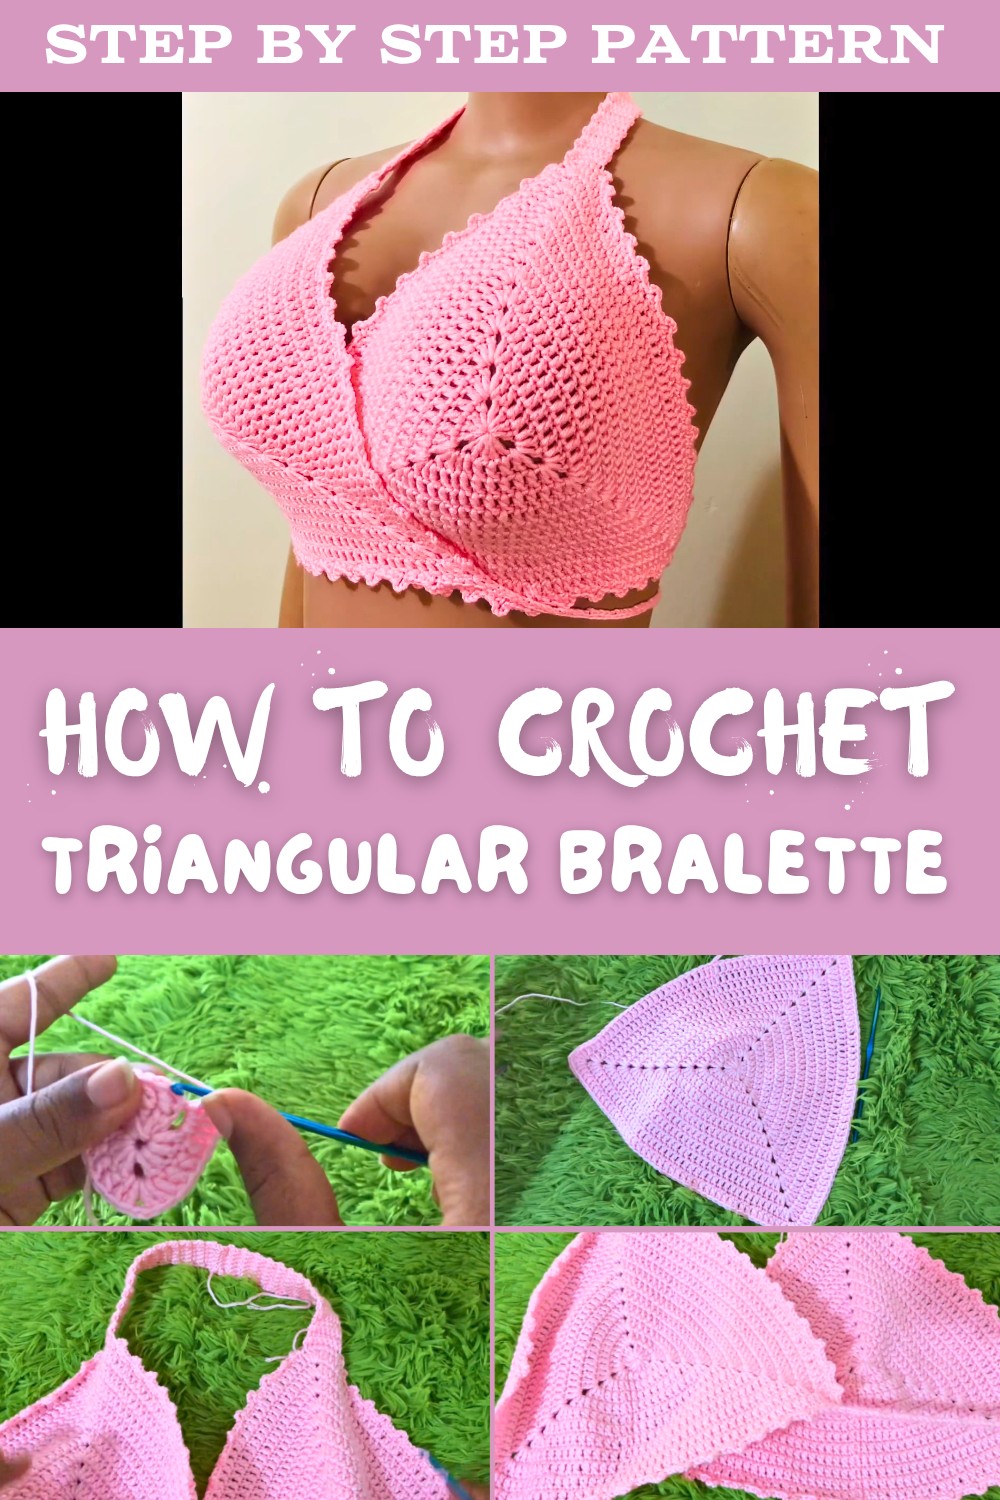
Free Crochet Triangular Bralette Pattern with Easy Step-by-Step Instructions
Learn how to make a stylish and comfy triangular crochet bralette that’s perfect for summer, easy to pair with any outfit, and fun to wear everywhere.
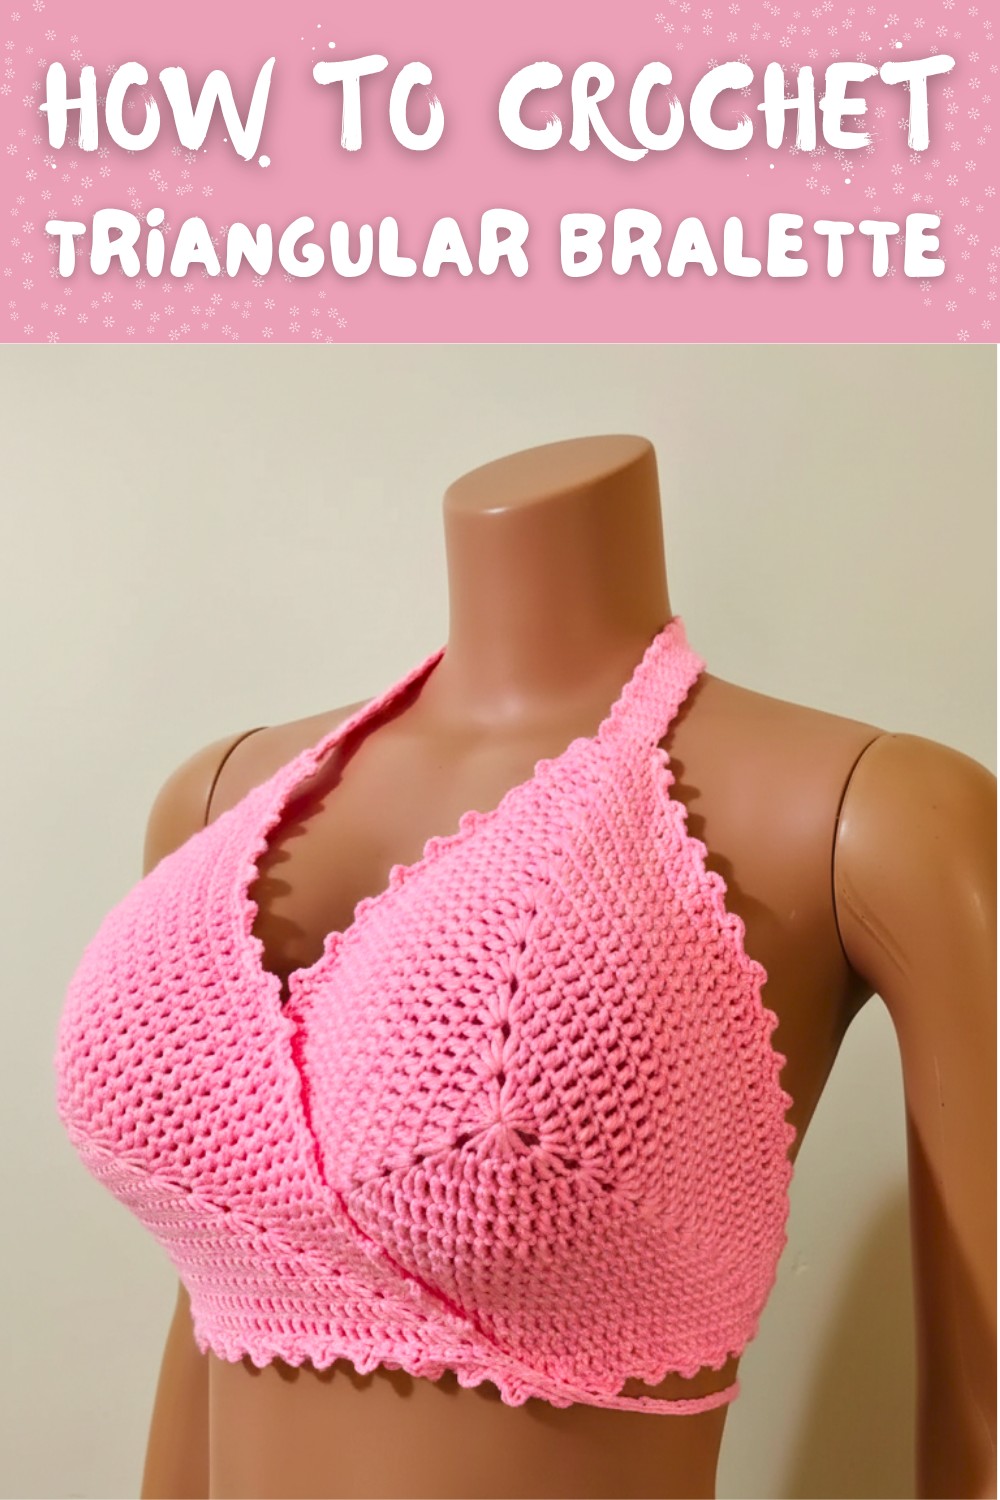
Soft, stylish, and perfect for sunny days, this beautiful piece of clothing is all about comfort and charm. Its triangle shape adds a chic and modern look, while the lightweight texture makes it ideal for summer fun or relaxing at home. The simple yet elegant design pairs effortlessly with skirts, shorts, or even under jackets, turning any outfit into something unique and fashionable.
Its versatility makes it perfect for the beach, music festivals, or casual outings with friends. The soft material feels gentle on the skin, offering both comfort and style in one. Available in endless colors and customizable to your vibe, this item stands out as a symbol of creativity and self-expression. A perfect combination of beauty, practicality, and individuality, it’s a must-have for any wardrobe.
Free Crochet Triangular Bralette Pattern You Can Make in 12 Rows
Crochet Triangular Bralette: Step-by-Step Pattern
Skill Level
Intermediate
Materials
- Yarn: Medium-weight yarn (Category #4) such as acrylic or cotton yarn.
- Hook: 4mm (G-6) crochet hook.
- Scissors: To cut yarn.
- Darning Needle: For weaving in ends and finishing.
- Stitch Markers (Optional): To keep track of specific sections like chain spaces.
Key Abbreviations
- ch: Chain
- sc: Single Crochet
- dc: Double Crochet
- sl st: Slip Stitch
- st: Stitch
Special Notes
- Adjustable Sizing:
- Increase the number of rows in each cup for more coverage.
- Adjust the chain lengths for straps as per your fit requirement.
- Seam Alignment: Always position the seam line at the bottom of the cups for a polished finish.
- Optional Colors: Use contrasting or complementary colors for ribbing or borders.
Pattern Instructions
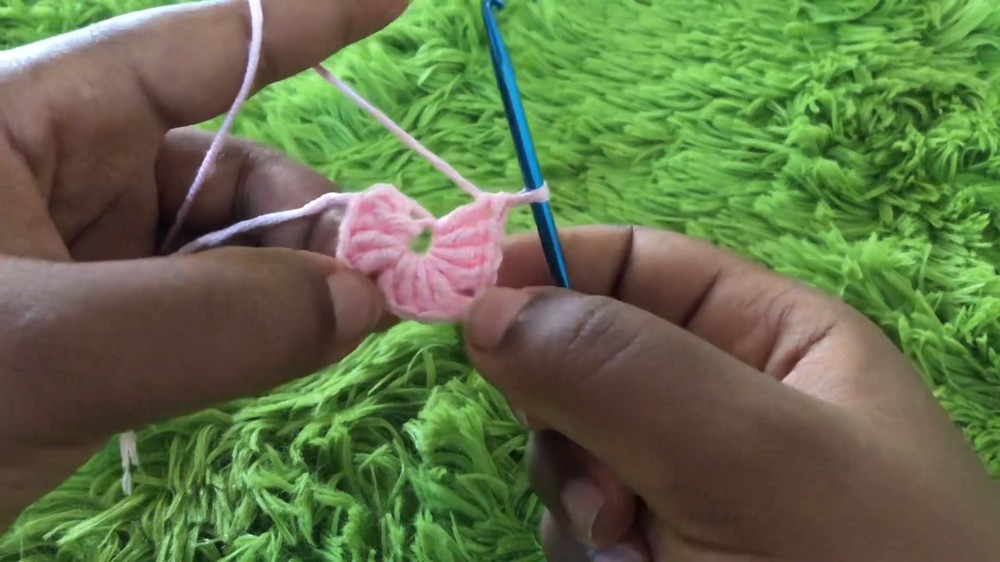
Step 1: Constructing the First Triangular Bra Cup
Foundation Row
- Create a magic circle:
- Wrap the yarn around your fingers to form a loop and secure it.
- Insert your hook, pull up a loop, and ch 2 (this does not count as a stitch).
- Work into the magic circle:
- Make 4 dc into the ring, ch 2, then make 4 dc into the same magic circle.
- Repeat this one more time for a total of 3 sets of 4 dc separated by ch-2 spaces.
- Pull the string to close the ring tightly.
- Ch 2, and sl st into the first dc to finish Round 1.
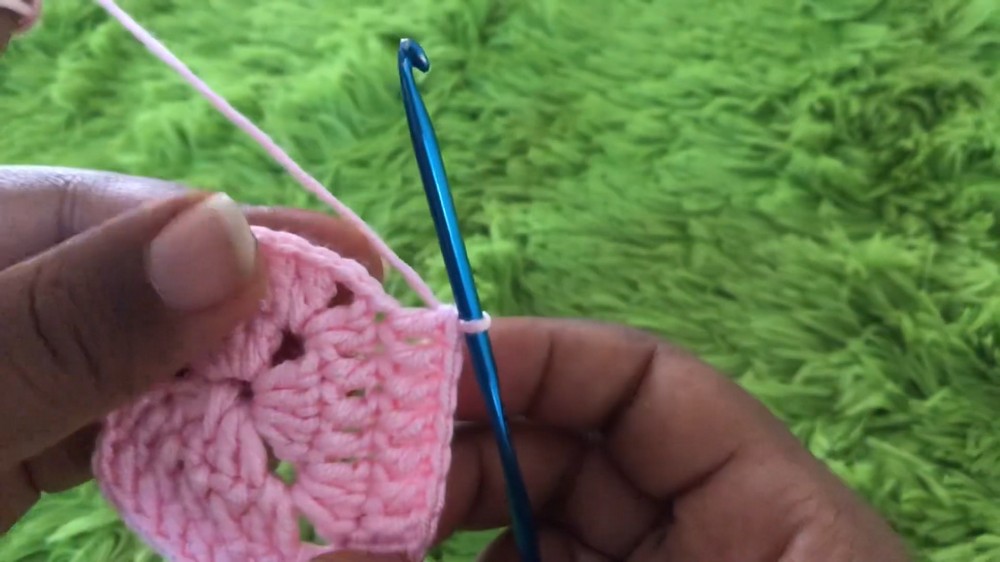
Row 2
- Ch 2 (does not count as a stitch).
- Make 1 dc into the same st as the ch 2.
- Work 1 dc in each dc until the chain-2 space.
- In the chain-2 space:
- Work 2 dc, ch 2, 2 dc into the same space.
- Continue making 1 dc on each dc until you reach the last dc.
- At the chain-2 space at the corner:
- Work 2 dc, ch 2, 2 dc into the space.
- Repeat this pattern across the row. At the end, sl st into the first dc to finish the row.
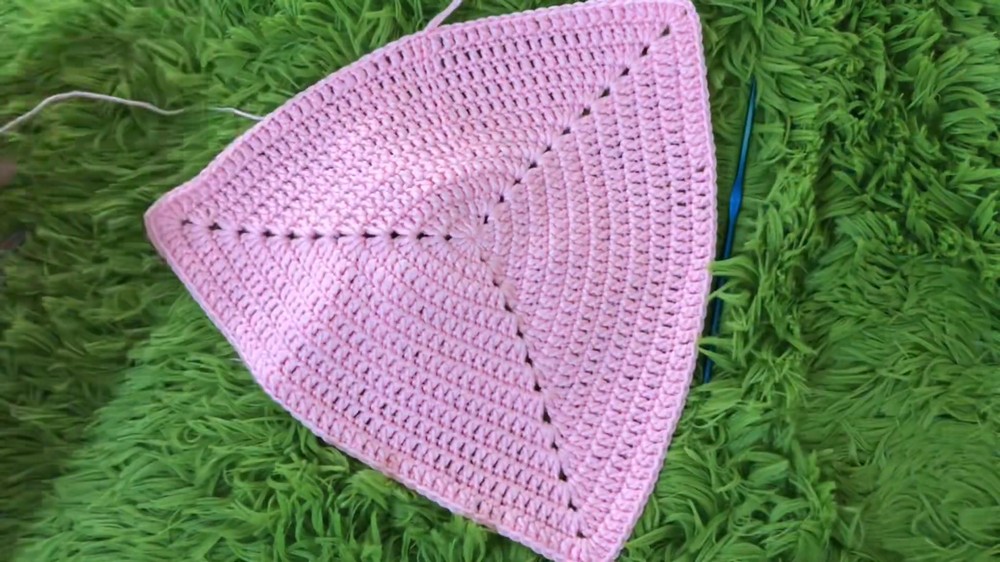
Row 3 & Beyond
- Ch 2, make 1 dc into the same st.
- Work 1 dc in each dc across until you reach the chain-2 space.
- At the chain-2 space:
- Work 2 dc, ch 2, 2 dc into the space.
- Continue making 1 dc on each dc until you reach the next chain-2 space.
- Repeat this pattern to grow the triangular bra cup.
- Work until you have 12 total rows (or as per your desired size).
Step 2: Adding Ribbing to the Base of the Bra Cup
- Count three dc from the chain-2 space, and attach yarn to the 4th stitch using a slip stitch.
- Work 1 sc in the same stitch, followed by ch 4.
- Slip stitch back into the last stitch and continue with 3 sc across.
- Repeat this pattern: ch 4, sl st, 3 sc in next three stitches using the previous pattern till you finish the base of the cup.
Step 3: Creating the Chain Ties
- Once you reach the chain-2 space of the triangle:
- Chain 120 for the tie (adjust this based on your desired length).
- Optionally, add picots to this strap:
- After completing the foundation chain, ch 4, skip the next 4 chains, and sl st into the 5th ch. Repeat till the end of the chain.
- Work back to the triangle, making a single crochet in the chain-2 space.
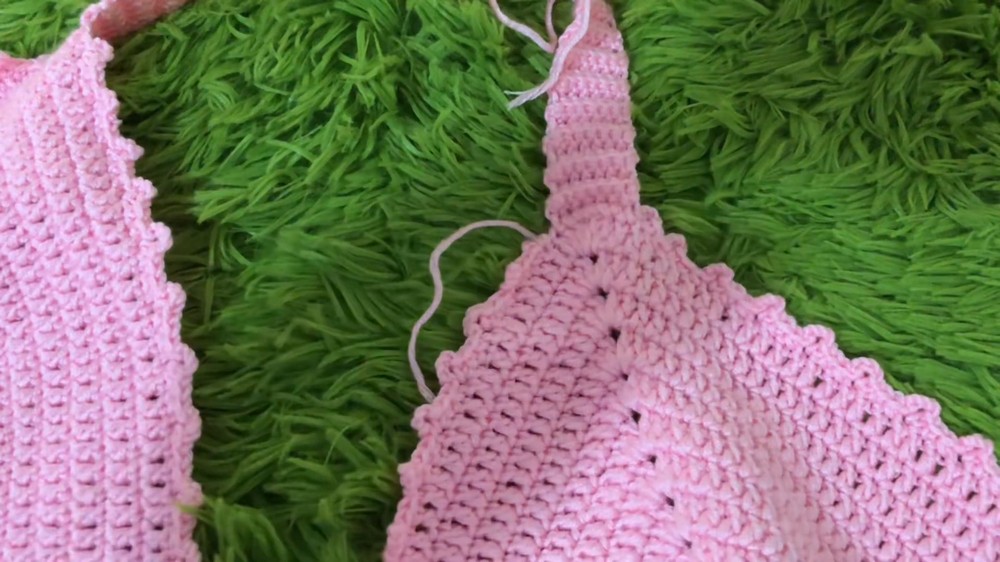
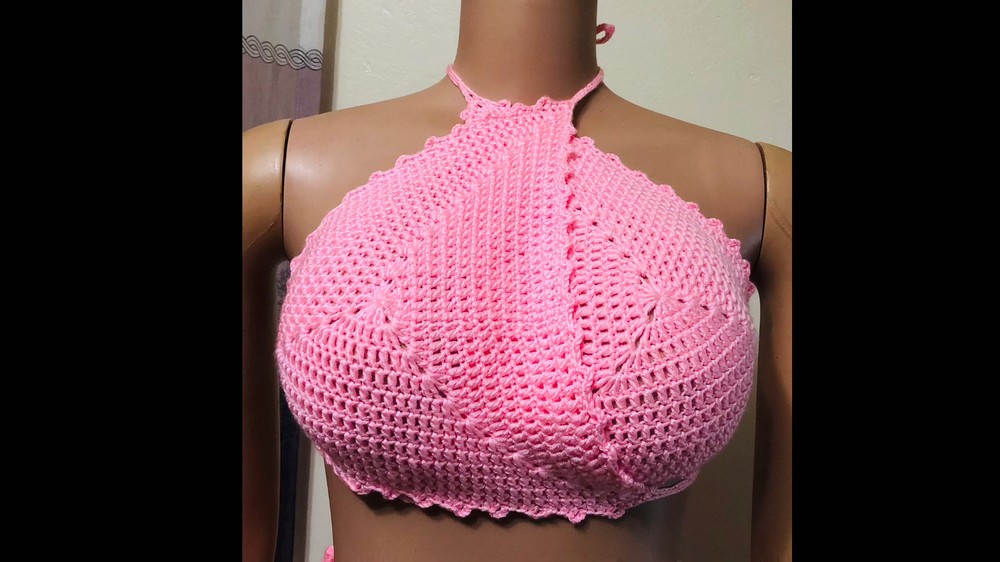
Step 4: Repeat for the Second Cup
- Replicate the steps above to create a second bra cup identical to the first one.
Step 5: Joining Cups
- Align both cups with the chain-2 spaces facing upward, ensuring the seam edges are at the base.
- Use a slip stitch, starting at the bottom corner of the cups:
- Insert the hook through the back loop of the first cup and the back loop of the second cup, and work sl sts across until securely joined.
- Alternatively, you can use single crochets or sew them together using a darning needle.
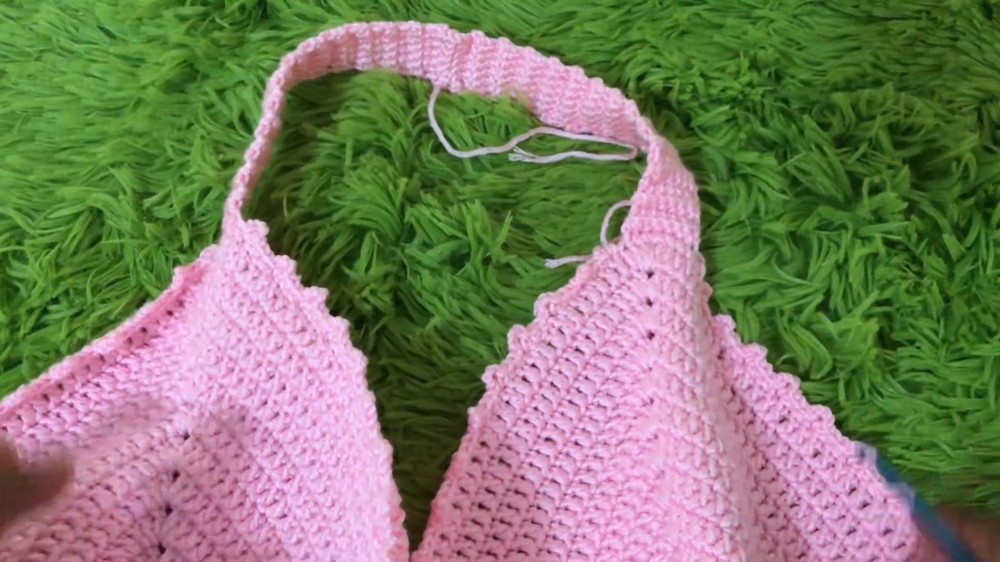
Step 6: Ribbing Addition
- To create the ribbing for the lower base of the bralette, begin at the chain-2 space:
- Work 7 single crochets across the bottom base of the cup in the back loop only.
- Continue working rows of 7 sc in the back loops only until you reach 27 rows in total.
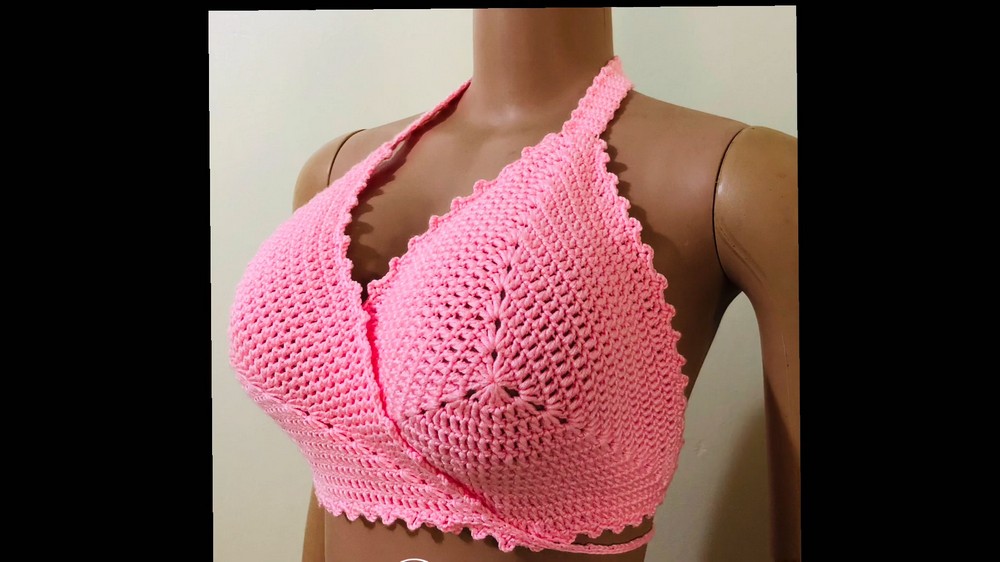
Finishing the Top
- Neck Straps: The chain ties made from both chain-2 spaces at the top are tied around the neck.
- Back Straps: The 120-chains from the base of each cup cross and tie at the back.
- Weave In Ends: Use a darning needle to weave in all loose ends neatly for a polished finish.
Conclusion
This Crochet Triangular Bralette is not only chic and functional but also customizable for different sizes and styles. It makes for a perfect summer accessory or a festival outfit piece. Share your crocheted bralette with others and let them marvel at your talent!
Pattern Suggestions and Tips
- Customization: Add more rows to each triangular bra cup for more coverage.
- Uniform Edges: Ensure consistent tension throughout the project to avoid wavy edges.
- Picot Alternative: Instead of picot edging, you can crochet a simple shell stitch for a softer look.