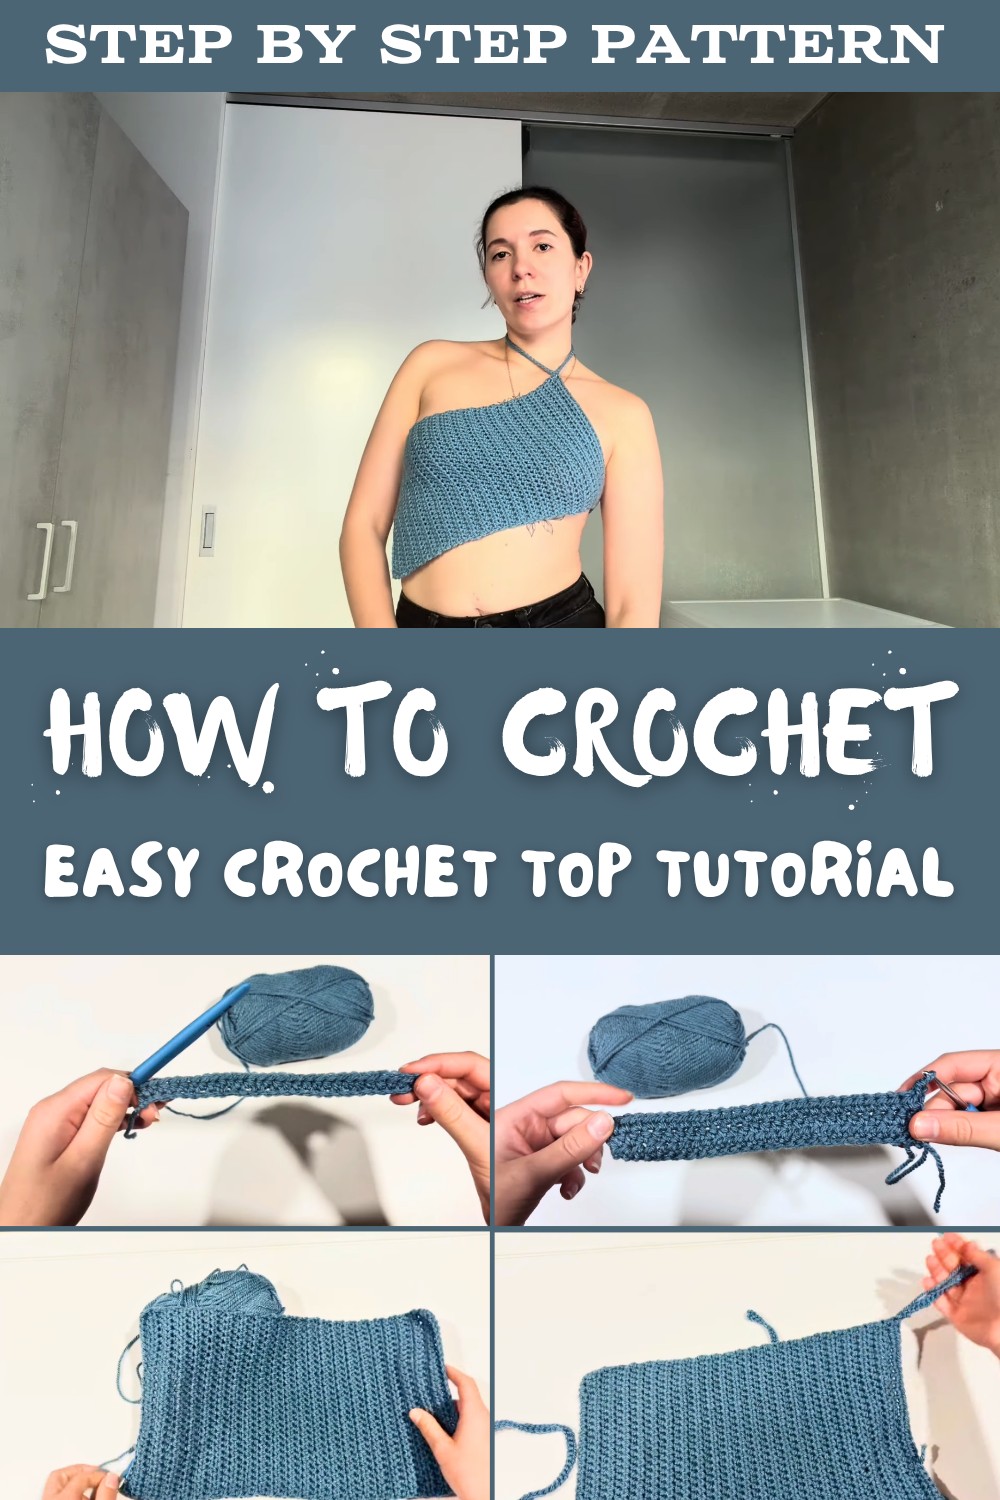
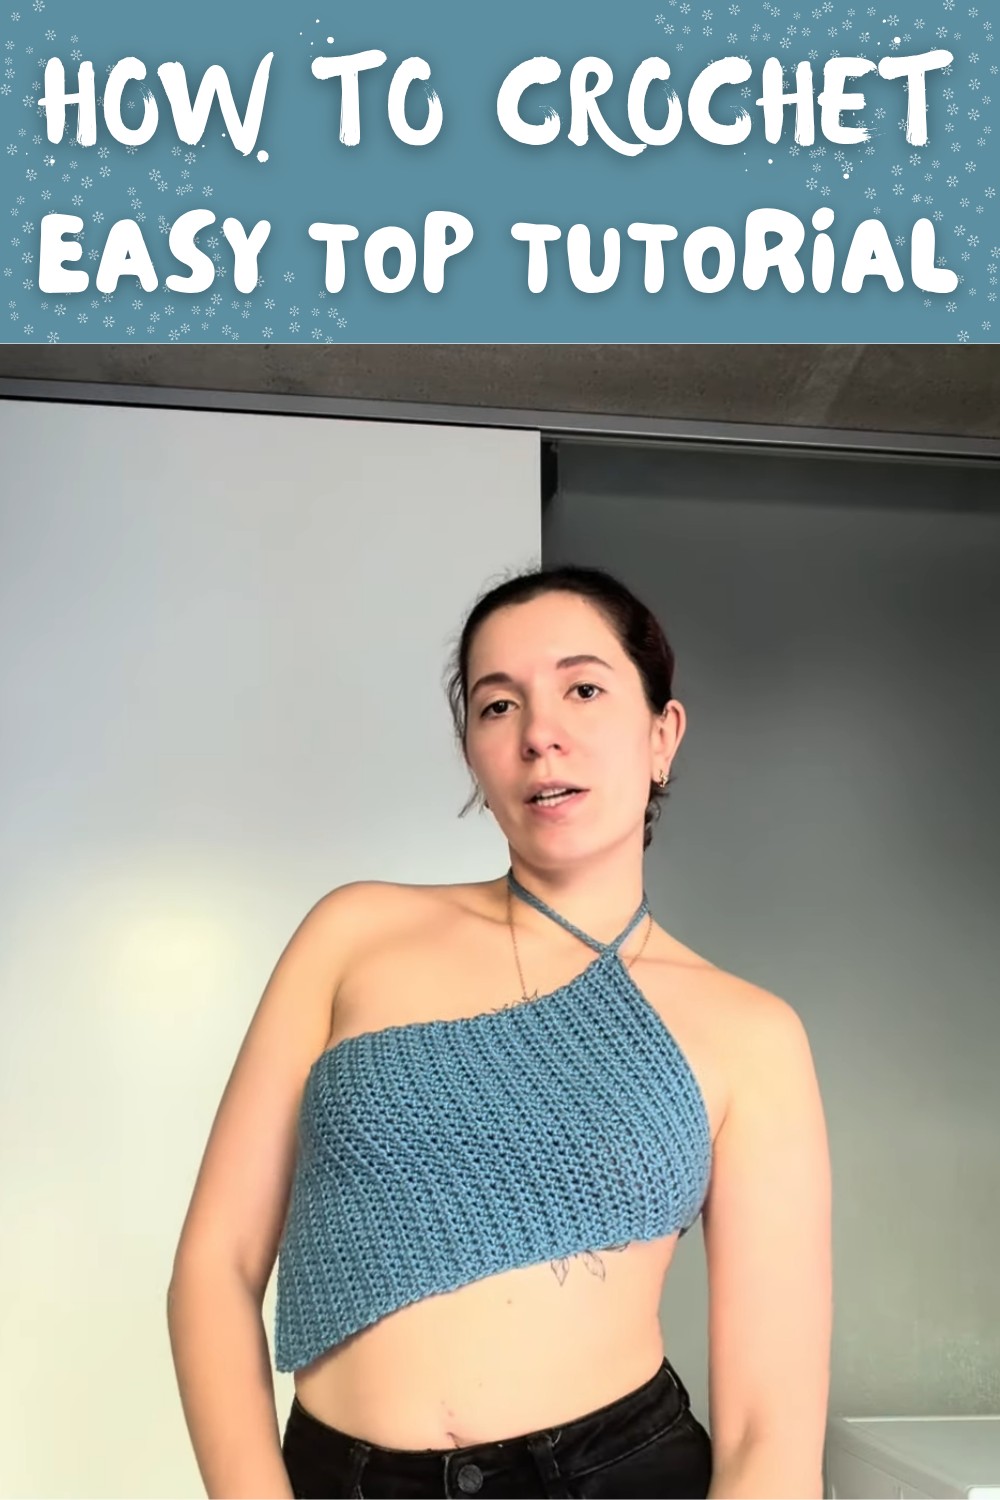
How to Crochet Top Pattern Free Summer Style Look
Learn about a Free Crochet Top Pattern that provides instructions for making a lightweight and adjustable summer top using simple crochet techniques.
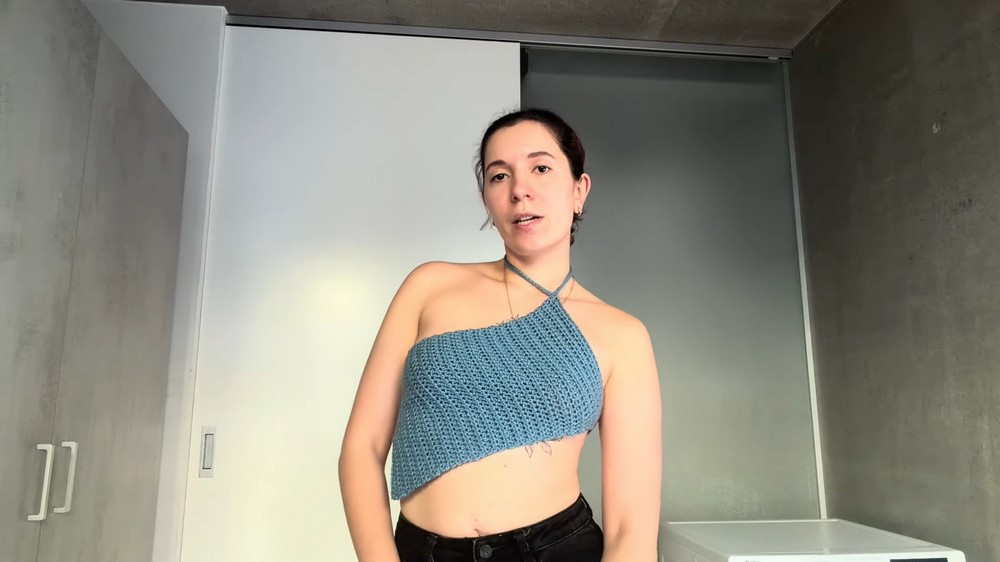
Creating a stylish and comfortable top that's perfect for sunny days, all with just a few simple steps. With the help of a Free Crochet Top pattern, you can craft a lightweight and elegant piece that is both functional and beautiful. This design uses basic crochet skills like chaining and slip stitching, making it an ideal project for beginners and experienced crafters alike. Even with minimal materials-just one and a half skeins of yarn and a 5 mm hook-you can create a top that looks sophisticated and fits perfectly.
Easy Free Crochet Top Pattern with Adjustable Straps
The beauty of this crochet top lies in its clean lines, symmetrical design, and breathable texture, making it a great choice for warmer weather. It's easy to customize the size and fit by adjusting the straps and adding rows, so it works for everyone. Whether you're looking for a casual outfit for a picnic, a beach-ready look, or a layering piece for everyday wear, this handmade top offers versatility and charm.
This Free Crochet Top pattern is not just a project, it's an opportunity to create something truly unique and stylish for your wardrobe while enjoying the process of crocheting. It's the perfect mix of simplicity, beauty, and practicality.
Crochet Summer Top - Step-by-Step Pattern Guide
Materials Required
- Yarn: 1.5 skeins of blue yarn
- Suggested yarn weight: Medium-weight (Category 4) cotton or cotton-blend yarn for breathability and comfort.
- Crochet Hook: 5 mm crochet hook (US size H-8)
- Accessories:
- Scissors
- Tapestry needle (for weaving in ends)
- Measuring tape
Gauge
- Gauge: 14 stitches and 16 rows = 4 inches in the main stitch pattern.
- It is crucial to measure your gauge before beginning to ensure the finished piece fits as intended. Adjust hook size if necessary to match gauge.
Finished Size
- Width of Front Panel: Approximately 16 inches (adjustable via the chain foundation).
- Length: Approximately 12 inches (adjustable via the number of rows).
- The straps are each approximately 16 inches long.
Pattern Notes
- Turning Chains: At the end of each row, chain one before turning your work to ensure neat edges.
- Adjust Size:
- Width: Add or reduce the initial foundation chains.
- Length: Increase or decrease the number of rows worked.
- Straps: Change the number of chains in each strap as desired.
- Customization Ideas: Add color stripes, sew decorative buttons, or use textured yarn for variations.
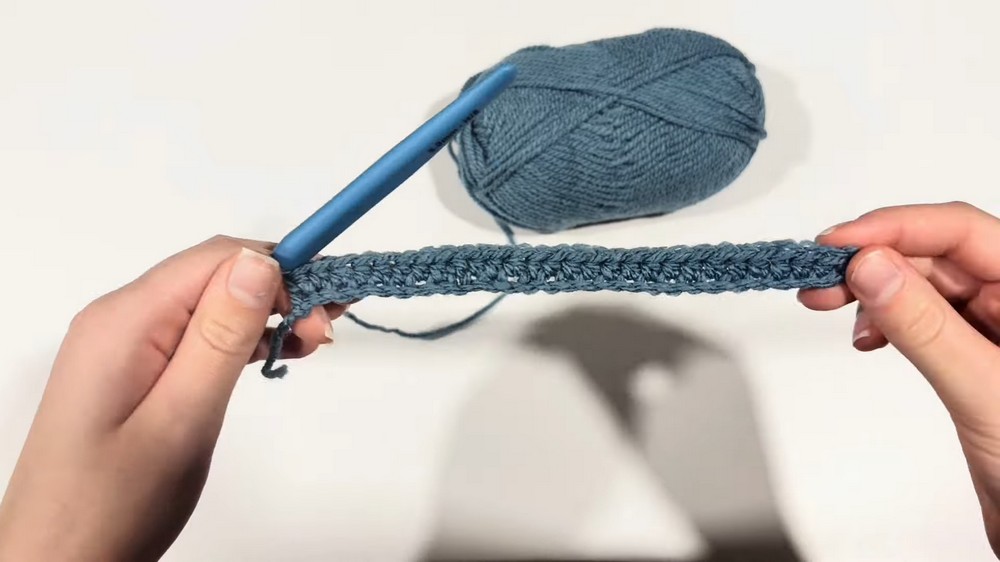
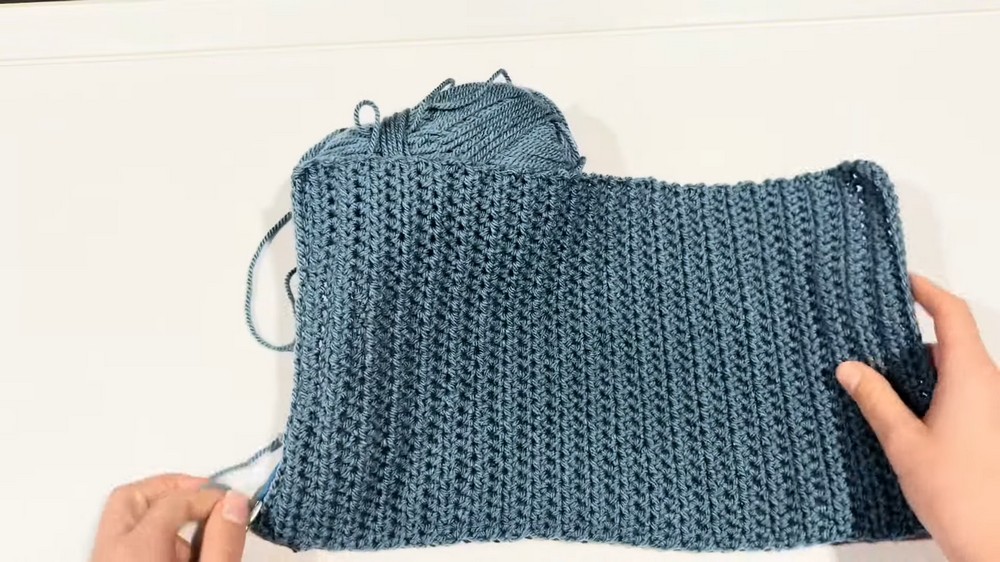
Step-by-Step Pattern
Foundation Chain:
- Make a slip knot and secure it on your hook.
- Chain 28 foundation chains (or more, depending on your desired width).
- Add 1 turning chain to work your stitches into the next row.
Row 1:
Repeat the following steps for each stitch across:
- Yarn over, insert your hook into the second chain from the hook.
- Pull up a loop (now you will have 3 loops on your hook).
- Yarn over again and pull through all 3 loops on the hook.
- Continue this pattern across the row.
At the end of the row:
- Chain one and turn your work.
Row 2-34:
Repeat the stitch pattern described for Row 1:
- Yarn over, insert your hook into the stitch of the previous row, and pull up a loop.
- Yarn over again and pull through all 3 loops.
- Continue working this pattern across all stitches.
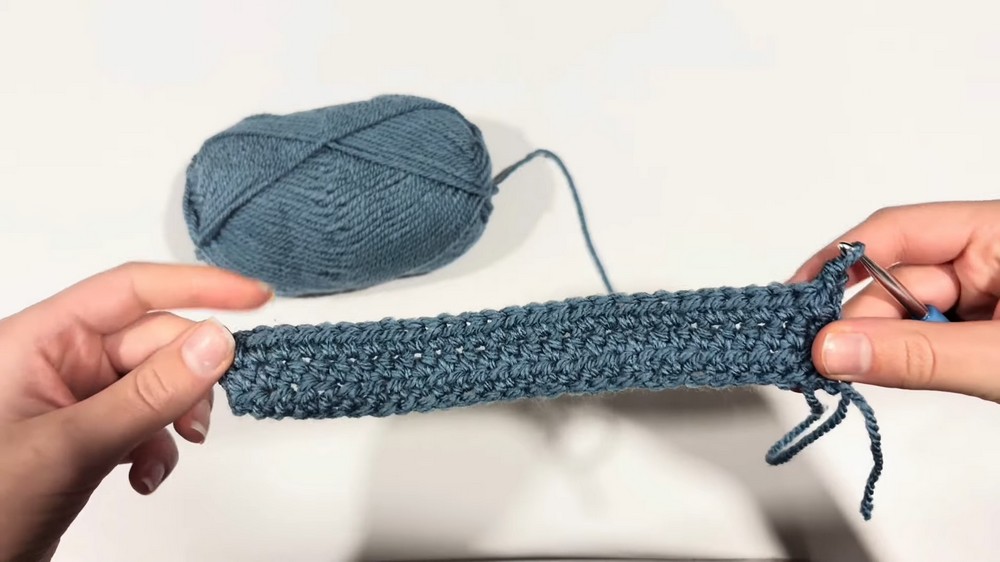
At the end of every row:
- Chain one and turn your work.
You can adjust the number of rows based on the desired length of the top.
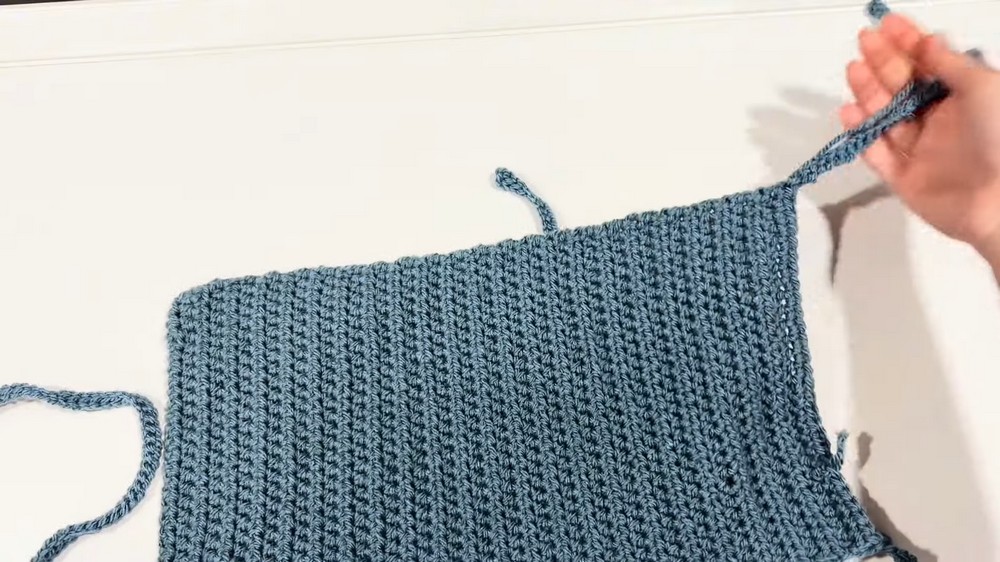
Creating the Straps:
Strap 1:
- Attach yarn to one top corner of your panel using a slip knot.
- Chain 65 chains (or customize length as needed).
- Add 1 turning chain.
- Work slip stitches across the length of the chain:
- Insert the hook into each chain.
- Yarn over and pull through the chain and loop on the hook simultaneously.
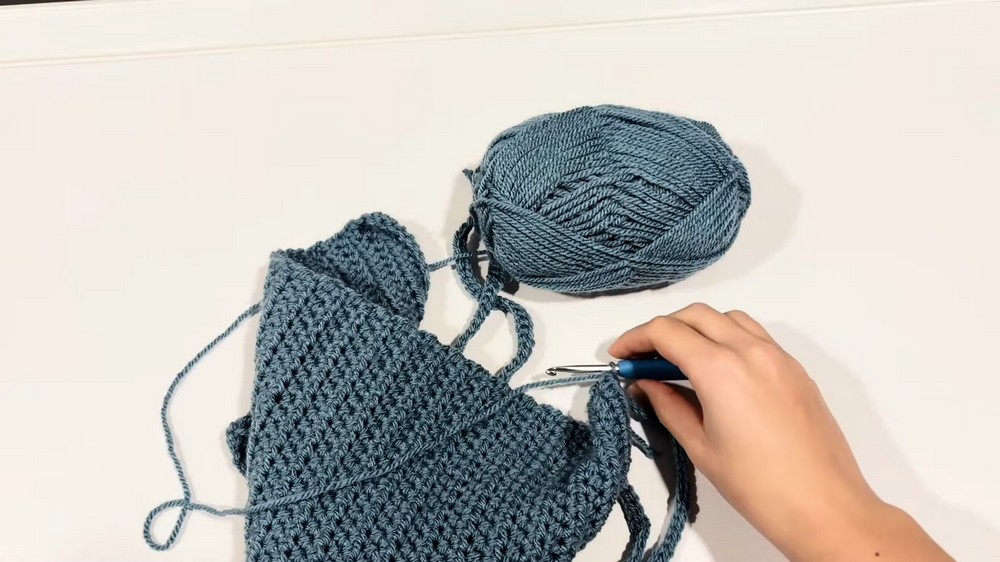
Straps 2, 3, and 4:
Repeat the process for the straps on the other three corners. Attach the yarn securely at each corner, chain 65 chains + 1 turning chain, and complete slip stitch rows.
Finishing:
- Secure the Ends: Use scissors to cut the yarn when you finish each strap, leaving a small tail. Pull the tail through the loop to secure.
- Weave in Ends: Use a tapestry needle to weave in all loose ends neatly.
- Assembly:
- Adjust the placement of straps to ensure proper fit.
- Sew side edges together using a whipstitch or mattress stitch, if desired, to make a fitted top instead of an open panel.
Tips for Enhancing Your Top:
- Ensure Even Stitches: Work evenly for a polished finish.
- Blocking: Wet or steam block your finished piece to relax the stitches and improve drape.
- Add Embellishments: Consider adding appliqués, beads, or tassels for customization.
Special Techniques Used:
- Slip Knot: Used to begin the foundation chain and attach yarn for straps.
- Slip Stitch: Used to create neat and sturdy straps.
- Half-Double Crochet (hdc): The main stitch for the body of the top.
Conclusion
This summer top is a versatile, breathable piece that can be customized to your style preferences. The simple stitch pattern ensures quick progress while the straps provide flexibility for fit. Whether you're wearing it as a relaxed layer or dressing it up, this handmade crochet top is a perfect addition to your summer wardrobe.
Important Remarks:
- Final Look: Expect a lightweight, stylish top with a beautiful drape and adjustable fit. The straps ensure comfortable wear, while the texture of the main panel lends an elegant style.
- Safety Reminder: Always keep sharp tools (scissors or needles) out of the reach of children.