
Two Tone Corset Top Crochet Pattern for Adjustable Fit Benefits
Make your style pop with Crochet Two Toned Corset Top Pattern that blends bold color contrast and modern fit into a unique handmade top with flair.
A fitted crochet garment with structured shaping and two contrasting tones, this corset-style top pattern offers a modern twist on handmade fashion. It is worked in panels or continuous rows that form a close-fitting bodice, often featuring lacing details or seam shaping that enhances the silhouette. The two-tone effect adds visual depth, allowing color changes to highlight texture and stitch definition.
Crochet Two Toned Corset Top Pattern for Trendy Outfits

This type of project is enjoyable because it combines simple stitches with a tailored finish that feels polished once worn. Lightweight cotton yarn gives it a breathable summer feel, while slightly thicker fibers can add structure for a more defined fit.
One creative idea is to reverse the color placement for each panel to achieve a mirrored effect, or to experiment with gradient yarn for a softer transition between tones. An interesting fact is that corset-inspired crochet garments often rely more on tension control than complex shaping, making them accessible while still producing a striking result suitable for layering or standalone wear.

Two-Tone Crocheted Corset Top Pattern
Materials Needed
- Yarn:
- Type: #5 bulky recycled T-shirt yarn (adds a sturdy and textured look).
- Colors: Two contrasting colors (e.g., green and pink for a two-tone effect).
- Crochet Hook: 8 mm.
- Additional Tools:
- Stitch markers.
- Tape measure (for taking custom measurements).
- Tapestry needle (to weave in ends).
- Scissors.
Special Techniques Used
This pattern incorporates the following techniques:
- Slip Knot:
- Wrap yarn around your finger to form an "X."
- Insert your hook under the first strand and grab the second. Pull through to form the knot.
- Chain Stitch (ch):
- Yarn over and pull through the loop on your hook.
- Half Double Crochet (hdc):
- Yarn over, insert hook into stitch, yarn over and pull up a loop (3 loops on hook). Yarn over and pull through all three loops.
- Half Double Crochet Through Back Loop Only:
- Yarn over, insert hook through the back loop of the "V" in the stitch, pull up a loop, yarn over and pull through all three loops.
- Slip Stitch (sl st):
- Insert hook into stitch, yarn over and pull through both loops on the hook.
- Single Crochet (sc):
- Insert hook into stitch, yarn over and pull up a loop (2 loops on hook). Yarn over and pull through both loops.
Pattern Instructions
Step 1: Front Panel (Green Panel)
Row 1: Foundation Chains
- Create a slip knot and chain 23 stitches (adjust the number to fit your desired corset width).
- Ensure you do not count the slip knot as a stitch.
Row 1: Half Double Crochet
- Yarn over, skip the first chain, and insert your hook into the second chain from the hook. Work a hdc.
- Continue working hdc across all chains.
- At the end of the row, work 3 hdc into the last chain (to form an increase at the corner).

Turn Your Work:
- Work hdc stitches along the other side of the foundation chain (mirroring the process). You should have 45 hdc stitches total at the end of Row 1:
- 21 hdc on one side.
- 3 hdc increase in the corner.
- 21 hdc on the other side.
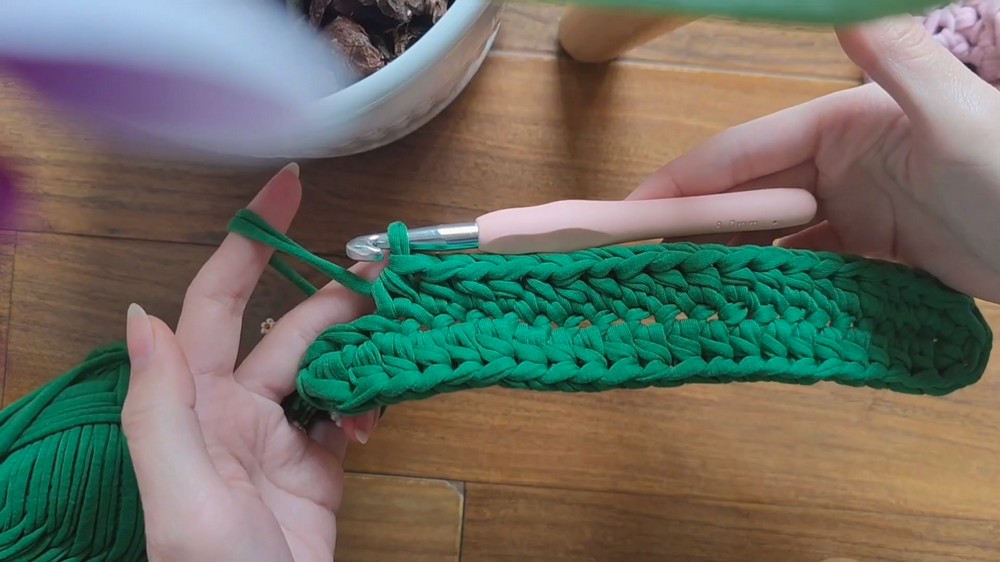
Row 2: Adding Back Loop Ribbing
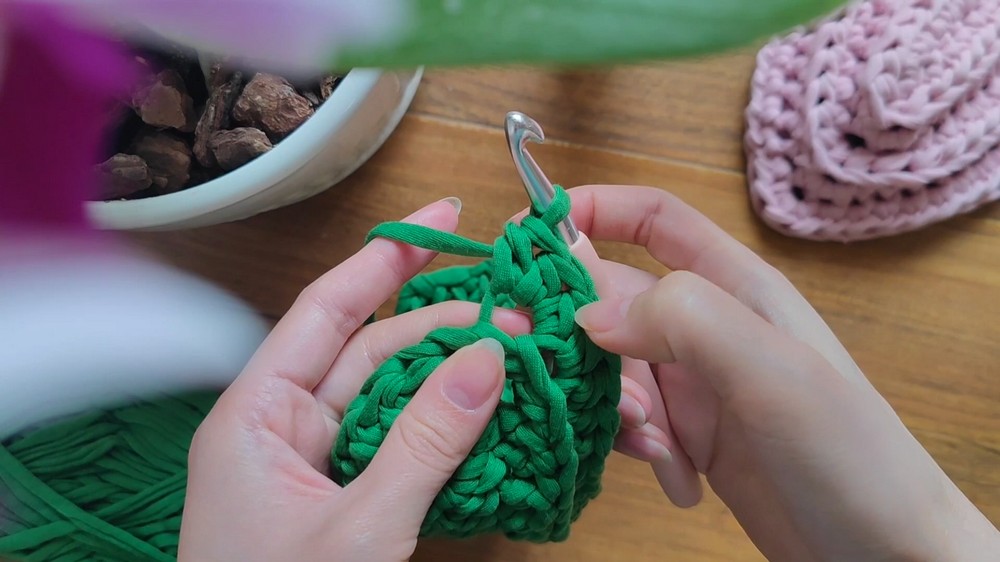
- Chain 1, turn your work. Work hdc through the back loop of each stitch.
- At the corner with the 3 hdc increase:
- Work 1 hdc into the first stitch.
- Work 3 hdc into the middle stitch (increase).
- Work 1 hdc into the last stitch.
Subsequent Rows:
- Repeat row instructions while increasing similarly at the corner.
- Each row will increase by 2 stitches. For example:
- Row 1: 45 stitches
- Row 2: 47 stitches
- Row 3: 49 stitches
- Continue until desired width or height is achieved.
- Each row will increase by 2 stitches. For example:

Step 2: Front Lacing Panel (Green Panel)
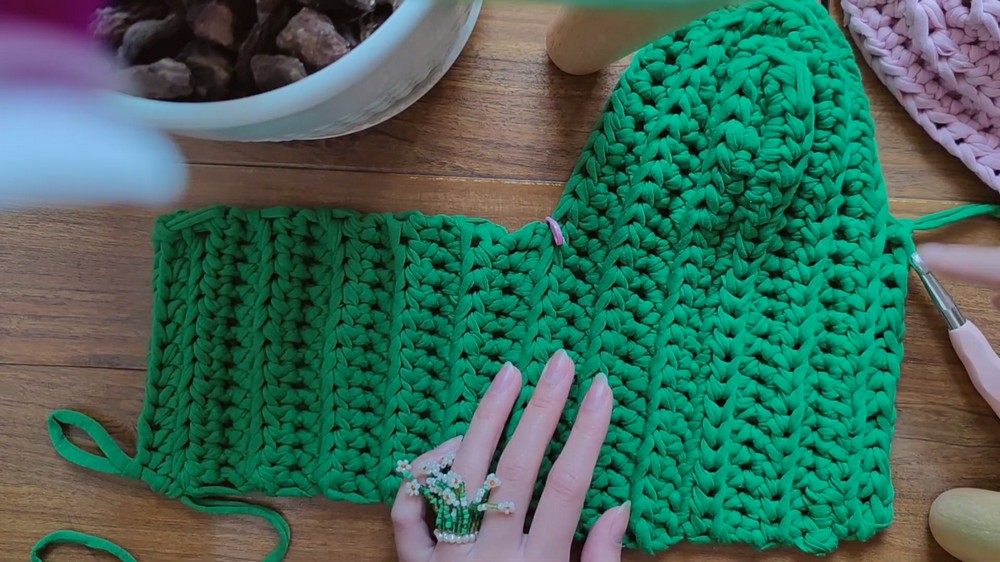
- Begin Lacing Section:
- At the end of your last row, chain 1, turn your work.
- Work hdc, chain 1, skip a stitch, work 3 hdc, then repeat the pattern.
- This creates evenly spaced holes for lacing across the edge of the green panel.
Step 3: Pink Panel
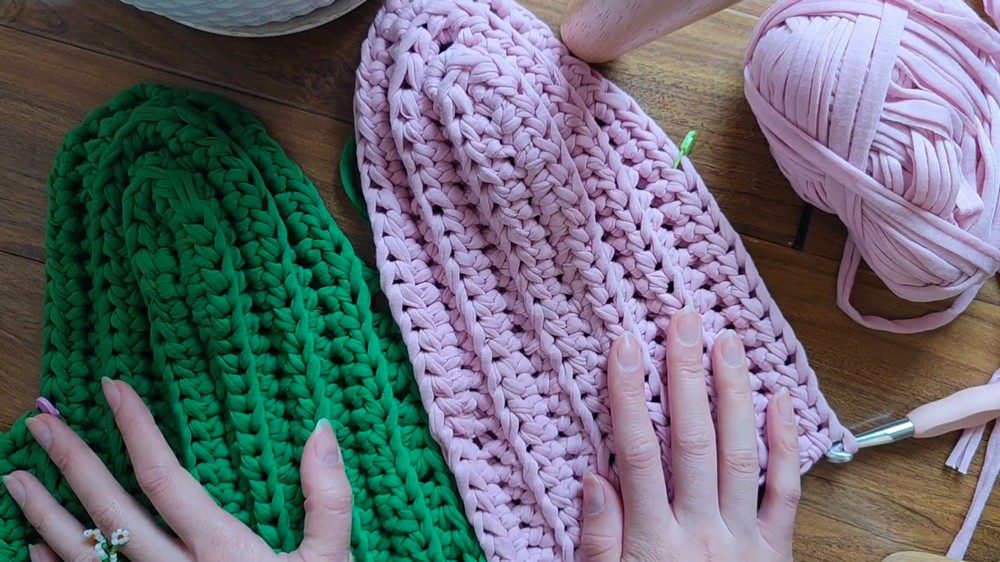
- Repeat Step 1 to create the pink front panel identical to the green panel:
- Chain 23.
- Work 5 rows of hdc through the back loop, ensuring the width and length match the green panel.
- Back Panel for Pink Panel:
- Leave 13 stitches (or your desired width) on one side for the back panel.
- Crochet hdc through the back loop rows (same instructions for the green panel back).
- Ensure the height matches the green panel back.
- Lacing Section for Pink Panel:
- Create lacing holes (as detailed in the green panel instructions).
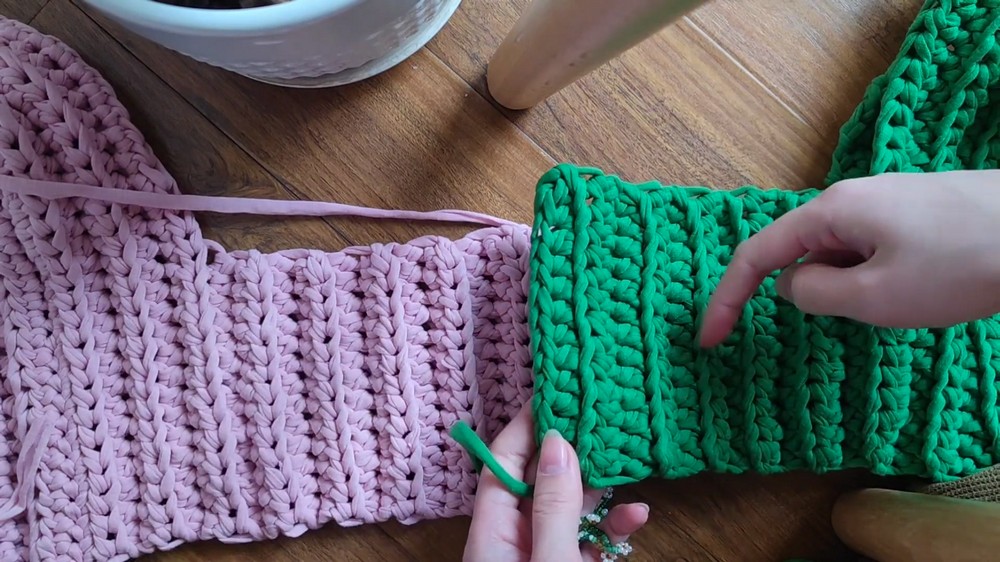
Step 4: Joining Panels
- Place the right sides of both panels facing each other.
- Using the sl st method, join the edges of the green and pink panels along the back.
- Insert your hook through the top "V" of one panel and the bottom "V" of the other panel. Pull yarn through both loops to create a slip stitch seam.
- Ensure the seam is neat and symmetrical.
Step 5: Corset Straps
- Create Straps:
- Locate the 3 hdc increase stitches on both panels.
- Attach yarn to the first hdc stitch and work 3 single crochets across the row.
- Chain 1, turn, and repeat single crochet rows until strap reaches desired length (42 cm or approximately 16.5 inches).
- Attach Straps:
- Align straps symmetrically to back panels.
- Use stitching or slip stitches to join securely.
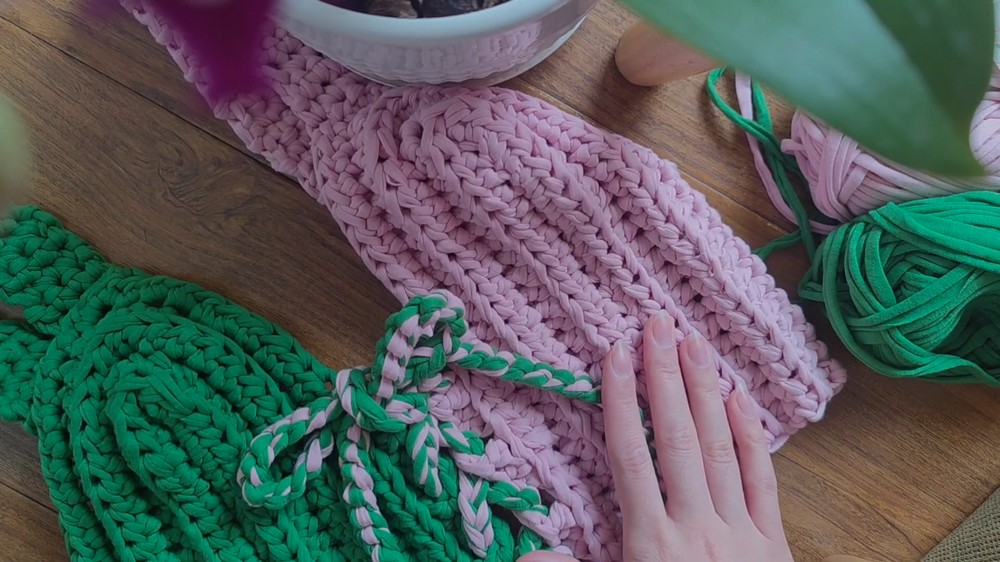
Step 6: Corset Lacing
- Using both yarn colors, create a long chain for lacing down the front.
- Thread the chain through the lacing holes, crisscrossing evenly for a polished look.
- Adjust tightness to fit your body comfortably.
Finishing
- Hide Yarn Tails:
- Use a tapestry needle to weave in loose ends securely on the wrong side of the fabric.
- Block the Corset (Optional):
- To ensure proper shape and fit, gently steam or wet block the corset.
Final Words
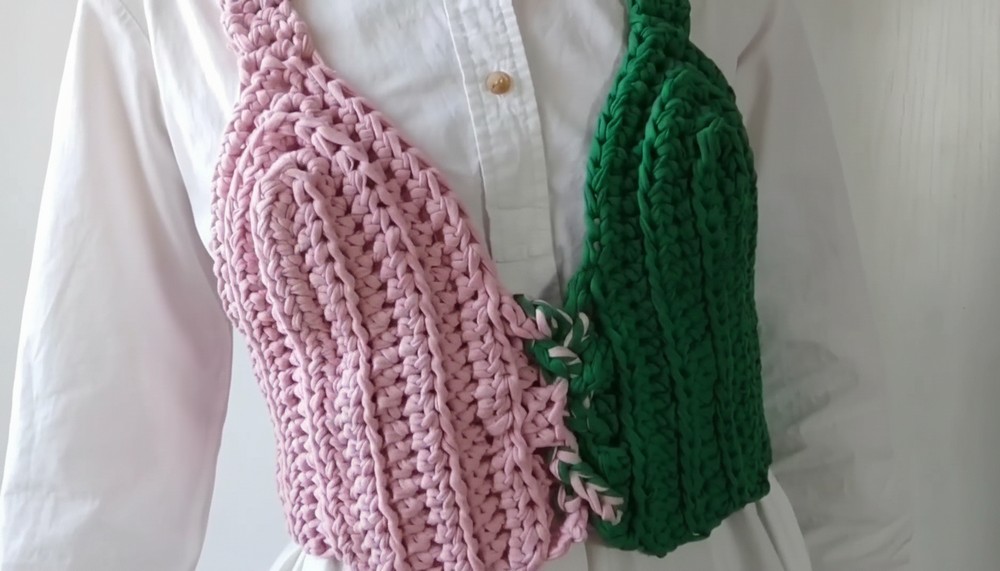
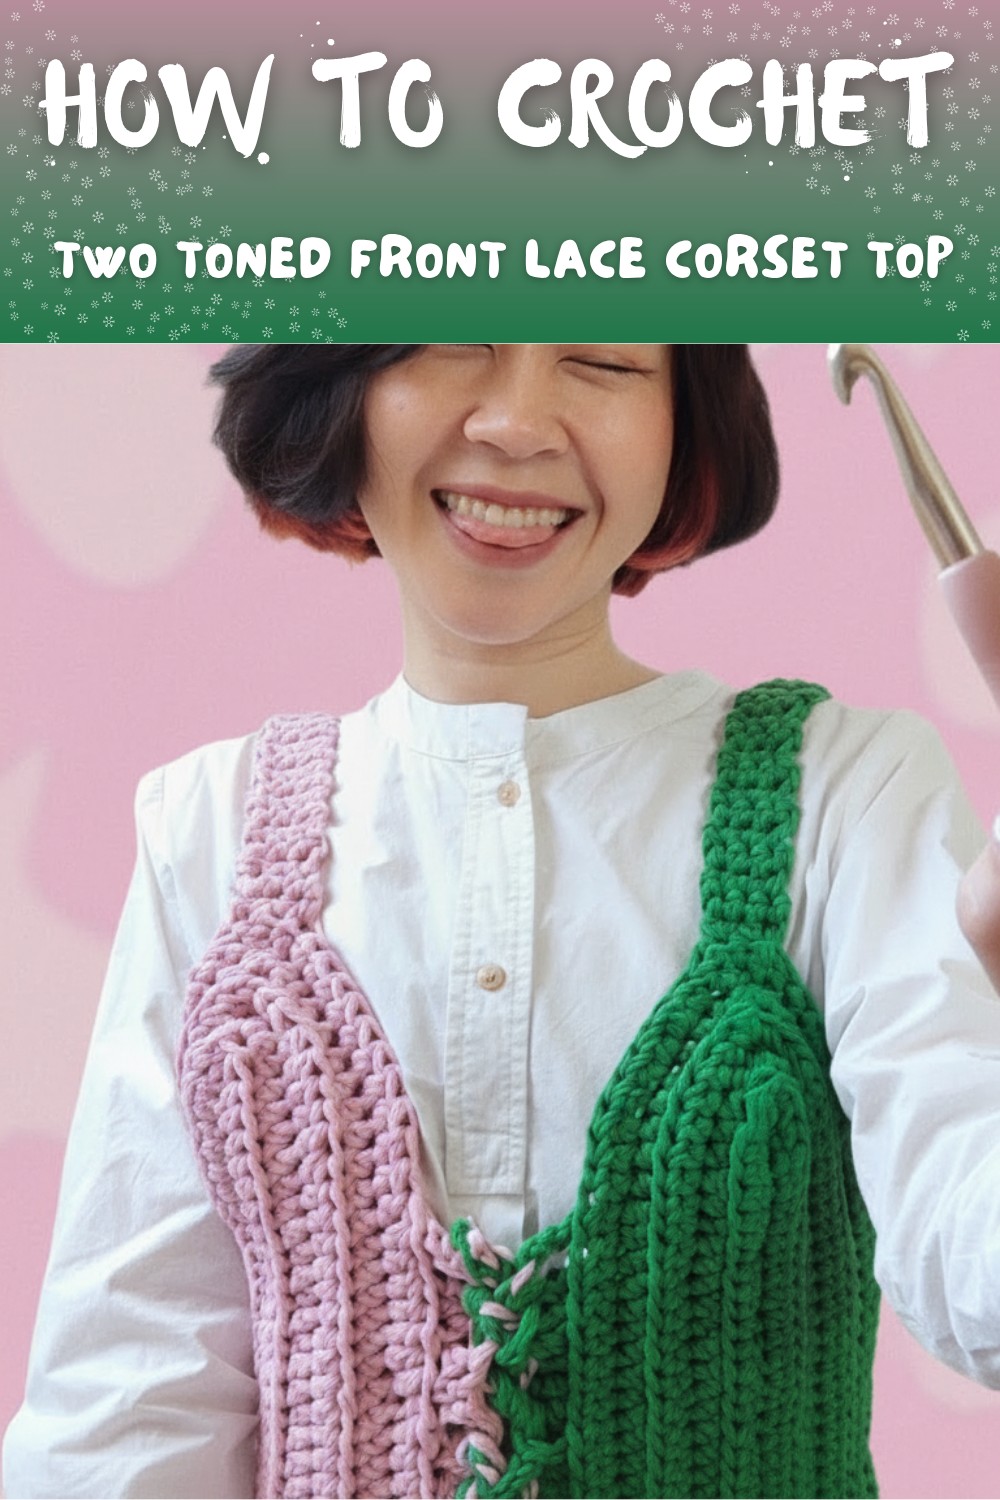
Congratulations on completing your two-tone crocheted corset top! This highly customizable design beautifully combines texture, durability, and style with practical front lacing for an adjustable fit.
Tips for Maintenance:
- Cleaning: Hand wash gently in cold water and lay flat to dry.
- Storage: Store folded to prevent stretching, or hang it delicately without pulling on the straps.